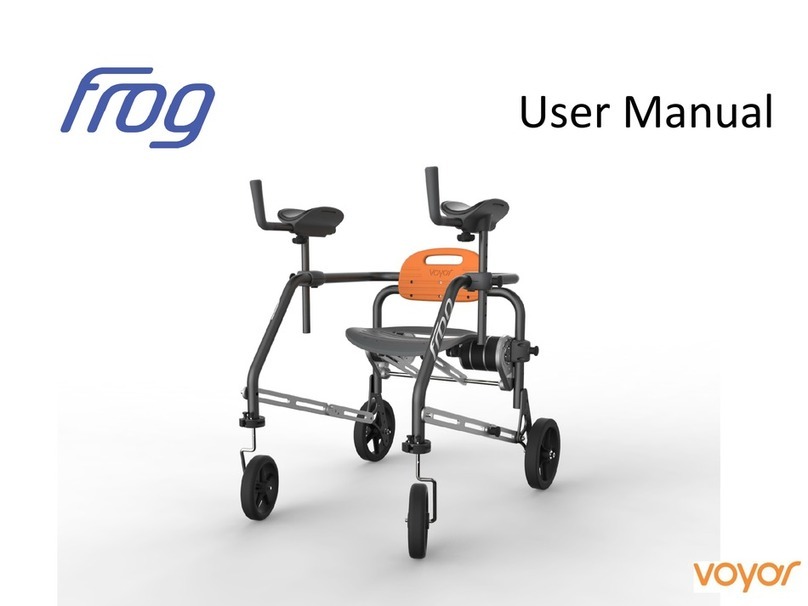
Voyar FROG M1-X User manual

User Manual
User Manual DP1601-281H_Eng_2021.05
FROG M1-X
FROG M2-X
FROG M3-X
FROG M4-X
FROG L1-X
FROG L2-X
FROG L3-X
FROG L4-X

(Intentionally left empty)
User Manual DP1601-281H_Eng_2021.10

Dear Customer,
Thank you very much for the trust extended in purchasing the Voyar FROG.
Please read the user manual prior to first use of the equipment and follow its instructions.
Could you take care that the user manual remains with the product.
Technical Details are subject to changes.
User Manual DP1601-281H_Eng_2021.10

(Intentionally left empty)
User Manual DP1601-281H_Eng_2021.10

Contents
Page
1. General Information
1.1. Product Line 6
1.2. Intended Use 7
1.3. Safety Information 8
1.4. Overview of components 9
1.5. Size Adjustments 10
2. Operation
2.1. Therapy Application 11
2.2. Unfolding the walker 12 - 13
2.3. Folding the Walker 14 - 15
2.4. Attaching Arm Supports 16 - 17
2.5. Wheel lock & Anti-reverse 18
3. Lift seat
3.1. Seat Lifting force Adjustment 19 - 22
4. Size adjustments
4.1. Seat Height Adjustment 23 - 25
4.2. Forearm Support Adjustment 26 - 28
4.3. Front Wheel Swivel Limit Setting 29 - 32
4.4. Frame Size Adjustment 33
4.5. Frame Width Adjustment 34
4.6. Frame Height Adjustment 35 - 36
5. Maintenance and Cleaning
5.1. Maintenance 37
5.2. Cleaning 38
5.3. Re-use 39
6. Specifications 40
7. Identification 41
User Manual DP1601-281H_Eng_2021.10

1.1. Product line
This user manual covers the following product variants, which are consisting of medium
size and large frame versions with or without the armrest and seat features:
6
Frame size With seat and
armrests
With seat
only
With
armrests only
No seat and
armrests
Medium FROG M1-X FROG M2-X FROG M3-X FROG M4-X
Large FROG L1-X FROG L2-X FROG L3-X FROG L4-X
1. General Information

1.2. Intended Use
The FROG gait trainer provides gait and balance support in patients with walking
difficulties and can be used in the rehabilitation of gait.It has weight bearing handles and
arm rests and afoldable seat as resting position.It can be used indoors in hospitals,
therapy centers and ambulatory activities at home.
7

1.3. Safety Information
•The walker should be used indoors and on fairly firm and level ground
•Maximum weight of the user needs to be observed
•Instructions for use should be read carefully before first use. Instructions for use should be kept and
remain with the product for future reference.
•All locks and adjustment knobs on the frame, armrests, seat and wheels need to be checked before
first use and at regular intervals.
•The walking aid should not be used without an accompanying person. Accompanying persons must
be adequately instructed.
•The users should remain within the frame during use.
•Adjustments for handle and the frame width need to remain within the marked maximum limits.
Contraindications :
Users not being able to tolerate an upright position (circulatory issues) or tolerate weight-bearing
(osteogenesis imperfecta, severe osteoporosis, joint instability, severe contractures), as well as
significant lack of head control.
Please report any serious incident that occurred in relation to the device to the manufacturer, XentiQ
Partners Pte Ltd, and to the competent authority of the Member State where the user is established.
8

1.4. Overview of components
Height adjustable
seat
Length & height & angle
adjustable armrests
Adjustable
force lift seat
On/Off Antireverse
and wheel lock
Adjustable wheel
swivel limiter
Folding frame
Height & width & length
adjustable frame
Telescopic height
adjustment
9

1.5. Size Adjustments
Adjustable armrest height:
M: 62 to 86 cm L: 74 to 95 cm
Adjustable frame width M: 38 to 46 cm L: 49 to 57 cm
Adjustable Seat height:
M: 32 to 53 cm L: 49 to 64 cm
Adjustable frame height:
M: 52 to 67 cm L: 67 to 76 cm
10
Dimensions for medium size (M) and large size (L) frames

2.1. Therapy Application
FROG is used to teach children and adolescents who need additional support and stabilization of the
upper body due to disorders of the nervous and muscular system to walk and move independently.
The use of this walking aid during therapy should be supervised by a clinician. The suitability of the
device depending on the degree of the condition should be assessed by a doctor or therapist and
settings or adjustments made in an appropriate manner.
Particular attention should be paid to the position of the user’s feet and, if necessary, the tendancy to
cross the feet. The use of lower leg orthoses is necessary in many cases. Getting in and out of the walker
must be done with the support of the supervisor. The child should grip the handles tightly and place
their forearms in the armrests. If there is insufficient control of the arms they can be stabilized with
straps in the armrests.
The supervisor should accompany the user either in front of or behind the walker, paying particular
attention to lateral stability (support with hands if necessary), as well as the position of the feet (avoid
crossing).
The initial training takes place step by step, which can be promoted in a playful way (e.g. with a ball).
Attention must be paid to fatigue, whereby regular breaks can be taken using the seat. Folding down
and taking the seat as well as transferring back to standing must be practiced progressively under
guidance and can then be done autonomously in most cases. 11
2. Operation

2.2. Unfolding the Walker
The rear wheel of the walker should be
supported on the ground to release the
plunger lock. (DO NOT lift up the walker)
1. Pull out and disengage right plunger lock
on frame.
Note: There is no need to pull the left lock.
Unlock
12

1. Pull back the rear frame against front
wheels on the ground.
2. Once walker is upright, ensure plunger
locks on both sides are ‘engaged’ and in
locked positions.
Caution: Please ensure locks are fully
engaged before use.
13

2.3. Folding the Walker
1. Pull out and disengage plungers lock on
both sides of the links.
2. Holding on to both sides of lock and frame,
slowly articulate the rear frame forward or
front frame backwards.
3.Fold walker until right lock engages to lock
folded position.
14

4. Remove both armrests from their sockets
(for models M1-X, M3-X, L1-X and L-3X
with armrests; other models do not have
armrest).
5. The walker is now secured and folded.
15

2.4.Attaching Arm Supports
(for models M1-X, M3-X, L1-X and L-3X with armrests; other models do not have armrest).
Each armrest needs to be on the correct side of the walker:
•Take note of section of arm rest that should face outwards (see below circled in red)
•Handle and knob should face forward
•Armrests can only be engaged in holder on correct side
16

1. Locate the armrest shaft socket.
2. Pull out lock [1] and hold it in position.
3. Holding the aluminium shaft, engage the
arm support into the hole.
4. At desired position, release lock ensuring
pin has engaged with hole in the shaft. If not
engaged, gently slide the shaft up or down
until lock snaps in.
Refer to page 28 on how to re-adjust
armrest height.
17
[1]

2.5. Wheel lock & Anti-reverse
Each rear wheel can also be locked completely with a spring plunger (“parking brake”)
Each rear wheel has a anti-reverse rachet which can be disengaged:
Anti-reverse
ratchet engaged.
To release, flip tag
towards the rear
Anti-reverse
ratchet released.
To engage, flip tag
towards the front
Wheel lock
released.
To engage,
rotate and
release
Anti-reverse
ratchet engaged.
To release, pull
and turn
18
The anti-reverse ratchet and the wheel lock are maintenance free. Please verify correct
functioning before initial usage.

Lift force of the seat is controlled by mechanisms located on both the left and right below
the seat.There are two adjustable components for each side -[A] and [B].
3.1. Seat Lifting Force Adjustment
Important: Scales [A] and [B] should be adjusted equally on BOTH sides.
Adjustments should also only be done with seat in flipped up position.
A B AB
19
3. Lift seat
(for models M1-X, M2-X, L1-X and L-2X with seat; other models do not have seats).

[A] controls the lifting force acting on the user
when in sitting position. The higher the lifting
force, the easier it is to get up.
[B] controls the transition force when the seat is
in half elevated position. Decreasing [B] means it
will be easier to push the seat down in transition.
Line marks
on ring
Low lifting force
Medium lifting force
High lifting force
20
A
B
This manual suits for next models
7
Table of contents
Other Voyar Mobility Aid manuals