vRbikes vR3 User manual

vR3
Operating instructions

2
Contents
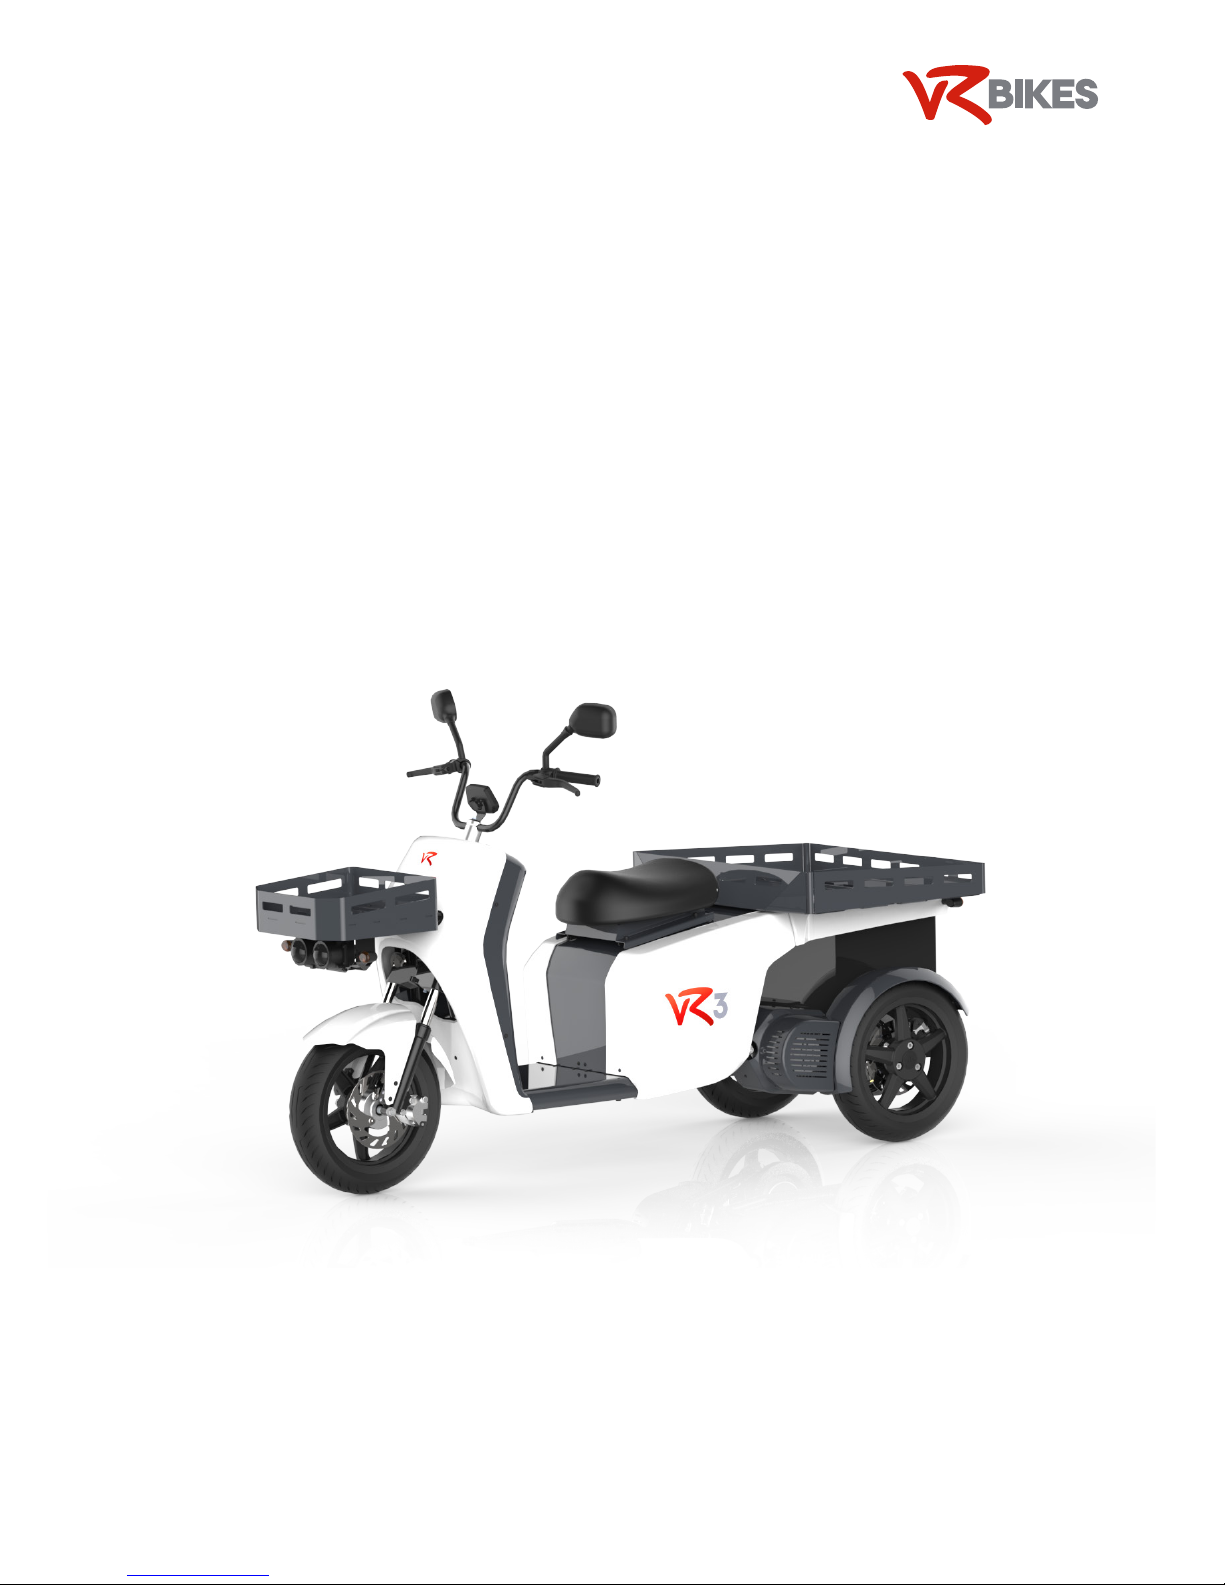
1. vR3 — the modular electric vehicle ..............................................................................3
1.1. Platform concept ...................................................................................................................................... 3
1.2. Productivity ............................................................................................................................................... 4
1.3. Safety and comfort ................................................................................................................................... 4
1.4. Sustainability ............................................................................................................................................. 4
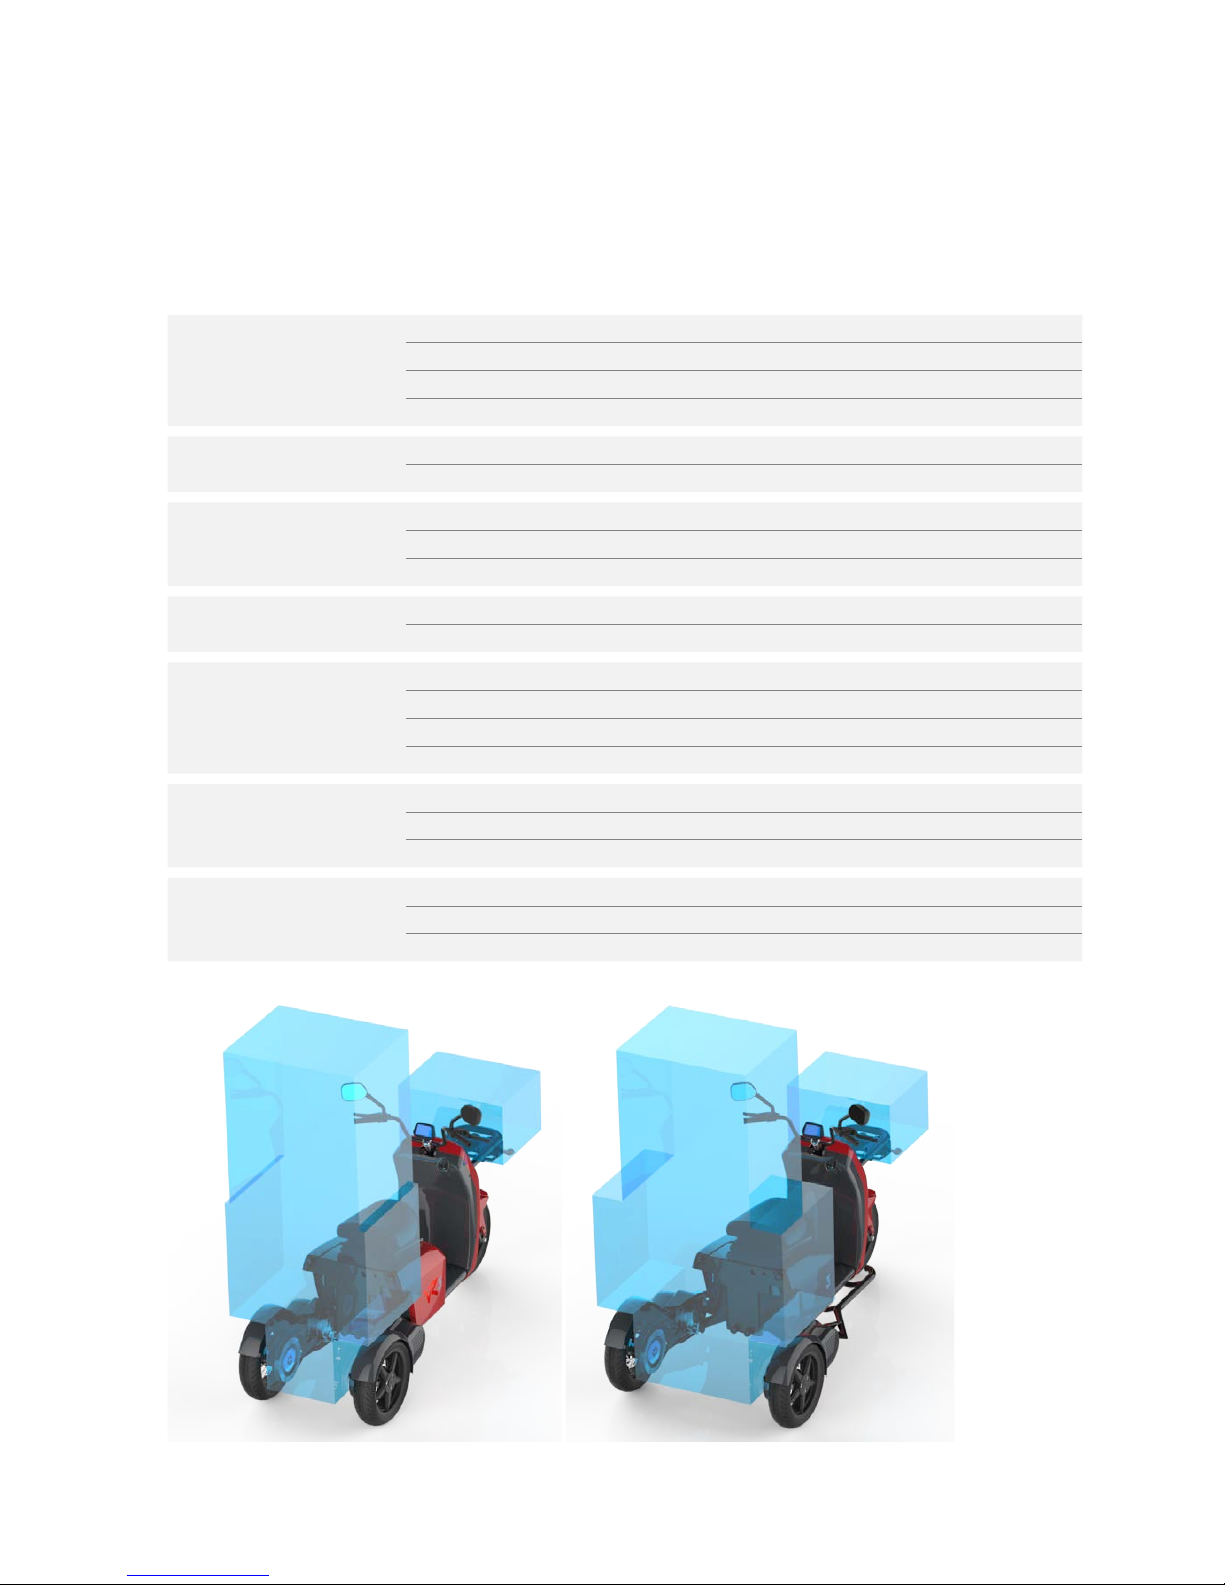
2. Specifications ................................................................................................................5
3. Preparation .....................................................................................................................6
3.1. Clothing ..................................................................................................................................................... 6
3.2. Seat position ............................................................................................................................................. 6
3.3. Rear-view mirrors...................................................................................................................................... 6
3.4. Function check.......................................................................................................................................... 6
4. Operating levers .............................................................................................................7
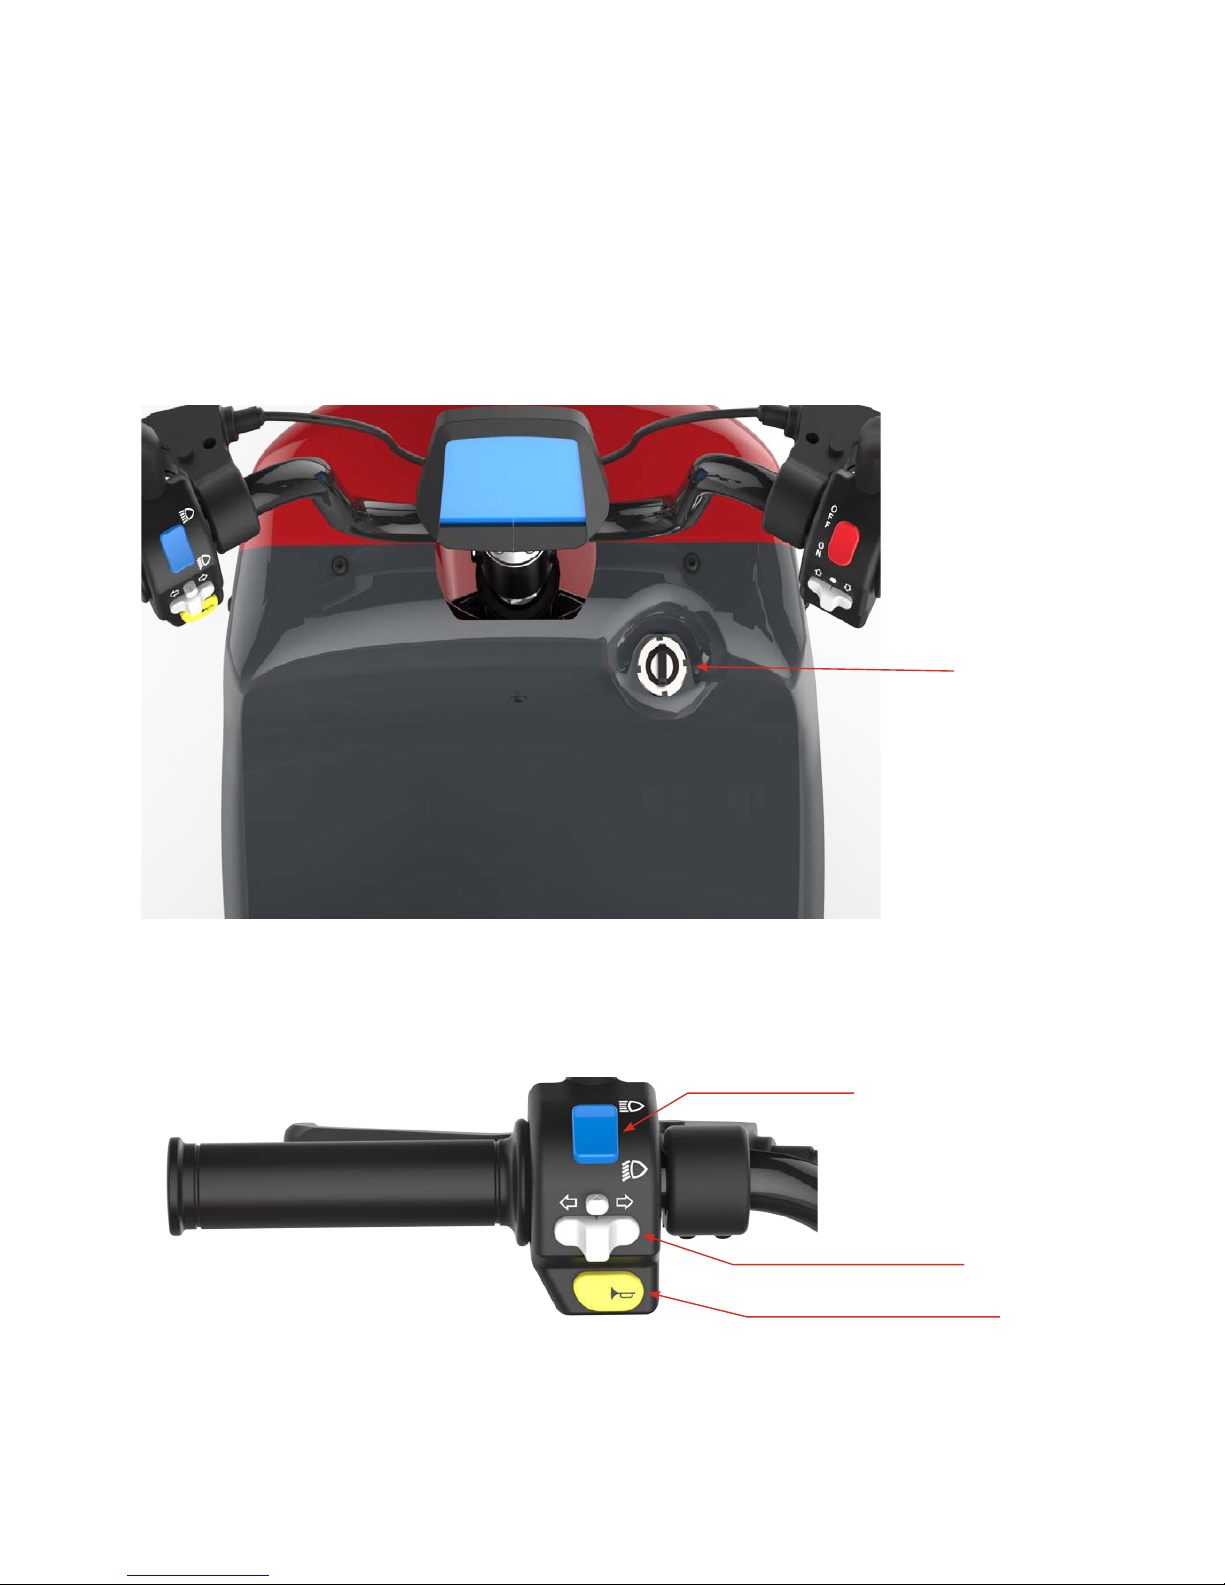
4.1. Waking the battery .................................................................................................................................... 7
4.2. Turning the vehicle on and off .................................................................................................................. 8
4.3. Left-hand operating levers ....................................................................................................................... 8
4.3.1. Light switch ............................................................................................................................................... 9
4.3.2. Indicators .................................................................................................................................................. 9
4.3.3. Horn ........................................................................................................................................................... 9
4.3.4. Rear brake ................................................................................................................................................. 9
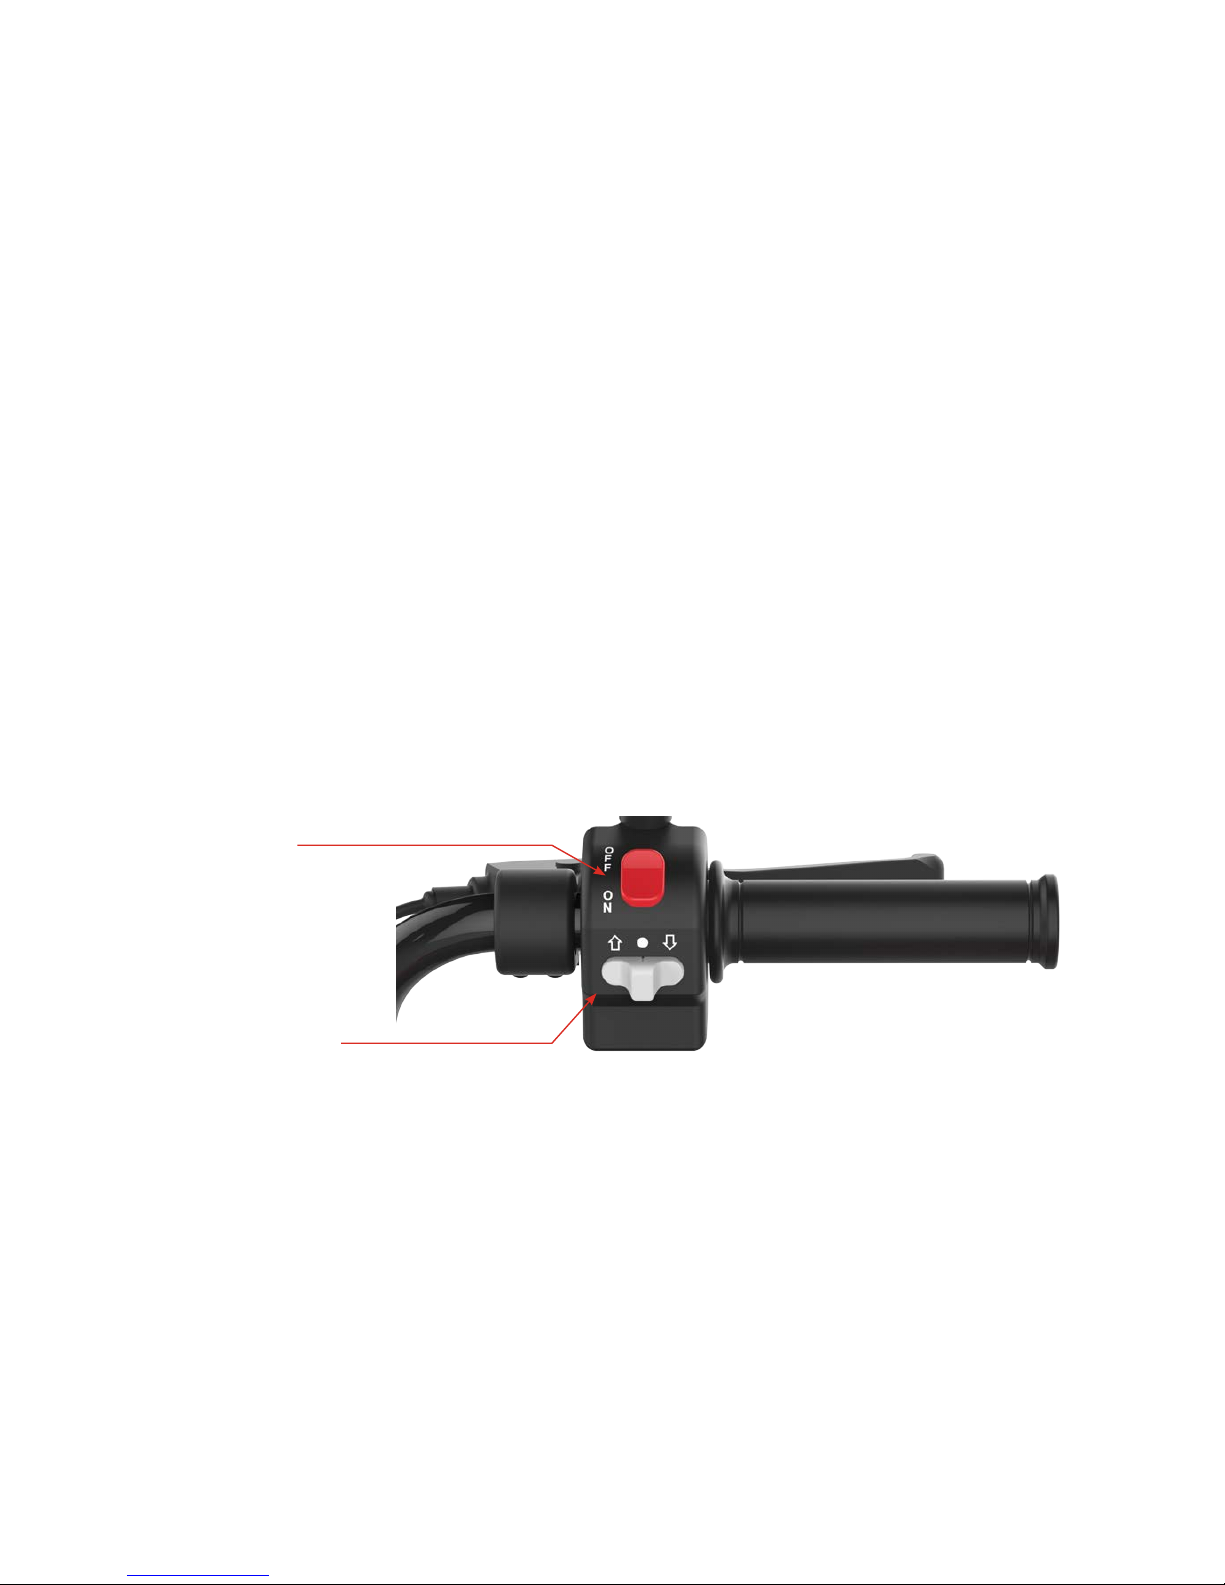
4.4. Right-hand operating levers ..................................................................................................................... 9
4.4.1. Optional switch ......................................................................................................................................... 9
4.4.2. Riding direction switch ............................................................................................................................. 9
4.4.3. Throttle grip ............................................................................................................................................. 10
4.4.4. Front brake .............................................................................................................................................. 10
4.5. Display ..................................................................................................................................................... 10
5. Battery ..........................................................................................................................12
5.1. Charging the battery ............................................................................................................................... 12
5.2. General battery safety advice ................................................................................................................ 13
6. Loading ........................................................................................................................14
7. Further operating advice .............................................................................................15
8. Servicing and maintenance .........................................................................................16
8.1. Independent checking and maintenance tasks .................................................................................... 16
8.2. Cleaning .................................................................................................................................................. 16
8.3. Services ................................................................................................................................................... 16
9. Manual shunting and breakdown service ...................................................................17
9.1. Manual vehicle shunting ......................................................................................................................... 17
9.2. vRbikes support ...................................................................................................................................... 18
9.3. Towing ..................................................................................................................................................... 18
10. About vRbikes ..............................................................................................................19

3
1. vR3 — the modular electric vehicle
1.1. Platform concept
The vR3 can easily be configured for a wide range of applications.
The vR3 is ideally suited as a:
– Courier and delivery vehicle
– Communal vehicle
– Service vehicle
– Transport vehicle
Central elements of the design include the universal connection points at the front and rear, and the space between
the two rear wheels, which is available thanks to the vR3's patented chassis design and significantly increases both
transport volume and flexibility.
Figure 1: vR3, front and rear universal connection points
Choose from a variety of standard modules. Customer-specific solutions are also often developed to facilitate opti-
mum usage.

4
1.2. Productivity
The vR3 has a transport volume of up to 1000 l (in the WIDEBODY version), 270 kg working load and 120 km ran-
ge. With a turning radius of less than 4.5 m, a ground clearance of 18 cm and the ability to climb steep gradients
of up to 25%, the vR3 is equally at home in narrow old-town alleyways as mountain villages. The automatic parking
brake, the redundant drivetrain with its energy recovery system, the unusually long range and the intelligent set-up
minimise downtimes and considerably boost productivity.
1.3. Safety and comfort
High-quality disk brakes on all three wheels bring the vR3 to a safe stop at all times. Thanks to its three-wheel
concept and balanced chassis, the vR3 is always safe to ride and remains a trusty companion even in rain or snow.
Even the WIDEBODY version of the vR3 glides as if on rails. The low step-through makes getting on and off easier.
The seat can be adjusted vertically and horizontally – with or without a backrest – so that any rider can find their
perfect position. The impressive ergonomics of the vR3 have been carefully conceived, down to the last detail: Cle-
arly arranged operating levers and an easy-to-read display make riding a pleasant experience.
1.4. Sustainability
The emissions-free drivetrain is only a small detail in comparison to the real plus in the area of sustainability: The
vR3 can easily adapt to constantly changing requirements within the holder organisation or in its new area of appli-
cation. The operating time of the vR3 is therefore considerably longer than comparable models. Not just a second
life, but maybe a different life too. This substantially reduces the overall impact on the environment and makes it
significantly more cost-effective.

5
2. Specifications
Properties Vehicle category L2e
Driving licence category F/A1, drivers aged 16+
Speed max. 45 km/h (may be limited as desired)
Range up to 120 km
Weights Kerb weight 225 kg
Working load/trailing load 90 kg at the rear, 30 kg at the front/200 kg
Drive Motor Brushless DC motor
Power 2 x 2 kW
Transmission Toothed belt
Battery Technology Lithium ions
Charge time (80% charged) Approx. six hours (with two batteries)
Chassis Front suspension Telescopic fork
Rear suspension Suspension strut
Front/rear rims Aluminium, 3.5 x 13"
Front/rear tyres Tubeless, 130/60-13"
Brakes Front/rear service brakes Hydraulic disk brakes 220 mm
Engine brake/regeneration Adjustable
Parking brake Fully automatic, on both rear wheels
Dimensions Length 2230 mm
Wheelbase 1620 mm
Width 800 mm/1100 mm as WIDEBODY
Figure 2: Standard module selection.

6
3. Preparation
3.1. Clothing
Wear clothing appropriate for the weather. Please also ensure that no items of clothing
(scarves, etc.) can become caught in the moving parts.
3.2. Seat position
The seat position can be adjusted according to your body size. To adjust, pull the lever on the left-hand side in-
wards. Then push the seat along the rails to a position which is comfortable for you. Please ensure that the lever is
locked back into place after the seat is in position.
Figure 3: Lever for seat position adjustment
3.3. Rear-view mirrors
The rear view mirrors can be manually adjusted to the optimum position. For this, hold the handlebar firmly and turn
the mirror housing in the desired direction. Please ensure that you have a good view to the rear when you are in the
riding position.
3.4. Function check
Ensure that the battery is sufficiently charged before starting your journey. We also recommend briefly checking the
brakes, horn and lights before starting your journey.

7
4. Operating levers
4.1. Waking the battery
The vR3 has an automatic switch-off function to protect the batteries. If the vehicle is not moved for a period of
eight days, then the batteries turn themselves off. Before the vehicle can be moved again, the batteries must be
turned on again via a separate button. This requires short, firm pressure. Make sure that both LED strips light up
briefly but constantly after turning on (no flashing).
This button is located on the rear casing above the left-hand rear wheel swing arm:
Figure 4: Button for turning on /off the battery
The batteries can also be manually torned off by pressing on the same button for a long time (approx. five se-
conds).
Push button
LED strips

8
4.2. Turning the vehicle on and off
The vehicle's electrical circuit is closed using the ignition key. When the ignition is turned off, the parking brakes are
activated automatically. The parking brakes are also active when the ignition is switched on, the riding speed is «0»
and the throttle grip is in neutral position.
Ignition key
Figure 5: Ignition key
4.3. Left-hand operating levers
The switch levers for the light, horn and rear brake are located on the left of the handleber.
Light switch
(main beam/dipped headlights)
Indicators
Horn
Figure 6: Left-hand operating levers

9
4.3.1. Light switch
When the ignition is turned on, the position lights and dipped headlights are automatically switched on. When requi-
red, an additional headlight may be flipping on by turning the blue switch.
4.3.2. Indicators
The indicators can be activated by sliding the grey switch to the left or right. In order to return the indicators to neu-
tral position, press on the small grey button above the slider.
4.3.3. Horn
If you want to give an acoustic warning signal, press the yellow button.
4.3.4. Rear brake
In addition to the recuperation brake, the vR3 also possesses fully hydraulic disk brakes. The two rear brakes are
operated with the left brake lever.
Even if they are not often used in daily operation; operate both brakes regularly in order to avoid in-storage
deterioration.
4.4. Right-hand operating levers
The throttle grip, riding direction switch and brake lever for the front brake are located on the right of the handleber.
Optional switch
Riding direction switch
Figure 7: Right-hand operating levers
4.4.1. Optional switch
This switch may be used for additional vehicle options. (e.g. special signal, gyro light, etc.)
4.4.2. Riding direction switch
The riding direction switch is used to determine the riding direction. Slide the switch to the left if you want to ride
forwards. If you want to engage the reverse gear, slide the switch to the right.
Only operate the riding direction switch when you hear the relay in operation (clicking under the seat) after
turning on the ignition. Signals are only transmitted from the controls once this has happened.

10
4.4.3. Throttle grip
By gently turning the throttle grip, the vehicle accelerates in the direction selected with the riding direction switch.
When the acceleration is released, the recuperation brake is automatically activated; this enables the vehicle to
regain some of the braking energy.
4.4.4. Front brake
In addition to the recuperation brake, the vR3 also possesses fully hydraulic disk brakes. The front brake is opera-
ted using the right-hand brake lever.
Even if they are not often used in daily operation; operate both brakes regularly in order to avoid in-storage
deterioration.
4.5. Display
The vR3 has a digital display on which various functions and displays can be called up.
Reset button
Left-hand indicator control "light"
Speed display
Charging indicator
Selected additional
information
"Ignition on/off" operating
indicator
Right-hand indicator control
light
Display functions
Battery warning light
Main beam control light
Figure 8: Display with speedometer and battery residual voltage

11
The most important information displayed relates to the speed and battery. The bar indicator and the battery volta-
ge correspond to each other as follows:
Bar indicator Battery voltage Additional warning
Seven bars 51.4-53.7 —
6 bars 49.6-51.3 —
5 bars 47.9-49.5 —
4 bars 46.3-47.8 —
3 bars 45.1-46.2 —
2 bars 43.5-45.0 —
1 bars 42.1-43.4 Orange battery indicator
0 or 1 bar flashing 35.0-42.0 Orange battery indicator, continuous power reduction until
vehicle stops moving
The voltage totals approx. 53.7 V when fully charged. At 42 V, power is constantly reduced until the vR3 comes to
a standstill at approximately 37 V. The mode button is used to switch between the different displays.
Briefly touching the "mode" or "reset" buttons allows browsing through the various sub-menus. Holding down the
reset button for longer,cames the sub-menus for daily kilometre counters 1 and 2 ("TRIP 1"/"TRIP 2", distance
ridden since the previous reset) and the operating hours counter ("RT") to reset to 0.
The total kilometre counter ("ODO") and total operating hours counter ("TT") cannot be reset.

12
5. Battery
Important: The lithium ion batteries of the vR3 are a central and valuable element of your vehicle. Correct
usage is paramount for battery performance and lifespan. Failure to observe the following provisions may
lead to damage to property, persons, animals and the environment.
vRbikes.ch ag shall accept no liability in the case of improper battery usage. In the case of improper usage,
no warranty claims shall be accepted and no replacements offered, even if the vehicle has been purchased
with a maintenance or all-inclusive service package.
5.1. Charging the battery
The vR3 has a built-in charging device. To charge the battery, plug the charging plug into a conventional 230 V/10
A electrical socket. The charging indicator on the display (see section 4.5) shows the current charging status. When
the batteries are full, the charging device automatically stops the charging process.
Charging device display:
Red light illuminated: The vehicle is being charged.
Green light illuminated: The vehicle is fully charged.
Please ensure that you remove the plug before riding off!
Figure 9: Charging plug and charging device control light (on right-hand side of vehicle)

13
Further important advice relating to battery charging:
– Charge the vR3 at every opportunity and after every trip. This answer that the vR3 is ready for operation as
often as possible. Regular and frequent charging is also better for the battery.
– If the vR3 is not used for an extended period of time, the batteries must be charged at least once every four
weeks.
– Charge the vehicle in a cool, dry and well-ventilated area wherever possible. The vR3 should not be located
near to a source of heat during charging.
– The vR3 must not be charged at temperatures below 0 °C or over 40 °C.
– If the vR3 is charged indoors, the room should be fitted with a smoke alarm. In addition, people should not
regularly remain in the room and no flammable materials or explosive substances should be present there.
5.2. General battery safety advice
Batteries must not be mechanically damaged (pierced, deformed, dismantled, etc.) and must not be shorted or
connected with incorrect polarity. The batteries must not be heated above 120 °C or burned and must not be
immersed in liquid. It is therefore recommended not to place the batteries close to a heating source and to protect
them from long-term exposure to sunlight or rain. Battery packs must not be modified or manipulated under any
circumstances, and should also be kept away from children. Furthermore, batteries must not be overcharged or
deep discharged. Deep-discharged batteries must not be re-charged or operate.
Measures to be undertaken if a defective battery discharges or in the case of fire:
– In principle, lithium battery fires can be fought with water. No additional or special extinguishing agents are to
be provided.
– If heavy smoke develops or gas is released, leave the room immediately. If possible, ensure sufficient ventilati-
on. Respiratory protection, protective gloves and protective clothing should be worn for fire-fighting.
– Direct contact with the batteries should be avoided. However, if there is contact with the skin or eyes, then
the affected areas should be thoroughly washed with water for at least 15 minutes
– If battery fluid is swallowed, the mouth and surrounding area must be immediately rinsed out with water
–Medical assistance should always be obtained if smoke is inhaled, if there is skin or eye contact, if
battery fluid is swallowed or if burns are sustained.

14
6. Loading
The vR3 can be equipped with various modules according to customer requirements. Without further expansion,
the maximum load is 120 kg (front 30 kg, rear 90 kg).
The vR3 is additionally designed for a towing load of 200 kg (weight of trailer plus load in trailer).
30 kg
90 kg
Please observe the maximum load. (front 30 kg, rear 90 kg)

15
7. Further operating advice
In principle, the vR3 is extremely easy to handle and designed for the various purposes. Nevertheless, a few key
points should be observed:
– Where possible, avoid significant drops such as curbs and pavements. This places unnecessary strain on the
vehicle, especially when heavily laden.
– The vR3 is designed for a speed of 45 km/h, and is automatically restricted to this speed. However, the
vehicle can achieve higher speeds when travelling downhill. Avoid speeds higher than 45 km/h by using the
hydraulic front and rear brakes; the rear brakes (left brake lever) should be applied more strongly.
– The vR3 demonstrates stable riding behaviour especially at higher speeds. You should therefore brake in
good time before curves, in order to avoid excessive steering forces or even the wheel interior lifting up.
– In order to prevent the vehicle from inadvertently rolling away, the vR3 has electro-mechanical parking
brakes, which function, or brake where relevant, even without voltage. During the ride, allow vehicles approa-
ching closely from behind to overtake wherever possible in order to prevent a rear impact collision in the case
of an unexpected loss of vehicle voltage and the subsequent engagement of the parking brakes.
– Stopping: Always brake until the vehicle has completely stopped and the two parking brakes have engaged.
Use the hydraulic front and rear brakes for recuperation as well.
– Only leave the vehicle when you have made sure that it cannot roll away by itself.
– When stopping on an incline (especially when the vehicle is fully laden) use the hydraulic front and rear brakes
in order to prevent the vehicle inadvertently rolling backwards.
– The vR3 also has a reverse gear. When in reverse, ride at a maximum of walking pace and make sure that
nothing is in the vehicles path.
– The vR3 has been designed i for use with a trailer with a maximum load of 200 kg. Usage may however, be
restricted depending on the model and version.
– Where possible, park the vR3 under cover, in order to protect the vehicle from excessive rain and sunlight.

16
8. Servicing and maintenance
8.1. Independent checking and maintenance tasks
In the case of commercial usage of the vR3, the following checks must be carried out on a weekly basis:
– Visual inspection of the vehicle: General condition, tilting wheels, warping, cracking of the container
– Error messages on the display
– Error message on the battery indicator (are the LED strips flashing or is only one strip being illuminated?)
– Tyre condition: Tread depth, tyre pressure (1.8 bar to 2.0 bar for all wheels)
– Lights and reflectors: Are all lights, indicators and reflectors present? Are the lights working?
– Is the vehicle due for maintenance?
– Short test ride: Can abnormal noises be heard? Are the brakes working? Is the seat switch working? Are
there indications of loose steering bearings?
If a wheel change is necessary, the screws should be tightened to 110 Nm.
8.2. Cleaning
Clean the vR3 with normal water and a cloth or sponge. Only use a hose with a nozzle or even a high-pressure
washer for cleaning the container. Never clean the vehicle itself with a high-pressure washer.
8.3. Services
We recommend the following maintenance intervals:
In the first year: At least one service, after 1000 km at the latest
From the second year onward: At least one service per year, at least after every 5000 km

17
9. Manual shunting and breakdown service
9.1. Manual vehicle shunting
To shunt the vehicle with its own propulsion, sit on the vehicle and operate it as usual but with a reduced amount of
throttle grip.
Do not operate the vehicle via the throttle grip if not sitting on it.
To shunt by hand, deactivate the two parking brakes using the toggle lever, pulling the lever outwards. These are
located on the inside of each swing arm at engine level. Now the vR3 can be shunted by hand.
Activate the parking brakes again before riding. (Push the lever back inwards)
Push lever outwards to deactivate the parking brakes
Figure 10: Parking brake

18
9.2. vRbikes support
If you require assistance with eliminating a fault, the vRbikes Service Team will be happy to help you. Contact us by
telephone at +41 (0) 79 227 70 11, or +41 (0) 710 99 55 or alleractively by e-mail at [email protected].
9.3. Towing
The tow rope should be firmly attached to the towing vehicle (ring below trailer coupling). On the vehicle to be to-
wed, the tow rope is wound around the handlebar and then held tight with a hand. This is so that it can be released
in an emergency.
The maximum towing speed is 15 km/h. Drivers holding appropriate driving licences should sit on both vehicles.
Ensure that both parking brakes have been deactivated when towing (if the vehicle is being moved by
hand, both are deactivated)

19
10. About vRbikes
vRbikes.ch is part of the vonRoll infratec Group, which operates in the electromobility, casting, water supply and IT
services sectors. vonRoll infratec employs around 1200 staff at eight production sites in Switzerland and abroad,
where at any one time around 30-50 young people are also completing an apprenticeship.
vRbikes is focused on the development, production and sale of products and services for the e-mobility sector. Our
vehicles and charging infrastructures (ELECTRANT) have been successfully series-produced since 2011, and are
perceived on the market as Swiss, smart and advanced in line with the vRbikes values.

vRbikes.ch ag | Bahnhofstrasse 23 | CH-6301 Zug, Switzerland | Tel. +41 (0) 41 710 99 55 | Fax +41 (0) 41 710 99 56
[email protected] | www.vrbikes.ch
A vonRoll infratec Group company
Table of contents