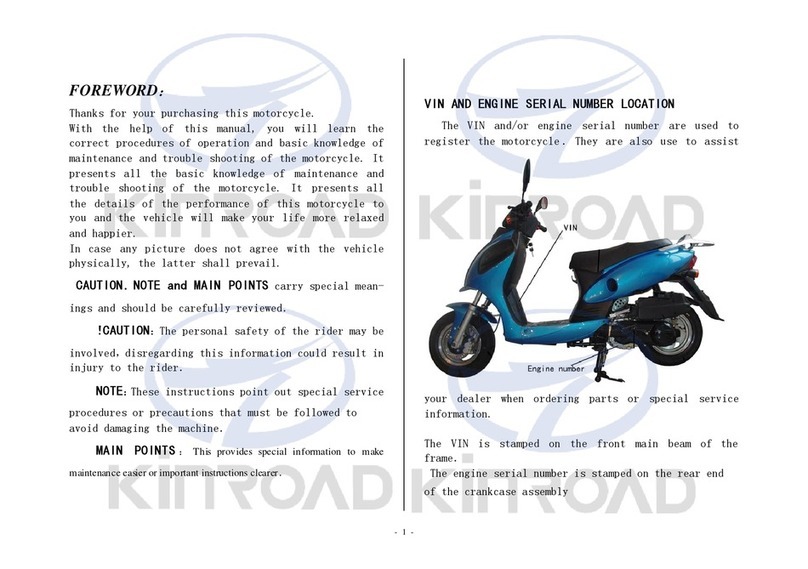
Clearwell Mobility Helios HD User manual

MOBILITY SCOOTER
USER MANUAL
Helios HD

Congratulations on the purchase of your new Helios HD Mobility Scooter! With its
superb power, full suspension and streamlined design, the Helios ensures trou-
ble-free mobility.
Your safety is important to us. Correct use of this scooter improves your mobility
and quality of life.
Please read this owner’s manual before using the scooter. Improper use of the
scooter could result in harm, injury or trafc accidents. This owner’s manual in-
cludes operation instructions for every aspect of the scooter.
01444 253 300
MODEL:
SERIAL NUMBER:
DATE OF PURCHASE:
Safety Guidelines
Pre-Ride Safety Check
Specication
Components of the Scooter
Control Panel
Scooter Assembley
Scooter Disassembley
Getting on the Scooter
Operating the Scooter
Getting off the Scooter
Batteries & Charging
EMI
Daily Checking & Maintenance
Basic Troubleshooting
Flash Codes
-3
-4
-5
-6
-7
-10
-16
-19
-20
-23
-24
-27
-29
-31
-32
Modications
Any modications to the specications will invalidate the warranty and may render
the vehicle dangerous.
Clearwell Mobility
Technical Support Helpline
Contents
Contents and Introduction
2

Safety Guidelines
The symbols below are used throughout this owner's manual and on the
scooter to identify warnings and important information. It is very important for
you to read them and understand them completely.
Indicates a hazardous situation that could result in
serious injury or death if it is not avoided.
Indicates a hazardous situation that could result in minor
or slight injury if it is not avoided.
Indicates a hazardous situation that could result in
damage to property if it is not avoided.
Recommendations and information for efcient,
trouble-free use.
The contents of this manual are based on the expectation that a mobility device
expert has properly tted the scooter to the user and has assisted the
prescribing health care professional and/or the authorized provider in the
instruction process for the use of the product.
There are certain situations, including some medical conditions, where the scooter
user will need to practice operating the scooter in the presence of a trained atten-
dant. A trained attendant can be dened as a family member or care professional
specially trained in assisting a scooter user in various daily living activities.
As you begin using your scooter during daily activities you will probably
encounter situations in which you will need some practice. Simply take your time
and you will soon be in full and condent control as you manoeuvre through door-
ways, on and off elevators, up and down ramps, and over
moderate terrain.
Additional general information can be found on the supplemental information
sheets and booklets included in your Owner’s Package.
Please fully read and review the information, and keep it readily available for
future reference.
WARNING!
CAUTION!
IMPORTANT!
USEFUL TIP!
3

Pre-Ride Safety Check
Get to know the feel of your scooter and its capabilities. We recommend that
you perform a safety check before each use to make sure your scooter operates
smoothly and safely.
Perform the following inspections prior to using your Travel Scooter:
Never drive the scooter with tiller lock in the locked
position.
Never exceed the maximum permissible load – see
Specications and never use the scooter to transport more
than one person.
Never drive the scooter under the inuence of medication or
alcohol.
Never attempt to get onto or off your scooter without rst
removing the key from the key switch. This will prevent the
scooter from moving if accidental throttle control lever con-
tact is made.
Check the condition of the tyres. Make sure they are not damaged or
excessively worn.
Check all electrical connections. Make sure they are tight and not cor-
roded.
Check all harness connections. Make sure they are secured properly.
Check the battery condition meter to ensure the batteries are fully
charged.
Ensure the manual freewheel lever is in drive mode before sitting on the
Travel Scooter.
If you discover a problem, contact Clearwell for assistance. Please refer to the
Contact Information on the rst page of this manual.
WARNING!
WARNING!
WARNING!
WARNING!
4

Specications
Model Helios HD
Maximum Speed 4mph
Maximum Range 16 miles
Battery Type 2 x 12V 22Ah AGM
Maximum User Weight 26 stone
Heaviest Part 18
Total Weight Without Batteries 45
Total Weight With Batteries 63
Overall Length 120cm
Overall Width 55cm
Overall Height 94cm
Maximum Climbing Gradient 12cm
Minimum Turning Radius 154cm
Ground Clearance 9cm
Seat Type Deluxe
Seat Width 46cm
Seat Height 44-50cm
Front Tyre Type 23cm (9”)
Rear Tyre Type 23cm (9”)
Suspension Full Active Front & Rear
Lights Front LED
Basket Black Plastic
Tiller Lock Yes
Tiller Type Delta Handle
Charger 2 Amp
Charging Type Battery Box/Tiller
Motor 280W
Brakes Automatic Electromagnetic
*May vary dependent on user weight and terrain
5

Control Panel
Seat Arm Pad
Seat
Basket
LED Light
Tiller Adjuster Knob
Tiller Lock
Front Wheel
Seat Post
Charger Socket – Battery Box
Battery Box
Arm Rest Retaining Screw
Seat Post Retaining Screw
1.
2.
3.
4.
5.
6.
7.
8.
9.
10.
11.
12.
13.
Freewheel Lever
Splitting Lever
Anti-Tip Wheel
Rear Wheel
Battery Indicator/Gauge
Speed Adjustment Dial
Key Switch
Tiller Handle
Horn Button
Throttle Lever Forward/Back
Charger Socket - Tiller
Light Switch
14.
15.
16.
17.
18.
19.
20.
21.
22.
23.
24.
25.
Components of the Scooter
6

Speed Adjustment Dial: (19)
Control Panel
Battery Indicator/Gauge
Speed Adjustment Dial
Key Switch
Tiller Handle
18.
19.
20.
21.
22.
23.
24.
25.
Horn Button
Throttle Lever Forward/Back
Charger Socket - Tiller
Light Switch
Battery Indicator/Gauge: (18)
Key Switch: (20)
Indicates the voltage of the batteries:
Green – batteries are fully charged.
Yellow – batteries are half full.
Red – batteries need charging.
Beeping sound continuing – batteries are out of
charge. Please re charge batteries.
This dial allows you to preselect and limit your Scooter’s top speed in the range of
0mph – 4mph:
The image of the snail represents the slowest speed setting.
The image of the hare represents the fastest speed setting.
This turns the power on and off on your scooter:
Insert the key into the key switch.
Turn the key clockwise to turn on your scooters power. The battery
indicator will light up to indicate that the power is on.
Turn the key anti-clockwise to turn off your scooter’s power. The battery
indicator light will turn off to indicate the power is off.
This button activates a warning horn. Your scooter must be turned on for the horn
to be operational. Do not hesitate to use the warning horn when doing so may
prevent an accident or injury.
Horn Button: (22)
7

Throttle Control Lever – Forward/Back: (23)
This lever allows you to control the forward speed and the reverse speed of your
scooter up to the maximum speed you pre-set with the speed adjustment dial.
Place your right hand on the right hand tiller handle and your left hand on the left
hand tiller handle.
Use your left thumb to push the left side of the throttle control lever.
Use your right hand ngers to pull back on the right side of the throttle
control lever.
To move forward, use either of the following:
To move backward, use either of the following:
Use your right thumb to push the right side of the throttle control lever.
Use your left hand ngers to pull back on the left side of the throttle con-
trol lever.
Release the lever and allow your scooter to come to a complete stop before push-
ing the other side of the lever to move in reverse. When the scooter is
moving in reverse, the reverse beeper will sound.
When the throttle is completely released, it automatically returns to the centre
“stop” position and engages your scooter’s brakes.
Charger Socket – Tiller: (24)
The Tiller Charger Socket allow the batteries to be charged without having to bend
down and charge from the battery box charging socket – see Batteries and
Charging for further information.
WARNING!
Chargers are selected precisely for particular applications
and are matched to the type, size, and chemical formulation of
specic batteries. For the safest and most efcient
charging of your scooter’s batteries, we recommend
using the charger supplied as original equipment. Any
charging method resulting in batteries being charged
individually is especially prohibited.
WARNING! Do not attempt to disassemble the battery from the battery
pack or ret the battery.
Control Panel
8

WARNING!
If your battery charger has not been tested and approved
for outdoor use, then do not expose it to adverse or extreme
weather conditions. If the battery charger is exposed to
adverse or extreme weather conditions, then it must be
allowed to adjust to the difference in environmental
conditions before use indoors. Refer to the manual supplied
with the battery charger for more information.
The light switch turns the front LED light on and off.
USEFUL TIP! There is also a switch on the back of the light so check that
this is on if the light is not working.
Light Switch: (25)
Control Panel
9

When disassembling or assembling your scooter, always make sure you have
suf cient room to move the parts around. You may need assistance to lift
some of the scooter components.
See Speci cations for individual component weights.
No tools are required to disassemble or assemble your scooter. Always
disassemble or assemble your scooter on a level, dry surface with suf cient
space for you to work and move around your scooter. Keep in mind that the
disassembled sections of the scooter take up more oor space than the as-
sembled scooter.
Lifting weight beyond your physical capability may result
in personal injury. Ask for assistance when necessary while
disassembling or assembling your scooter.
CAUTION!
Assembley of the Scooter
The scooter assembles from ve main pieces: the basket, front section, rear
section, seat and battery box as shown below:
Front
Rear Section
Battery Box
1.
2.
3.
Seat
Basket
4.
5.
10

Tiller Adjustment Knob
Fully tighten the adjustment knob by turning clockwise making sure the
tiller is securely positioned with the teeth fully engaged together.
Loosen the tiller adjustment knob by tuning anti-clockwise - see below.
Raise the tiller to the required position.
Never operate the scooter unless the tiller is raised, the teeth
are fully engaged and the tiller adjustment bolt fully tightened
and securely positioned.
WARNING!
Tiller Adjustment
Knob
Tiller Lock
The scooter has been provided with a tiller lock which makes transporting
and carrying the scooter easier. It is only to be used when the scooter is
dismantled, either for transportation or storage.
To unlock - fully press the tiller lock button down then quickly release your
nger. The button will spring up to the unlocked position. The tiller will now
move sideways.
To lock – set the wheels to be directly facing forward, press the tiller lock
button down rmly and release your nger. The button will stay down in
the locked position.
11

Fig 6.3.1 Fig 6.3.2
Tiller Lock in un-locked
position:
Tiller Lock in locked
position:
WARNING! Never drive the scooter with tiller lock in the locked position.
Connecting Front & Rear Sections
Connect the front and rear sections by aligning them and gently lifting the
front section onto the two hooks of the rear section. See Fig 6.3.1. Make
sure the rear section is tipping back to allow the front section to lower into
the correct position.
Make sure the front and rear sections are securely and correctly
connected. See Fig 6.3.2.
When assembling the front and rear sections together keep
ngers well clear of ‘pinch points’.
CAUTION!
12

Seat Post
Adjust seat post to your require height by using the seat post pin provided. Then
securely tighten seat post retaining screw. See Fig 6.4.1.
Fig 6.4.1
Fitting Battery Box & Battery
Carefully lower the battery box into position on the scooter making sure
the box is securely and fully connected to the battery connector. See Fig
6.5.1.
Place basket onto bracket and make sure it is securely xed. See Fig 6.5.2.
See Fig 6.5.1. See Fig 6.5.2.
13

CAUTION! Make sure the seat is fully locked onto the seat post before
sitting.
Freewheel Lever
The Freewheel lever on the scooter is located on the rear section of the
scooter. Before driving the scooter needs to be put into the drive position. The two
positions are:
Drive position - is indicated by ‘Closed’ - pull the lever backwards for this
position. Fig 6.7.1.
Freewheel position - is indicated by ‘Open’ – push the lever forwards for
this position. Fig 6.7.2.
Fig 6.6.1
Fig 6.7.1 Drive Mode
(Closed)
Fig 6.7.2
Freewheel Mode (Open)
Fitting Seat
Stand behind the scooter and with both hands lower the seat onto the seat
post making sure the seat is straight above the seat post. If the seat is not
straight on the seat post you will not be able to fully lock the seat. Make
sure seat has fully locked onto seat post.
Fix arm rests and adjust to the required width, then tighten arm rest retain-
ing screws securely. See Fig 6.6.1.
14

Before placing your scooter into or taking it out of freewheel
mode, remove the key from the key switch. Never sit on the
scooter when it is in freewheel mode. Never put your scooter
in freewheel mode on any incline.
WARNING!
WARNING!
WARNING!
WARNING!
When your scooter is in freewheel mode, the braking
system is disengaged.
Disengage the drive motors only on a level surface.
Ensure the key is removed from the key switch.
Stand to the side of the scooter to engage or disengage free-
wheel mode. Never sit on a scooter to do this.
WARNING!
WARNING! After you have nished pushing your scooter, always return it
to the drive mode to lock the brakes.
15

Disassembley of the Scooter
The scooter disassembles into ve main pieces: the basket, front section, rear
section, seat and battery box as shown below:
Front
Rear Section
Battery Box
1.
2.
3.
Seat
Basket
4.
5.
When disassembling or assembling your scooter, always make sure you
have suf cient room to move the parts around. You may need assistance to
lift some of the scooter components.
No tools are required to disassemble or assemble your scooter. Always
disassemble or assemble your scooter on a level, dry surface with
suf cient space for you to work and move around your scooter. Keep in
mind that the disassembled sections of the scooter take up more oor
space than the assembled scooter.
See Speci cations for individual component weights.
CAUTION! Lifting weight beyond your physical capability may result in
personal injury. Ask for assistance when necessary while
disassembling or assembling your scooter.
16

See Speci cations for individual component weights.
Remove the Seat
Remove the Battery Box
Remove the Basket
Fold Down the Tiller
Stand behind the scooter and fold the seat back down, then with both hands
lift seat directly upwards.
Grip the battery box handle rmly and lift directly upwards and off the scoot-
er.
Stand in front of the scooter and lift basket directly upwards off the
basket bracket.
Loosen the tiller adjustment knob by turning anti-clockwise.
Carefully lower the tiller.
Loosen the tiller adjustment knob by turning anti-clockwise.
With the tiller in its lowered position, tighten the adjustment knob by turn-
ing clockwise making sure the tiller is securely positioned.
See Tiller Adjustment Knob.
Loosen the tiller adjustment knob by turning anti-clockwise.
Lock the tiller lock. See Tiller Lock.
Disconnecting the Front & Rear Sections
Push down the splitter lever and at the same time grip the seat post and lift up-
wards lifting the front section off the rear section hooks Fig 7.5.1, disconnecting
the front section from the rear Fig 7.5.2.
Push Splitter
Lever Down
Lift Up Post
Seat
Fig 7.5.1 Fig 7.5.2
17

Before Getting onto the Scooter
Keep your batteries fully charged and avoid deeply discharging your batteries.
Never leave the manual freewheel lever in the forward position unless you are
manually pushing your scooter.
WARNING! Never attempt to get on or off your scooter without rst
removing the key from the key switch. This will prevent the
scooter from moving if accidental contact with the throttle
control lever is made.
WARNING! Never sit on the scooter when it is in freewheel mode.
WARNING! Never exceed maximum permissable load [see Specications]
and never use the scooter to transport more than one person.
WARNING! Never drive the scooter under the inuence of medication or
alcohol.
WARNING! Never drive the scooter with the tiller in the locked position.
18

Getting on the Scooter
Make certain that the key is removed from the key switch.
Make sure that the tiller is in the locked position.
When getting onto the scooter, always adhere to the following:
Stand to the side of the scooter.
Disengage the seat rotation lever and rotate the seat until it is facing you.
Make certain that the seat it secured into position.
Position yourself comfortably and securely in the seat.
Disengage the seat rotation lever and rotate the seat until you are facing
forward.
Make certain that your feet are safely on the oorboard.
WARNING! The following can adversely affect steering and stability while
operating your scooter.
Holding or attaching a leash to walk a pet.
Carrying another passenger or pet.
Hanging any article from the tiller.
Towing or being pushed by another motorised vehicle.
IMPORTANT! Keep both hands on the tiller and both feet on the
oorboards at all times while operating the scooter. This
driving position gives you the most stability while operating
the scooter.
19

Operating the Scooter
Starting
Make sure you are seated safely and properly on your scooter.
Turn the speed adjustment dial fully anti-clockwise to the slowest setting.
Insert the key into the key switch.
Turn the key clockwise into the ‘On’ position.
Place your hands on the hand grips:
Pull on the left hand grip to steer your scooter to the left.
Pull on the right hand grip to steer your scooter to the right.
Move the tiller to the centre position to drive straight ahead.
Slowly engage the throttle control lever to gently accelerate your scooter
forwards by either:
Use your left thumb to push the left side of the throttle control lever
forward.
Use your right hand ngers to pull back on the right side of the throttle
control lever.
To stop release the throttle control lever to allow your scooter to stop
gradually. The electronic brakes will automatically engage when your scooter
comes to a stop.
Steering
Place both hands on the handgrips of the tiller, turn the tiller to the right to
travel right – never turn at high speeds as this will result in loss of control.
Turn the tiller to the left to turn left – never turn at high speeds as this will
result in loss of control.
Make sure to maintain sufcient clearance when turning your scooter so that
the rear wheels will be clear of any obstacles.
Show even greater caution when steering in reverse.
WARNING! Turning your scooter too sharply at high speed will cause loss
of control and balance, resulting in the scooter tipping over,
which risks serious injury or death.
Driving on Hills, Slopes or Ramps
When driving your scooter, never descend or climb a gradient which is greater
than recommended [see Specications]. This could result in serious injury or
death.
20
Table of contents
Other Clearwell Mobility Scooter manuals

Clearwell Mobility
Clearwell Mobility Aguna Ultralight User manual

Clearwell Mobility
Clearwell Mobility Mazarine User manual

Clearwell Mobility
Clearwell Mobility Skipper User manual

Clearwell Mobility
Clearwell Mobility Admiral Mk3 User manual

Clearwell Mobility
Clearwell Mobility Aguna Comfort User manual

Clearwell Mobility
Clearwell Mobility Argent User manual
Popular Scooter manuals by other brands

Denver
Denver SCO-85350 user manual

BMX
BMX 42922315 instructions

Drive DeVilbiss Healthcare
Drive DeVilbiss Healthcare AutoFold Elite FLEX/SUSP/RED instruction manual

Razor
Razor E100 series owner's manual

Pride Mobility
Pride Mobility Go-Go Elite traveller owner's manual

3T
3T EBIKE MOTION X 35 System manual