VS Sassoon VS7920A User manual

Model VS7920A
I-CLIP
VS7920A_NEW4.indd 1VS7920A_NEW4.indd 1 10/17/08 9:34:06 AM10/17/08 9:34:06 AM

IMPORTANT SAFETY INSTRUCTIONS
When using electrical appliances, especially when children are
present, basic safety instructions should always be followed,
including the following:
Polythene bags over product or package may be dangerous. To
avoid danger of suffocation, keep this wrapper away from babies
and children. This bag is not a toy.
DANGER: Unplug unit when not in use. All appliances are electrically
live even when switched off.
WARNING: This appliance must not be taken
into a bathroom.
• Do not immerse in water or other liquids.
• Do not use in the bath, or near basins or other vessels containing
water.
• Do not reach for an appliance that has fallen into water. Unplug
immediately.
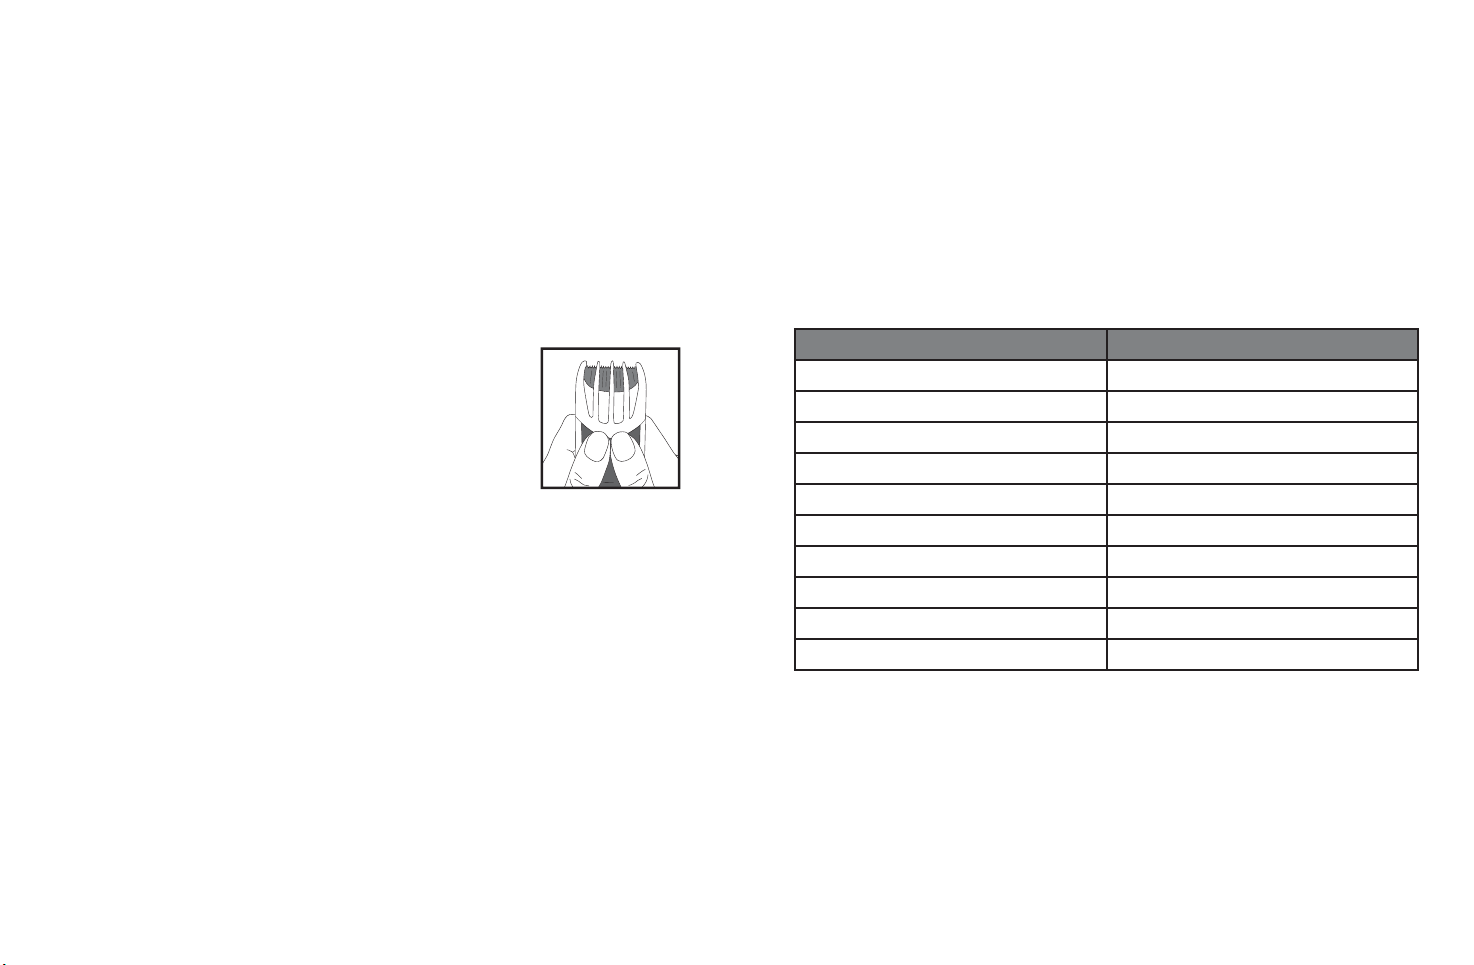
• Take care to avoid contact between the moving blades of the unit
and the skin, paying particular attention to the face, neck and
hands.
• This appliance is not intended for use by persons (including
children) with reduced physical, sensory or mental capabilities, or
lack of experience and knowledge, unless they have been given
supervision or instruction concerning use of the appliance by a
person responsible for their safety.
• Children should be supervised to ensure that they do not play
with the appliance.
• IMPORTANT: Always unplug the appliance when not in use or
before cleaning. Do not leave unattended when plugged in or
switched on. Do not place on any heat sensitive surface and always
allow to cool before storing away.
• Do not use any attachments other than those supplied by Conair
Australia Pty Ltd.
• Do not use the appliance with damaged or broken attachment
combs or with any teeth missing from the blades, as injury may
occur.
• Use this appliance only for its intended use as described within
this instruction booklet.
• This appliance is not intended for commercial use.
• Never drop or insert any object into any opening.
• Ensure appliance is switched off before plugging it into the
power outlet.
• Do not place appliance on any surface while it is operating.
• Do not use outdoors or operate where aerosol (spray) products
are being used or where oxygen is being administered.
• Keep the cord away from heated surfaces.
• Do not use this appliance if the supply cord is damaged. In the
event of damage, discontinue use immediately and contact
your dealer for instructions on returning it for examination or
exchange.
• After use do not wrap the cord around the appliance as in time
this may cause the cord to fracture. Coil cord loosely by the side
of the appliance in storage.
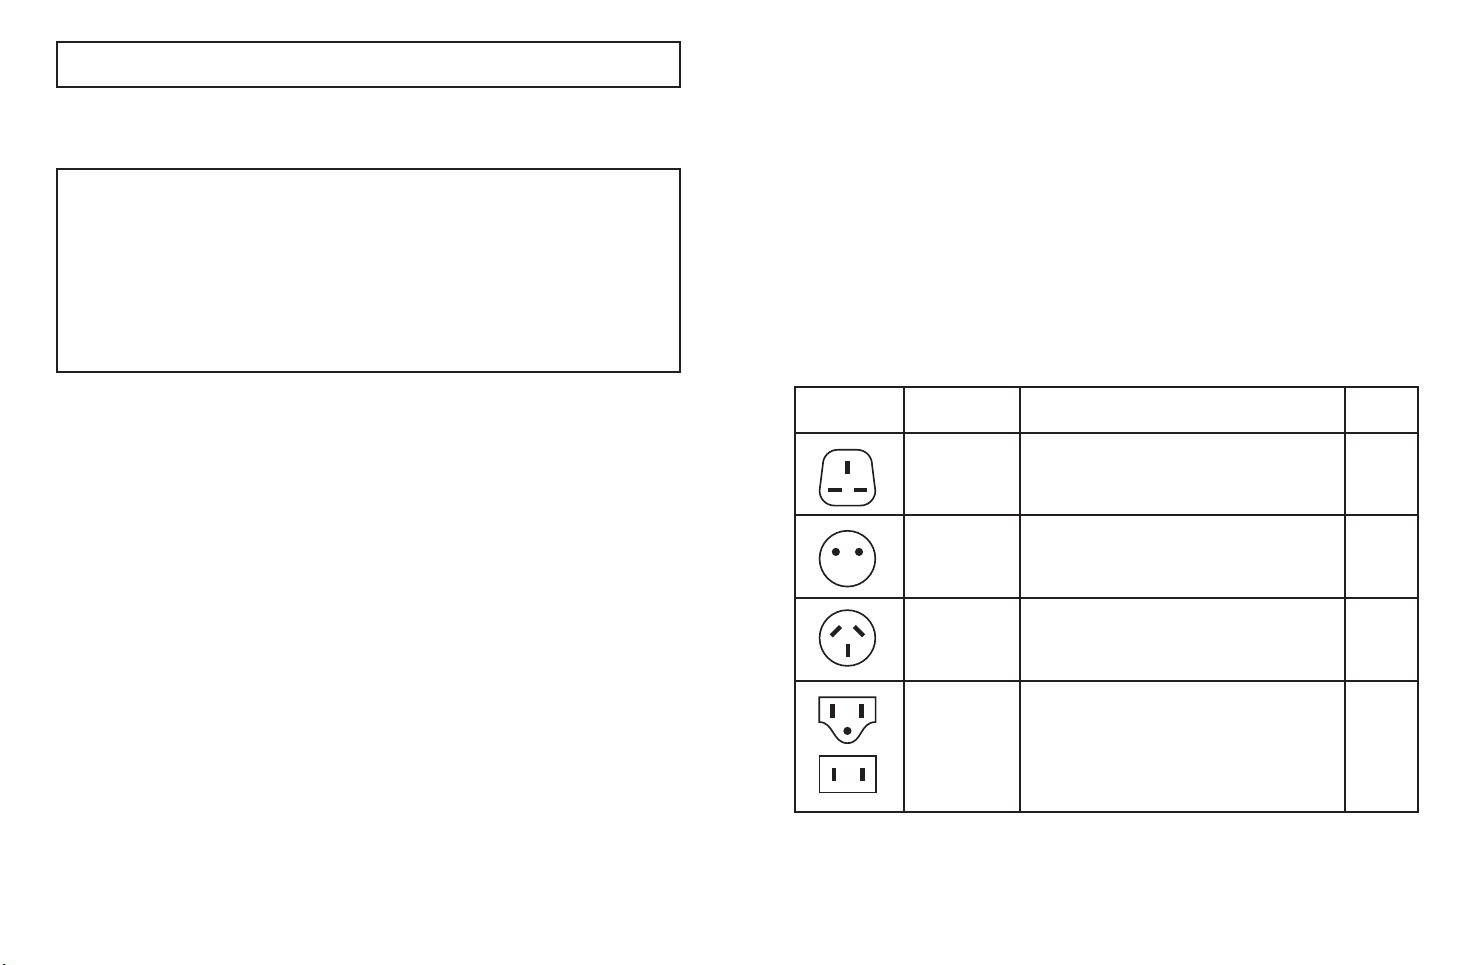
• Always ensure that the voltage to be used corresponds to the
voltage marked on the unit.
• For additional protection, the installation of a residual current
device (RCD) with a rated operating current not exceeding 30mA
is advisable in the electrical current circuit supplying the bathroom.
Ask your installer for advice.
VS7920A_NEW4.indd 2-3VS7920A_NEW4.indd 2-3 10/17/08 9:34:07 AM10/17/08 9:34:07 AM

17 13
15
4
2
3
12
14
18
I-CLIP PROFESSIONAL DC MOTOR HAIR CLIPPER
Thank you for purchasing the VS For Men i-clip Professional DC Motor
Hair Clipper, a revolution in men’s hair clipper design and performance
that’s easy to use. Featuring a rotary control comb guide system, you can
select from 23 different cutting lengths without the clutter and storage
of traditional ‘clip on’ comb guide attachments. The i-clip delivers VS
For Men’s best cutting performance by combining premium HLD (‘Hard
Like Diamond’) blade technology and a high performance PowerTec™
DC motor with motor management technology that delivers 50% more
power than traditional clipper motors and automatically adjusts the
power required according to your hair type.
FEATURES AND ACCESSORIES
1) Rotary cutting length adjustment control (thumb wheel)
2) 1 Telescopic comb guide for shorter styles 3mm – 15mm
3) 1 Telescopic comb guide for longer styles 18mm – 30mm
4) 1 precision comb guide with 5 positions (0.5mm to 2.5mm)
5) Clipper blades - HLD (‘Hard Like Diamond’) and titanium coated
moving blade with 100% stainless steel fixed blade
6) Integrated thinning system with thin and cut trimming
selections
7) Rechargeable Ni-MH battery with 16 hour charge
8) Cordless or corded use.
9) On/Off button
10) Motor management system indicator lights
11) Charging indicator light
12) Charging stand
13) AC dual voltage power adaptor
Accessories
14) Cleaning brush
15) Barbers comb
16) Scissors
17) Lubricating oil
18) Storage pouch
1
9
6
5
7
8
10
11
16
VS7920A_NEW4.indd 4-5VS7920A_NEW4.indd 4-5 10/17/08 9:34:07 AM10/17/08 9:34:07 AM

To remove adaptor from charging base
- turn base over to underside with cord facing you.
- using your thumb, push the adaptor cover to the right until it
pivots clear of the inserted plug adaptor.
- pull adaptor upwards to remove from base.
MULTI VOLTAGE
This appliance has a multi voltage feature for worldwide use. The
voltage automatically converts for ease of use from 100v - 240v.
This appliance has an automatic internal converter which will
automatically convert the voltage without the need of a switch.
A suitable plug adaptor will be required, please refer to the chart
below.
Plug adaptor
required
Voltage and
plug adaptors
Country Voltage
setting
British plug:
240V
Ireland, Great Britain, Singapore, South America,
Hong Kong (parts only), Africa (parts only)
240V
European plug:
240V
Asia, Europe, Middle East Noumea, Scandinavia,
South America, Hong Kong (parts only)
240V
Australian and
New Zealand
plug: 240V
Australia, New Zealand 240V
American
plugs: 120V
North America, Japan, Canada
(parts of)
120V
INSTRUCTIONS FOR USE
CHARGING THE CLIPPER
(FOR CORDLESS OPERATION)
The charging cord can be placed into the charging stand (as
assembled) or removed and placed directly into the base of the
clipper.
1. Plug the transformer into a 100V - 240V power supply.
2. Place the appliance onto the charging stand or plug the adaptor
directly into the base of the clipper, ensuring that the appliance is
switched off. The charging light will illuminate when the adaptor
is correctly inserted into the clipper and connected to the mains
power supply.
3. A 16 hour full charge will provide 60 minutes usage time.
CORDED USE – OPERATION WITH POWER CORD
1. Remove the power cord adaptor from the charging base
2. Plug the power cord adaptor directly into the clipper
3. Plug the cord into a 100V - 240V power supply
4. Press On/Off button to turn on
NOTE: If battery power is very weak, wait about 1 minute before
pressing On/Off button
IMPORTANT: Before using the appliance for the first time, charge
for a full 16 hour continuous charge. Maximum battery capacity
will only be reached after 3 charging and discharging cycles.
After the 3 cycles, the clipper must still be charged for 16 hours.
In order to maintain optimum capacity of the rechargeable
batteries, every 3 months the clipper should be recharged for
16 hours.
VS7920A_NEW4.indd 6-7VS7920A_NEW4.indd 6-7 10/17/08 9:34:11 AM10/17/08 9:34:11 AM

USING THE COMB GUIDES
IMPORTANT: Always attach the comb guide BEFORE turning the
clipper on. The contour following comb guide assists in creating an
even cutting result.
To attach a comb guide, first wind the rotary control (thumb wheel)
downwards, until it cannot be pushed down any further. Align the
comb guide by lining up the long sides of the guide with the sides
of the clipper. Insert side of guide into clipper and push down until
it ‘clicks’ into place.
To remove comb guide, first wind the rotary
control (thumb wheel) downwards, until it cannot
be pushed down any further. Turn clipper so that
the underside (back of unit) is facing towards you.
Holding the clipper with two hands, place thumbs
underneath the bottom of the comb guide and
push up until the guide ‘clicks’ out of position.
Telescopic comb guides (3mm to 30mm)
The I-clip features 2 telescopic comb guides with 18 precise length
settings (Comb guide grades #1-10) eliminating the need changing
and storing traditional comb guides.
Telescopic comb guide for shorter styles (3mm – 15mm)
Attach the comb guide as per instructions “Using the comb guides”
Use the rotary control (thumb wheel) to position the comb guide to
the required length.
Check the length setting (in mm) of your haircut through the
viewing window on the left side of the comb guide.
To remove the comb guide refer to “Using the comb guides”
Telescopic comb guide for longer styles (18mm – 30mm)
Attach the comb guide as per instructions “Using the comb
guides”
Use the rotary control (thumb wheel) to position the comb guide to
the required length.
Check the length setting (in mm) of your haircut through the
viewing window on the right side of the comb guide.
To remove the comb guide refer to “Using the comb guides”
Cutting Length Comb Guide
3mm #1
6mm #2
9mm #3
12mm #4
15mm #5
18mm #6
21mm #7
24mm #8
27mm #9
30mm #10
Precision comb guide (0.5 to 2.5mm)
The precision guide is designed for ultra close cutting length ideal
for creating designer stubble or close cropped hair styles.
This comb is adjusted manually.
To adjust the length setting, slide the switch located on top of the
comb guide.
5 length settings are shown on the top of the comb guide.
VS7920A_NEW4.indd 8-9VS7920A_NEW4.indd 8-9 10/17/08 9:34:12 AM10/17/08 9:34:12 AM

Settings Cutting Length
Setting 1 0.5mm
Setting 2 1mm
Setting 3 1.5mm
Setting 4 2mm
Setting 5 2.5mm
STARTING AND USING YOUR I-CLIP
Push the On/Off button to activate the clipper motor. The green
light on the LED display will illuminate to show power is on.
Wind rotary control (thumb wheel) up or down to adjust required
cutting length.
MOTOR MANAGEMENT TECHNOLOGY
The motor-management system delivers more power as needed, so
if there is a thicker section of hair where there is more resistance,
there will be more power delivered to the blades to maintain a
smooth cutting performance. The 5 bar LED on the front of the
clipper displays the motor – management system power level.
To turn the clipper off press the ON/OFF button
BEST CUTTING PERFORMANCE
1. Use on clean dry hair that has been combed until tangle-free.
2. Set the cutting length as required.
3. It is always best to start cutting with a longer grade first.
4. Hold the Clipper against the hair, the teeth of the comb guide
should be pointing upwards and flat against the
head.
5. Move the clipper upwards and outwards through
the hair, a little at a time, against the direction
of hair growth. (Fig 5)
6. The Clipper will work most efficiently when
cutting through the hair at its own speed. Never force through
the hair.
7. Never switch the clipper off whilst in the hair.
8. For longer hair on top of your head, you may wish to use the
barbers comb to lift the hair and then clip over the comb, or hold
the hair between your fingers and cut to the desired length.
• For the finishing touches, that is, around the
nape and sideburns, use the clipper without a
comb guide. Turn your clipper over and move it
from top to bottom. (Fig. 6)
• If you want a length greater than 30 mm, or if
you are experienced, you can create ‘comb’ or
‘finger’ cuts:
- Work without a comb guide.
- Take up a small section of hair with a comb or in your fingers.
- Move the comb or your fingers along the section of hair to the
desired length.
- Cut your hair along the comb or your fingers.
- Remove the cut hair using a comb and check the
evenness of the cut regularly. (Fig. 7)
9. Work around your head in sections.
THINNING AND TEXTURISING FUNCTION
• The thinning and texturising function makes hair less thick, and
gives a textured and choppy finished look.
1. Slide the switch at the top of the clipper to the «THIN» position.
2. The thinning comb appears in front of the blades.
3. Choose a comb guide, and set to the desired length.
4. Work in sections around your head.
5. On the top of your head, you may wish to use a longer length
setting on the comb guide, and lift your hair with the barbers
comb or your fingers at the same time.
Fig.5
Fig.7
Fig.6
VS7920A_NEW4.indd 10-11VS7920A_NEW4.indd 10-11 10/17/08 9:34:12 AM10/17/08 9:34:12 AM

LIMITED THREE YEAR WARRANTY
Conair Australia Pty Ltd. will repair or replace (at our option) your
appliance free of charge for thirty six months from the date of
purchase if the appliance is defective in workmanship or materials.
This warranty is an additional benefit and does not affect your
legal rights. To obtain service under this warranty, please fill in and
return the Warranty Registration as instructed.
6. This method of clipping will give a professional feel to your
haircut, and will cut the hair with a jagged finish to the tips
- instead of a blunt cut.
CLEANING AND MAINTENANCE
• Regular cleaning will maintain the high performance of your
clipper.
1. Switch OFF and remove the power cord if connected. Remove
cutting guide
2. To make cleaning easier, you can remove the
blades. Hold the clipper with the blades pointing
up and remove them by pressing the top of the
blade. (Fig 8)
3. Use the cleaning brush supplied to brush away
the hair and debris.
4. Ensure that you do this after each use, and
before storing away.
5. When used regularly the blades will not need to be oiled, however
if the clipper has not been used for a prolonged period of time,
then it is advisable to apply a small amount of oil (provided) to
the blades before using.
BATTERY DISPOSAL
The appliance contains Nickel Metal-Hydrate batteries. To protect
the environment, the appliance must be disposed of safely at the
end of its useful life. Please take the appliance to a recycling centre,
where the internal rechargeable battery should be removed by a
professional and recycled separately.
Fig.8
®
Vidal Sassoon and related logos are trademarks of
The Procter & Gamble Company used under licence by Conair
©2009 Conair Corporation USA
Conair Australia Pty Ltd, Suites 20 & 21,
7 Narabang Way, Belrose NSW 2085.
Australia Customer Service Hotline (Australia): 1800 650 263
Customer Service e-mail: aus_info@conair.com
Conair New Zealand Limited, PO BOX 251159, Pakuranga, Auckland
1706 New Zealand
Customer Service Hotline (New Zealand): 0800 266 247
For more information about the recycling of electrical and battery
operated appliances, please contact your local council office or your
household waste disposal service.
Ni-MH
VS7920A_NEW4.indd 12-13VS7920A_NEW4.indd 12-13 10/17/08 9:34:13 AM10/17/08 9:34:13 AM
Table of contents
Other VS Sassoon Hair Clipper manuals

VS Sassoon
VS Sassoon Rugged Commander VSM423RA Assembly instructions

VS Sassoon
VS Sassoon VSM7118A User manual

VS Sassoon
VS Sassoon XPERT CLIP VSM990A Assembly instructions

VS Sassoon
VS Sassoon TURBO-PRO VS7702A User manual

VS Sassoon
VS Sassoon THE STYLE CUT User manual

VS Sassoon
VS Sassoon VSM795A User manual

VS Sassoon
VS Sassoon X5 PRO User manual

VS Sassoon
VS Sassoon VSM7565A User manual

VS Sassoon
VS Sassoon VS7183A User manual

VS Sassoon
VS Sassoon I-CLIP AUTOMATIC VS7930A User manual