VWR Zippette Classic User manual

Zippette Classic
Instruction Manual
For capacities of
2.5 ml, 5 ml, 10 ml, 30 ml and 50 ml
Capacity EU Cat. No. NA Cat. No.
2.5 ml 612-4176 75856-460
5 ml 612-4177 75856-462
10 ml 612-4178 75856-464
30 ml 612-4179 75856-466
50 ml 612-4180 75856-468
Version: 1
Issued: May 2017

ZIPPETTE CLASSIC
2VWR |INSTRUCTION MANUAL |EN
Instruction Manual.............................. 3 - 14
Manuel d’instructions ....................... 15 - 28
Bedienungsanleitung ........................ 29 - 42
Manual de instrucciones....................43 - 56
Manuale d’istruzioni.......................... 57 - 70
Manual de instruções........................ 71 - 84
EN
FR
DE
ES
IT
PT
United States Europe
Manufactured for Address of legal manufacturer
VWR International, LLC VWR International bvba
100 Matsonford Rd Researchpark Haasrode 2020
Radnor, PA 19087 Geldenaaksebaan 464
800-932-5000 B-3001 Leuven
+ 32 16 385011
http://www.vwr.com http://be.vwr.com

3EN |INSTRUCTION MANUAL |VWR
Contents
Warning .....................................................................4
Safety Information ......................................................4
Package Contents.......................................................5
Installation..................................................................5
Restriction of Use ................................................. 5
Before Using the Zippette Classic ..........................5
Assembly.............................................................. 5
Specication ...............................................................5
Instructions for Use.....................................................6
Priming Reservoir..................................................6
Dispensing............................................................6
User Calibration Procedure ...................................6
Fine Adjustment ...................................................6
Troubleshooting.......................................................... 7
General Maintenance..................................................8
Maintenance/Cleaning.......................................... 8
Sterilising/Autoclaving ..........................................8
Disassembly Options/Cleaning ..............................9
Accessories and Spares ............................................. 10
Adaptors ............................................................10
Reservoirs........................................................... 10
Spare Parts 2.5 ml, 5 ml, 10 ml and 30 ml .......... 11
50 ml .................................................................14
Technical Service .......................................................14
Return for Repair................................................ 14
Warranty ............................................................14

ZIPPETTE CLASSIC
4VWR |INSTRUCTION MANUAL |EN
Warning
Use the utmost caution when dispensing caustic, radioactive or hazardous chemicals.
1. Follow safety regulations (e.g. protective clothing, goggles etc.) If in doubt, consult your safety ofcer.
2. Follow the operating instructions.
3. Only use the instrument for its proper purpose and within the limits of its materials. If in doubt, please
consult the manufacturer/distributor.
4. Regularly inspect the instrument for leakage. Before use it is sensible to check connections.
5. Do not use force. Damage to parts may cause leaks.
6. The temperature of the instrument and reagent to be dispensed must not exceed 40 °C.
7. Please note,
i only the manufacturer’s original parts must be used.
ii materials coming into contact with the liquid to be dispensed are borosilicate glass, PTFE, alumina
ceramic, FEP, PVDF and platinum iridium.
Safety Information
•When using the instrument, take into consideration the chemical compatibility of the materials in
contact with the liquid.
•Never leave the Zippette Classic on your work bench with the piston barrel full of liquid without moving
the dispense anti-drip tap into ‘Closed’ position.
•Always check that the dispense anti-drip tap is in the ‘Open’ position before attempting to dispense.
Tap open Tap closed

5EN |INSTRUCTION MANUAL |VWR
Package Contents
•Zippette Classic bottle top dispenser
•Three adaptors 38 mm, 40 mm and 45 mm
•PTFE inlet tube
Installation
Restriction of Use
NEVER use the Zippette Classic with:
•Liquids which are not compatible with PTFE, PVDF, FEP, borosilicate glass, alumina ceramic or those
which may attack platinum-iridium
•Hydrouoric acid
•Liquids which contain solid particles
Temperature limits of Zippette Classic and reagent are 15 °C to 40 °C
Before Using the Zippette Classic
Check that the instrument has not been damaged in transit.
Assembly
The Zippette Classic is packed with the dispense tube attached and the inlet feed tube removed. The 300
mm length of PTFE inlet tube provided should be trimmed to t your particular reservoir. The bottom end
should be cut diagonally at a length that is close to the bottom of the container when the Zippette Classic
is assembled to the container.
The threaded platform base of the Zippette Classic has a 30 mm screw thread for use with the
recommended squat amber reservoir 1.4 litre with side ller neck, see page 10 for ordering details. The
assembled Zippette Classic is screwed onto the reservoir using gentle hand torque applied to the Zippette
Classic’s threaded platform base only. Removal should also be by means of hand torque applied to this
same base.
Do not operate the piston until the unit is safely and fully mounted on the reservoir bottle.
Specification
Accuracy ≤±0.3% on maximum delivery and a precision ≤0.1%CV using distilled water at 20 °C.
Testing takes place according to DIN EN ISO 8655 using maximum nominal volume of distilled water at
20°C, with a uniform and smooth dispense action.

ZIPPETTE CLASSIC
6VWR |INSTRUCTION MANUAL |EN
Instructions for Use
Operating instructions
Priming Reservoir
It is recommended that you use the VWR squat anti-tip reservoir with safety side ll neck, available in 1.4
litre and 2.5 litre capacities, see page 10 for ordering details. Fill the reservoir to approximately 50 mm below
side neck aperture.
Place a container under the Zippette Classic dispense tube (14). Move the cursor (6) to the bottom of the
scale to enable free movement of the piston. To move the cursor, simply press the button (7) on the cursor
sideways and slide up or down. The cursor will lock automatically into position as soon as you release the
button. Prime the unit with a few gentle up and down strokes, taking the piston right down and lifting it up
about 25 mm. Repeat until steady, bubble free ow is dispensed.
Dispensing
After priming, the piston (4) should be left in the fully down position. To dispense a precise volume of uid,
adjust the cursor (6) so that the cursor line aligns to the volume required. Draw in the required volume of
uid by lifting the piston slowly until the stop. To dispense, push the piston assembly down fully, slowly, until
it stops, allowing the liquid to be collected in an appropriate vessel. When the Zippette Classic is not in use it
is recommended that the anti-drip tap is closed.
User Calibration Procedure
Fine Adjustment
The gures quoted on our Test Certicate apply to the calibration of the Zippette Classic at full volume. The
Zippette Classic adjustment cap enables the user to ne calibrate for accuracy. Using the adjustment disc
tool that is held on the rear of the Zippette Classic body, change the factory calibration by turning the slot
on the printed top cap insert:-
Anti-clockwise to increase volume Clockwise to decrease volume
The graduations on the adjustment ring increase or decrease by the following volumes:-
Zippette Classic 50 ml 0.1 ml per line
Zippette Classic 30 ml 0.1 ml per line
Zippette Classic 10 ml 33 µl per line
Zippette Classic 5 ml 17 µl per line
Zippette Classic 2.5 ml 8 µl per line

7EN |INSTRUCTION MANUAL |VWR
Troubleshooting
Problem Possible cause Remedy
Air bubbles appear in dispense
tube
Liquid reservoir is empty Refill reservoir and prime unit
Too fast filling action Pump liquid out, refill and dispense slower
Glass barrel is not sealing against
FEP ‘O’ ring
Unscrew the threaded platform ring and make
sure that the FEP ‘O’ ring is properly fitted into its
recess if necessary stretch ‘O’ ring slightly using
fingertips
Leaking piston Clean piston. If problem persists, replace piston
assembly (21)
Leaking discharge valve Clean unit by flushing through - if problem
persists, replace pedestal complete assembly
(20)
Barrel does not fill with liquid Inlet tube not fitted correctly Connect inlet tube correctly
Inlet valve stuck Free inlet valve by inserting a thin rod into the
inlet aperture
Glass barrel is not sealing against the
FEP ‘O’ ring
Unscrew the threaded platform ring and make
sure that the FEP ‘O’ ring is properly fitted into its
recess if necessary stretch ‘O’ ring slightly using
fingertips
Dispensing not possible Blocked dispense tube nozzle Disassemble the dispense tube and flush through
with cleaning fluid
Discharge valve stuck Clean unit by immersing platform in cleaning
fluid - if problem persists, replace pedestal
complete assembly (20)
Wrong dispense volume Instrument not calibrated Calibrate the unit - See page 6 ‘User Calibration’
Leaking valves Clean platform base - if problem persists, replace
pedestal complete assembly (20)
Liquid appears between glass
barrel and polypropylene
protection sleeve
Glass barrel is not sealing against the
FEP ‘O’ ring
Unscrew the threaded platform ring and make
sure that the FEP ‘O’ ring is properly fitted into its
recess if necessary stretch ‘O’ ring slightly using
fingertips
Damaged FEP ‘O’ ring Replace FEP ‘O’ ring

ZIPPETTE CLASSIC
8VWR |INSTRUCTION MANUAL |EN
General Maintenance
Maintenance/Cleaning
Note; All maintenance should be carried out wearing suitable eye protection and protective clothing. If in
doubt, consult your safety ofcer.
1. Make sure that the Zippette Classic is completely empty and turn the anti-drip tap to ‘Open’ position.
2. Place the instrument into an empty sink together with its reservoir. Unscrew the threaded platform base
from the reservoir and lift the dispenser’s intake tube carefully out of the reservoir, whilst tapping it
against the reservoir’s aperture to shake off any droplets from the intake tube.
3. Hold the dispense tube nozzle over the aperture of the reservoir and apply gentle piston strokes in order
to return any glass barrel contents into the reservoir.
4. Flush out remaining glass barrel contents with distilled water or a suitable solvent. This will preserve the
smooth action of the piston and free action of the inlet and outlet valves. If the inlet valve does stick and
is not freed by ushing, it may be freed by gently inserting a thin rod into the inlet aperture and gently
pushing the ball off its seating. Re-check unit for operation.
5. Empty the instrument completely after cleaning, and ush through with distilled water.
Sterilising/Autoclaving
Autoclaving is permissible at 121 °C 2 bar
after the normal cleaning procedure is carried
out. The cursor should be locked in the centre
of the adjustment slot before autoclaving.
Place the instrument on a cloth in order to
avoid contact with metal surface. Autoclave
the unit in its assembled status but with
the threaded ring completely loosened.
Autoclaving of the piston outside the glass
barrel will damage it. Cool slowly back to
ambient temperature before use.
Chemical sterilisation
The uid path components of the Zippette
Classic can be soaked overnight in a dilute
(1:1000) solution of sodium hypochlorite. (See
page 9 for disassembly procedure).
Unit ready for
autoclaving with
threaded platform ring
completely loosened Cursor locked
in centre of
adjustment slot
Threaded ring
Anti-drip tap

9EN |INSTRUCTION MANUAL |VWR
Disassembly Options/Cleaning
WARNING Do not use force in assembly or disassembly.
Disassembly should only be undertaken after the unit has been cleaned using the recommended cleaning
procedure. Wear protective clothing and goggles during disassembly.
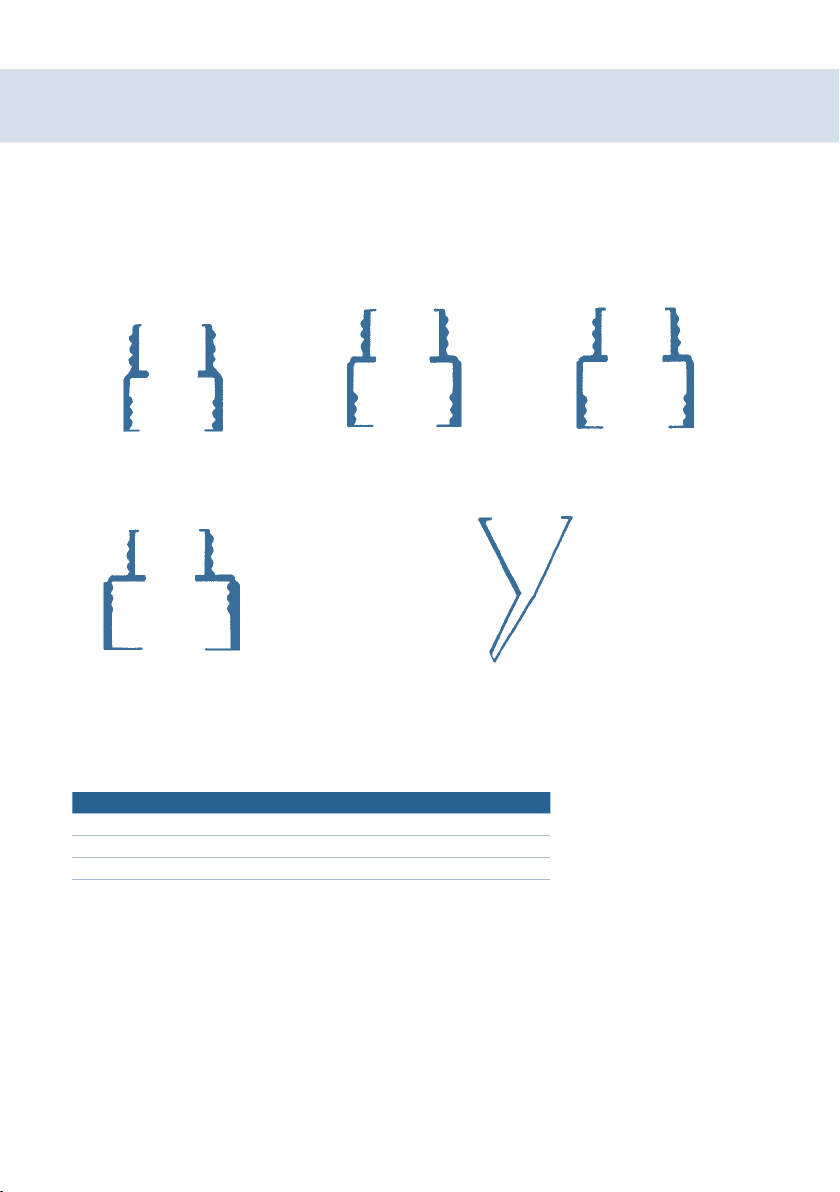
1. Move the cursor (6) down the scale and undo the dispense sleeve cap (1) by turning anti-clockwise
andlifting.
2. The piston holder (2) is now exposed and the piston (4) is ready for removal. Remove the piston
assemblycarefully.
3. Clean the piston’s surface with a suitable cleaning solution. Do not use hard tools to scrape off residue
of reagent from the piston as this will damage the surface and will not seal with the glass barrel when
reassembled.
4. If it is necessary to clean or replace the graduated outer dispense sleeve (5) of your Zippette Classic, this
is carried out with the help of the supplied assembly tool (17).
a. Loosen the polypropylene threaded ring (9) on the base by approximately one turn.
b. Using the assembly tool (17), undo the top stop ring (3) by turning clockwise and lifting it out. You
can now lift off the dispense sleeve (5).
c. To remove the polypropylene protection sleeve (11) and borosilicate glass barrel (10), fully undo the
threaded ring (9), remove the polypropylene protection sleeve (11) and gently lift out the glass barrel
(10) for replacement or cleaning.
Note: Bevelled inside edge of barrel must be at the top end when tted.
d. Removal of FEP dispense tube (14); Firstly turn the anti-drip tap to the closed position.
Then remove dispense tube protection cover (15) in an upward direction allowing dispense tube (14)
to be pulled out of anti-drip shut-off valve assembly in direction indicated on pages 12 and 13.
e. Reassemble in reverse, make sure the front end of the dispense tube is clipped into the dispense tube
protection cover (15) from the underside.
f. Reassemble the remaining components following the above points in reverse order, making sure that
the FEP ‘O’ ring (12) is well located into its platform recess. Take special care not to damage the piston
when inserting it into the glass barrel.
g. Before tightening the threaded ring (9) fully onto the threaded platform base (13), rotate the
polypropylene protection sleeve (11) so that the tooth on its base locates properly into the notch on
the threaded ring (9).
h. After reassembling the instrument, prime with distilled water to ensure that assembly has been
correctly followed and the piston is working smoothly. Check that no leaks occur.

Description EU Cat. No. NA Cat. No.
1.4 litre 2-neck, amber Squat 613-0971 14526-000
2.5 litre 2-neck, amber Squat 631-0975 14526-002
2.5 litre 2-neck, amber Winchester 613-0972 53410-044
ZIPPETTE CLASSIC
10 VWR |INSTRUCTION MANUAL |EN
30 mm
115 mm
33 mm
30 mm
30 mm 30 mm
45 mm
EU Cat. No. 612-3980
NA Cat. No. 53409-990
EU Cat. No. 612-3979
NA Cat. No. 53409-996
EU Cat. No. 613-0969
NA Cat. No. 14526-004
38 mm
EU Cat. No. 612-3978
NA Cat. No. NA 53409-992
40 mm
EU Cat. No. 612-3977
NA Cat. No. 53409-994
Angled
Funnel
Accessories and Spares
Adaptors
A range of four adaptors for tting your dispenser to the reservoir are available along with an angled funnel
to aid lling of reservoirs.
Reservoirs

2.5 ml 5 ml
Description Drawing EU Cat. No. NA Cat. No. EU Cat. No. NA Cat. No.
Stop Ring 3 613-5684 10782-832 613-5684 10782-832
Threaded Ring 9 613-5663 10782-852 613-5663 10782-852
Borosilicate Glass Barrel 10 613-5681 10782-826 613-5682 10782-828
Protection Sleeve 11 613-5686 10782-836 613-5686 10782-836
FEP ‘O’ Ring 12 613-5666 10782-786 613-5667 10782-788
FEP Dispense Tube 14 613-5659 10782-790 613-5659 10782-790
Polypropylene Dispense Tube
Protection cover
15 613-5660 10782-794 613-5660 10782-794
PTFE Inlet Tube 16 613-5658 10782-772 613-5658 10782-772
Assembly Tool for Outer Sleeve 17 613-5683 10782-830 613-5683 10782-830
Pedestal Complete Assembly 20 613-5673 10782-808 613-5673 10782-808
Piston Assembly 21 613-5676 10782-816 613-5677 10782-818
See page 12 for reference
10 ml 30 ml
Description Drawing EU Cat. No. NA Cat. No. EU Cat. No. NA Cat. No.
Stop Ring 3 613-5684 10782-832 613-5685 10782-834
Threaded Ring 9 613-5663 10782-852 613-5663 10782-852
Borosilicate Glass Barrel 10 613-5689 10782-842 613-5690 10782-844
Protection Sleeve 11 613-5686 10782-836 613-5687 10782-838
FEP ‘O’ Ring 12 613-5692 10782-848 613-5693 10782-850
FEP Dispense Tube 14 613-5659 10782-790 613-5668 10782-792
Polypropylene Dispense Tube
Protection cover
15 613-5660 10782-794 613-5660 10782-794
PTFE Inlet Tube 16 613-5658 10782-772 613-5658 10782-772
Assembly Tool for Outer Sleeve 17 613-5683 10782-830 613-5683 10782-830
Pedestal Complete Assembly 20 613-5673 10782-808 613-5674 10782-810
Piston Assembly 21 613-5678 10782-820 613-5679 10782-822
See page 13 for reference
Spare Parts
11EN |INSTRUCTION MANUAL |VWR

ZIPPETTE CLASSIC
12 VWR |INSTRUCTION MANUAL |EN
Drawing 2.5 ml/5 ml
Note
See page 11 for spare
part re-ordering details.
Zippette Classic body
complete with cursor (18)
Borosilicate glass
barrel (10)
Bottom barrel
locating ring (19)
Assembly tool for outer sleeve (17)
Stop ring (3)
FEP dispense
tube (14)
PTFE inlet tube (16)
Zippette Classic pedestal complete assembly (20)
Polypropylene dispense tube
protection cover (15)
Platform base containing valve assembly (13)
Polypropylene protection sleeve (11)
FEP ‘O’ ring (12)
Threaded ring (9)
Top barrel location ring (8)
Adjustment button (7)
Cursor (6)
Outer dispense sleeve (5)
PTFE piston (4)
Dispenser sleeve cap with ne adjustment (1)
& piston holder (2) Top cap &
piston assembly (21)

13EN |INSTRUCTION MANUAL |VWR
Drawing 10 ml/30 ml/50 ml
Note
See pages 11 & 14 for spare
part re-ordering details.
Dispenser sleeve cap with ne adjustment (1)
Piston holder (2)
Outer dispense sleeve (5)
Cursor (6)
Adjustment button (7)
PVDF piston (4) & PTFE piston end
Top cap & piston assembly (21)
Polypropylene protection sleeve (11)
Threaded ring (9)
Platform base containing valve assembly (13)
Polypropylene dispense tube
protection cover (15)
Zippette Classic complete pedestal assembly (20)
FEP dispense
tube (14)
‘O’ ring (12)
PTFE inlet tube (16)
Zippette Classic body
complete with cursor (18)
Borosilicate glass
barrel (10)
Assembly tool for outer sleeve (17)
Stop ring (3)

Technical Service
Return for Repair
In the unlikely event of repair, or where the damage to the unit necessitates return to your distributor or the
manufacturer, please decontaminate the unit and complete the required decontamination certicate where
appropriate. In addition, please give written details of the fault. The decontamination certicate is available
from the product ordering page on www.vwr.com.
Warranty
The manufacturer warrants that this product will be free from defects in material and workmanship for a
period of three (3) years from date of delivery. If a defect is present, VWR will, at its option and cost, repair,
replace, or refund the purchase price of this product to the customer, provided it is returned during the
warranty period. This warranty does not apply if the product has been damaged by accident, abuse, misuse,
or misapplication, or from ordinary wear and tear. If the required maintenance and inspection services are
not performed according to the manuals and any local regulations, such warranty turns invalid, except to
the extent, the defect of the product is not due to such non performance.
Items being returned must be insured by the customer against possible damage or loss. This warranty shall
be limited to the aforementioned remedies. IT IS EXPRESSLY AGREED THAT THIS WARRANTY WILL BE IN LIEU
OF ALL WARRANTIES OF FITNESS AND IN LIEU OF THE WARRANTY OF MERCHANTABILITY.
50 ml
Description Drawing EU Cat. No. NA Cat. No.
Stop Ring 3 613-5685 10782-834
Threaded Ring 9 613-5663 10782-852
Borosilicate Glass Barrel 10 613-5691 10782-846
Protection Sleeve 11 613-5688 10782-840
FEP ‘O’ Ring 12 613-5693 10782-850
FEP Dispense Tube 14 613-5668 10782-792
Polypropylene Dispense Tube
Protection cover
15 613-5660 10782-794
PTFE Inlet Tube 16 613-5658 10782-772
Assembly Tool for Outer Sleeve 17 613-5683 10782-830
Pedestal Complete Assembly 20 613-5674 10782-810
Piston Assembly 21 613-5680 10782-824
See page 13 for reference
ZIPPETTE CLASSIC
14 VWR |INSTRUCTION MANUAL |EN

Zippette Classic
Mode d’emploi
Pour une capacité de
2,5ml, 5ml, 10ml, 30ml et 50ml
Code Art. Code art. EU Code art. NA
2,5 ml 612-4176 75856-460
5ml 612-4177 75856-462
10ml 612-4178 75856-464
30ml 612-4179 75856-466
50ml 612-4180 75856-468
Version: 1
Publié: Mai2017

16 VWR |MANUEL D’INSTRUCTIONS |FR
ZIPPETTE CLASSIC
Instruction Manual.............................. 3 - 14
Manuel d’instructions ....................... 15 - 28
Bedienungsanleitung ........................ 29 - 42
Manual de instrucciones....................43 - 56
Manuale d’istruzioni.......................... 57 - 70
Manual de instruções........................ 71 - 84
EN
FR
DE
ES
IT
PT
États-Unis Europe
Fabriqué pour : Adresse légale du fabricant
VWR International, LLC VWR International bvba
100 Matsonford Rd Researchpark Haasrode 2020
Radnor, PA 19087 Geldenaaksebaan 464
800-932-5000 B-3001 Leuven
+3216385011
http://www.vwr.com http://be.vwr.com

17FR |MANUEL D’INSTRUCTIONS |VWR
Sommaire
Avertissement ...............................................18
Consignes de sécurité......................................18
Contenu de la livraison ....................................19
Installation ...................................................19
Restrictions d’utilisation ..............................19
Avant d’utiliser le Zippette Classic...................19
Assemblage.............................................19
Spécications................................................19
Mode d’emploi..............................................20
Réservoir pour amorçage.............................20
Distribution .............................................20
Procédure d’étalonnage utilisateur .................20
Réglage de précision ..................................20
Résolution des problèmes .................................21
Maintenance générale .....................................22
Maintenance/nettoyage ..............................22
Stérilisation/autoclavage..............................22
Options de démontage/nettoyage ..................23
Accessoires et pièces de rechange .......................24
Adaptateurs ............................................24
Réservoirs ...............................................24
Pièces de rechange 2,5ml, 5ml
10ml et 30ml .........................................25
50ml ....................................................28
Service technique ...........................................28
Retour pour réparation ...............................28
Garantie............................................................. 28

18 VWR |MANUEL D’INSTRUCTIONS |FR
ZIPPETTE CLASSIC
Avertissement
Faites preuve de la plus grande prudence lors de la distribution de produits chimiques caustiques, radioactifs
ou dangereux.
1. Suivez les consignes de sécurité (par exemple, vêtements de protection, lunettes, etc.). En cas de doute,
contactez votre responsable sécurité.
2. Suivez les instructions d’utilisation.
3. Utilisez uniquement l’instrument aux ns et dans les limites des matériaux spéciées. En cas de doute,
veuillez vous adresser au fabricant/distributeur.
4. Inspectez régulièrement l’instrument an de déceler toute fuite. Avant utilisation, il est donc judicieux de
vérier les raccords.
5. N’exercez pas de force. La détérioration des composants peut causer des fuites.
6. La température de l’instrument et des réactifs à distribuer ne doit pas dépasser 40°C.
7. Veuillez noter que
i seules les pièces d’origine du fabricant doivent être utilisées.
ii les matériaux qui sont en contact avec le liquide à distribuer sont en verre borosilicaté, en PTFE, en
céramique d’alumine, en FEP, en PVDF et en platine-iridium.
Consignes de sécurité
•Lorsque vous utilisez l’appareil, vous devez prendre en considération la compatibilité chimique des
matériaux en contact avec le liquide.
•Ne laissez jamais le Zippette Classic sur votre paillasse avec le cylindre du piston rempli de liquide sans
mettre le robinet de distribution anti-goutte en position «Fermée».
•Vériez toujours que le robinet de distribution anti-goutte est en position «Ouverte» avant de
commencer à distribuer.
Tap open Tap closed

19FR |MANUEL D’INSTRUCTIONS |VWR
Contenu de la livraison
•Distributeur adaptable sur acon Zippette Classic
•Trois adaptateurs de 38mm, 40mm et 45mm
•Tube d’admission en PTFE
Installation
Restrictions d’utilisation
N’utilisez JAMAIS le Zippette Classic:
•avec des liquides incompatibles avec le PTFE, le PVDF, le FEP, le verre borosilicaté, la céramique
d’alumine ou des liquides pouvant attaquer le platine-iridium;
•avec de l’acide uorhydrique;
•avec des liquides contenant des particules solides;
à des températures en dehors des limites de 15°C et40°C xées pour le Zippette Classic et les réactifs.
Avant d’utiliser le Zippette Classic
Vériez que l’instrument n’a pas été endommagé lors du transport.
Assemblage
Le Zippette Classic est livré avec le tube de distribution xé et le tube d’admission retiré. Le tube
d’admission enPTFE de 300mm de long fourni doit être raccourci pour s’adapter à votre conteneur.
L’extrémité inférieure doit être coupée en diagonale à une longueur proche de celle de la partie inférieure
du conteneur lorsque le Zippette Classic est assemblé sur le conteneur.
La base letée de la plateforme sur le Zippette Classic possède un letage de 30mm pour une utilisation
avec le réservoir ambré renforcé de 1,4litre avec col de remplissage latéral recommandé. Reportez-vous à
la page24 pour les informations de commande. Une fois le Zippette Classic assemblé, il doit être vissé au
réservoir par torsion manuelle légère sur la base de la plateforme letée uniquement. Le retrait s’effectue
également par torsion manuelle sur cette même base.
N’actionnez pas le piston tant que l’appareil n’est pas monté entièrement et en toute sécurité sur le
réservoir.
Spécification
Exactitude de ≤±0,3% en distribution maximale et précision de ≤0,1%CV avec de l’eau distillée à20°C.
Les essais sont réalisés conformément à la norme DIN EN ISO8655, en utilisant le volume nominal maximal
d’eau distillée à20°C, avec une distribution uniforme et uide.

20 VWR |MANUEL D’INSTRUCTIONS |FR
ZIPPETTE CLASSIC
Mode d’emploi
Instructions d’utilisation
Réservoir pour amorçage
Il est recommandé d’utiliser le réservoir renforcé anti-basculement VWR avec col de remplissage latéral,
disponible en capacités 1,4litres et 2,5litres. Voir page24 pour les informations de commande. Remplissez
le réservoir jusqu’à environ 50mm en-dessous de l’ouverture du col latéral.
Placez un récipient sous le tube de distribution du Zippette Classic (14). Déplacez le curseur (6) vers le bas
de l’échelle pour permettre le mouvement du piston. Pour déplacer le curseur, appuyez simplement sur
le bouton (7) sur le côté du curseur et faites-le glisser vers le haut ou vers le bas. Le curseur se verrouille
automatiquement en position dès que le bouton est relâché. Amorcez l’unité en tapotant délicatement
vers le haut et vers le bas, en déplaçant le piston bien droit vers le bas et en le soulevant d’environ 25mm.
Répétez l’opération jusqu’à ce qu’il soit stable en vous assurant que le ux distribué ne contienne pas de
bulles.
Distribution
Après l’amorçage, le piston (4) doit être laissé dans la position la plus basse. Pour distribuer un volume
précis de liquide, ajustez le curseur (6) an qu’il s’aligne sur le volume nécessaire. Arrêtez-vous au niveau du
volume de liquide requis en soulevant doucement le piston jusqu’à l’arrêt. Pour distribuer, poussez lentement
le piston complètement vers le bas jusqu’à ce qu’il s’arrête an de recueillir le liquide dans un récipient
approprié. Lorsque le Zippette Classic n’est pas utilisé, il est recommandé de fermer le robinet anti-goutte.
Procédure d’étalonnage utilisateur
Réglage de précision
Les chiffres indiqués sur notre certicat de test s’appliquent à l’étalonnage du Zippette Classic à plein
volume. Le bouchon de réglage du Zippette Classic permet à l’utilisateur un étalonnage précis. À l’aide du
disque de réglage situé à l’arrière du corps du Zippette Classic, modiez l’étalonnage d’usine en tournant la
fente située sur la garniture de bouchon imprimée:-
Dans le sens inverse des aiguilles d’une montre pour augmenter le volume Dans le sens des aiguilles d’une
montre pour diminuer le volume
Les graduations sur l’anneau de réglage augmentent ou diminuent selon les volumes suivants:-
Zippette Classic 50ml 0,1ml par ligne
Zippette Classic 30ml 0,1ml par ligne
Zippette Classic 10ml 33µl par ligne
Zippette Classic 5ml 17µl par ligne
Zippette Classic 2,5ml 8µl par ligne
Table of contents
Languages:
Other VWR Dispenser manuals