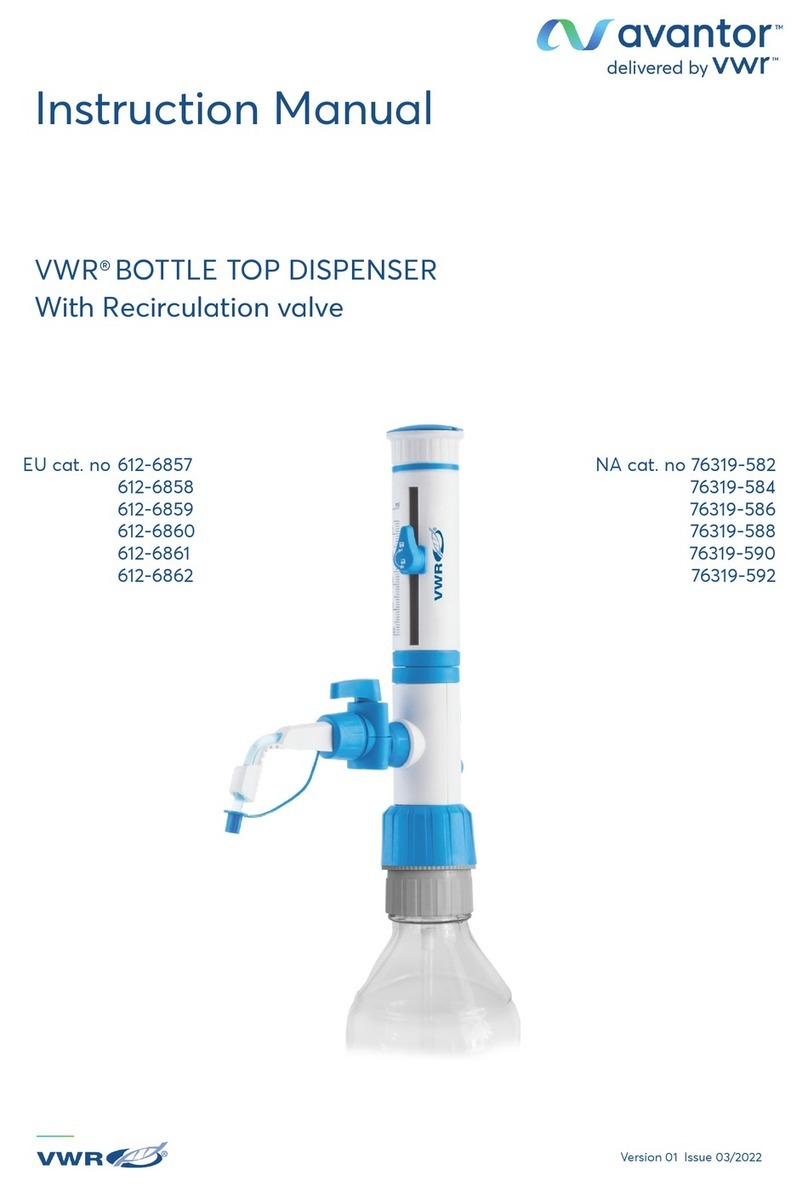
VWR 612-4750 User manual

EU Catalogue Numbers:
612-4750 Dispenser 10ml, ground glass piston,
clear glass cylinder
612-3669 Dispenser 10ml, PTFE coated piston,
clear glass cylinder
612-3671 Dispenser 10ml, glass piston,
amber glass cylinder
612-4751 Dispenser 50ml, ground glass piston,
clear glass cylinder
612-3670 Dispenser 50ml, PTFE coated piston,
clear glass cylinder
612-3672 Dispenser 50ml, glass piston,
amber glass cylinder
Instruction manual
VWR®Bottle Top Dispenser
Version: Ref 202003
Issued: 4th May 2020
Instruction manual
VWR®[product title]
NA Catalog Number [if applicable]
EU Catalogue Number(s):
Euro Plug: xxx-xxxx
UK Plug: xxx-xxxx
Swiss Plug: xxx-xxxx
[A product picture can be included if appropriate]
Version: 1
Issued: x day, y month, z year
[use if applicable i.e. if product CE marked]
Instruction manual
VWR®[product title]
NA Catalog Number [if applicable]
EU Catalogue Number(s):
Euro Plug: xxx-xxxx
UK Plug: xxx-xxxx
Swiss Plug: xxx-xxxx
[A product picture can be included if appropriate]
Version: 1
Issued: x day, y month, z year
[use if applicable i.e. if product CE marked]

2–60
Legal Address of Manufacturer
United States
VWR International, LLC
100 Matsonford Rd
Radnor, PA 19087
+1 800-932-5000
www.vwr.com
Country of origin: Germany
Europe
VWR International bv
Researchpark Haasrode 2020
Geldenaaksebaan 464
B-3001 Leuven
+ 32 16 385011
www.vwr.com

3–60
Safety information
Package Contents
Unpacking
Installation
Intended Use
Symbols and conventions
Specications
Instructions for use
Troubleshooting
General maintenance
Accessories and spares
Technical Service
Warranty
Disposal
Table of Contents
ENG

4–60
Safety Information
1. Please follow the guidelines below, and read this manual in its entirety
to ensure safe operation of the unit and follow the safety instructions.
2. Observe general notes on hazards and safety regulations, e. g. wear
protective clothing, gloves and glasses.
3. Observe any hazard symbols on reagent bottles.
4. Use only appropriate containers to dispense liquids. If using small
bottles, please use a stand.
5. Always make sure that the discharge tube does not point at the user
or any other person.
6. When transporting the dispenser please ensure that the piston is in
zero-position and no liquid is in the cylinder.
!The stopper cap must close the discharge tube and the volume setting
system must be set at zero-position!
Never carry the dispenser at the nger guard, only at the PP valve block!
7. Please check the correct assembling of the dispenser and the tight t
on the bottle before use.
8. To guarantee a trouble-free working please clean and use the dispenser
according to the operating manual.
9. Repairs if necessary must be carried out by the manufacturer himself
or authorized service stations only by using original parts.
Range of application
10 ml Bottle top dispenser for aqueous liquids and acids
Art. No. 612-4750
Piston made of precision ground glass. Integrated glass dispensing cylin-
der, plastic coated. Valve block made of PP. Valve system with Hastelloy
metal spring in discharge channel. FIX adapter.
Art. No. 612-3669
PTFE-coated piston. Integrated glass dispensing cylinder, plastic coated.
Valve block made of PP. Valve system with Hastelloy metal spring in
discharge channel. FIX adapter.
Art. No. 612-3671
Piston made of glass. Integrated amber glass dispensing cylinder, plastic
coated. Valve block made of PP. Valve system with Hastelloy metal spring
in discharge channel. FIX adapter.

5–60
50 ml Bottle top dispenser for aqueous liquids and acids.
Art. No. 612-4751
Piston made of precision ground glass. Integrated glass dispensing cylin-
der, plastic coated. Valve block made of PP. Valve system with Hastelloy
metal spring in discharge channel. FIX adapter.
Art. No. 612-3670
PTFE-coated piston. Integrated glass dispensing cylinder, plastic coated.
Valve block made of PP. Valve system with Hastelloy metal spring in
discharge channel. FIX adapter.
Art. No. 612-3672
Piston made of glass. Integrated amber glass dispensing cylinder, plastic
coated. Valve block made of PP. Valve system with Hastelloy metal spring
in discharge channel. FIX adapter.
!Warning: Please see the technical information about polypropy-
lene. This dispenser can only be used with chemicals against which
Polyproylene is resistant.
!Avoiding Damage to the Instrument.
Package Contents
Description Quantity
dispenser 1
intake tube, 6 x 7 mm 1
adapters made of PP (GL40/45) 2
volume setting system 1
operating manual 1
Please check this before using the dispenser.
Unpacking
Before using the dispenser please check the dispenser for any damages
or glass breakage.
Installation
Push intake tube over the hose connection of the PP valve block.

6–60
Screw dispenser direct onto containers with
thread GL 32 or use adapters to x on any
other threads or ground joint necks.
Check the correct tting.
The dispenser can be turned on the ask and
xed in any direction by using the built-in
FIX adapter.
Intended use
This dispenser was made for dosing liquids in general laboratory use.
This dispenser can only be used with chemicals against which
Polyproylene is resistant, such as aqueous media and acids.
The maximum viscosity of the liquids to be dispensed is 102 mPa.s.
Symbols and conventions
!CAUTION! This symbol indicates a potential
risk and alerts you to proceed with caution.
Product Specications
Volume Range - Subdivisions - Accuracy
Volume range Graduation Accuracy Precision
in ml in ml A in % CV in %
2,0 - 10,0 0,2 0,6 0,2
10,0 - 50,0 1,0 0,6 0,2
The datas of accuracy and precision are established according to the German calibration ordinance (PTB)
at a room temperature of +20° C (+68° F) by using destilled water. By using chemicals with a different
viscosity or density a calibration on an analytical balance is necessary.
Packing
The dispensers 10 ml and 50 ml: single carton, 25,5 x 15,5 x 7 cm.

7–60
Weight, Dimensions
Volume range Weight Height
in ml in g appr. in mm
2,0 - 10,0 132 160
10,0 - 50,0 237 220
Operating Temperature
The operating temperature is from +15° C (+59° F) to +35° C (+95° F).
Finger guard
Finger guard made of PP. All descriptions on the nger guard are printed
and the graduation on the scale is lasered in order to guarantee perma-
nence.
Volume setting system
Easy-to-use volume setting system with ne adjustment for calibration.
Suitable to be used by left- and right-handers.
Dispensing cylinder (clear glass for 612-4750/4751, 612-3669/3670,
amber glass for 612-3671/3672)
Integrated glass cylinder, vacuum-calibrated and plastic coated, with
stopper ring. Graduation printed black.
Valve block and FIX Adapter made of PP.
Valves Intake and discharge valve made of PP. Ceramic valve balls.
Hastelloy metal spring in discharge channel.
Dispensing piston
612-4750/4751 + 612-3671/3672: Dispensing piston made of precision
ground glass, 612-3669/3670:Dispensing piston made of precision ground
glass, PTFE-coated piston
Discharge tube
Integrated discharge tube made of PP. For safety reasons the discharge
tube can not be taken apart. White stopper cap made of PP.
Instructions for use
Operation
Assembling / Filling
Before using the dispenser please check the dispenser
for any damages or glass breakage.
(1) Push intake tube over the hose connection of the PP
valve block. (2) Screw dispenser direct onto containers
with thread GL 32 or use adapters to x on any other
threads or ground joint necks. Check the correct tting. 12

8–60
The dispenser can be turned on the ask and xed in any direction by
using the built-in FIX adapter.
To ll the dispenser the rst time lift and lower piston
a short distance several times until no air bubbles are
seen in the cylinder.
Volume setting
Loosen the nut of the volume setting system, set the
desired volume. The upper edge of the ne adjustment
screw shows the volume set. Fix the screw.
For calibrating purposes turn the screw of the ne ad-
justment. Turn downwards to increase the volume, turn
upwards to decrease the volume.
!Warning:
If the stopper cap is not removed when dispensing,
there may be an over-pressure in the channel system
and uncontrolled dispensing may be the conse-
quence.
Dispensing procedure
a) For safety make sure that the discharge tube does not point at the user
or any other person. By using the built-in FIX adapter it is possible to t
the dispenser accordingly. Remove stopper cap by holding the discharge
tube tight with other hand.
b) Set the desired volume with the volume setting system.
c) Lift the dispensing piston up with the nger guard. Do not touch the
piston itself to avoid contact with chemicals. The piston stops at the volume
set. The graduation on the glass cylinder is an additional optical control of
the volume set or air-bubbles.
d) To dispense the liquid push the piston down.
e) Avoid uneven piston movements or hard pushes against the
stopper ring.
f) Replace stopper cap after the dispensing procedure by holding the
discharge tube tight with other hand.
!Warning:
The piston must be pushed down manually. Therefore chemicals
may remain in the dispensing cylinder after dispensing. To avoid
unintentional dispensing, always dispense the total volume set. The
stopper cap must be placed on the discharge tube after every use.
When dispensing observe safety precautions!

9–60
Troubleshooting
Description of Possible Solution
the malfunction reason
Air bubbles in The dispensing Slowly and uniformly pulling
the dispensing piston has been out and pressing down the
cylinder pulled up too quickly. dispensing piston.
The system has Repeated lling and
not been vented. emptying the dispensing
cylinder.
The dispensed The dispensing Slowly and uniformly
volume is too piston has been pulling out and pressing
low. pulled up too down the dispensing
quickly. piston.
The system has Repeated lling and
not been vented. emptying of the
dispensing cylinder.
There are impurities Remove and clean the
in the intake tube. intake tube.
The dispensing There is conta- Disassembly and cleaning
piston is sluggish. mination between the of dispensing piston and
dispensing piston and dispensing cylinder.
the dispensing cylinder.
Disassembly of the
dispenser, put the PTFE
The PTFE-piston piston together with the
(612-3669/3670) nger protection cap in the
is swollen. freezer for a short time.
Check the dosing liquid,
solvents can only be dis-
pensed with 612-4750/4751
or 612-3671/3672.
The dispensing The volume setting Adjust the volume setting
cylinder can not be system sits at thetop. system to the desired
lled. volume.
The intake tube Unscrew the dispenser
is missing. from the bottle and insert
the intake tube.

10–60
General maintenance
Maintenance and Cleaning
1. To guarantee a trouble-free function also for a long term it is necessary
to clean the dispenser regularly.
2. Do not leave the dispenser empty without having it cleaned before to
avoid blocking of the valve balls! If this happens all the same please put
the dispenser for some hours in cold water or clean it by using ultrasound.
Once the piston can be moved again, dismantle and remove any residual
impurities by cleaning with a normal solution.
3. The dispenser can be left on the bottle all the time if the channel system
is lled.
4. When changing the dispensing liquid the dispenser should be cleaned.
Sterilization
The dispenser can be autoclaved at +121° C (+248° F) / 1 bar. Before
sterilization loosen screw of the volume setting system.
612-4750/4751 + 612-3671/3672: the piston can remain in the cylinder
when autoclaving
612-3669/3670:the dosing piston has to be sterilized separately.
!Warning: Do not autoclave with higher temperatures. This will
damage the dispenser. Wait before use until the dispenser has room
temperature.
Sterilisation of dispensers will put excessive stress on the
dispensers both thermally and mechanically. As a consequence
sterilisation of the dispensers will invalidate the warranty oered
on the dispensers. Replacement for complaint after sterilization
can be made only if sterilization protocol is available.
Repair Service
1. The dispenser is mainly maintenance-free and reliable. If there is a
problem or a defect and the user himself is not able to solve it, the faulty
parts will be exchanged through our dealer or the manufacturer. In case
a repair would be necessary, it must be done by the manufacturer or an
authorized service station. This does not refer to parts which are available

11–60
as spare parts, such as piston with nger guard, volume setting system,
stopper cap, intake tube, adapters.
2. Before returning the dispenser please do not forget to register
it with the manufacturer in advance. Make sure that it is perfectly
cleaned to avoid any contamination. Please also enclose a lled in
safety declaration.
3. Please operate the dispenser according to the operating manual to be
entitled to the warranty. Repairs must be carried out by the manufacturer
or authorized service stations.
User replaceable accessories and spare parts
Catalogue Number Description
612-3673 Spare Piston, 10 ml : 0.2; PTFE-encased
612-3674 Spare Piston, 50 ml : 1.0; PTFE-encased
612-3675 Valve Block Unit, 10 ml : 0.2; with amber cylinder
612-3676 Valve Block Unit, 50 ml : 1.0; with amber cylinder
612-6682 Spare Piston, 10 ml : 0.2; made of glass
612-6683 Valve Block Unit, 10 ml : 0,2 ml
612-6684 Valve Block Unit, 50 ml : 1.0 ml
612-6685 Spare Piston, 50 ml : 1.0 ml; made of glass
612-6686 Intake Tube, 350mm, 6/7 mm diameter
Technical service
Web Resources
Visit the VWR website at www.vwr.com for:
• Complete technical service contact information
• Access to the VWR Online Catalogue, and information about accessories
and related products
• Additional product information and special oers
Contact us For information or technical assistance contact your local VWR
representative or visit.
www.vwr.com.
Warranty
VWR warrants that this product will be free from defects in material and
workmanship for a period of two (2) years from date of delivery. If a defect
is present, VWR will, at its option and cost, repair, replace, or refund the

12–60
purchase price of this product to the customer, provided it is returned during
the warranty period. This warranty does not apply if the product has been
damaged by accident, abuse, misuse, or misapplication, or from ordinary
wear and tear. If the required maintenance and inspection services are
not performed according to the manuals and any local regulations, such
warranty turns invalid, except to the extent, the defect of the product is
not due to such non-performance.
Items being returned must be insured by the customer against possible
damage or loss. This warranty shall be limited to the aforementioned
remedies. IT IS EXPRESSLY AGREED THAT THIS WARRANTY WILL
BE IN LIEU OF ALL WARRANTIES OF FITNESS AND IN LIEU OF THE
WARRANTY OF MERCHANTABILITY.
Compliance with local laws and regulations
The customer is responsible for applying for and obtaining the necessary
regulatory approvals or other authorisations necessary to run or use the
Product in its local environment. VWR will not be held liable for any related
omission or for not obtaining the required approval or authorisation, unless
any refusal is due to a defect of the product.

13–60
Instructions de Sécurité
Contenu du colis
Déballage
Installation
Utilisation prévue
Symboles et conventions
Spécications du produit
Mode d'Emploi
Dépannage
Entretien général
Accessoires et pièces de rechange
Service technique
Garantie
Disposition
Contenu
FRA

14–60
Instructions de Sécurité
1. Avant l'utilisation du distributeur veuillez lire le mode d'emploi et suivre
toutes les instructions de sécurité.
2. Observez les règles de sécurité; utilisez l'équipement de protection: les
habits, les lunettes et les gants adaptés aux produits chimiques utilisés.
3. Faites attention aux informations des fabricants sur les produits chi-
miques.
4. Utilisez des récipients appropriés pour distribuer les produits chimi-
ques. Pour les petites bouteilles nous recommandons des embases
stabilisatrices.
5. Pendant la distribution assurez vous que la position du tuyau de refou-
lement soit latérale à l'utilisateur.
6. Le distributeur ne doit jamais être transporté si le piston n'est pas à la
position zéro et si le cylindre n'est pas vide.
Faites attention que le capuchon ferme la canule de refoulement et que
le système de réglage du volume soit à la position zéro!
Ne le transporter jamais par la tête du piston mais par le bloc soupape
an d'éviter une distribution non intentionnelle.
7. Avant la distribution veriez que le distributeur soit xé correctement
et bien étanche.
8. Pour garantir un fonctionnement parfait un nettoyage conforme aux
instructions du mode d'emploi est necessaire.
9. En cas de réparation, seul le fabricant ou les ateliers de réparation
agréés sont autorisés à eectuer des remplacements en n'utilisant que
des pièces d'origine.
La liste des applications
10 ml Distributeur pour liquides standard et acides.
Code 612-4750
Piston en verre de précision. Cylindre intégré en verre, plastié. Bloc
soupape en PP. Système de soupape avec ressort en Hastelloy. Bague
de serrage tournante.
Code 612-3669
Piston en verre à manchon massif de PTFE. Cylindre intégré en verre,
plastié. Bloc soupape en PP. Système de soupape avec ressort en Ha-
stelloy. Bague de serrage tournante.
Code 612-3671
Piston en verre. Cylindre intégré en verre brune, plastié. Bloc soupape
en PP. Système de soupape avec ressort en Hastelloy. Bague de serrage
tournante.
50 ml Distributeur pour liquides standard et acides.
Code 612-4751
Piston en verre de précision. Cylindre intégré en verre, plastié. Bloc

15–60
soupape en PP. Système de soupape avec ressort en Hastelloy. Bague
de serrage tournante.
Code 612-3670
Piston en verre à manchon massif de PTFE. Cylindre intégré en verre,
plastié. Bloc soupape en PP. Système de soupape avec ressort en Ha-
stelloy. Bague de serrage tournante.
Code 612-3671
Piston en verre. Cylindre intégré en verre brune, plastié. Bloc soupape
en PP. Système de soupape avec ressort en Hastelloy. Bague de serrage
tournante.
!Avertissement:
Voyez les informations techniques de polypropylène.
Cet distributeur peut être utilisé seulement pour le dosage de produits
chimiques contre lesquels polypropylène est résistant.
Contenu du colis
Description Quantity
distributeur 1
tuyau d'aspiration, 6 x 7 mm 1
adaptateurs en PP (GL40+45) 2
réglage du volume 1
mode d'emploi 1
Nous vous prions de le verier avant l'utilisation.
Déballage
Avant la distribution contrôlez que le distributeur n'ait pas subi de dom-
mages.
Manipulation
Engagez le tuyaux d'aspiration sur l'olive de
la soupape d'aspiration.
Vissez le distributeur directement sur
les bouteuilles à goulot GL 32. Pour des
diamètres de goulots dierents utilisez les
adaptateurs letés ou coniques disponibles.

16–60
Avant veriez que le distributeur soit correctement vissé et bien étanche.
La bague de serrage tournante vous permet de xer le distributeur dans
n'importe quelle direction.
Installation
Ce distributeur a été conçu pour le dosage de liquides en laboratoires.
Cet appareil ne doit pas être utilisé que pour doser des produits chimiques
résistant au polypropylène, tels que liquides aqueux et acides.
La viscosité maximale des liquides à distribuer est de 10² mPa.s.
Symboles et conventions
!ATTENTION! Ce symbole indique un potentiel risque
et vous alerte de procéder avec prudence.
Spécications du produit
Volume Range - Subdivisions - Accuracy
Plages de Graduation Exactitude Précision
Réglage en ml in ml
2,0 - 10,0 0,2 0,6 0,2
10,0 - 50,0 1,0 0,6 0,2
Les valeurs pour l'exactitude et la précision se rapportent aux mesures conformes aux règlements
sur l'étalonnage (PTB) à une température ambiante de +20° C (+68° F) utilisant de l'eau distillée.
Pour l'utilisation des produits chimique ayant une viscosité et une densité diérentes il est néces-
saire de faire une calibration en utilisant une balance analytique.
Emballage
Distributeur 10ml et 50ml: carton individuel, 25,5 x 15,5 x 7 cm.
Poids, Dimensions

17–60
Plages de Réglage Poid Hauteur
en ml en g appr. en mm
2,0 - 10,0 132 160
10,0 - 50,0 237 220
Température d'Utilisation
Le distributeur doit être utilisé entre +15° C (+59° F) et +35° C (+95° F).
Protection des doigts
Protection des doigts en PP. Les inscriptions sont imprimés et la gradua-
tion sur la tige de réglage du volume sont gravés au laser et résistant aux
produits chimiques.
Réglage du volume
Réglage facile et rapide avec écrou de calibration (réglage de précision).
Approprié pour la manipulation de la main gauche ou de la main droite.
Cylindre de dosage (en verre clair: 612-4750/4751, 612-3669/3670, en
verre brune: 612-3671/3672)
Cylindre de dosage intégré en verre, calibré et plastié, avec bague de
butée. Graduation imprimé noir.
Bloc soupape et bague de serrage tournante en PP.
Système de soupape en PP avec des billes en céramique. Ressort en
Hastelloy.
Piston de dosage
612-4750/4751+612-3671/3672: Piston de précision en verre rodé, 612-
3669/3670: Piston en verre à manchon massif de PTFE
Canule de refoulement en PP, intégré dans le bloc soupape ferme et
capuchon de fermeture blanche en PP.
Mode d'Emploi
Manipulation
Assemblage / Ventilation
Avant la distribution contrôlez que le distributeur n'ait pas subi de dom-
mages.
(1) Engagez le tuyaux d'aspiration sur l'olive de la soupape d'aspiration.
Vissez le distributeur directement sur les bouteuilles
à goulot GL 32. Pour des diamètres de goulots dif-
ferents utilisez les adaptateurs letés ou coniques
disponibles.
(2) Avant veriez que le distributeur soit correc-
tement vissé et bien étanche. La bague de serrage
tournante vous permet de xer le distributeur dans
n'importe quelle direction. Pour amorcer le distribu-
teur, soulevez plusieurs fois le piston jusqu'à ce qu'il 12

18–60
ne reste plus de bulles d'air.
Réglage du Volume
Desserrez l'écrou du système de réglage. Positionnez le système de
réglage sur la tige graduée. Le volume est déterminé par de l'écrou de
réglage n. Serrez l'écrou.
Pour la calibration du volume avec une balance analytique, utilisez l'écrou
du système de réglage n, le déplacer vers le bas, ce qui augmentera le
volume. Le déplacer vers le haut, diminuera le volume délivré.
!Avertissement:
Il est absolument nécessaire d'enlever le capuchon de fermeture
avant la distribution, an d'éviter une surpression dans le cylindre
et un écoulement non intentionnel.
Opération de Distribution
a) Pour la sécurité assurez vous que la distribution soit eectuée laté-
ralement. Ceci est possible grâce à la bague de serrage
tournante. Enlevez le capuchon de fermeture du tuyau de
refoulement. Tenez la canule de refoulement avec l'autre
main pour éviter que le distributeur ne perde l'equilibre.
b) Ajustez le volume avec le système de réglage.
c) Soulevez le piston jusqu'à la butée. Le système de
réglage limite le mouvement du piston. Le volume ajusté
peut être contrôlé par la graduation sur le cylindre.
Les bulles d'air éventuelles sont visibles.
d) Pour la distribution poussez par le haut du piston.
e) Evitez les mouvements irréguliers et les coups violents
dans la butée.
f) Fermez le tuyau de refoulement avec le capuchon. Tenez
le tuyau de refoulement dans l'autre main pour éviter que
le distributeur ne perde l'equilibre.
!Avertissement:
Le piston doit être poussé et il est donc possible qu'il
reste du liquide dans le cylindre après le dosage. Pour
éviter une distribution non intentionelle, il est important de distribuer
le volume ajusté entièrement et de mettre le capuchon après chaque
utilisation!When dispensing observe safety precautions!
Dépannage
Description du Raison Solution
défaut possible
Bulles d'air dans le Le piston de dosage Tirez et appuyez le cylindre

19–60
cylindre de dosage a été tiré trop rapide- de dosage lentement et
ment en haut. régulièrement.
Le système n'a pas Remplissage et vidange
été ventilé. le cylindre de dosage
plusieurs fois.
Le volume mesuré Le piston de dosage Tirez et appuyez le cylindre
est trop petit. a été tiré trop rapide- de dosage lentement et
ment vers le haut. régulièrement.
Le système n'a pas Remplissage et vidange le
été ventilé. cylindre de dosage
plusieurs fois.
Il y a des pollutions Démontez et nettoyez de
dans de tuyau tuyau d'aspiration.
d'aspiration.
Le piston de dosage Il y a des contaminants Démontage et nettoyage
est dicile à déplacer. entre le piston de du piston de dosage
dosage et le cylindre et du cylindre de dosage
de dosage
Démontage du distributeur,
pose le piston en PTFE
Le piston PTFE est avec la protection des
(612-3669/3670) doigts brièvement en
goné congélateur. Vérication du
liquide de dosage, liquides
à base de solvants peuvent
être dosés seulement avec
612-4750/4751 ou 612-
3671/3672.
Le cylindre de Le réglage du volume Ajuster de réglage du volume
dosage ne peut pas se trouve à la butée volume désiré
être rempli. en haut.
Le tuyau d'aspiration Dévisse de distributeur de
manque. la bouteille et mets le tuyau
d'aspiration
Entretien géneral
Entretien et Nettoyage
1. Pour garantir un fonctionnement parfait, une longévité et une sécurité
de travail il est nécessaire de nettoyer le distributeur de temps en temps
en fonction des produits distribués.

20–60
2. Ne laissez pas le distributeur sans nettoyage après la bouteuille est vide
an d'éviter un blocage du piston et des billes! En cas de blocage mettez
le distributeur dans l'eau froide quelques heures ou faites un nettoyage
par ultra-son. Démontez le piston le plus vite possible, nettoyez les pièces
et le système de billes avec des dètergents habituels ou par ultra-son.
3. Quand le distributeur n'est pas utilisé il n'y a pas de problème s'il reste
de produit dans les conduits.
4. Avant le changement de produit, il est recommandé de nettoyer le
distributeur avec un détergent habituel ou de l'eau.
Stérilisation
Le distributeur est autoclavable à +121° C (+248° F) / 1 bar. Desserrez
l'écrou de réglage de volume avant la stérilisation.
612-4750/4751+ 612-3671/3672: Le piston peut rester dans le cylindre
pendant le stérilisation. 612-3669/3670:le piston doit être démonter.
!Pour éviter des malfonctions le distributeur ne doit pas stérilisé
plus chaud que indiqué plus haut. Laissez le distributeur se rafraîchir
à température de pièce.
Les distributeurs sont soumis à des eorts thermiques et mécaniques
fortement par la stérilisation. Pour cette raison, la garantie pour les
distributeurs qui étaient stérilisés est limité. Le remplacement d'une
plainte après la stérilisation ne peut être faite que si le protocole de
stérilisation est disponible.
Service Après-Vente
1. Grâce à la construction spéciale il n'y à guère de pièces sujettes à
réparation. Une distribution très able se trouve garantie. S'il y a une
malfonction les parts défectueux séront remplacés par le service technique
et en cas d'une réparation, elle sera faite dans l'usine du fabricant ou par
le service autorisé. La réparation sous garantie ne peut donner droit au
prolongement de celle-ci.
2. Avant de retourner au fabricant, s'il vous plaît l'inscrit au fabricant.
Nettoyez le distributeur complètement avant le retour en réparation.
N'oubliez pas de joinde l'attestation de décontamination au retour.
3. Pour avoir droit à la garantie, il est impératif de suivre le mode d'emploi.
Accessoires et pièces de rechange
Numéro de
catalogue Description
612-3673 Piston de remplacement,10 ml:0.2; à manchon de PTFE
612-3674 Piston de remplacement, 50 ml:1.0; à manchon de PTFE
This manual suits for next models
5
Table of contents
Languages:
Other VWR Dispenser manuals
Popular Dispenser manuals by other brands

Tokheim
Tokheim OPTimum IQ 6000 Technical manual

Tecmec
Tecmec Sirio HH Series Use and maintenance manual

Elkay
Elkay Smartwell DSSW1808FSC Use and care

Panasonic
Panasonic NC-ER30NW Operating (English operating instructions

SODAX
SODAX X1 user guide

Franke
Franke EXOS EXOS616X Installation and operating instructions