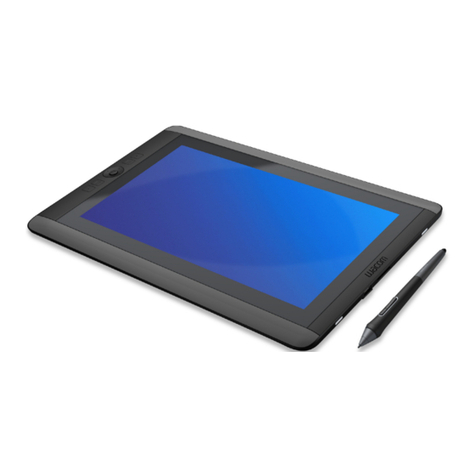
Wacom DTH-2400 User manual

Installation Guide & Hardware Manual
설치 가이드 및하드웨어 설명서
安裝指南及硬體手冊
安装指南与硬件手册
DTH-2400
DTH-2400.indd 1 2011/03/25 13:27:18

Notice for this product
Install the driver software for correct pen and this product.
The following Help and Support information provides information about this product.
Help and Support information Description
User's Manual PDF
document
The User's Manual is downloaded to your computer when the driver software is installed.
Refer to the User's Manual to learn the useful information such as changing cables, using a
VESA mount, troubleshooting and so on.
Important product information PDF
document
The Important product information is included in the installation CD. It contains precautions,
product specifications, and other important information.
Quick Start Guide
(This document)
Printed
document
The Quick Start Guide provides a general overview of this product, including information such
as how to use the product, and how to connect it to a PC.
•
•
DTH-2400.indd 2 2011/03/25 13:27:18

1
Welcome message
Dear Customer,
Thank you for buying this product pen display.
Many customers tell us that this product is critical to helping them be both more productive and more creative. For them, this product has
become an essential part of their workflow. We appreciate the trust you place in us and our responsibility to provide you with the best creative
tools possible.
To bring this latest product to market we have spent many hours talking to customers and incorporating your feedback. For example we have
increased the size, resolution and color gamut over the earlier product models.
We also noticed that many of you work many hours a day, often struggling to meet a deadline while juggling numerous projects. Some of you
experience aches and pains as a result. Consequently we have designed the ergonomics of this product for unparalleled flexibility on how it
can be positioned on your desk. It has been one of our major goals that the product you are about to use will be comfortable and easy to use.
There are many other enhancements and improvements in this latest product. We encourage you to read this Quick Start Guide and at least
scan the manual which will help you get the most out of your purchase.
We wish you the best of success in your creative endeavors.
Sincerely
This product Development Team
DTH-2400.indd 1 2011/03/25 13:27:18

2
Supplied accessories
Accessories not supplied with all models. Check the contents listed on the product packaging.
See the User's Manual to replace pen nib and personalize your pen.
See the User's Manual for information on attaching the VESA Mount.
DTH-2400.indd 2 2011/03/25 13:27:19

3
Connecting this product
1Turn off your computer.
2Connect the DVI-D cable or DisplayPort cable to the corresponding connector on your computer. Note that the DisplayPort cable is
shipped inside the stand. See the following page for instructions.
Connections can also be made with the included DVI-I to VGA cable. See the User's Manual for more information.
DTH-2400.indd 3 2011/03/25 13:27:19

4
When using the DisplayPort cable, remove from the stand as shown.
3Plug the USB connector into an available USB port on your computer or a USB hub attached to your computer.
DTH-2400.indd 4 2011/03/25 13:27:19

5
4Plug the power cable into the power adapter and then into an AC outlet.
DTH-2400.indd 5 2011/03/25 13:27:20

6
5Turn on this product. The power LED will change from orange to blue.
6Turn on your computer.
If a DVI-I to VGA cable is connected, configure the color resolution and size settings while looking at the display.
Then, open the menu screen, and select [Screen Setting] > [Auto Adjust].
For information on how to open the menu screen, see the User's Manual.
DTH-2400.indd 6 2011/03/25 13:27:20

7
Installing the tablet driver
Save your work and close all open applications.
1Insert this product installation CD. If the software installer menu is not automatically displayed, double-click on the Install icon located
on the CD.
2In the displayed dialog, click Install Tablet and follow the prompts.
The User's Manual is downloaded to your computer when the driver software is installed.
Click the Important Product Information menu in the dialog to view the Important Product Information guide for this product.
It includes product safety precautions, specifications, and other important information.
DTH-2400.indd 7 2011/03/25 13:27:20

8
Calibrating this product
For optimum performance, you must calibrate this product to align the screen cursor with the position of the pen on the display screen. This is
required to compensate for the viewing angle, and to adjust for parallax. Set this product in its working position, then follow the procedure below.
1Open the pen tablet's control panel.
See page 18.
2Click the [Position Adjustment] tab.
3Click [Calibrate...].
DTH-2400.indd 8 2011/03/25 13:27:20

9
4In the order of (1) > (2) > (3) > (4) from the top-left, click the center of the cross marks on the screen with the pen.
The position adjustment is completed when the cross marks disappear.
When using Windows, click [OK] (or [Save]) and close the control panel after saving the adjustment contents.
•
•
DTH-2400.indd 9 2011/03/25 13:27:21

10
Changing the angle of this product
Use the lever to tilt the display forward.
Use the lever to tilt the display backwards.
The angle of the display can be changed with either the upper or lower lever.
DTH-2400.indd 10 2011/03/25 13:27:21

11
Adjusting this product to a comfortable position
This product can be used nearly flat on your work surface.
This product can be lowered off the edge of a desk or table and used above your lap for intensive creative work. See page 14
for details.
DTH-2400.indd 11 2011/03/25 13:27:21

12
Flip down feet on bottom edge to allow keyboard placement beneath.
This product can be used vertically upright as a display.
DTH-2400.indd 12 2011/03/25 13:27:21

13
Setting up this product to be positioned above your lap
1Put the display into a flat position.
DTH-2400.indd 13 2011/03/25 13:27:22

14
2Pull the display toward you until it just clears the desktop or until you feel it lock into place. (There are rubber pads on
the base that grip the surface of the desk and prevent the display from moving beyond a safe position.)
3Use the incline levers to adjust the angle as required.
DTH-2400.indd 14 2011/03/25 13:27:22

15
Getting to know this product
1. Incline lever
2. Touch Ring
By default, the Touch Ring enables you to zoom in most graphics ap-
plications and to scroll in other applications. Press the mode button
to switch between three customizable states.
3. ExpressKeys
These keys simulate modifier keys, keystrokes, and other frequently
used functions.
4. OSD buttons
These buttons enable you to adjust a variety of display settings.
5. Power LED
6. Status LED
See the User's Manual for details on these and other features.
4
2
1
3
5
6
DTH-2400.indd 15 2011/03/25 13:27:22

16
7. Support legs
8. Power switch
9. VESA mount hole
10. Power cable
11. DVI cable
12. USB cable
13. Stand lock release lever
8
9
7
13
10
11
12
DTH-2400.indd 16 2011/03/25 13:27:22

USING AN ALTERNATE MOUNT OR STAND
Mounting screws that are 4 mm wide with a 0.7 mm pitch (M4 Regular), with a screw clearance depth of 17 mm
are required. Exceeding the clearance depth of 17 mm will damage the internal components of the pen display.
To remove the adjustable stand and attach the pen display to a different mounting platform:
1. Turn off your computer and power off the pen display.
Then disconnect all cables from between the unit and your computer.
2. Protect the display screen surface by spreading a soft cloth onto a flat table and placing the pen display face down
on the cloth.
3. Remove the screws and lift the adjustable stand assembly away from the body of the unit.
4. Using the appropriate screws for your mounting platform, firmly attach the pen display to the alternate mounting
platform.
5. Reattach the cabling.
Caution
When attaching the pen display onto an alternate mounting platform, be sure to follow all instructions in the
documentation supplied by the platform manufacturer. If improperly installed, the unit could fall, resulting in damage to
the unit or physical injury.
Ifyouwillbeusingtheinteractivependisplayinaninstallationthatrequirestheuseofanalternatemounting
platform,youcanremovetheadjustablestandfromtheunitandmountthependisplayontoanymountarmor
standconformingtotheVESAstandard.

17
Product Specifications
GENERAL SPECIFICATIONS
Model/Brand DTH-2400 (Code Name: Osprey) Pen&Touch model
Dimensions (W x H x D) 769.3 x 463.74 x 64 mm (excluding the Stand)
Weight Main Body: 10.0 kg, Tablet Stand: 14.0 kg (TBC)
Operating temperature & humidity 5 to 35 degrees C, Humidity: 20 % to 80 % RH (non-condensing)
Storage temperature & humidity
-10 to 60 degree C, Humidity: 20 % to 90 % RH (non-condensing)
(Maximum storage humidity is 38 % at a temperature of 60 degree C, and maximum strage temperature is
42 degree C at a humidity of 90 %.)
Certification and Compliance VCCI Class B, FCC Part 15 Subpart B(class B) and C, CE, KCC, BSMI, C-tick
CB, CCC, GOST-R, China RoHS, Korean RoHS, EU RoHS
Compatibility Windows7 / Vista / Vista x64 / XP / XP x64
Mac OS X 10.4 or greater
Stand Stand style can be changed flexibly.
Interface Cables DisplayPort, DVI-D, DVI-A, USB
Cover plate Tempered Glass with AG film (back side: ITO sputtering)
Input voltage 24 VDC
Power Management VESA DPMS
Power Consumption (with AC adaptor)
80 W (MAX) (TBC)
2 W or less in sleep mode (USB non-connected)
1 W or less in OFF mode
USB HUB Up stream: 1 Down stream: 3 (internal; 2, external; 1)
Load current is Maximum 0.5 A per port.
DTH-2400.indd 17 2011/03/25 13:27:22
Table of contents
Languages:
Other Wacom Tablet manuals

Wacom
Wacom DTU-1141 User manual

Wacom
Wacom DTU-1031X User manual

Wacom
Wacom ArtZ II User manual

Wacom
Wacom Intuos S User manual

Wacom
Wacom Cintiq Pro 24 Pen User manual

Wacom
Wacom INTUOS 3 User guide

Wacom
Wacom Intuos4 Large User manual

Wacom
Wacom Intuos3 12x19 User manual

Wacom
Wacom cintiq companion User manual

Wacom
Wacom STU-500B User manual

Wacom
Wacom PL-300 User manual

Wacom
Wacom Cintiq 24HD User manual

Wacom
Wacom STU-530 User manual

Wacom
Wacom DTU-1031 User manual

Wacom
Wacom STU-520A User manual

Wacom
Wacom CDS-600P User manual

Wacom
Wacom INTUOS 4 Operating instructions
Wacom
Wacom One User manual

Wacom
Wacom One CTH-671 User manual

Wacom
Wacom INTUOS 3 User manual