manuals.online logo
Brands
  1. Home
  2. •
  3. Brands
  4. •
  5. Wacom
  6. •
  7. Tablet
  8. •
  9. Wacom cintiq 13HD User manual

Wacom cintiq 13HD User manual

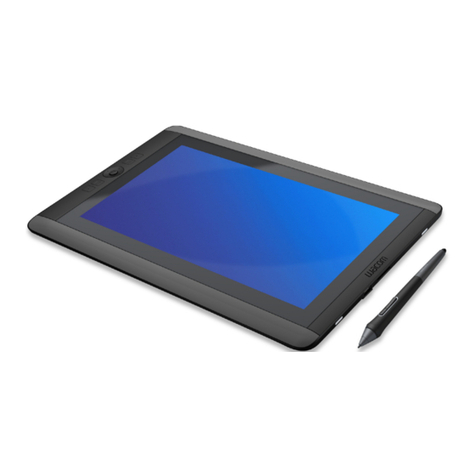
About the Cintiq 13HD
Your Cintiq 13HD creative pen display gives you many different ways to express
yourself. See Cintiq 13HD features for illustrations of your tablet, and Using your
pen display for information on system requirements and setup instructions. To
view additional options for using your pen display, see Getting Started.
If you are using the Cintiq 13HD touch (Cintiq 13HDT), you can also use touch to
perform functions directly on your pen display screen using standard gestures.
Your Cintiq 13HD or Cintiq 13HDT can be used with the pen that came with your
product, or a Wacom accessory pen or tool specified for use with your Cintiq.
Please refer to the printed Quick Start Guide provided in the product box for
descriptions of the parts and components for your Cintiq 13HD, and instructions
on how to set it up. The product Help topics will help you make the best use of
your Cintiq. You can access Help from the ?icon in Wacom Tablet Properties, or
from the Help dropdown in the Wacom Desktop Center.
Included with your Cintiq 13HD
When you have unpacked your Cintiq 13HD, make sure that you have received
the following items and accessories:
Cintiq 13HD (or Cintiq 13HDT) creative pen display
Pen
Pen stand
Pen color rings
Pen case and extra nibs
Installation CD (not in all regions)
Quick Start Guide (booklet)
3-in-1 cable
AC power adapter and cable
Plug for AC power adapter
Nib removal tool
Cleaning cloth
Some configurations may include additional CDs or DVDs containing application
software. To install, see the instructions for those CDs or DVDs.
Review the Important Product Information, which describes safety precautions,
specifications, warranties, and the license agreement for your device, on the
Wacom Desktop Center.
Features
The controls of your Cintiq 13HD or Cintiq 13HDT include:
Customizable ExpressKeys™: Four keys on the front of the creative pen
display allow you to set frequently used functions or keystrokes, simulate
button clicks or modifier keys, or create automatic settings for a number of
applications. See Customizing the ExpressKeys and About your Cintiq 13.
Rocker Ring: The four-position Rocker Ring allows you to further customize
your functions. See Using the Rocker Ring.
Status LED: The Status LED should light white when the Cintiq 13HD has
power and is connected to an active USB port for each of the following
actions:
oClick with the tool tip
oTouch the active area with a pen, or with a pen or finger on the
13HDT
oUse the pen, Rocker Ring or ExpressKeys
oPress the side switch
oPress the eraser to the screen
ExpressKeys
You can customize the ExpressKeys to execute the functions that make your work
quickest and easiest for you. Your Wacom pen display has four or more
ExpressKeys, depending on the device.
Select the ExpressKeys tab in Wacom Tablet Properties, then choose functions
from the dropdown menus. For pen displays that have a set of ExpressKeys on
both the left and right bezels, there is a separate Left and Right designation or
button that allows you to customize the ExpressKeys on each side individually.
On some pen displays, you can click a Show Express View checkbox on the
ExpressKeys tab to activate Express View. When the box is checked, you can
lightly press any ExpressKey to view the current ExpressKeys settings on your
screen.
The above screenshot is for descriptive purposes; it may not match your screen.
Rocker Ring
You can assign the positions of the Rocker Ring and Center Button to various
settings, menu and keystroke defaults from the Rocker Ring tab in Wacom Tablet
Properties.
Important: Some applications can override and control the Rocker Ring functions
you select from the Tablet Properties. For details, see Using integrated
applications.
Customizing the Rocker Ring and Center Button
Customize the four positions of the Rocker Ring, and the Center Button or Home
Button, to execute the functions that make your work quickest and easiest for
you.
To view the current settings for your ExpressKeys at any time, click the Show
Express View checkbox on the ExpressKeys tab. Lightly touch any ExpressKey to
view the current ExpressKeys settings on your screen.
To customize the Rocker Ring, select the Rocker Ring tab in Wacom Tablet
Properties and then choose functions from the dropdown menus. You may also
select the Keystroke... option and define a custom keystroke function. See Button
functions for more information about the Keystroke... option.
The above screenshot is for descriptive purposes; it may not match your screen.
Note: The functions can be defined for use with specific applications. However,
some applications can override and control the Rocker Ring functions you select
from Wacom Tablet Properties. For details, see Using integrated applications.
Settings View
You can view the current settings for the ExpressKeys, Rocker Ring, Touch Ring,
Center or Home button, Touch Strips, Touch on/off, and the pen for your Pen
Display at any time. Your display will vary, depending on model.
To use Settings View:
In the Tablet Properties ExpressKeys tab, set an ExpressKey to Settings.
To view the settings on the screen, press that ExpressKey.
To close the Settings View screen, click on it with your mouse, tap it with
your pen, or press the ExpressKey a second time.
To open the Tablet Properties tab for ExpressKeys, Pen, or Touch, click the
Properties... button for that item on the Settings View screen.
If an ExpressKey has been disabled it will be displayed as disabled.
The above screenshot is for descriptive purposes; it may not match your screen.
Note: Some applications can override and control the ExpressKey functions.
Get started with your pen display
To set up your pen display and get started, connect it to your computer and install
the driver software.
The Quick Start Guide included in the box contains images that can help you to set
up your pen display.
User Help
Help topics give you quick access to information about the features and
capabilities of your pen display. You can access the Help topics from Wacom
Tablet Properties by clicking the ?icon or from the Wacom Desktop Center Help
menu.
Note: The User Help is common to Windows and Mac computers. Screenshots are
from a Windows computer, unless otherwise noted.
Information about your specific computer hardware, operating system, and
application software is not included. Refer to the product information provided
with those products.
Stand Setup and Usage
In landscape orientation, the Cintiq stand can be used in one of three inclined
positions. After attaching the stand, adjust the display incline:
1. Place the Cintiq on a flat, stable surface.
2. Place the stand with the aluminum surface down and the three tabs facing
up.
3. Decide which of the inclines you want to use.
4. Hold the Cintiq upright so you can see the back.
5. Place the tab at the bottom edge of the stand into the slot in the lower
edge of the Cintiq.
6. Keeping the lower tab in the slot, tilt the Cintiq toward the stand and insert
the tab for the incline you want to use into the other slot. Make sure both
tabs are fully inserted into the slots.
Install the driver
Important: You must install the driver to make your device work, unless your
device comes with a pre-installed driver. Refer to the Quick Start Guide to see if
your device has a pre-installed driver or not.
1. Go to Customer Support and select Drivers.
2. Click Download next to the latest driver that corresponds to your
computer's operating system.
3. Follow the prompts to finish installation.
Update the driver and firmware
Updated drivers and firmware are made available on the Wacom Desktop Center
and at Customer Support periodically. Check in and update regularly so that your
device has the latest features and functionality.
From the Wacom Desktop Center, select Updates, and then click the
update to install it.
If the Wacom Desktop Center is not available for your device, go to
Customer Support and select Drivers to find the latest updates.
Note: Your device will not work if you uninstall the driver. If you uninstall the
driver, reinstall the latest driver from the drivers page so that your device works
again, with default settings.
Calibration
For optimum performance, calibrate your pen display to align the screen cursor
with the position of the pen on the screen. This is required to compensate for
viewing angle, and to adjust for parallax.
1. Set up your pen display in its working position.
2. Open Wacom Tablet Properties. If more than one pen display is installed on
your system, select the one you are working with from the Device list.
3. Select a pen from the Tool list.
4. Select the Calibrate tab.
The above screenshot is for descriptive purposes; it may not match your
screen.
5. If you are working with multiple monitors, select the monitor
corresponding to your pen display from the dropdown menu.
6. Click Calibrate... to activate the calibration screen.
7. Holding the pen, sit or stand as you normally would when working with the
pen display. Use the pen tip to click on the center of the crosshairs in the
upper-left corner.
8. Click on the center of the crosshairs that are displayed in the remaining
corners.
9. Test the alignment by positioning the pen at a few different points on the
display.
10.Click OK to accept the calibration, or Try Again to recalibrate.
Set up your work area
Position your tablet, pen, and keyboard for easy access.
Adjust your monitor so you can view it comfortably without eyestrain,
placing it about one arm's length away from you.
Position the tablet so the screen cursor follows the same direction as your
hand movements on the tablet.
If you are using the tablet as a creative tool, consider placing the tablet
below the keyboard and centered underneath your monitor.
Display Toggle
Display Toggle is available when working on multiple monitor systems. This
feature allows you to work with your pen display on all other connected displays,
or on one display at a time.
In Wacom Tablet Properties, the Display Toggle tab is automatically available
when your pen tablet is installed on a multi-monitor system. This tab lets you
select the monitor(s) to be included in the toggle sequence.
After setting an ExpressKey or pen side switch to Display Toggle, you can use it to
toggle the current tablet mapping between a base mapping and other monitors.
The display options are:
Pen display to desktop toggles the screen cursor from your pen display to
the entire system desktop. Press the button a second time to return the
cursor to pen display.
Pen display to other displays toggles the screen cursor from your pen
display to another active pen display or monitor. The cursor toggles to each
connected display in turn, then returns to the device where the first toggle
began.
The above screenshot is for descriptive purposes; it may not match your screen.
Active Area options determine the size of the area where the pen will
function on the pen display.
Force Proportions adjusts the size of the active area to maintain correct
vertical and horizontal proportions between your pen display and the
entire desktop or display. Depending on your settings, some portions of the
active area may no longer be usable when this option is selected. When
deselected, the correct scale or proportions are not maintained.
Use Inset Area limits the active area to a sizing of 6 x 8 inches. If Force
Proportions is also selected, this sizing may be less. When deselected, as
much of the active area as possible will be used for tablet-to-display
mapping.
Important: When using application-specific settings with Display Toggle, be sure
that each customized application in the Application list (including All Other) has a
tool button or ExpressKey assigned to Display Toggle.
Any of the following actions will return the toggle sequence to the base mapping:
Launching a graphics application that supports pressure sensitivity.
Logging out of or rebooting the system.
Switching users.
Placing the system in sleep mode.
Changing the Display Toggle settings.
Changing the resolution or number of displays on your system.
Using the Mode Toggle... function.
Selecting Pen Mode or Mouse Mode from On-Screen Controls.
Note: The Display Toggle feature is not available on devices in mobile mode.
Multiple Tablets
You can customize tool and application settings for any pen tablet or pen display
that is connected to your system. An icon for each one will appear in the Wacom
Tablet Properties Device list, and in the Wacom Desktop Center My Devices
section.
To add a new pen tablet or pen display, connect it to your computer. The
system will automatically find it and initialize it. Its icon will appear in
Wacom Tablet Properties and the Wacom Desktop Center, and the tools
associated with it will appear in the Tools list.
To customize settings for any pen tablet or pen display, click its icon in the
Device list.
Notes:
Wacom Desktop Center is not supported by all devices.
Wacom Tablet Properties will not launch unless at least one supported pen
tablet or pen display is connected to the computer.
Settings can only be viewed or changed for an attached pen tablet or pen
display.
The eraser function may not work in some applications when using an
added pen tablet or pen display.
Work with your pen
All pen tablets and pen displays include a cordless, battery-free pen that you can
use to interact with your device. You can hold, write, and draw as you normally
would with a pen or pencil.
Pen styles vary depending on the pen tablet or pen display that you purchased.
If the pen tip is worn, you can replace the nib.
Personalizing your pen with a color ring
If your pen includes color rings, you can use them to identify and personalize your
pen.
1. Unscrew the cone near the pen tip.
2. Remove the color ring that is already on the pen and slide on your
preferred color ring.
3. Replace the cone.
Specialty pens
Pens designed for more advanced artwork, such as an Art Pen or an Airbrush, can
be used with many pen tablets and pen displays.
To discover other pens and tools that can be used with your pen tablet or pen
display, go to the Wacom Store.
Use your pen
Hold the pen as you would normally hold a pen or pencil. Adjust your grip so that
you can press any pen buttons easily with your thumb (recommended) or index
finger without accidentally pressing it while drawing or signing.
Using the pen tip and eraser
Draw or sign: Use the pen to interact with your device by drawing or
signing with the pen tip directly on the device surface.
oPens are pressure-sensitive, so the harder you press, the thicker your
lines and the denser the color.
Move the cursor: Move the pen while holding it slightly above the device
without touching the screen surface.
Double-click: Quickly tap the screen twice in the same place with the pen
tip.
Erase: Flip the pen to the side opposite the pen tip and move the eraser
over the area you want to erase, just as you would use the eraser on a
pencil.
oNote: Some pens do not have an eraser.
Select an item: Tap the screen once with the pen tip.
Move an item: Select the item with the pen tip, then slide the pen tip
across the screen to move it.
Using the pen button
Note: Some pens do not have any buttons.
To perform the function assigned to a pen button, hold the pen tip slightly
above the surface of your device and press the button.
oYou do not have to touch the pen tip to the surface in order to use
the button.
oTo see what functions are assigned to the button, look on the Pen
tab in Wacom Tablet Properties.
If your pen has a long, thin button, press the upper part of the button for
one function and the lower part for another.
Important: You can customize how your pen and pen buttons work by going to
Wacom Tablet Properties and Advanced Options.
Store your pen
Storing your pen properly keeps it in good condition and helps the pen tip last
longer.
Important: Store your pen so there is no pressure on the pen tip or eraser.
If your device has a pen stand, store the pen with the tip down in the stand.
If your device has a magnetized bezel, place the pen on the bezel when not
in use.
If your device included a pen case, store the pen in the pen case.
Tip: Do not leave the pen on the device when you are not using the pen. This
might cause issues when you are using a mouse and might prevent your computer
from going to sleep.
Pen Customization
You can customize settings for your pen tip feel and pressure, eraser feel, side
switch and application-specific pen functions. To customize your pen, choose it
from the Tool list in the Wacom Tablet Properties. Select the Pen tab and choose
from the available options.
Use the two dropdown menus to select the function to perform when
pressing the upper or lower side switch. The selected function for the
switch occurs when you bring the pen tip within 10 mm (0.4 inch) of the
tablet surface without touching the tablet, and then press the side switch.
Set the Tip Double Click Distance slider to your preferred double-click
distance from the tablet.
Use the Tip Feel slider to customize the amount of pressure needed to
click, draw, or ink.
With your screen cursor positioned over an empty area of the control
panel, press down on the Current Pressure bar with the pen tip to
determine pressure levels.
Drag the Tilt Sensitivity slider to change tilt sensitivity. Test the new setting
in an application that supports tilt. The tilt setting applies to both the tip
and eraser of your tool, and is direction-sensitive, and can be used in some
applications to control brush orientation or other characteristics.
Click Customize to further adjust the tip sensitivity. See Advanced pen and
eraser.
The above screenshot is for descriptive purposes; it may not match your screen.
Double-click the pen tip to change its function.
At least one tool button should be set to the Click function.
The tip must be set to Click in order to draw in most graphics applications.
You can change how the side switch operates for right clicks or other click
functions. See Advanced options.
Tips:
To make double-clicking easier, set the side switch to Double Click.
Use a soft Tip Feel for a narrower range of pressure values in most
pressure-sensitive applications.
In some applications a soft pressure setting can make the pen overreact so
that slight pressure on the pen will be magnified on the screen. If so, try a
firmer Tip Feel setting.
A large double-click distance may cause a delay at the beginning of brush
strokes in some drawing applications. This may also cause a delay at the
beginning of a drag action or inking stroke. If so, try setting a smaller
double-click distance and using the side switch to double-click. You can also
set an ExpressKey to double-click.
Accessories such as the Art Pen and Airbrush that are compatible with your device
are fully supported by the Wacom driver software. They appear in the Tool list
after you touch the tablet surface with the tip of the pen. The Wacom Tablet
Properties then shows the new tool and the options for customization.
The Art Pen supports a pressure-sensitive tip and eraser, tilt, and rotation.
Rotating the barrel in supporting applications creates a unique effect.
The Airbrush is a true digital airbrush. It features a pressure-sensitive tip
and eraser, tilt sensitivity, and a fingerwheel to control the application of
digital paint.
In supporting applications you can adjust the functionality of the Art Pen rotation
or the Airbrush fingerwheel within the application. See the documentation that
came with your application for details.
Eraser
Select the Eraser tab to adjust eraser sensitivity.
The above screenshot is for descriptive purposes; it may not match your screen.
Use the Eraser Feel slider to customize the amount of pressure needed to
erase.
From the Erase dropdown menu, select the function to perform when using
the eraser.
Click Customize to further adjust the eraser sensitivity.
With your screen cursor positioned over an empty area of the control
panel, press down on the Current Pressure bar with the eraser to
determine pressure levels.
Replace the pen nib
Tip: Replace your pen nib when it is approximately 1 mm (1/25 inch) or has a
sharp edge.
1. To replace the pen nib, use the nib removal tool to grab the old nib and pull
it straight out of the pen.

Other manuals for cintiq 13HD

2

Other Wacom Tablet manuals

Wacom INTUOS 3 User manual

Wacom

Wacom INTUOS 3 User manual

Wacom INTUOS 3 User manual

Wacom

Wacom INTUOS 3 User manual

Wacom STU-500 User manual

Wacom

Wacom STU-500 User manual

Wacom STU-520A User manual

Wacom

Wacom STU-520A User manual

Wacom DTU-1031X User manual

Wacom

Wacom DTU-1031X User manual

Wacom BAMBOO PAD User manual

Wacom

Wacom BAMBOO PAD User manual

Wacom INTUOS 3 User guide

Wacom

Wacom INTUOS 3 User guide

Wacom Cintiq 24HD User manual

Wacom

Wacom Cintiq 24HD User manual

Wacom cintiq companion User manual

Wacom

Wacom cintiq companion User manual

Wacom One CTH-671 User manual

Wacom

Wacom One CTH-671 User manual

Wacom INTUOS 3 User manual

Wacom

Wacom INTUOS 3 User manual

Wacom Bamboo CTH-670 User manual

Wacom

Wacom Bamboo CTH-670 User manual

Wacom CTL-6100WL User manual

Wacom

Wacom CTL-6100WL User manual

Wacom Intuos3 12x19 User manual

Wacom

Wacom Intuos3 12x19 User manual

Wacom CintiqPartner Troubleshooting guide

Wacom

Wacom CintiqPartner Troubleshooting guide

Wacom INTUOS 4 Operating instructions

Wacom

Wacom INTUOS 4 Operating instructions

Wacom Intuos4 Large User manual

Wacom

Wacom Intuos4 Large User manual

Wacom INTUOS CTL-480 User manual

Wacom

Wacom INTUOS CTL-480 User manual
Wacom STU-300 User manual

Wacom

Wacom STU-300 User manual

Wacom cintiq companion User manual

Wacom

Wacom cintiq companion User manual

Wacom DTU-1031 User manual

Wacom

Wacom DTU-1031 User manual
Wacom Intuos GD-0405-R User manual

Wacom

Wacom Intuos GD-0405-R User manual
Wacom PL-300 User manual

Wacom

Wacom PL-300 User manual

Wacom GRAPHIRE 4 Owner's manual

Wacom

Wacom GRAPHIRE 4 Owner's manual

Popular Tablet manuals by other brands

A.C.Ryan Tab 7.9 user manual

A.C.Ryan

A.C.Ryan Tab 7.9 user manual

Advanced Technologies The Edge 7 Tablet quick start guide

Advanced Technologies

Advanced Technologies The Edge 7 Tablet quick start guide

Getac E100 user manual

Getac

Getac E100 user manual

Smartbox Eye Gaze EG13A quick start guide

Smartbox

Smartbox Eye Gaze EG13A quick start guide

Sungale CYBERUS ID1010WTA quick start guide

Sungale

Sungale CYBERUS ID1010WTA quick start guide

Dell M02M002 user manual

Dell

Dell M02M002 user manual

Huawei CMR-AL19 quick start guide

Huawei

Huawei CMR-AL19 quick start guide

Panasonic Toughbook H2 Comparison chart

Panasonic

Panasonic Toughbook H2 Comparison chart

DT Research DT302RP Product End-of-Life Disassembly Instructions

DT Research

DT Research DT302RP Product End-of-Life Disassembly Instructions

Sony SGP311U1/B Reference

Sony

Sony SGP311U1/B Reference

HP 7 Plus Maintenance and service guide

HP

HP 7 Plus Maintenance and service guide

Archos 97 platinum HD manual 

Archos

Archos 97 platinum HD manual 

Archos GamePad user manual

Archos

Archos GamePad user manual

Venturer Challenger 10 Pro user manual

Venturer

Venturer Challenger 10 Pro user manual

Fujitsu Stylistic Q702 user guide

Fujitsu

Fujitsu Stylistic Q702 user guide

LEXIBOOK MFS100EN quick start guide

LEXIBOOK

LEXIBOOK MFS100EN quick start guide

IRULU BABYPAD Y1-PRO user manual

IRULU

IRULU BABYPAD Y1-PRO user manual

X2 Computing Carbon X220 user manual

X2 Computing

X2 Computing Carbon X220 user manual

manuals.online logo
manuals.online logoBrands
  • About & Mission
  • Contact us
  • Privacy Policy
  • Terms and Conditions

Copyright 2025 Manuals.Online. All Rights Reserved.