L2
Input power Grounding
L1
L2
Input power Grounding
L3
L1
Single-phase power supply
3-phase power supply (check if rotation is correct)
Fig. 1
VII. Starting
1. Before starting, the pump must be primed.
Please follow the procedure as shown in
Fig 3.
a. Remove the filling plug
b. Fill water in chamber
Water
c. Replace the filling plug
Fig. 2
2. Installation where the pump inlet is below
the water supply, remove the priming plug
and allow the water to flow into the priming
chamber until all air is expelled.
3. The priming procedure should be repeated
until all air is expelled and the pump delivers
a full stream of water without air bubbles.
4. The pump must always be checked for
prime if not used for a prolonged period. It is
imperative to fill the pump with liquid before
operation as dry running causes irreparable
damage to the mechanical seal.
5. When 3-phase motor is supplied, please
ensure if the rotation is correct. You can
switch any of the 2 wires to get your desired
rotation.
VIII. Precautions
1. The pump should be shut down and the
trouble corrected if the pump is running at
speed and found to have any of the following
problems:
- No liquid discharged - Not enough liquid
discharged
- Excessive vibration - Motor runs hot
2. Do not allow the pump to continually start
and stop (cycling) as this will reduce the
motor life.
~ 3 ~
2. The single phase models are supplied with
plug and lead and can be connected directly
to the mains supply. The 3 phase models
should hook up with a circuit breaker.
VI. Wiring diagram
WARNING:
Risk of Electric Shock - This pump is
supplied with a grounding conductor and
grounding-type attachment plug. To reduce
the risk of electric shock, be certain that it
is connected only to a properly grounded,
grounding-type receptacle".
Before operation, please ensure the voltage is
correct and the circuit breaker and grounding
connectors are all connected in accordance
with local regulations.
IX. Operation and maintenance
Under normal operating conditions, the pump
does not require any maintenance as long as
the following points are observed:
1. Periodically check the condition of the check
value and strainer (if used).
2. If the pump is to be inactive for long periods,
it should be rinsed thoroughly with clean
water, then, drained and stored in a dry
place.
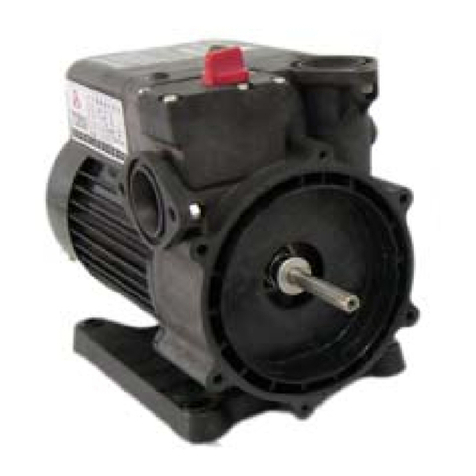
3. If the pump sticks after periods of inactivity,
a screw driver slot is provided on the motor
shaft end to free up the pump/motor. To do
so, insert a screw driver in the slot in the
motor shaft as shown in Fig 3 and turn to
free the rotor. If this does not remedy the
problem, the unit will need dismantling.
Fig. 3
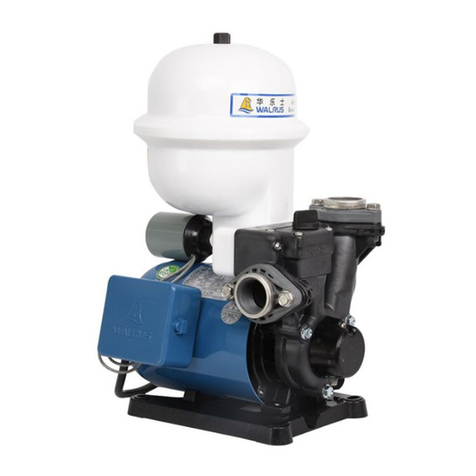
4. Pressure tank air charge should be checked
at regular intervals of every 3 months and
after the pump has not been used for a
prolonged period.To check the Pressure
Tank air pressure, turn off power, open a tap
on the discharge line to release pressure
from the pump, unscrew the black plastic
cover and apply an accurate pressure gauge
to the valve as shown in Fig 4.
Pressure should be adjusted to the original
pre-charge as follows:
TQ200: 17 psi (1.2 Kg/cm²)
TQ400: 26 psi (1.8 Kg/cm²)
TQ800: 36 psi (2.5 Kg/cm²)
TQ1500 up to TQ3700: 36 psi (2.5 Kg/cm²)
Fig. 4
X. Adjustments and Reset procedures
The TQ has a preset activation pressure as per
the table below. For most applications this will
be satisfactory.
1. When the inlet pressure is below the preset
pressure range, please DO NOT adjust the
original setting.
2. The activation pressure can be adjusted
higher when the inlet pressure exceeds the
preset pressure range. Remember that inlet
pressure adds to the TQ pressure, so take
the 40 psi inlet pressure supplied to the
TQ800 for example, internal pressure can
reach approximately 107 psi (67 + 40 psi). If
too high internal pressure is the concern, it
is recommended to install a regulator to
reduce the inlet pressure. The TQ
maximum pressure as per the table below.
The factory preset activation point is as follows:
Model
TQ200
TQ400
TQ800
TQ1500
TQ2200
TQ3700
Power
( HP )
¼
½
1
2
3
5
Preset activation
point ( psi )
20
28
36
43
43
43
Model
TQ200
TQ400
TQ800
TQ1500
TQ2200
TQ3700
Maximum Pressure point ( psi )
31
40
67
58
60
72
~ 4 ~
3. Cycling can occur on pressure units when
the pressure tank pre-charge drops, or
where there is a leak in the discharge
plumbing.
