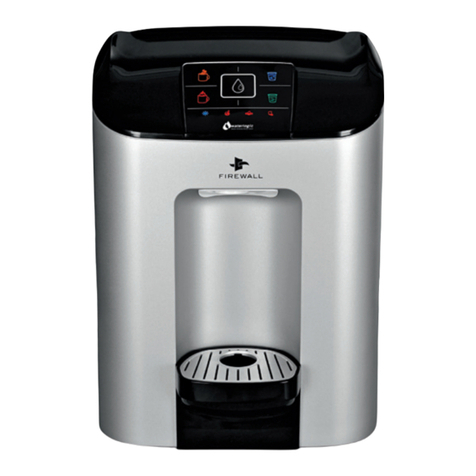
WaterLogic PUREZZA CLASSE User manual

PUREZZA CLASSE
BASE CABINET

1
PUREZZA CLASSE BASE
CABINET
ASSEMBLY
MANUAL
INTRODUCTION
Carefully read and follow all instructions to ensure proper and efficient operation
of your water purification system. Contact Waterlogic oranauthorized Waterlogic
distributor if you
have any questions.
Waterlogic and an authorized Waterlogic distributor employ trained service
personnel who
are experienced in the installation, function and repair of
Waterlogic equipment.
Waterlogic water purification systems should be combined with selected water
treatment components to create a system specifically tailored for each
application by trained and
qualified personnel.
Products manufactured and marketed by Waterlogic and its affiliates are protected by
patents.
Waterlogic International Limited and WLI Trading Limited reserve the right,
in order to reflect continuous research and development, toamend or
change specifications
without prior notice
. Waterlogic and the Waterlogic logo, Firewall and the
Firewall logo are trademarks in countries where the Group operates. WLI
Trading Ltd licensed to use
BioCote, and BioCote logo which are registered
trademarks of BioCote Ltd.
Waterlogic technical manuals cover voltages of both 120v and 220v for all
markets
where Waterlogic operates. Please ensure that you carefully read the
information in this
manual and for any parts specific toany market, refer to
your technical agreement or specific part listing.

2
TABLE OF CONTENTS
1.
PRECAUTIONS AND GENERAL
....................................................................................................... 3
2.
PRODUCTINFORMATION ........................................................................................................... 5
3. INSTALL AND ASSEMBLY............................................................................................................ 7

3
1.
PRECAUTIONS AND
GENERAL
RECOMMENDATIONS
SAFETY PRECAUTIONS
Connect to potable water supply: this system is to be used for water only and is
not intended for use where water is microbiologically unsafe or with water of
unknown quality without adequate disinfection. The system is not intended for
treatment of contaminated water.
Installation and maintenance: the installation, maintenance, sanitising and
any repair must be performed by qualified persons trained by Waterlogic or
their authorized distributors only. Do not remove any panels or covers unless
qualified and competent to do so. The detachable hose-sets and the
connection kit used to connect the main water are supplied by the technician.
Do not reuse connectors.
Indoor use only: Never expose to direct sunlight, heat sources, to freezing
temperatures, ambient air temperature above 32°C (86°F) and keep the unit
away from excessive humidity.
This appliance is intended to be used in household and similar applications such as:
staff kitchen areas in shops, offices and other working environments;
farm houses and by clients in hotels, motels and other residential type
environments;
bed and breakfast type environments;
catering and similar non-retail applications.
GROUNDING INSTRUCTIONS
: This appliance must be grounded. In the event of
a malfunction or breakdown, grounding will reduce the risk of electric shock by
providing a path of least resistance for electric current. This appliance is
equipped with a cord having an appliance-grounding conductor and a
grounding plug. The plug must be plugged into an appropriate outlet that is
installed and grounded in accordance with all local codes and ordinances.
Use a water pressure regulator:
Waterlogic will not be responsible for injury or damage
caused by excessive water pressure. Input or feed pressure must be regulated to 3 bar.
Beawareofanypotentialpressuresurgescausedbybuilding/municipalpumping
stations. Water block devices and external leak detectors are strongly recommended.
UV-C emitter (UV lamp):
this appliance contains a UV-C emitter (UV Lamp). UV-C radiation
may, even in little doses, cause harm to the eyes and skin. Never operate the UV-C emitter
if damaged or removed from enclosure. Do not touch or look directly into the faucet. The
replacement of the UV-C must be done by Waterlogic or approved Waterlogic distributors
and with power supply disconnected. The UV lamp must be replaced at 6 month intervals
or when necessary.
Donotoperateifdamaged:
If the machine or supply cord is damaged, it must be
replaced by the manufacturer, its service agent or similarly qualified persons in
order to avoid a hazard.
Ensure all local laws and codes including health and safety guidelines are met when installing this
Waterlogic purification system. Only qualified service technicians should attempt installation and
service. Always read the entire operating instructions before using the appliance and save these
instructions for future use.
WARNING Improper connection of the appliance-grounding conductor can result in a risk of
electric shock. Check with a qualified electrician or service representative if you are in doubt
whether the appliance is properly grounded. Do not modify the plug provided with the
appliance; if it will not fit the outlet, have a proper outlet installed by a qualified technician
!

4
This appliance contains a UV-C emitter:
Unintended use of the appliance or
damage to the housing may result in the escape of dangerous UV-C radiation. UV-
C radiation may, even in little doses, cause harm to the eyes and skin.
Appliances that are obviously damaged must not be operated.
Replacement of the UV-C emitter cannot be conducted by the user, please contact
Waterlogic for assistance or help finding an Authorized Service Representative.
Read the maintenance instructions before opening the appliance.
The appliance must be disconnected from the supply before replacing the UV-C
emitter.
Electrical installation:
For an appliance provided with a cord and intended for
installation under a counter or in a cabinet, the following must be followed;
•
The electrical power socket shall be installed in a cabinet or on a wall
adjacent to the undercounter space in which the appliance is to be
installed
•
There shall be an opening through the partition between the
compartments specified in (a) that is large enough for the attachment
plug to pass through. The longest dimension of the opening shall not be
more than 1-1/2 in (38 mm);
•
The edges of the opening shall, if the partition is wood, be smooth and
rounded, or, if the partition is metal, be covered with an edge protector
provided for this purpose by the manufacturer
•
Care shall be exercised, when the appliance is installed or removed, to
reduce the likelihood of damage to the supply cord
•
The appliance is to only be used with the power supply provided with the
appliance.
Electrical shock hazard:
Always use a dedicated and properly earthed outlet. Unit
should be protected by residual current device (RCD) having a rated residual
operating current not exceeding 30 mA. Use only Waterlogic supplied power cord.
Never use extension cords or power strips to connect unit. Do not use if the supply
cord is damaged, it must be replaced by the service agent or a similarly qualified
person in order to avoid a hazard.
EN:
This appliance can be used by children aged from 8 years and above and
persons with reduced physical, sensory or mental capabilities or lack of experience
and knowledge if they have been given supervision or instruction concerning use of
the appliance in a safe way and understand the hazards involved. Children shall not
play with the appliance. Cleaning and user maintenance shall not be made by
children without supervision.
IEC:
This appliance is not intended for use by persons (including children) with
reduced physical, sensory or mental capabilities, or lack of experience and
knowledge, unless they have been given supervision or instruction concerning use
of the appliance by a person responsible for their safety.
Children should be supervised to ensure that they do not play with the appliance.
The instructions for an ultraviolet radiation appliance shall contain the
manufacturer’s declaration of conformity to the applicable provisions of the Code of
Federal Regulations (CFR) requirements including, Title 21, Chapter 1, Subchapter J,
Radiological Health

5
2.
PRODUCT INFORMATION
PUREZZA CLASSE BASE CABINET
2.1 CONTENTS
Item No
Image
Description
1
Rubber Feet
2
Down Panel
3
Bottom Hinge/Top Hinge
4
Side panel (L/R)
5
Middle Shelf
6
Top Shelf
7
Back Panel
8
Front Panel
1
.
2
.
3
.
4
.
4
.
3
.
5
.
6
.
7
.

6
2.2 TECHNICAL INFORMATION
Physical
Dimensions (W x D x H)[mm] 400mm(W) X 590mm(D) X 824mm(H)
Weight(net)[kg] 4.2kg
TECHNICALDATA CLASSE BASE CABINET

7
3. INSTALL AND ASSEMBLY
3.1 ASSEMBLY
1. Carefully unbox and remove the base cabinet parts from its packaging. Ensure there
are no trip hazards while you do this. Locate the down panel (Item 2, page 5) and the
rubber feet (Item 1, page 5). You will need to fit a rubber foot to each corner of the down
panel. Then locate the bottom hinge (item 3, page 5) and screw to the front, left hand
side of the down panel as per below image.
Note: If your ClassE unit came with caster wheels and they were installed on the unit, they
must be removed for the unit to seat properly onto the base cabinet. Those wheels may
be transferred to the base cabinet if desired for easier mobility. Removing and reinstalling
the caster wheels onto the base cabinet will require the use of a 14mm thin-profile
wrench pictured below.
Ensure all local laws and codes including health and safety guidelines are met when installing this
Waterlogic purification system. Only qualified service technicians should attempt installation and
service. Always read the entire operating instructions before using the appliance and save these
instructions for future use.
!
Rubber Feet
Caster Wheels
Thin-Profile
Wrench –14mm

8
2. Lay the down panel flat on its rubber feet (or Caster Wheels) with the bottom hinge
facing towards you on the right-hand side. Locate the left-hand panel (item 4, page 5) and
screw to the down panel as per below image;
3. Locate the middle and top shelf (items 5 and 6 from page 5) and carefully screw each
shelf to the left-hand panel, gently support the shelf as you screw the shelf to the left-
hand panel.

9
4. The base cabinet now has its core supports with the shelving. Locate the right-hand
side panel (Item 4, page5) and screw the right-hand panel to the down panel, middle shelf
and top shelf.
5. Locate the rear panel (item 7, page 5) for the base cabinet. It may be easier to lay the
base cabinet on its front, carefully screw the back panel to the rear of the base cabinet as
per the below image;

10
6. The base cabinet should now feel sturdy and solid. The front panel (item 8, page 5)
now needs to be fitted to the base cabinet. To do this, carefully slot the front panel into
the bottom hinge (item 3, page 5) and rest the top panel against the base cabinet. Locate
the top hinge and slot this into the top panel. Screw the top hinge to the base cabinet and
ensure the door opens and closes freely.
7. Carefully clean all the panels of the base cabinet ensuring any hand or finger marks
have been removed. It is recommended to use S11 Aquadosa spray to ensure all bacteria
has been removed from the base cabinet.

Waterlogic Trading Ltd
+353 1 293 1960
WLI Trading Limited Second floor, Suite 4,
Beacon Court, Sandyford, Co. Dublin, Ireland
WLI (UK) LTD
Waterlogic International LTD Global
Headquarter
1
Grenfell Road,
Maidenhead, Berkshire, SL6 1HN,
United Kingdom
For technical support Email: support@waterlogicsupport.zendesk.com
ENGINFW- 04/12/19
Other WaterLogic Dispenser manuals
Popular Dispenser manuals by other brands

Dolphin
Dolphin BC194 Instructions to Replace Wearing Parts
Curtis
Curtis Cafe Primo Cappuccino 3 user guide

OK International
OK International DX-200 user guide
Miele professional
Miele professional DOS G 80 flex Fitting instructions
DIMA
DIMA HC-100 Service manual
American Standard
American Standard GZ16B owner's manual

