WaterRower WRP-B410 Programming manual

WRP-B410
Water Transfer Utility Pump
Quick Start Instructions
Before using your water transfer utility pump for the first time, please be sure to read
all instructions from the product owner’s manual.
IMPORTANT:
This is a NON-SUBMERSIBLE pump.
Ensure hands are dry while operating the pump.
Pump must be connected only to a properly grounded, GFCI outlet.
DO NOT let the pump run dry - it will be damaged.
Do not attempt to disassemble the motor.
Be sure hoses are tightly connected to avoid personal injury.
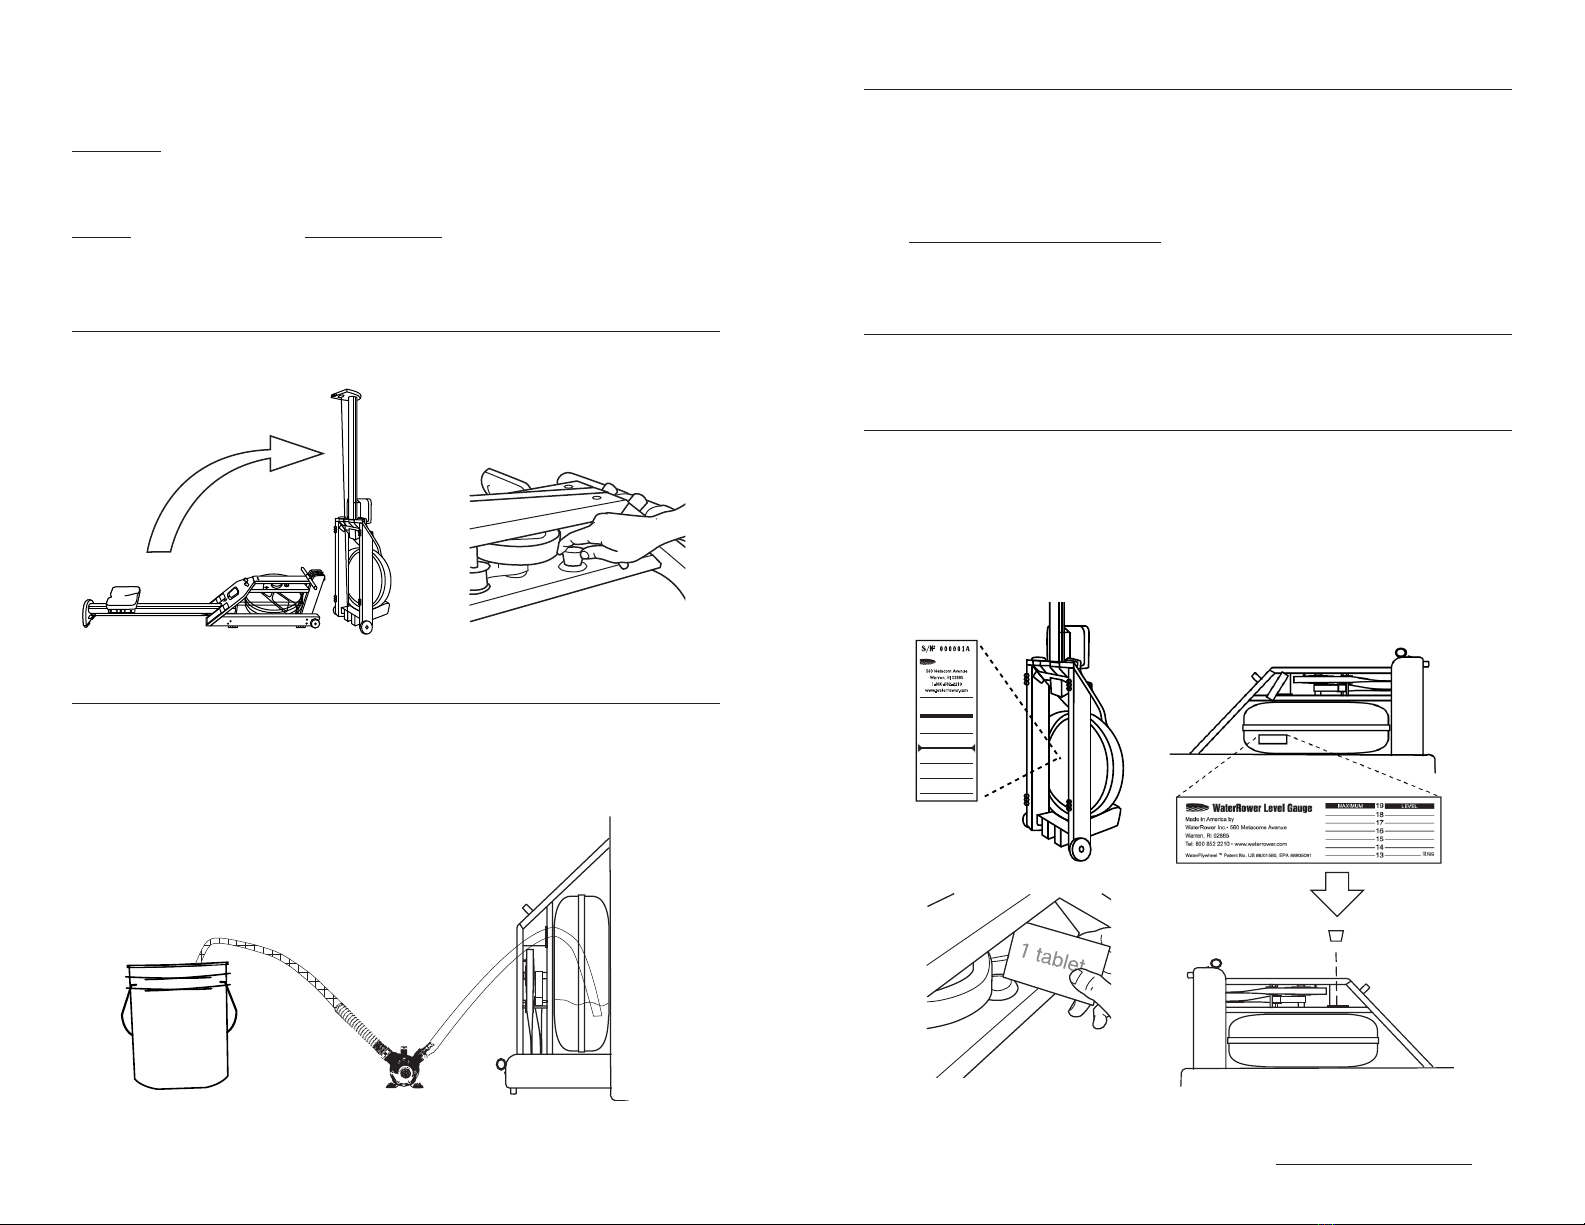
STEP 1
Stand up your rower and remove the stopper from the tank.
STEP 2
After inspecting that the inlet (clear) hose and outlet (opaque) hose are tightly
connected to the pump:
• Place the clear hose in the WaterRower tank.
• Place the outlet (opaque) hose into the vessel in which the water will drain (sink,
bucket, etc.)
STEP 3
After ensuring hands are dry, plug in the pump to power on. Water will begin to
drain. Closely monitor the pump to:
1. Ensure it is transferring the water (if not, unplug the pump and troubleshoot -
page 5 & 6 of the product owner’s manual).
2. As soon as the water is drained from the tank, unplug the pump.
DO NOT LET THE PUMP RUN DRY - doing so can quickly and irreparibly damage
the pump in as little as 30 seconds.
STEP 4
Once the pump is unplugged, drain excess water out of the hoses.
STEP 5
Proceed with refilling your tank, remembering:
• Do not go above the highest level on the level gauge sticker positioned under the
tank (on GX/A1 models), or on the side of the tank (on dual rail S4 models).
• Add municipial water.
• Add a purification tablet when finished filling (Note: do not add a purification
tablet if you are adding blue dye).
• Replace the rubber stopper before laying the rower back down.
If you have trouble with the operation of the pump, please refer to the complete
owner’s manual that came with the pump or contact service@waterrower.com.
WaterRower
MAXIMUM LEVEL
CALIBRA T I ON
LEVEL
19
18
17
16
15
14
560 Metacom Avenue
Warren, RI 02885
1-800-582-2210
www.waterrower.com
LEVEL GAUGE

United States | www.waterrower.com
560 Metacom Avenue | Warren, RI 02885
Tel: +1 (401) 247 7742 | info@waterrower.com
United Kingdom | www.waterrower.co.uk
19 Acton Park Estate | The Vale, London W3 7QE
Tel: +44 (0)20 8749 9090 | info@waterrower.co.uk
Australia | www.waterrower.com.au
Unit 8/46-50 Wellington Rd. | South Granville, NSW 2142
Tel: +61 (0) 2 9681 4221 | info@waterrower.com.au
WRM7095
Popular Water Pump manuals by other brands


Pfeiffer Vacuum
Pfeiffer Vacuum HENA 50 operating instructions

ITT
ITT Goulds Pumps CV 3196 i-FRAME Installation, operation and maintenance manual

Graco
Graco 19D873 manual

Rietschle Thomas
Rietschle Thomas SAP Series operating instructions

GORMAN-RUPP PUMPS
GORMAN-RUPP PUMPS 02K31-X2 1P Installation, operation, and maintenance manual with parts list

Mallory
Mallory 4060FI installation instructions

SFA
SFA SANILife Tray Matic installation instructions

Piusi
Piusi VISCOMAT 60/2 AC Installation, use and maintenance

Beretta
Beretta Hydro Unit M Installation and owner's manual

Watson-Marlow
Watson-Marlow MasoSine SPS 600 Manual - Technical Documentation

Shibaura
Shibaura FK500-A owner's manual

Foy
Foy MG344 user manual