Waters Fitness Indoor Cycle Computer User manual
1section
INDOOR CYCLE COMPUTER INSTRUCTIONS
2www.waterstness.com
INSTALLING THE COMPUTER
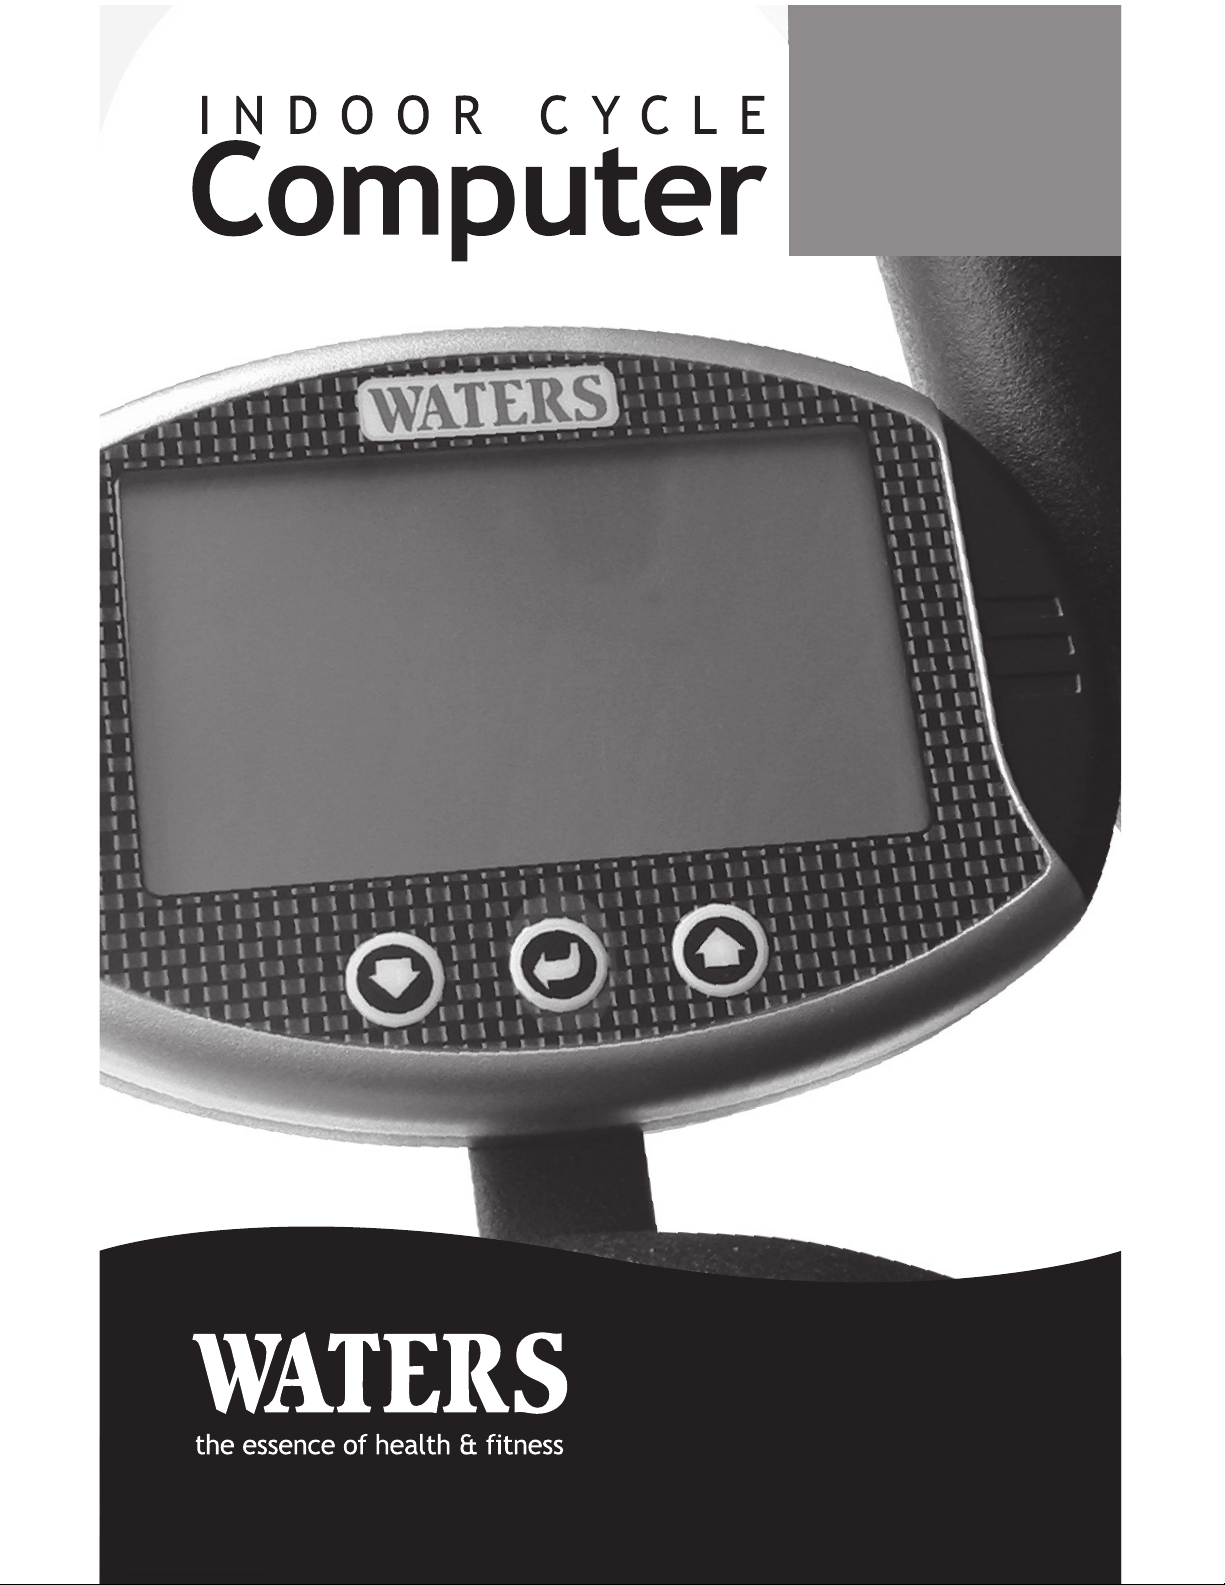
1) Computer Bracket
The Computer Bracket mounts to
the underside of the handlebar. The
easiest method of installation is to
remove the handlebar from the cycle
and lay it on a at surface with the
insert post pointing up. You should
see two indentations in the rubber
on the underside of the center handlebar bend. On the Pro model,
indentations are on the inside bar. These indentations are the pre-drilled
bracket holes. Use a phillips screwdriver to clear the rubber material
from the pre-drilled holes by rotating the screwdriver into the holes.
When the holes are clear, install the bracket with the two bronze colored
washers and screws. The bracket should point forward.
2) Computer
The Computer has a slot on the back which allows it to slide onto
the Computer Bracket.
3) Wheel Magnet
Newer Tsunami Cycles have the
magnet pre-installed under the
outer edge of the left side wheel
decal. To test if your cycle has
a magnet pre-installed, hold the
speed sensor within an inch of
the outer edge of the left side
wheel decal. A magnet has been
pre-installed if you get a RPM
reading on the connected Computer
while the ywheel is spinning.
Original Version of the Tsunami
Cycles do not have the magnet
installed. Attach the supplied
magnet to the angled section of the
ywheel above the left-side wheel
decal. Wipe the area clean and
press the magnet with adhesive
backing rmly to the ywheel.
3installation
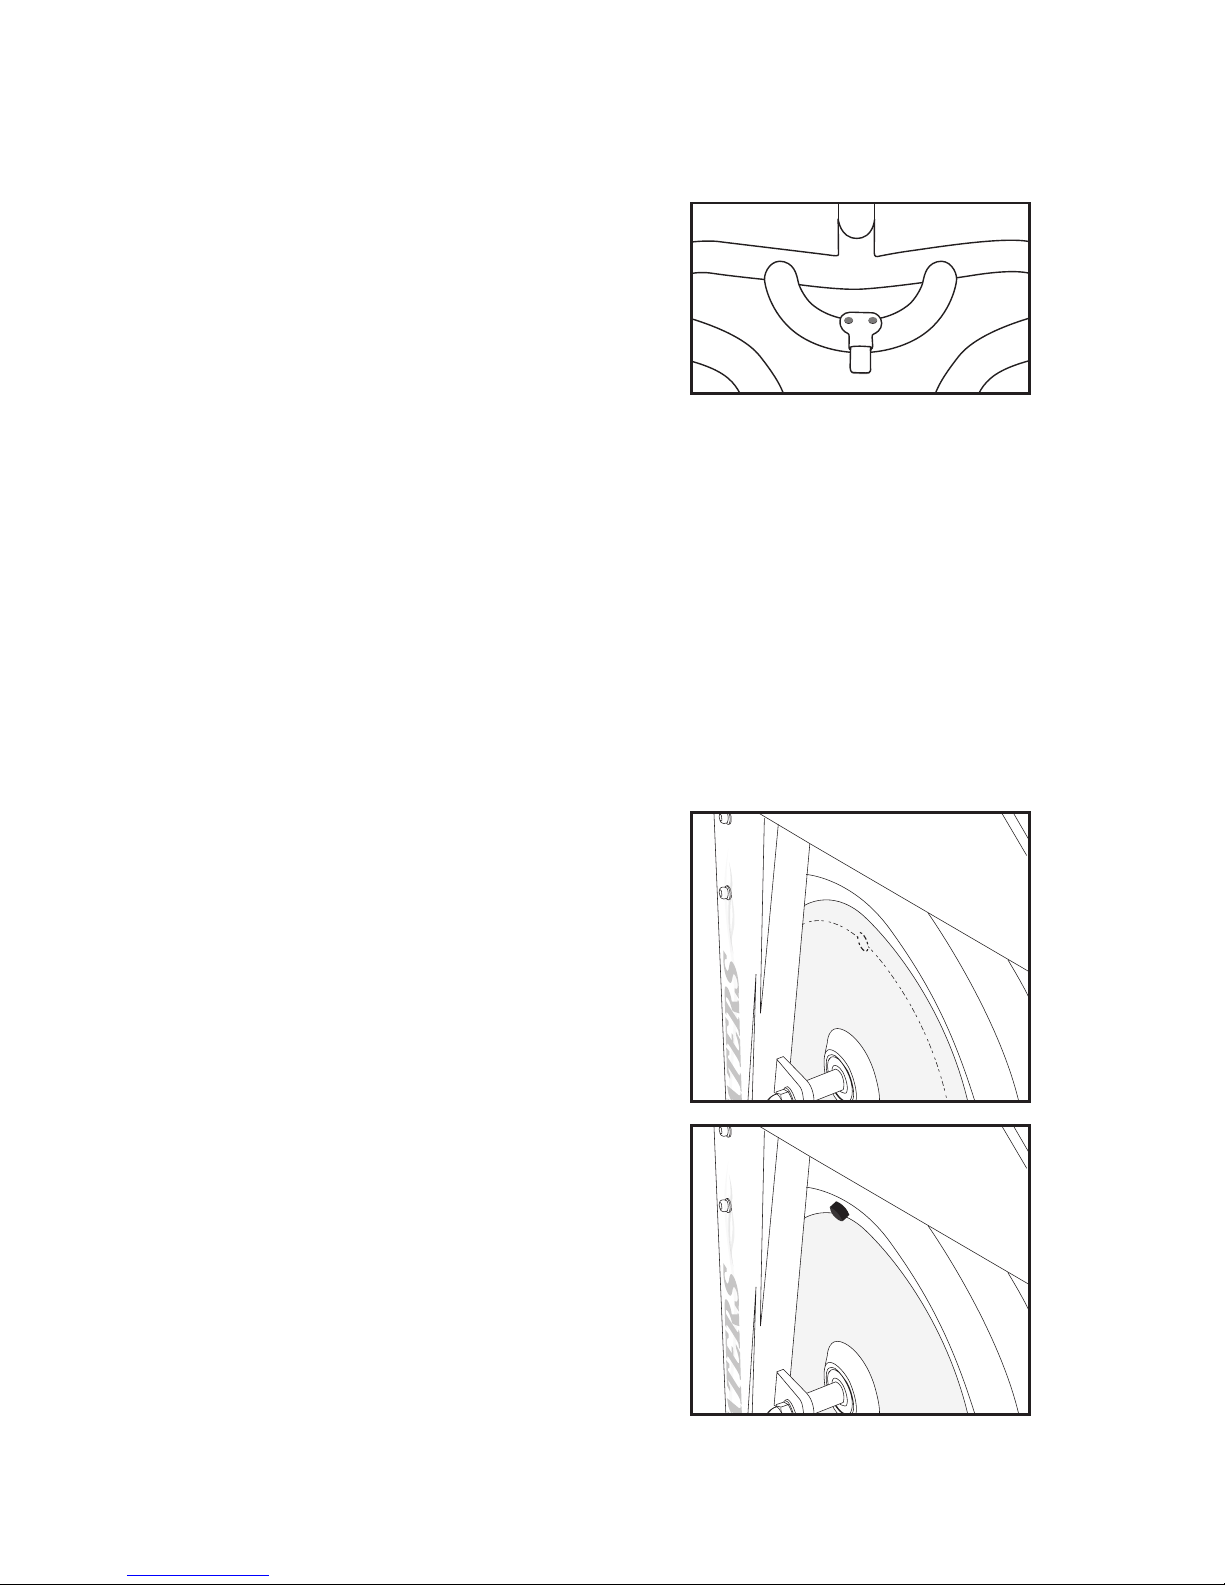
4) Speed Sensor Bracket
The Speed Sensor Bracket is
installed on cycles that come
with a speed sensor braze-on.
The braze-on is located on the
backside of the left fork. Unscrew
the braze-on bolt, and attach
the Speed Sensor Bracket with
the washer and bolt. Install the
bracket pointing towards the
ywheel and parallel to the oor.
5) Speed Sensor
To install the Speed Sensor Bracket attach the Speed Sensor
Holder to the Speed Sensor Bracket so the sensor points towards
the wheel magnet. The sensor should be about 1/4to 1/2of an
inch from the surface of the magnet. The Speed Sensor Holder can be
attached with a washer and bolt or applied with the adhesive backing.
To install without a Speed Sensor
Bracket attach the Speed Sensor
Holder on the backside of the left
fork so the sensor points towards
the wheel magnet. The sensor
should be about 1/4to 1/2of an inch
from the surface of the magnet.
The Speed Sensor Holder attaches
with the adhesive backing.
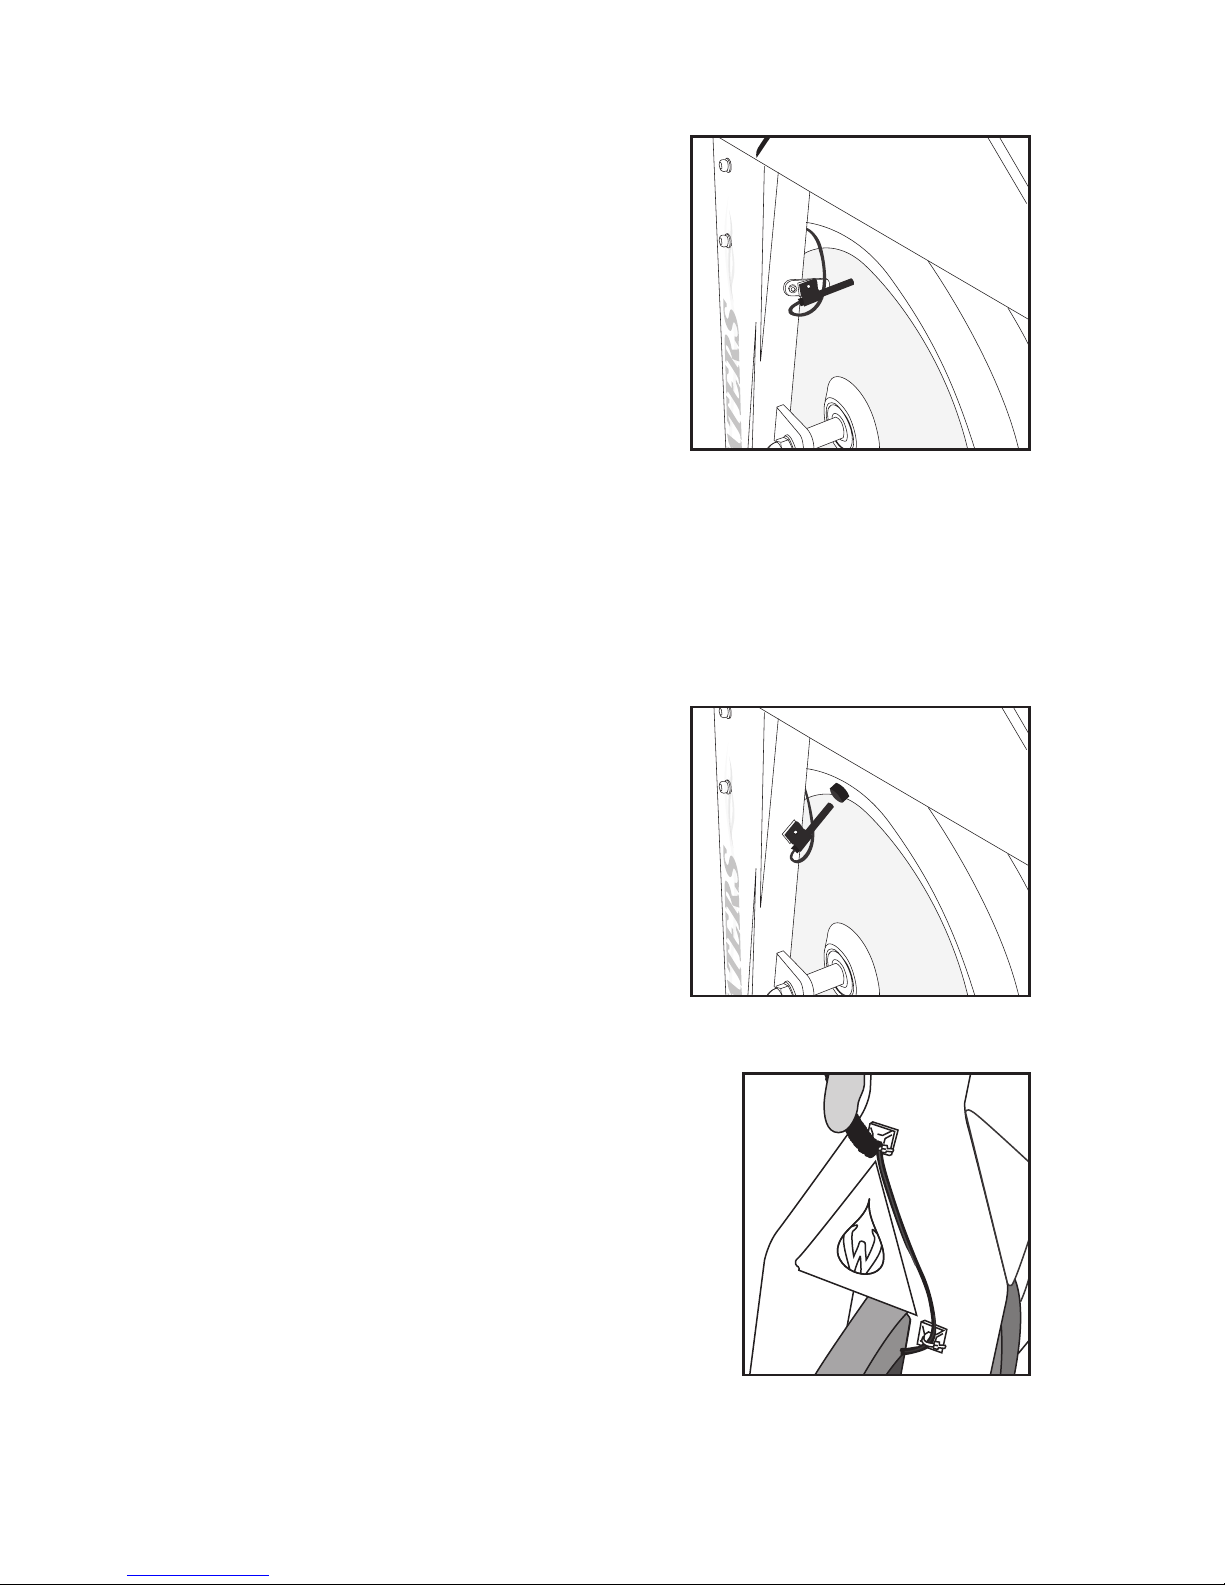
6) Wire Routing
See Diagram for suggested placement
of the frame mounts and cable
routing. Apply the frame mounts with
the adhesive backing in the suggested
positions on the frame. Route the
cable from the sensor to the lower
frame mount and secure with a zip tie.
Check to ensure the cable is snuggly
against the frame and there is no extra
cable free to rub against the ywheel.
Continue routing the cable through the higher frame mount and
secure with a zip tie. Install batteries. Plug the sensor into the
back of the Computer. The Computer is ready to use.

4www.waterstness.com
LCD DISPLAY
Liquid Crystal Display
DISTANCE DISPLAY
kilometers (Km) or miles (Mile)
SPEED DISPLAY
kilometers per hour(KPH)
OR
miles per hour(MPH)
HEART RATE DISPLAY
Your heart rate/pulse is displayed
in beats per minute (BPM).
NOTE: If the letter”P” is
displayed then the Computer is
not receiving a pulse signal.
NOTE: SPEED and HEART RATE
share the same display.
Press the DOWN qKey to alternate
the display which will also
change the CALORIES/RPM
Display as they are linked.
DOWN qKey
two functions
1) Decrease Target Value
during target value selection,
press the Key to decrease
your target value.
2) Alternate both Displays during
and after your workout, press
the Key to alternate both displays
between:
SPEED and HEART RATE Display
PLUS
CALORIES and RPM Display
as they are linked.
ENTER SELECT KEY
two functions
1) Activate Target Value Selection Before your
workout, press the ENTER Key once to impute
your time target value
OR
Press the ENTER Key twice to impute your
distance target value.
2) Reset the Computer
Press and hold the ENTER Key for three seconds
to reset the computer. NOTE: You will loose all
data recorded by the computer.
FAST TRACK
Press and hold either the DOWN q Key or the UP pKey
to fast track during target value selection.
COMPUTER INSTRUCTIONS

5instructions
TIME DISPLAY
hours, minutes and seconds
CALORIES DISPLAY
Measured in kilocalories (K/CAL).
Also known as large Calories
and food Calories.
RPM / CADENCE DISPLAY
revolutions per minute (RPM)
NOTE: CALORIES and RPM share the
same display.
Press the DOWN qKey to alternate the
display which will also change the
SPEED / HEART RATE Display
as they are linked.
LOW BATTERY DISPLAY
The low battery display will
ash when the batteries
need replacing.
MAXIMUM & AVERAGE
DISPLAY
During your workout press
the UP pKey to alternate
between the following:
MAX SPEED / CALORIES
AVG SPEED / CALORIES
SPEED / CALORIES
OR
MAX HEART RATE / MAX RPM
AVG HEART RATE / AVG RPM
HEART RATE / RPM
NOTE: The SPEED / HEART RATE and
CALORIES / RPM displays are linked.
After your workout the Computer will
automatically display your total and
maximum and average values for
approximately 75 seconds.
UP pKEY
two functions
1) Increase Target Value during target value
selection, press the Key to increase your
target value.
2) Alternate both Displays during your
workout, press the Key to alternate both
displays to show the
MAXIMUM, AVERAGE and CURRENT
display data.
FAST TRACK
Press and hold either the DOWN q Key or the UP pKey
to fast track during target value selection.
COMPUTER INSTRUCTIONS
Table of contents
Popular Bicycle Accessories manuals by other brands


Specialized
Specialized Elite CylcoComputer user manual

Sigma
Sigma BC 16.16 manual

Playcore
Playcore Dero Setbacks installation instructions

VDO Cyclecomputing
VDO Cyclecomputing x3dw instruction manual

Cateye
Cateye RAPID X2 manual

buratti meccanica
buratti meccanica Clorofilla Trail Use and maintenance manual


