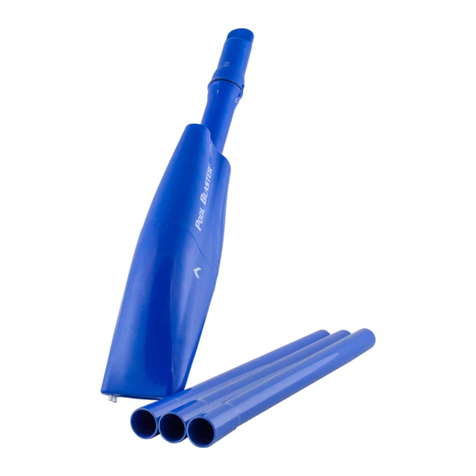
WaterTech Pool Blaster Pulse User manual

Pool Blaster
P
ulse
C
ordless, Rechargeable Pool & Spa Vacuum
Water Tech Corp.
“The Pool Invention People”

Battery : 6V, 2.0Ah
Charging voltage :7.2V, 1000mAh
Motor: 6V DC
1
Handle
2
Rear Body
3
Back Cover (Not to
be opened)
4
Filter Cone
5
Filter Sleeve
6
Suction Nozzle
Flap
7
Vacuum Head
8
Outlet Valve
9
Filter Cone Base
(Not to be
disassembled)
10
Filter Sleeve
Locking Tab
11
Charging contact
plate
12
Handle locking
hole
13
Power ON/OFF
Button
14
Filter Sock
15
Charging Base
16
Contact Plate
(Charging Base)
17
Hanging Slot (for
attaching to
charging base)
18
Pole Connector

SAFETY WARNINGS & INSTRUCTIONS
R
ead and follow all instructions in this manual and on the equipment. Failure to do so could resul
t
i
n severe or fatal injury.
W
ARNING!
This is not a TOY. Children should be supervised to ensure that they do not play with thi
s
cleaner and its accessories.
Never allow children to operate this product.
Keep this cleaner and its accessories out of reach of children.
This cleaner is not intended for use by persons with reduced physical, sensory or menta
l
capabilities, or lack of experience and knowledge, unless they have been given supervisio
n
or instruction concerning use of the appliance by a person responsible for their safety.
Make sure the cleaner is fully immersed in the water before operation. DO NOT operate i
t
outside of water. It will lead to failure of the shaft seals / motor, and then VOID the warranty
.
Maximum operating depth in water is 3 meters (10 ft).
Maximum water temperature : 5˚C(41˚F) –35˚C(95˚F)
DO NOT use power extension cords.
Connect the external adaptor to power source through a residential current device (RCD)
.
If in doubt, consult a qualified professional electrician.
Do not use this cleaner if any damage is found.
It is necessary to change parts or assemblies as quickly as possible if they becom
e
damaged. Only use parts certified by the distributor or manufacturer.
Turn off the power, disconnect the external adaptor from the power source, and unplug th
e
external adaptor from the charging base before detaching the cleaner from the chargin
g
base.
Detach the cleaner from charging base and make sure the cleaner is power OFF befor
e
servicing the product.
Should not operate this cleaner when people/pets are in the water.
DO NOT use without intact filter sock, sleeve in place. Using your cleaner without intac
t
filter sock and sleeve in place will VOID your warranty.
Risk of Suction Entrapment Hazard. This cleaner generates suction. Avoid hair, body o
r
any loose parts of your clothing to contact with the suction hole of the cleaner in operation
.
Never insert body parts, clothing or other objects into the openings and moving parts o
f
the cleaner.
DO NOT use this cleaner to pick up any toxic substance, flammable or combustible liquid
s
such as gasoline, or operate in the presence of explosive or flammable fumes.
Never attempt in any way to disassemble your cleaner.

Under no circumstances should you attempt to disassemble the cleaner and replace th
e
impeller, motor and battery by yourself.
E
xternal adaptor and Charging Base :
For indoor use only.
Never use the external adaptor and charging base for purpose other than battery
charging for the pool vacuum supplied in the same pack.
The external adaptor and charging base should not be used outdoor and not be expose
d
to rain, humidity, any liquid or heat.
Keep the external adaptor and charging base out of reach of children.
Never use the external adaptor and charging base if any damage is found.
DO NOT handle the external adaptor and charging base with wet hands.
DO NOT handle the cleaner, external adaptor and charging base while charging with we
t
hands and without shoes.
Disconnect the external adaptor from power when not in use.
Never attempt to open the external adaptor and charging base.
If the supply cord is damaged, it must be replaced by the manufacturer or its service agen
t
or a similarly qualified person in order to avoid a hazard.
Make sure the cleaner and charging base are totally dry before charging.
C
AUTION!
This cleaner is designed for underwater use only, not for use as an all-purpose vacuu
m
cleaner. DO NOT attempt to use it to clean anything other than your pool / spa.
Use original accessories delivered with this product.
DO NOT use this cleaner right after pool shocking. It is recommended to leave the poo
l
circulating for at least 24-48 hours.
It is not recommended to use this cleaner with another cleaner simultaneously.
Avoid picking up hard, sharp objects with this product. They may damage the cleane
r
and filter.
Use extra care when cleaning stairs in the pool.
Only use the charging base for its intended purpose as outlined in this manual.
To avoid damage to the external adaptor and cord, never attempt to carry it by its cor
d
or pull the cord to disconnect it from the power source and product.
Charge the cleaner indoor in a clean, dry place with good ventilation.
If the cleaner is not to be used for an extended period, detach it from the charging base,
use dry damp cloth to clean and dry the cleaner and accessories. Store them in a well-
ventilated area away from the sunlight, children, heat, ignition sources and pool
chemicals. Never leave the cleaner plugged for long term storage. Recharge the cleane
r
every three months.
A
bove warnings and cautions are not intended to incorporate all possible instances fo
r
r
isks and / or severe injury. Pool / spa owners should always exercise intensive caution an
d
c
ommon sense when utilizing the cleaner.
G
ETTING STARTED
S
et Up for Battery Charging
W
ARNING!
Charging must be done indoors, in a well-ventilated area away from the sunlight, children,
heat and ignition sources.
Never use the external adaptor and charging base if any damage is found.
Use the original external adaptor provided only.
Make sure cleaner and Charging Base are clean and dry before set up.
T
here are two different ways of setting up the cleaner ready for battery charging.
F
ree Standing
1
. Place your cleaner on a dry, clean and flat surface with Contact Plate on the cleaner facin
g
u
pwards.
2
. Slide the Charging Base wider hook inside the Hanging Slot on the cleaner handle. Press th
e
o
ther end of Charging Base down into the gap (between the Filter Cone base and rear body) unti
l
t
wo extended hooks are secured under the tabs on the Filter Cone base. Fig. 1

W
all Mounted
1
. Use screws (not included) to fix the Charging Base to the wall at a height at least 16 inche
s
(
40cm) above a level surface. Fig.2
2
. Align Hanging Slot of the cleaner to the upper hook of the Charging Base. Push the cleaner t
o
C
harging Base until two extended hooks are secured under the tabs on the Filter Cone base
.
F
ig.3
C
harging the Battery
W
ARNING!
DO NOT handle the cleaner, external adaptor and charging base while charging with wet hand
s
and without shoes.
Connect the external adaptor to power source through a residential current device (RCD).
Charge the cleaner with the original external adaptor provided.
DO NOT use power extension cords.
C
harge and Recharge time:
C
harge the cleaner 4hours prior to the first use. Re-charge time is 4 hours.
1
. Plug the female jack of the external adaptor into the charging port on the side of Chargin
g
B
ase.
2
. Connect the external adaptor to the power source. Now the indicator light on the external
a
daptor shows red color. Normally, it takes about 4 hours to complete charging and indicator
l
ight turns to green color.

3
. When charging is completed, disconnect the external adaptor from power source and unplu
g
the jack from the Charging Base.
4
. If the Charging Base is mounted on the wall for charging, hold and lift the front body of cleane
r
to release it from the two extended hooks on Charging Base at first. Then, lift up the cleane
r
f
rom the upper hook of Charging Base.
5
. If the Charging Base is not mounted on wall for charging, first lift the extended hooks from th
e
cleaner and then slide off the wider hook from the cleaner Hanging Slot.
N
OTE: Leave the cleaner for 10 to 15 minutes before using it after charge or recharge of batteries
.
N
ormally, the cleaner can be operated for 30-40 minutes after fully charged.
S
et Up for Operation
H
andle assembly
H
andle can be attached to the cleaner in 2 different directions. You can select the handle positio
n
t
hat you find easier to hold the cleaner when cleaning the pool / spa wall and bottom.
I
nsert the handle into the cleaner as shown until the side pin on the handle is secured in th
e
H
andle Locking Hole on the cleaner. Fig.4
T
o release the handle, press down the side pin and pull out the handle.
T
elescopic pole (not included) assembly
I
nsert the end (with one side pin) of the Pole Connector into the cleaner as shown until its single
s
ide pin is secured in the Handle Locking Hole of the cleaner. Slide and align the side holes of
t
he telescopic pole with the side pins of the Pole Connector.
Fig.5

T
o release the telescopic pole, press down two side pins simultaneously and pull out the pole.
V
acuum head assembly
I
nsert the Vacuum Head adapter directly to the suction hole of the cleaner tightly by hand. Fig.
6
B
rushes on the vacuum head can be replaced if needed by removing the bottom cover.
I
t is recommended to keep both brushes and wheels on the vacuum head for most efficien
t
c
leaning and to prevent damage to your pool.
O
PERATION
W
ARNING!
Do not use the cleaner if any damage is found.
Do not operate this cleaner when people/pets are in the water.
Make sure the cleaner is fully immersed in the water immediately after powering on th
e
machine.
DO NOT operate it outside of water for more than 15 seconds, It will lead to failure of the shaf
t
seals / motor, and then VOID the warranty.
DO NOT use the cleaner without filter sock and sleeve in place. Using your cleaner withou
t
intact filter sock and sleeve in place will VOID your warranty.
Risk of Suction Entrapment Hazard. This cleaner generates suction. Avoid hair, body or an
y
loose parts of your clothing to contact with the suction hole of the cleaner in operation.
N
ever insert body parts, clothing or other objects into the openings and moving parts.

DO NOT use this cleaner to pick up any toxic substance, flammable or combustible liquids suc
h
as gasoline, or operate in the presence of explosive or flammable fumes.
C
AUTION
Use original accessories delivered with this product.
DO NOT leave the cleaner in the water when not in use or when battery is low as water leakag
e
may occur.
S
tarting pump motor
1. Bring your cleaner to the side of your pool / spa. Press the On/Off button to start pum
p
motor, immediately immerse the cleaner into water after the pump motor is operating.
S
topping the pump motor
2. Remove the cleaner from the pool / spa. Lift cleaner out of water, keep it face downwar
d
to allow water to escape from the Outlet Valve and Handle / Pole Connector.
3. Turn Off pump motor. Press On/Off switch to turn off pump motor.
C
AUTION! When removing the cleaner from the pool with telescopic pole, always keep th
e
c
leaner facing downward. Otherwise it may bend the Pole Connector and damage it.
It is recommended to rinse the cleaner and filter with fresh water after every use.
E
MPTYING THE FILTER
F
or maximizing the cleaning efficiency, always clean the filter before and after use.
C
AUTION
Always disconnect the external adaptor from power source and detach the cleaner from th
e
Charging Base before performing any routine cleaning or maintenance of cleaner.
1
. Place the cleaner on a stable surface.
2
. Press down the Filter Sleeve Locking Tab; rotate the sleeve until its tabs are released from th
e
slots on the Filter Cone Base. Fig. 7

3
. Detach the Filter Sleeve from the cleaner. Clean out the debris from the sleeve.
4
. Pull up the small loop on Filter Sock elastic to lift up the band and then pry along the band t
o
release the sock from the tabs on the Filter Cone base. Fig. 8
5
. Rinse the Filter Sock with clean water only. DO NOT wash it in a washing machine or wit
h
detergent.
6
. Reverse the steps to place back the Filter Sock to the Filter Cone. Make sure the elastic ban
d
is not twisted.
N
ote: To assemble the Filter Sleeve back to the body, push the sleeve towards the Filter Con
e
B
ase until it stops. Turn the sleeve until its indentation on the edge is secured by the Filter Sleev
e
L
ocking Tab.
C
AUTION!
R
eplace the damaged Filter Sock immediately before next operation.
M
AINTENANCE & STORAGE
1. Unplug the external adaptor from socket and then unplug the adapter jack from Chargin
g
Base.
2. If necessary, rinse the cleaner with fresh water. DO NOT use detergent.
3. Use dry damp cloth to clean and dry the cleaner and all accessories.
4. Store cleaner and accessories indoors in a well-ventilated area away from the sunlight
,
children, heat, ignition sources and pool chemicals.
5. Ambient temperature for storage should be 10˚C – 40˚C (50˚F – 104˚F).

W
ARNING!
Never attempt in any way to disassemble your cleaner.
Under no circumstances should you attempt to disassemble the cleaner and replace th
e
impeller, motor and battery by yourself or hire an unauthorized service provider to replace th
e
battery. The battery is specially designed for your cleaner and contains fuses for safety.
C
AUTION!
Heat can damage the battery and reduce its life.
The battery should last about 300 charging cycles (under proper charging and operation)
.
Consult your dealer for the proper new replacement battery or service if the followin
g
happens.
•Battery appears damaged or will not charge fully.
•Battery operation time is noticeably reduced.
B
ATTERY LIFE: Incorrect battery maintenance may reduce the battery life and influence it
s
f
unction.
1
.Should re-charge the battery after use within 24 to 48 hours.
2
.Must re-charge the battery at least every three months when not in use.
3
.To allow the batteries to fully charge after long storage period, follow re-charge instruction
s
above.
B
ATTERY DISPOSAL
T
he maintenance free, Nickel Metal Hydride battery in your Pool Blaster must be properl
y
d
isposed of in accordance to State and local law. To confirm if recycling is required; contact you
r
l
ocal authority for information.
W
ARNING!
N
ever attempt to disassemble a battery pack
Remove all personal items such as rings, bracelets, necklaces and watches when unwiring
a
pack from the vacuum unit.
A battery can produce a short circuit current high enough to weld a ring (or like item) to meta
l
causing a severe burn.
Wear complete eye protection, gloves and protective clothing when removing the battery pack
.
Take care not to touch wires together or allow them to contact any metal items, which woul
d
cause sparking and/or short circuit the battery.

Never smoke or allow a spark or flame in the vicinity of the battery or the cleaner. Batteries ca
n
generate gases which could possibly ignite.
Do Not expose to fire or intense heat as this may result in an explosion.
C
AUTION!
I
f a battery leak develops, avoid contact with the leaking acid and place the damaged battery in
a
plastic bag.
If acid comes in contact with skin and clothing, wash immediately with plenty of soap and
water.
If acid comes in contact with eyes, immediately flood eye with running cool water for at least
15 minutes. Get medical attention immediately.
H
ow to remove the battery
R
ecommended tools (not included): Philips screwdriver, Slotted screwdriver and wrench socket/
a
djustable wrench.
1
. Use Philips screw driver to unfasten 4 screws under the filter base, and then detach the filter
b
ase, filter cone and filter sleeve from the main body.
2
. Unscrew the 2 small screws to release the cover.
3
. There is a slot on the extended screw base of main body. Insert Slotted screwdriver to the
s
lot of any one screw base and then pry the cover open. Remove the cover.

4
. Use Philips screw driver to unfasten 10 screws on the motor plate as pointed in diagram, and
t
hen remove the motor plate.
5
. Remove battery pack from unit and lay next to plate with wires attached.
6
. Use wrench socket to unfasten the nut, and then detach the battery wire terminal from the
m
otor plate.
W
ARNING!
When unfastening the nut, avoid the metal part of the tool contacting both wire terminal
simultaneously. This will cause short circuit, and then fire or explosion.
After detaching one, (the first) battery wire terminal from the motor plate, wrap it
immediately with insulating tape in order to avoid short circuit caused by contact of both
wire terminals.

TROUBLE SHOOTING
Problem
Possible Cause
Remedy
Cleaner does not capture the debris
Battery is running out
Charge the battery again. Normally
cleaner can operate 30-40 minutes
after fully charged.
Impeller is jammed
Power off the cleaner and visually
check the gap in middle of the
cleaner to see if the impeller is
jammed by larger debris. If possible,
use small tool to remove it with
intensive care & caution. If
necessary, contact your dealer for
instruction.
WARNING! Make sure cleaner is
powered off when servicing the
cleaner.
Impeller is broken
Contact your dealer for impeller
replacement.
Filter is full
Clean the filter and filter sock.
Debris escapes from the filter
Suction nozzle flap is broken
Suction nozzle flap works like a door
to prevent the debris from escaping
from the filter. Contact dealer for
replacement part and instruction.
Debris goes inside the filter cone
Filter sock is damaged
Replace a new filter sock.
Filter sock is not in place
Make sure the filter sock is placed
and secured on the filter cone before
operation.
Outlet valve comes off
Without outlet valve, cleaner might
capture from this hole. Contact
dealer for valve replacement.
Handle / pole connector cannot be
secured in assembly
Side pin broken
Replace a new handle / pole
connector.
Cleaner cannot be recharged
Battery is dead
Contact dealer for battery
replacement.
WARNING! DO NOT open the
cleaner and replace the battery by
yourself. This will result in severe or
fatal injury and void the warranty.
External adaptor is out of order
Contact dealer for proper
transformer.
WARNING! Using wrong external
adaptor will result in damaging the
cleaner / battery and void the
warranty.
Vacuum head does not move
smoothly
Wheels jammed or damaged or
excessive build-up of dirt in
wheel or adapter cavities
Rotate the wheels by hand to
confirm they are not jammed. Look
for damage or excessive wear.
Clean out the wheel and adapter
cavity.
Water Tech Corp.
10 Alvin Ct.
East Brunswick, NJ 08816 - USA
Tel: 1-800-298-8800
Fax:-1800-488-0700
Table of contents
Other WaterTech Vacuum Cleaner manuals

WaterTech
WaterTech VOLT FX-4Li User manual

WaterTech
WaterTech Pool Blaster CATFISH Li User manual

WaterTech
WaterTech POOL BLASTER DYNAMO 18001JL: 852506007386 User manual

WaterTech
WaterTech POOL BLASTER SPA VAC PLUS User manual

WaterTech
WaterTech Pool Blaster CX-1 User manual

WaterTech
WaterTech Pool Blaster iVac 150 User manual

WaterTech
WaterTech 10A0021 User manual

WaterTech
WaterTech VOLT SPA VAC User manual

WaterTech
WaterTech Pool Blaster Aqua Broom Ultra User manual

WaterTech
WaterTech Pool Blaster User manual