Waversasystems WMiniDAC MK2 User manual

WMiniDAC MK2
Owner’s Manual

Important Notice
1. Read these instruction manual
2. Keep the manual
3. Keep remind all warnings
4. Follow all instructions
5. Do not use this equipments near water or moisture
6. Clean only with dry cloth
7. Do not block any ventilation openings. Install in accordance with the manufacturer’s
instructions
8. Do not use near any heat sources such as radiators, stoves or heat registers
9. Use grounding-type plug
10. Use only attachments/accessories specified by the manufacturers
11. Unplug this equipmentduring lightning storms or when unused for long periods of time
12. Refer all servicing to qualified service personnel. Servicingis required when the
equipment has been damaged inany way, such as power-supply cord or plug is
damaged,liguidhas been spilled or objects have fallen into the equipment, the equipment
has been exposed to rain or moisture, does not operate normally, or has been dropped.
Manufacturer does not take any responsibility for repairing due to misused operation
13. Do not put any liquidmaterial onto the equipment
14. Remove plug after checking the equipment power is off. Otherwise, it may cause
equipment failure.
WARNING: Unqualified personnel are not able to repair this equipments.
To reduce the risk of electric shock, do not open bottom cover on purpose.
WMiniDAC MK2 Owner’s Manual 01

Thanks for choosing
Waversa Systems’ WMiniDAC MK2.
Recent development of innovative IT/ Digital technology brings
vast changes in concept and environment of old Analog based
High-end Audio market.
Waversa Systems is leading
New High-end Audio paradigm combining world top class IT with
digital technology under the goal of developing sophisticated
sound and design.
Waversa Systems is
Happy with your purchasing equipments and promises to become
best partners for your audio life.
CEO Junho Shin
WMiniDAC MK2 Owner’s Manual 02

①Power/Source button
②IR remote sensor
③LED Panel
①Balanced output : XLR male
②Unbalanced output : RCA female
③SD card slot : Software update
④Inputs
•Coaxial
•Optical
•Ethernet
•USB A / B
⑤DC Input: 12v DC
WMiniDAC MK2 Owner’s Manual 03
① ②
③
④
⑤
① ② ③

WMiniDAC MK2 Owner’s Manual 04
Input Select
- Press power button 0.5 seconds for change source
- Press select button of WMiniRemote.
-Press source button of Remote Controller of “Quick Setting”
•U : USB Input
•C : Coaxial
•O : Optical
•N : Network

WMiniDAC MK2 Owner’s Manual 06
PCM Enhancement function
-Press “menu” button and press “select” button
when “R” menu displayed on the LED screen
-“RB” : bypass input sample rate
-“R1” : 44.1 / 48 KHz
-“R2” : 88.2 / 96 KHz
-“R4” : 176.4 / 192 KHz
-“R8” : 352.8 / 384 KHz
- Select the resolution depend on your preference
- High resolution output willprovide warm sound

WMiniDAC MK2 Owner’s Manual 06
Output Level
-Press “menu” button and press “select” button
when “L” menu displayed on the LED screen
-LM –Max Level
- L9 ~ L1 –Drop output level by -3dB for each step

WMiniDAC MK2 Owner’s Manual 05
①Optical - Input for transport or TV’s optical output
②USB B - Input for PC or network player
③Coaxial - Input for CDT or CD Player’s digital output
④USB A - External USB Memory device extension
⑤Ethernet - Network connection for various network players
⑥Balanced Analog Output
⑦Unbalanced Analog Output
⑧DC 12V Power Input
⑨SDCARD for Built-in Software
①② ③ ④⑤
⑥ ⑦
⑧
⑨

Finding IP address in Windows
- Windows Explorer →Network →Media Devices →Mouse right
click in WMiniDAC MK2 →Properties →IP address in the below
WMiniDAC MK2 Owner’s Manual 07

Finding IP address in Mobile Devices
-Install App named “Fing” →Scan Devices→Find WMiniDAC MK2 →
IP address in the below
WMiniDAC MK2 Owner’s Manual 08

1. In PC / Mobile device, User can connect “WMiniDAC MK2 Quick
Setting” web page.
2. Connect WMiniDAC MK2 to router with LAN cable
3. Connect PC / Mobile device to network.
4. Enter WMiniDAC MK2’s IP address into web browser(Explorer,
Safari , Chrome)
5. Finding IP address will be described in next page
WMiniDAC MK2 Owner’s Manual 09
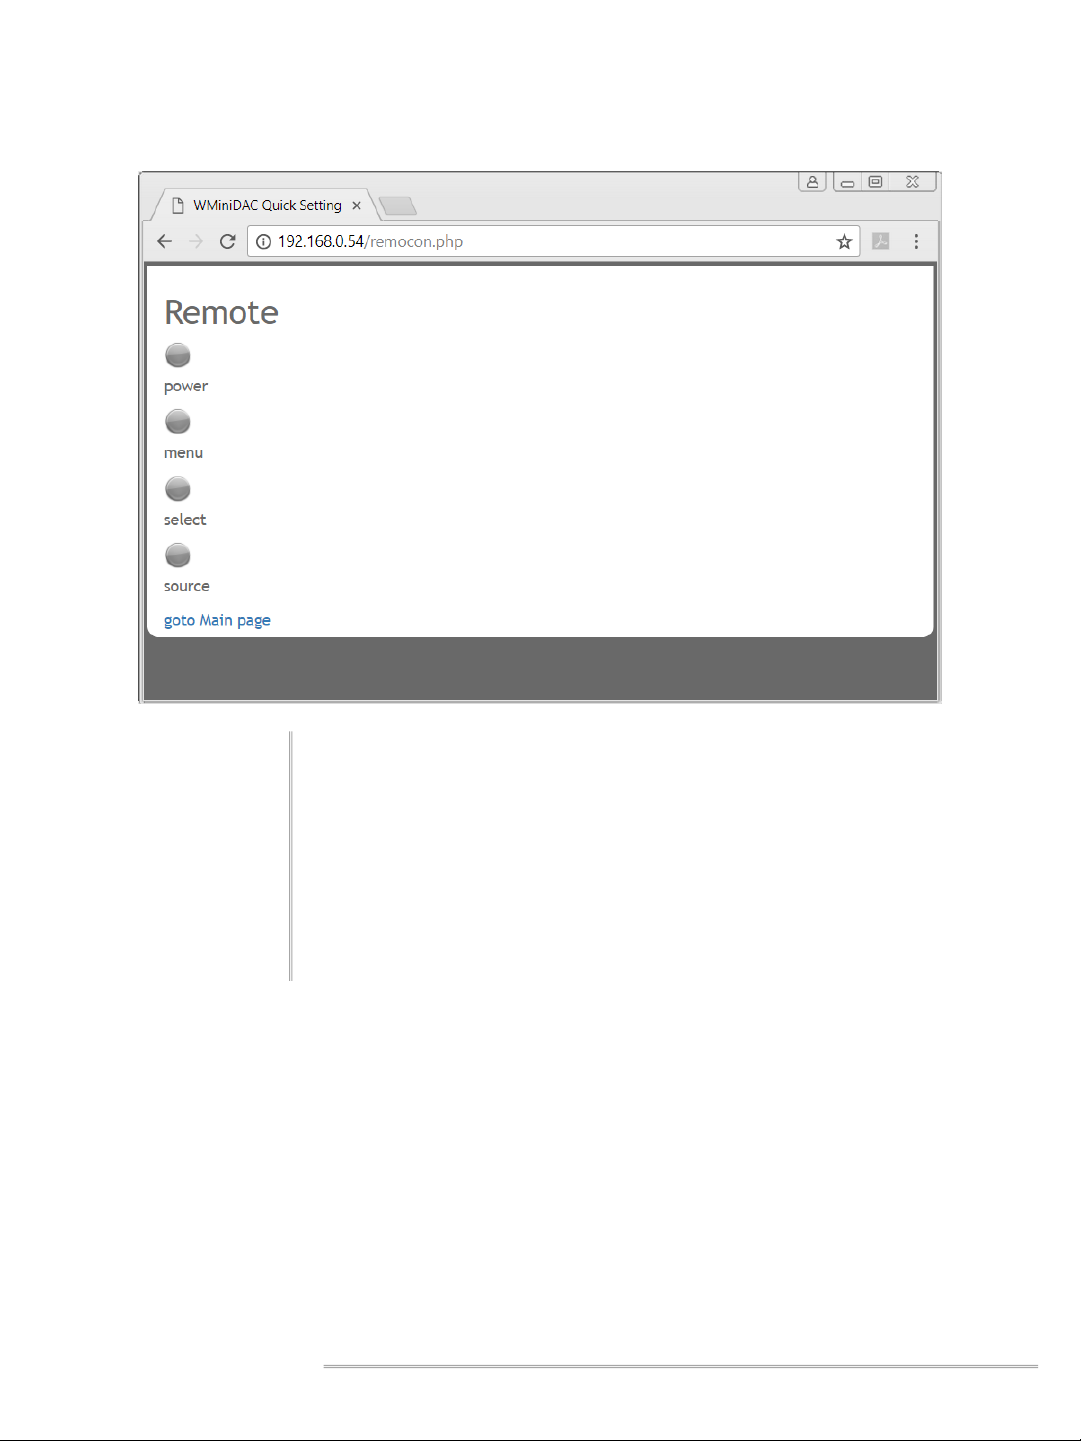
1. Select “Remote Controller” and press “Remote Controller” button
to open remote controller page
2. Power button for turn on/off WMiniDAC MK2
3. Menu, select button for using menu of WMiniDAC MK2
4. Source button to change input source
WMiniDAC MK2 Owner’s Manual 10

1. If new version of software for WMiniDAC MK2then browser
indicate “New version available”
2. Select “Update” tab in WMiniDAC MK2 Quick Setting
3. Press “Update” button and wait for update done page displayed.
4. Press “Update” tab again and if it show “Update again” then press
“Update button” once more.
WMiniDAC MK2 Owner’s Manual 11

①Menu button
②Select button
③Source button
④Power button
WMiniDAC MK2 Owner’s Manual 12
①
②③④

①Menu button
②Select/Source button
③Power button
WMiniDAC MK2 Owner’s Manual 13
①②
③

WMiniDAC MK2 Owner’s Manual 14
NOTES: All specifications are accurate at the time of printing.
Waversa Systems reserves the right to adjust specifications without
notice.
1 x Balanced(XLR)
1 x Unbalanced(RCA)
Ultra Low Power Universal Serial Bus Audio Class 2.0
with High Precision Clock
Waversa System Processor(WAP) Type 1 applied Built-in
Linux 3.2 with 1GHz TI OMAP Processor ( ARM CORTEX-A8 )
Single ES9018K (Sabre)
•Coaxial
•Optical
•Ethernet
•USB A / B
•COAX, OPT- up to 96kHz
•USB/NET - PCM 44.1, 48, 88.2, 96, 176.4, 192, 352.8, 384 kHz
•USB /NET - DSD64, DSD128 (DOP), DSD256(Native DSD)
•Up to 384kHz
12V Adapter 90~120 VAC / 180~240 VAC @ 50~60Hz
W 180 x L 150 x H 37 (Spike 7 mm)
2 Kg
•DLNA
•AirPlay
•Roon
•WNDR –Waversa Network Direct Rendering

WMiniDAC MK2 Owner’s Manual 15
Install Driver program to use Windows (MAC doesn’t need this installation)
You can download driver file in followingURL.
http://www.waversa.com/download

WMiniDAC MK2 Owner’s Manual 16
1. Select ”N” source
2. Install ‘mconnect” from App/Play store.
3. Select WMiniDAC MK2 from “Plat to” tab
4. Browse media files which you want to play by “Browser” tab

WMiniDAC MK2 Owner’s Manual 17
1. Select “N” source
2. Install “Roon Remote” from App/Play Store
3. Enter “Settings” and select “Audio” tab
4. Enable “Waversa Systems WDAC” and set name as “WMiniDAC MK2”
5. Press Speaker Icon in bottom right and then switch to “WMiniDAC MK2”
6. Choose media file to play.

WMiniDAC MK2 Owner’s Manual 18
1. Select “U” Source
2. Connect USB cable between PC & WMiniDAC MK2 and Run JRiver Media
Center
3. Select Player -> PlaybackOptions -> Audio -> Audio Device and select
XMOS USB Audio.
4. Select Player -> Playback Options -> Audio -> Audio Device -> Device
Setting and check “DSD bitstream in DoP format”
Table of contents
Other Waversasystems Stereo System manuals


