Scansonic DA310 User manual

1
DA 310
Micro System with
CD/MP3 player
UK User Manual
DK Brugervejledning
DE Bedienungsanleitung
NL Gebruikershandleiding
IT Manuale di istruzioni
FR Guide d’instructions
E Manual de instrucciones
DA 310

2
Safety warnings
• Read all the instructions carefully before using the unit and keep them
for future reference.
• Retain the manual. If you pass the unit onto a third party make sure to
include this manual.
• Check that the voltage marked on the rating label matches your mains
voltage.
Damage
• Please inspect the unit for damage after unpacking.
• Do not continue to operate the unit if you are in any doubt about it work-
ing normally, or if it is damaged in any way – switch off, unplug from the
mains socket and consult your dealer.
Location of Unit
• Theunitmustbeonaatstablesurfaceandshouldnotbesubjectedto
vibrations.
• Do not place the unit on sloped or unstable surfaces as the unit may fall
off or tip over.
• The mains socket must be located near the unit and should be easily
accessible.
• This unit is designed for indoor use only.
Temperature
• Avoid extreme degrees of temperature, either hot or cold. Place the unit
wellawayfromheatsourcessuchasradiatorsorgas/elctricres.
• Avoid exposure to direct sunlight and other sources of heat.
Naked Flames
• Neverplaceanytypeofcandleornakedameonthetopornearthe
unit.
Moisture
• Toreducetheriskofre,electricshockorproductdamage,donot
exposethisunittorain,moisture,drippingorsplashing.Noobjectslled
with liquids, such as vases, should be placed on the unit.
• If you spill any liquid into the unit, it can cause serious damage. Switch it
off at the mains immediately. Withdraw the mains plug and consult your
dealer.
Ventilation
• Topreventtheriskofelectricshockorrehazardduetgooverheating,

3
ensure that curtains and other materials do not obstruct the ventilation
vents.
• Do not install or place this unit in a bookcase, built-in cabinet or in an-
otherconnedspace.Ensuretheunitiswellventilated.
Safety
• Always disconnect the unit from the mains supply before connection/
disconnecting other devices or moving the unit.
• Unplug the unit from the mains socket before a lightning storm.
• In the interests of safety and to avoid unnecessary energy consumption,
never leave the unit switched on while unattended for long periods of
time, e.g. overnight, while on holiday or while out of the house. Switch it
off and disconnect the mains plug from the mains socket.
Mains cable
• Make sure the unit or the unit stand is not resting on top of the m,ains
cable, as the weight of the unit may damage the cable and create a
safety hazard.
Interference
• Do not place the unit on or near appliances which may cause electro-
magnetic interference. If you do, it may adversely affect the operating
performance of the unit, and cause distorted sound.
Batteries
• Batteries used in the remote control for this unit are easily swallowed by
young children and this is dangerous.
• Keep loose batteries away from young children and make sure that the
battery holder tray is secure in the remote control. Seek medical advice
if you believe a cell has been swallowed.
• Please dispose of batteriers correctly by following the guidance in this
manual.
• Do not expose the battery to direct sunlight of sources of excessive
heat.
Supervision
• Children should be supervised to ensure that they do not play with the
unit and the remote control.
• Never let anyone especially children push anything into the holes, slots
or any other openings in the case – this could result in a fatal electric
shock.

4
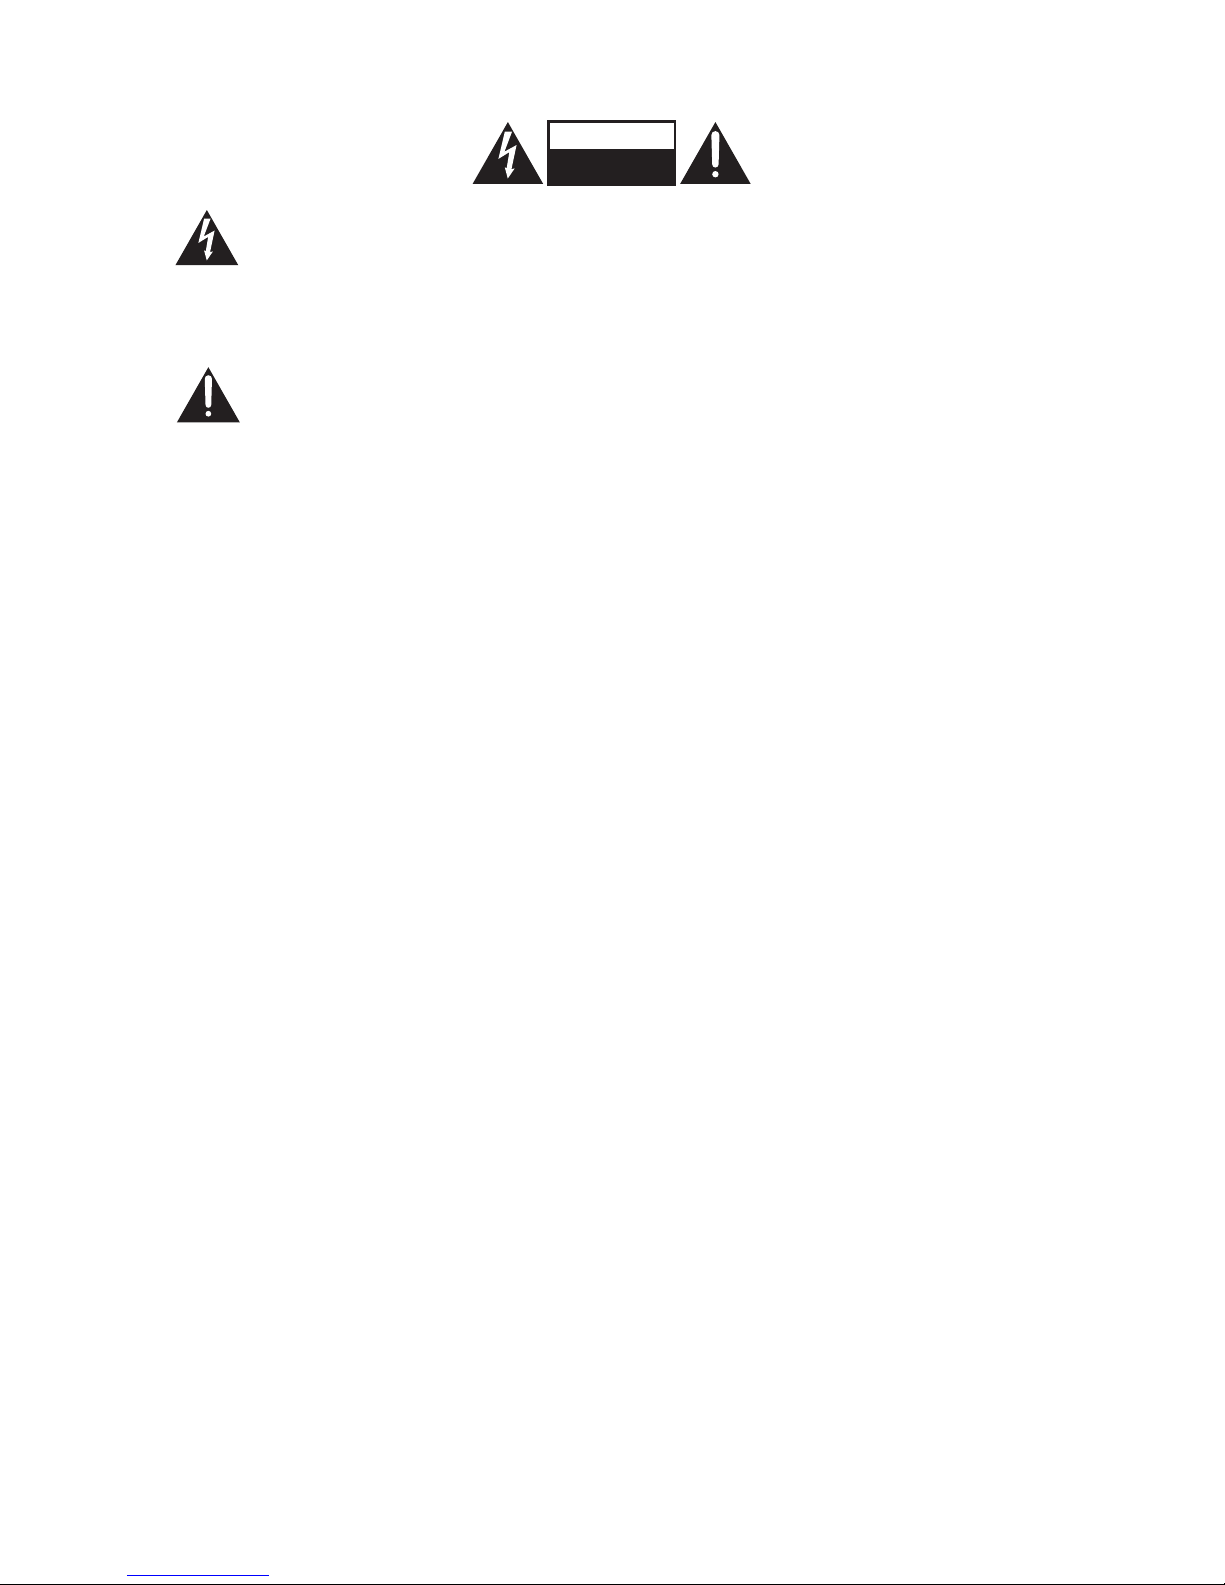
Thelightningashwitharrowheadsymbol,witinanequilateral
triangle, is intended do alert the user to the presence of uninsulated
“dangerousvoltage”withintheunit’senclosurethatmaybeofsuf-
cient magnitude to constitute a risk of delectric shock.
The exclamation point within an eqauilateral triangle is intended to
alert the user to the presence of important operating and mainte-
nance accompanying the unit.
Service
• To reduce the risk of electric shock, do not remove screws. The unit
does not contain any user-serviceable parts. Please leave all mainte-
nanceworktoqualiedpersonnel.
• Donotopenanyxedcoversasthismayexposedangerousvoltages.
Maintenance
• Ensure the unit is fully unplugged from the power supply before clean-
ing.
• Do not use any type of abrasive pad or abrasive cleaning solutions as
these may damage the unit’s surface.
• Do not use liquids to clean the unit.
Supervision
t ChildrFOTIPVMECFTVQFrWJTFEtPFOTVrF
thaUUIFZEPOPUQMaZXJUIUIFVOJUBOEUIF
rFNPtFcPntrPl.
t NevFSMFUBnZPOFFTQFDJBMMZDIJMErFOQVTI
anZUIJOHJntPUIFIPMFTTMPUTPSBnZPUIFS
PQFOJOHTJOUIFDBTFUIJTcPVMErFTVMUJOB
faUBMFMFctrJDTIPDk.
CAUTION
RISK OF ELECTRIC SHOCK
DO NOT OPEN
TZNCPlXJUIJOBOFRVJMaterBMUrJBOHMeJT
intFOEFEtPBMFrUUIFVTFStPUIFQrFTFOcF
PGVOJOTVMated“EBOHFrPVTvPMUBHe”XJUIJO
UIFVOJt’TFODMPTVrFUIaUNaZCFPG
electrJDTIPDk.
TIFexclamaUJPOQPJnUXJUIJOBO
FRVJMaterBMUrJBOHMFJTJntFOEFEtPBMFrUUIF
VTFStPUIFQrFTFOcFPGJNQPrtanU
PQFraUJOHBOENBJntenancFTFrWJDJOH
JOTUSVcUJPOTJOUIFNBOVBMBccPNQBnZJOH
UIFVOJt.
Service
t TPrFEVcFUIFrJTLPGFMFctrJDTIPDkEPOPU
remPvFTDreXT.TIFVOJUEPFTOPUcPnUBJO
anZVTFrTFrvicFBCMFQBrtTPMFBTFMFavFBMM
t
eYQPTFEBOHFrPVTvPMUBHFT.
Maintenance
t &OTVrFUIFVOJUJTGVMMZVOQMVHHFEGrPNUIF
QPXFSTVQQMZCFfPrFDMFBOJOH.
t DPOPUVTFBnZtZQFPGBCrBTJvFQBEPS
BCrBTJvFDMFBOJOHTPMVUJPOTBTUIFTFNaZ
EBNBHFUIFVOJt’TTVrface.
t DPOPUVTFMJRVJETtPDMFBOUIFVOJt.
6

5
Product overview
Front view
1. Disk tray
2. Display
3. Remote Control Sensor
Receive signal from the
remote control.
4. USB … 5V 1A Charging Port
• For charging external devices.
• For MP3 playback.
5. STANDBY Button
Switch the unit between the
ON and STANDBY modes.
6. MODE Button
Switch between DAB, FM,
CD, USB, AUX and
Bluetooth modes.
7. AUDIO IN Socket
Connects to an external
audio device.
8. VOLUME +/– Dial
Increase or decrease the
volume.
9. SCAN/►/II Button
Play/pause/resume playback.
Auto-scan in DAB/FM mode.
10. SKIP/TUNE SEARCH I◄◄
Button
Skip backwards to the
beginning of the track or to
the previous track.
Allow fast reversing of the
current track.
Search for a radio station
going backwards through
accessible radio frequencies.
11. SKIP/TUNE SEARCH I►►
Button
Skip forwards to the next track.
Allow fast forwarding of
the current track.
Search for a radio station
going forwards through
accessible radio frequencies.
12. ENTER Button
■Stop playback
13. ▲open/close disk Button
3
4 5 6 7 8 9 1110
21
12
product overview
front view
1. Disk tray
2. Display
3. Remote Control Sensor
Receive signal from the remote control.
4. USB 5V 1A Charging Port
t'PSDIBSHJOHFYUFSOBMEFWJDFT
t'PS.1QMBZCBDL
5. STANDBY Button
4XJUDIUIFVOJUCFUXFFOUIF0/BOE
45"/%#:NPEFT
6. MODE Button
4XJUDICFUXFFO%"#'.$%64#"69BOE
Bluetooth modes.
7. AUDIO IN Socket
$POOFDUTUPBOFYUFSOBMBVEJPEFWJDF
8. VOLUME +/– Dial
Increase or decrease the volume.
9. SCAN/ Button
t1MBZQBVTFSFTVNFQMBZCBDL
t"VUPTDBOJO%"#'.NPEF
10. SKIP/TUNE SEARCH Button
t4LJQCBDLXBSETUPUIFCFHJOOJOHPGUIF
track or to the previous track.
t"MMPXGBTUSFWFSTJOHPGUIFDVSSFOUUSBDL
t4FBSDIGPSBSBEJPTUBUJPOHPJOHCBDLXBSET
UISPVHIBDDFTTJCMFSBEJPGSFRVFODJFT
11. SKIP/TUNE SEARCH Button
t4LJQGPSXBSETUPUIFOFYUUSBDL
t"MMPXGBTUGPSXBSEJOHPGUIFDVSSFOUUSBDL
t4FBSDIGPSBSBEJPTUBUJPOHPJOHGPSXBSET
UISPVHIBDDFTTJCMFSBEJPGSFRVFODJFT
12. ENTER Button
StopQMBZCBDL
PQFODMPTFEJTL#VUUPO
8
MODE
13

6
Remote control
1. STANDBY Button
Switch the unit between the
ON and STANDBY modes.
2. Number buttons
3. REPEAT Button
Set repeat function.
4. EQ Button
Select the EQ (Equaliser) mode.
5. SELECT/MONO/ST. Button
Switch between mono or
stereo in FM mode.
6. I◄◄ Button
7 PRESET Button
SelectoderdowninCD
or USB mode.
8. VOLUME Buttons
Decrease volum
9. PRESET Button
Select a preset station down
in DAM or FM mode.
10. FOLDER Button
SelectoderdowninCD
or USB mode.
11. CD Button
switch to CD operating mode.
rear view
12
1. Mains Cable 2. FM Aerial
9
remote control
1. STANDBY Button
Switch the unit between the ON and
STANDBY modes.
2. Number buttons
3. REPEAT Button
Set repeat function.
4. EQ Button
Select the EQ (Equaliser) mode.
5. SELECT/MONO/ST. Button
Switch between mono or stereo in FM mode.
6. Button
t4LJQCBDLXBSETUPUIFCFHJOOJOHPGUIF
USBDLPSUPUIFQSFWJPVTUSBDL
t"MMPXGBTUSFWFSTJOHPGUIFDVSSFOUUSBDL
t4FBSDIGPSBSBEJPTUBUJPOHPJOHCBDLXBSET
UISPVHIBDDFTTJCMFSBEJPGSFRVFODJFT
7. PRESET Button
t4FMFDUBQSFTFUTUBUJPOVQJO%"#PS
FM mode.
8. VOLUME – Buttons
Decrease volum
9. PRESET Button
t4FMFDUBQSFTFUTUBUJPOEPXOJO%"#PS
FM mode.
10. FOLDER - Button
Select oder down in CD or USB mode.
B LU E TOOTH
ME N U
4
6
7
8
9
5
1
2
3
13
15
17
19
20
21
22
23
24
25
26
27
28
29
30
31
32
33
34
35
36
37
38
16
18
11
10
12
14
rear view
12
1. Mains Cable 2. FM Aerial
9
remote control
1. STANDBY Button
Switch the unit between the ON and
STANDBY modes.
2. Number buttons
3. REPEAT Button
Set repeat function.
4. EQ Button
Select the EQ (Equaliser) mode.
5. SELECT/MONO/ST. Button
Switch between mono or stereo in FM mode.
6. Button
t4LJQCBDLXBSETUPUIFCFHJOOJOHPGUIF
USBDLPSUPUIFQSFWJPVTUSBDL
t"MMPXGBTUSFWFSTJOHPGUIFDVSSFOUUSBDL
t4FBSDIGPSBSBEJPTUBUJPOHPJOHCBDLXBSET
UISPVHIBDDFTTJCMFSBEJPGSFRVFODJFT
7. PRESET Button
t4FMFDUBQSFTFUTUBUJPOVQJO%"#PS
FM mode.
8. VOLUME – Buttons
Decrease volum
9. PRESET Button
t4FMFDUBQSFTFUTUBUJPOEPXOJO%"#PS
FM mode.
10. FOLDER - Button
Select oder down in CD or USB mode.
B LUE TOOTH
ME N U
4
6
7
8
9
5
1
2
3
13
15
17
19
20
21
22
23
24
25
26
27
28
29
30
31
32
33
34
35
36
37
38
16
18
11
10
12
14

7
12. USB Button
switch to USB operating mode.
13. BLUETOOTH Button
switch to Bluetooth operating mode.
14. I◄◄ Button
Skip backwards to the beginning of the track or to the previous
track in bluetooth mode.
15. Display Button
Display track information in CD or USB mode.
16. SCAN Button
Auto-scan in DAB mode.
17. OPEN/CLOSE Buttons
open and close disc compartment.
18. MEMORY Button
Press to show preset stations in DAB or FM mode.
Press to programme preset station in DAB or FM mode.
19. CLOCK Button
Press to show the clock.
Press and hold to enter clock setup in Standby mode.
20. TIMER Button
Setup an alarm timer.
21. INTRO Button
Play soundtrack for 10 seconds.
22. RANDOM Button
Set to random playback.
23. MUTE Button
Silence the unit or restore the sound.
24. SLEEP Button
Select a sleep timer.
25. I►► Button
skip forwards to the next track.
Allow fast forwarding of the current track.
Search for a radio station going forwards through accessible radio
frequecides.
26. VOLUME + Buttons
Increase the volume.
27. ENTER Button
conrmselection.
28. FOLDER + Button
SelectoderupinCDorUSBmode.
29. AUDIO IN Button
switch to AUDIO IN operating mode.

8
30. TUNER/DAB Button
switch to TUNER or DAB operating mode.
31. ►/II Button
Start and pause playback in bluetooth mode.
32. I►► Button
Skip forwards to the next track in bluetooth mode.
33. ►/II Button
Start and pause playback in CD or USB mode.
34. ■Stop Button
Stop playback in CD or USB mode.
35. Display Buttons
Display information in DAB mode.
36. MENU Buttons
MENU in DAB mode.
37. Display Button
switch between station names, program type, radio text and
frequency in FM mode.
38. SCAN Button
Auto-scan in FM mode.
Battery replacement for the remote control
The remote control requires a LR6 1.5V AA/AM3 battery.
1. Open the battery cover.
2. Insert the supplied battery according to the direction indicated in the
battery compartment. When inserting or removing the battery, push it
towards the (–) battery terminals.
3. Close the cover.
battery replacement for the remote control
The remote control requires a LR6 1.5V AA/AM3 battery.
1. Open the battery cover.
2. Insert the supplied battery according to the direction indicated in the battery compartment.
When inserting or removing the battery, push it towards the (–) battery terminals.
3. Close the cover.
Handling the Battery
t Improper or incorrect use of batteries may cause corrosion or battery leakage, which could
t Install the battery correctly in the battery compartment. Normally the battery’s positive
polarity (+) will face up.
t Use only the battery type indicated in this manual.
t Do not dispose of the used battery as domestic waste. Dispose of it in accordance with
local regulations.
t Small button cell batteries such as the one used in the remote control are easily swallowed
by young children and this is dangerous. Keep loose button cells away from young children
and make sure that the battery is secure in the remote control. Seek medical advice if you
believe a battery cell has been swallowed.
11

9
Handling the Battery
• Improper or incorrect use of batteries may cause corrosion or battery
leakage, which could cause re, personal injury or damage to
property.
• Install the battery correctly in the battery compartment. Normally the
battery’s positive polarity (+) will face up.
• Use only the battery type indicated in this manual.
• Do not dispose of the used battery as domestic waste. Dispose of it
in accordance with local regulations.
• Small button cell batteries such as the one used in the remote control
are easily swallowed by young children and this is dangerous. Keep
loose button cells away from young children and make sure that the
battery is secure in the remote control. Seek medical advice if you
believe a battery cell has been swallowed.
battery replacement for the remote control
The remote control requires a LR6 1.5V AA/AM3 battery.
1. Open the battery cover.
2. Insert the supplied battery according to the direction indicated in the battery compartment.
When inserting or removing the battery, push it towards the (–) battery terminals.
3. Close the cover.
Handling the Battery
t Improper or incorrect use of batteries may cause corrosion or battery leakage, which could
t Install the battery correctly in the battery compartment. Normally the battery’s positive
polarity (+) will face up.
t Use only the battery type indicated in this manual.
t Do not dispose of the used battery as domestic waste. Dispose of it in accordance with
local regulations.
t Small button cell batteries such as the one used in the remote control are easily swallowed
by young children and this is dangerous. Keep loose button cells away from young children
and make sure that the battery is secure in the remote control. Seek medical advice if you
believe a battery cell has been swallowed.
11
Handling the Remote Control
• Takecareofyourngernailswhenyouslideandpullthebattery
releasetab.
• Donotdroptheremotecontrol.
• Donotallowanythingtoimpacttheremotecontrol.
• Donotspillwaterorliquidontheremotecontrol.
• Donotplacetheremotecontrolonawetobject.
• Donotplacetheremotecontrolunderdirectsunlightornearsources
ofexcessiveheat.
• Removethebatteryfromtheremotecontrolwhennotinusefora
longperiodoftime,ascorrosionorbatteryleakagemayoccurand
resultinphysicalinjury,and/orpropertydamage,and/orre.
• Whenthebatteryisexhausted,theremotecontrolwillnotfunction.

10
Remote control operation range
• The remote control sensor on the front unit is sensitive to the remote
control’s commands up to a maximum of 4 metres away and within a
maximum of 60° arc.
• Please note that the operating distance may vary depending on the
brightness of the room.
Connecting to the mains supply
• This unit is designed to operate with an AC power supply.
• Connecting the unit to any other power source may cause damage to
the unit. Unwind the mains cable to its full length. Connect the mains
plug to a mains socket. Make sure the mains plug is fully inserted into
the mains socket. The unit is now connected and ready to use.
• To switch the unit off completely, unplug the mains plug from the mains
socket.
Ensure all connections are connected to the mains power socket.
remote control operation range
t The remote control sensor on the front unit is sensitive to the remote control’s commands up
to a maximum of 4 metres away and within a maximum of 60° arc.
t Please note that the operating distance may vary depending on the brightness of the room.
30° 30°
Max. 4 m
Handling the Remote Control
t
t Do not drop the remote control.
t Do not allow anything to impact the remote control.
t Do not spill water or liquid on the remote control.
t Do not place the remote control on a wet object.
t Do not place the remote control under direct sunlight or near sources of excessive heat.
t Remove the battery from the remote control when not in use for a long period of time,
as corrosion or battery leakage may occur and result in physical injury, and/or property
t When the battery is exhausted, the remote control will not function.
12
BLUETOOTH
MEN U
MODE
battery replacement for the remote control
The remote control requires a LR6 1.5V AA/AM3 battery.
1. Open the battery cover.
2. Insert the supplied battery according to the direction indicated in the battery compartment.
When inserting or removing the battery, push it towards the (–) battery terminals.
3. Close the cover.
Handling the Battery
t Improper or incorrect use of batteries may cause corrosion or battery leakage, which could
t Install the battery correctly in the battery compartment. Normally the battery’s positive
polarity (+) will face up.
t Use only the battery type indicated in this manual.
t Do not dispose of the used battery as domestic waste. Dispose of it in accordance with
local regulations.
t Small button cell batteries such as the one used in the remote control are easily swallowed
by young children and this is dangerous. Keep loose button cells away from young children
and make sure that the battery is secure in the remote control. Seek medical advice if you
believe a battery cell has been swallowed.
11

11
General operation
powering ON/OFF
Whenyourstconnecttheunittothemainssocket,displaywillshowthe
“Scan Time 00:00:00” and synchronize to the current local time if you can
receive a DAB signal in your lopcation. After approximate one minute, it will
switch to STANDBY mode.
• Press⏻on the unit or press ON/STAND-By on the remote control to
switch the unit to ON mode.
• Press ⏻to switch the unit back to STANDBY mode.
• Disconnect the mains plug from the mains socket if you want to switch
the unit off completeley.
Selecting modes
Press MODE repeatedly on the unit or press CD, USB, TUNER/DAB,
AUDIO IN, BLUETOOTH on the remote to switch between DAB, FM, CD,
USB, AUX and Bluetooth modes.
Adjusting the volume
• Turn the VOLUME +/– dial on the unit or press VOL +/– on the remote
control to adjust the volume.
• If you wish to turn the sound off, press MUTE on the remote control.
Press MUTE again or press VOL +/– on the remote control or turn VOL-
UME +/– to resume normal listening.
Auto setting the clock
The clock can be updated automatically if you can receive a DAB signal
in your location. In order to synchronise to the current local time you must
leave it on the DAB station for a short period of time.
Manually setting the time
1. During Standby mode, press and hold CLOCK on the remote control.
Thehourdigitsashonthedisplay.
2. Press I◄◄ I ►► to adjust the hour digits, and then press CLOCK to
conrm.Theminutedigitswillashonthedisplay.
3. Press I◄◄ I ►► to adjust the minute digits, and then press CLOCK to
conrm.
4. The time is now set.
general operation
powering ON/OFF
Scan Time
00:00:00” and synchronize to the current local time if you can receive a DAB signal in your
location. After approximate one minute, it will switch to STANDBY mode.
tPress on the unit or press ON/STAND-BY on the remote control to switch the unit to
ON mode.
t Press to switch the unit back to STANDBY mode.
t
completely.
t When the unit is idle for approximately 15 minutes, it will automatically switch to standby.
t
selecting modes
Press MODE repeatedly to switch between DAB, FM, CD, USB, AUX and Bluetooth modes.
adjusting the volume
t Turn the VOLUME +/– dial on the unit or press VOLUME +/– on the remote control to
adjust the volume.
t MUTE on the remote control. Press MUTE again
or press VOLUME +/– on the remote control or turn VOLUME +/– to resume normal
listening.
auto setting the clock
The clock can be updated automatically if you can receive a DAB signal in your location.
In order to synchronise to the current local time you must leave it on the DAB station for a
short period of time.
manually setting the time
1. During Standby mode, press and hold CLOCK on the remote control. The hour digits
2. Press to adjust the hour digits, and then press CLOCK
3. Press to adjust the minute digits, and then press CLOCK
4. The time is now set.
15
MODE repeatedly on the unit or press
CD, USB, TUNER/DAB, AUDIO IN,
BLUETOOTH on the remote
• When the unit is idle for approximately 15 minutes, it will
automatically switch to standby.
• Please turn the unit off completely to save when not in use.

12
Setting the daily timer
1. Press and hold TIMER on the remote control
until the display shows “On Timer”, and the hour
digitsash.
2. Press I◄◄ I ►► to adjust the hour digits, and
then press TIMERtoconrm.Theminutedigits
willashonthedisplay.
3. Press I◄◄ I ►► to adjust the minute digits, and
then press TIMERtoconrm.
4. when On Timer Clock set, the display will show
“OffTimer”andthehourdigitswillash.
5. Press I◄◄ I ►► to adjust the hour digits, and
then press TIMERtoconrm.Themunitedigits
willashonthedisplay.
6. Press I◄◄ I ►► on the remote control to adjust
the minute digits, and then press TIMER to
conrm.
7. Finally Press I◄◄ I ►► to select DAB, FM,
DICS or USB mode, then press TIMER to
conrm.Thedisplaywillshow“VOL#”andash.PressI◄◄ I ►► to
adjust the volume, and then press TIMERtoconrm.
8. Press TIMER to select "Timer On", wait for a while “◷”icon will show on
the display to indicator the timer is on.
9. The Timer setting is now complete.
To cancel the daily timer
Press TIMER on the remote control repeatedly to select Timer Off mode.
The “◷” indicator will disappear from the display.
Setting the sleep timer
Use the sleep timer to turn the system off after a certain number of minutes
in play mode. By setting the sleep timer, you can fall asleep to music and
know that your system will turn off by itself rather than play all night.
1. To set the sleep timer press SLEEP on the remote control repeatedly
to view the different timer settings. The number of minutes shown will
display in this sequence:
general operation
powering ON/OFF
Scan Time
00:00:00” and synchronize to the current local time if you can receive a DAB signal in your
location. After approximate one minute, it will switch to STANDBY mode.
tPress on the unit or press ON/STAND-BY on the remote control to switch the unit to
ON mode.
t Press to switch the unit back to STANDBY mode.
t
completely.
t When the unit is idle for approximately 15 minutes, it will automatically switch to standby.
t
selecting modes
Press MODE repeatedly to switch between DAB, FM, CD, USB, AUX and Bluetooth modes.
adjusting the volume
t Turn the VOLUME +/– dial on the unit or press VOLUME +/– on the remote control to
adjust the volume.
t MUTE on the remote control. Press MUTE again
or press VOLUME +/– on the remote control or turn VOLUME +/– to resume normal
listening.
auto setting the clock
The clock can be updated automatically if you can receive a DAB signal in your location.
In order to synchronise to the current local time you must leave it on the DAB station for a
short period of time.
manually setting the time
1. During Standby mode, press and hold CLOCK on the remote control. The hour digits
2. Press to adjust the hour digits, and then press CLOCK
3. Press to adjust the minute digits, and then press CLOCK
4. The time is now set.
15
MODE repeatedly on the unit or press
CD, USB, TUNER/DAB, AUDIO IN,
BLUETOOTH on the remote
If you cannot received any DAB signal, you can manually set the
time. Once DAB signal is received, the time will be automatically
updated.
If you cannot received any DAB signal, you can manually set the time. Once DAB signal is
received, the time will be automatically updated.
setting the daily timer
1. Press and hold TIMER on the remote control until the
2. Press to adjust the hour digits, and then press
TIMER
display.
3. Press to adjust the minute digits, and then press
TIMER
4.
5. Press to adjust the hour digits, and then press
TIMER
display.
6. Press on the remote control to adjust the minute
digits, and then press TIMER
7. Finally Press to select DAB, FM, DISC or USB mode,
then press TIMER
to adjust the volume, and then
press TIMER
9. The Timer setting is now complete.
8. Press TIMER to select "Timer On",wait for a while “ ” icon will show on the display to
indicator the timer is on.
to cancel the daily timer
Press TIMER on the remote control repeatedly to select mode. The “ ” indicator
will disappear from the display.
setting the sleep timer
By setting the sleep timer, you can fall asleep to music and know that your system will turn
1. To set the sleep timer press SLEEP on the remote control repeatedly to view the
90 80
OFF 10 20 30 40
70 60 50
2.
display will show “SLEEP #”, e.g. “SLEEP 10
10 minutes, “SLEEP 20
3. Press SLEEP
back to previous screen.
16

13
2. The system is now set to turn off after the number of minutes you have
set. The display will show “SLEEP #”, e.g. “SLEEP 10” means the unit
will switch itself off after 10 minutes, “SLEEP 20” means the unit will
switch itself off after 20 minutes, and so on.
3. Press SLEEP to show the reminding time till the unit switches off min-
utes and return back to previous screen.
4. To cancel the sleep timer press SLEEP repeatedly until “Sleep OFF”
shows on the display.
EQ control
the system supports a vafriety of equalizers and sound effects.
During playback, press EQ on the remote control to select a desired music
mode. Each time EQ is pressed, the music mode will change to the next
one as follows:
System reset
There may be times when you need to reset your unit back to the factory
settings especially when you have moved house. If you experience recep-
tion problems you may want to reset and try again. If you move to another
part of the country and pick up the local and national DAB stations in that
area, your previously tuned channels may no longer be available.
1. During DAB mode, open the CD Disk tray then
press and hold STOP on the unit until the
display show “Restarting… FACTORY RESET”.
2. When successful reset, it will back to DAB mode.
DAB operation
If the unit is connected to the mains power and then switched on from
standbyforthersttime,theunitwillautomaticallyenterintotheDAB
mode and perform auto scan function. During the scan the display will show
“Scanning…” together with a slide bar that indicates the progress of the
scan and the amount of stations that have been found so far.
If you cannot received any DAB signal, you can manually set the time. Once DAB signal is
received, the time will be automatically updated.
setting the daily timer
1. Press and hold TIMER on the remote control until the
2. Press to adjust the hour digits, and then press
TIMER
display.
3. Press to adjust the minute digits, and then press
TIMER
4.
5. Press to adjust the hour digits, and then press
TIMER
display.
6. Press on the remote control to adjust the minute
digits, and then press TIMER
7. Finally Press to select DAB, FM, DISC or USB mode,
then press TIMER
to adjust the volume, and then
press TIMER
9. The Timer setting is now complete.
8. Press TIMER to select "Timer On",wait for a while “ ” icon will show on the display to
indicator the timer is on.
to cancel the daily timer
Press TIMER on the remote control repeatedly to select mode. The “ ” indicator
will disappear from the display.
setting the sleep timer
By setting the sleep timer, you can fall asleep to music and know that your system will turn
1. To set the sleep timer press SLEEP on the remote control repeatedly to view the
90 80
OFF 10 20 30 40
70 60 50
2.
display will show “SLEEP #”, e.g. “SLEEP 10
10 minutes, “SLEEP 20
3. Press SLEEP
back to previous screen.
16
4. To cancel the sleep timer press SLEEP repeatedly until “Sleep OFF” shows on
the display.
EQ control
During playback, press EQ on the remote control to select a desired music mode. Each time
EQ is pressed, the music mode will change to the next one as follows:
FLAT ROCKCLASSIC JAZZPOP
system reset
There may be times when you need to reset your unit back to the factory settings especially
when you have moved house. If you experience reception problems you may want to reset
and try again. If you move to another part of the country and pick up the local and national
DAB stations in that area, your previously tuned channels may no longer be available.
1. During DAB mode, open the CD Disk tray then press and
hold STOP on the unit until the display show “Restarting…
FACTORY RESET”.
2. When successful reset, it will back to DAB mode.
After the system reset, all the tuned stations, FM/DAB preset
stations will be erased.
17
Restarting . . .
FACTORY RESET
general operation
powering ON/OFF
Scan Time
00:00:00” and synchronize to the current local time if you can receive a DAB signal in your
location. After approximate one minute, it will switch to STANDBY mode.
tPress on the unit or press ON/STAND-BY on the remote control to switch the unit to
ON mode.
t Press to switch the unit back to STANDBY mode.
t
completely.
t When the unit is idle for approximately 15 minutes, it will automatically switch to standby.
t
selecting modes
Press MODE repeatedly to switch between DAB, FM, CD, USB, AUX and Bluetooth modes.
adjusting the volume
t Turn the VOLUME +/– dial on the unit or press VOLUME +/– on the remote control to
adjust the volume.
t MUTE on the remote control. Press MUTE again
or press VOLUME +/– on the remote control or turn VOLUME +/– to resume normal
listening.
auto setting the clock
The clock can be updated automatically if you can receive a DAB signal in your location.
In order to synchronise to the current local time you must leave it on the DAB station for a
short period of time.
manually setting the time
1. During Standby mode, press and hold CLOCK on the remote control. The hour digits
2. Press to adjust the hour digits, and then press CLOCK
3. Press to adjust the minute digits, and then press CLOCK
4. The time is now set.
15
MODE repeatedly on the unit or press
CD, USB, TUNER/DAB, AUDIO IN,
BLUETOOTH on the remote
After the system reset, all the tuned stations, FM/DAB preset
stations will be erased.

14
Oncethescanhasnishedtheunitwillselecttherstalphanumerically
found station. to explore the found stations, press I◄◄ I ►►.
Full scan
The full scan will search for the entire DAB Band III channels. After the
scanhasnished,therstalphanumericallyfoundstationwillbeautomati-
cally selected.
1. To activate auto scan, press ►/II/SCAN and the display will show
“Scanning … ” and a progressing slide bar.
2. All the stations that have been found will be
stored automatically. To explore and listen to
the found stations, press I◄◄ I ►► to select.
ThenpressENTERconrmintostations.
Manual tuning
As well as the auto tune function, you can manually tune the receiver. This
can help you when aligning your aerial or when adding stations that were
missed while auto tuning.
1. Press ENTER to select Manual tune.
2. Press I◄◄ I ►► to cycle through the DAB
channels, which are numbered from 5A to 13F.
3. After your desired channel number is selected,
press ENTERtoconrm.Thedisplaywillshow
the multiplex.
4. Press MENU again to add selected channel to station list.
Secondary services
You may see a “>” symbol after the name of the station, this indicates that
there are secondary services available to that station. These secondary
services contain extra services that are related to the primary station. e.g. a
sports station may want to add extra commentaries. The secondary ser-
vices are inserted directly after the primary station in the station list.
To select the secondary station, press MENU when the “>” appears in the
display before the station name. When the secondary service ends, the unit
will automatically switch back to the primary station.
Preset stations
You can store up to 30 of your favourite stations to the memory. This will
enable you to access your favourite stations quickly and easily.
1. Tostoreaprset,youmustrstgbedlisteningtothestationthatyou
would like to save, press and hold MEMORY. The display will show
“Preset Store <#: (Empty)>”.
DAB operation
time, the unit will automatically enter into the DAB mode and perform auto scan function.
During the scan the display will show “Scanning… ” together with a slide bar that
indicates the progress of the scan and the amount of stations that have been found so far.
explore the found stations, press .
full scan
1. To activate auto scan, press /SCAN and the display will
show “Scanning … ” and a progressing slide bar.
2. All the stations that have been found will be stored
automatically. To explore and listen to the found stations,
press to select.Then press ENTER conrm into stations.
manual tuning
As well as the auto tune function, you can manually tune the receiver. This can help you
when aligning your aerial or when adding stations that were missed while auto tuning.
1. Press MENU to display the menu.
2. Press to cycle through the DAB channels, which are
numbered from 5A to 13F.
3. After your desired channel number is selected, press
ENTER to conrm. The display will show the multiplex.
4. Press MENU again to add selected channel to station list.
secondary services
You may see a “>” symbol after the name of the station, this indicates that there are
secondary services available to that station. These secondary services contain extra
services that are related to the primary station. e.g. a sports station may want to add extra
commentaries. The secondary services are inserted directly after the primary station in the
station list.
To select the secondary station, press MENU when the “>” appears in the display before
the station name. When the secondary service ends, the unit will automatically switch
back to the primary station.
18
DAB
< Manual tune >
Manual tune
< 5A 174 928MHz >
MENU on the remote
Press ENTER to select Manual tune.

15
2. Press PRESET to select your desired preset station number.Then press
ENTERconrm.
3. The station will be stored in few seconds and the screen will then show
“Preset # Stored“.
Recalling a stored station
1. Once you have saved a station to one of the preset buttons, you can
recall it by pressing MEMORY.
2. Press PRESET until your desired station show on the display; Then
pressENTERconrmintostations.
DAB display modes
Press DISPLAY on the remote control, the display will switch through the
following display modes.
The information of each display mode is displayed on the lower segment of
the display.
Ensemble
This displays the name of the multiplex that con-
tains the station you are listening to. A multiplex is
a collection of radio stations that are bundled and
transmitted on one frequency. There are national
and local multiplexes. Local ones contain stations
thatarespecictothatarea.
Signal Strength
This shows a slide bar to indicate the signal
strength, the stronger the signal, the longer the bar
will be from left to right.
Time / Date
This displays the current time and date provided automatically by the
broadcaster.
general operation
powering ON/OFF
Scan Time
00:00:00” and synchronize to the current local time if you can receive a DAB signal in your
location. After approximate one minute, it will switch to STANDBY mode.
tPress on the unit or press ON/STAND-BY on the remote control to switch the unit to
ON mode.
t Press to switch the unit back to STANDBY mode.
t
completely.
t When the unit is idle for approximately 15 minutes, it will automatically switch to standby.
t
selecting modes
Press MODE repeatedly to switch between DAB, FM, CD, USB, AUX and Bluetooth modes.
adjusting the volume
t Turn the VOLUME +/– dial on the unit or press VOLUME +/– on the remote control to
adjust the volume.
t MUTE on the remote control. Press MUTE again
or press VOLUME +/– on the remote control or turn VOLUME +/– to resume normal
listening.
auto setting the clock
The clock can be updated automatically if you can receive a DAB signal in your location.
In order to synchronise to the current local time you must leave it on the DAB station for a
short period of time.
manually setting the time
1. During Standby mode, press and hold CLOCK on the remote control. The hour digits
2. Press to adjust the hour digits, and then press CLOCK
3. Press to adjust the minute digits, and then press CLOCK
4. The time is now set.
15
MODE repeatedly on the unit or press
CD, USB, TUNER/DAB, AUDIO IN,
BLUETOOTH on the remote
the stored stations will be saved into the memory and power off will
not erase it. Storing a new station into a preset location will erase
the previously stored station in that location.
DAB display modes
Press DISPLAY on the remote control, the display will switch through the following display
modes.
The information of each display mode is displayed on the lower segment of the display.
Ensemble
This displays the name of the multiplex that contains
the station you are listening to. A multiplex is a
collection of radio stations that are bundled and
transmitted on one frequency. There are national
and local multiplexes. Local ones contain stations
DAB – unlike normal radio, groups together
several radio stations and transmits them on one
frequency.
Signal Strength
This shows a slide bar to indicate the signal strength,
the stronger the signal, the longer the bar will be
from left to right.
Time / Date
This displays the current time and date provided
automatically by the broadcaster.
DLS (Dynamic Label Segment)
Dynamic label segment is a scrolling message
that the broadcaster may include with their
transmissions. The message usually includes
information, such as programme details etc.
Programme Type
This describes the “style” or “genre” of the
programme that is being broadcast.
Audio Bit Rate
The display will show the digital audio bit rate being
received.
Frequency
This displays the frequency of the present station,
such as “11C 220.352MHz”.
Ensemble
Signal Strength
Frequency
Audio Bit Rate
Time / Date
DLS
Programme Type
20
general operation
powering ON/OFF
Scan Time
00:00:00” and synchronize to the current local time if you can receive a DAB signal in your
location. After approximate one minute, it will switch to STANDBY mode.
tPress on the unit or press ON/STAND-BY on the remote control to switch the unit to
ON mode.
t Press to switch the unit back to STANDBY mode.
t
completely.
t When the unit is idle for approximately 15 minutes, it will automatically switch to standby.
t
selecting modes
Press MODE repeatedly to switch between DAB, FM, CD, USB, AUX and Bluetooth modes.
adjusting the volume
t Turn the VOLUME +/– dial on the unit or press VOLUME +/– on the remote control to
adjust the volume.
t MUTE on the remote control. Press MUTE again
or press VOLUME +/– on the remote control or turn VOLUME +/– to resume normal
listening.
auto setting the clock
The clock can be updated automatically if you can receive a DAB signal in your location.
In order to synchronise to the current local time you must leave it on the DAB station for a
short period of time.
manually setting the time
1. During Standby mode, press and hold CLOCK on the remote control. The hour digits
2. Press to adjust the hour digits, and then press CLOCK
3. Press to adjust the minute digits, and then press CLOCK
4. The time is now set.
15
MODE repeatedly on the unit or press
CD, USB, TUNER/DAB, AUDIO IN,
BLUETOOTH on the remote
DAB – unlike normal radio, groups together
several radio stations and transmits them
on one frequency.

16
DLS (Dynamic Label Segment)
Dynamic label segment is a scrolling message that the broadcaster may
include with their transmissions. The message usually includes information,
such as programme details etc.
Programme Type
This describes the “style” or “genre” of the programme that is being broad-
cast.
Audio Bit Rate
The display will show the digital audio bit rate being received.
Frequency
This displays the frequency of the present station, such as “11C
220.352MHz”.
FM operation
Switching from DAB to FM mode
To switch the unit to FM mode, press MODE repeatedly to select FM mode.
The display will show the frequency.
Auto scan
Press SCAN/►/II until the tuner starts searching for a station. To scan
down the frequency band, press and hold SCAN/►/II. Once a station has
been found, the scanning will stop automatically.
Manual scan
To search for FM stations manually, press I◄◄ I ►► repeatedly until your
desired frequency is reached.
Audio mode
Press SELECT/MONO/ST. on the remote control to toggle between the
Stereo or Mono selection.
The search may not stop at a station with a very weak signal.
general operation
powering ON/OFF
Scan Time
00:00:00” and synchronize to the current local time if you can receive a DAB signal in your
location. After approximate one minute, it will switch to STANDBY mode.
tPress on the unit or press ON/STAND-BY on the remote control to switch the unit to
ON mode.
t Press to switch the unit back to STANDBY mode.
t
completely.
t When the unit is idle for approximately 15 minutes, it will automatically switch to standby.
t
selecting modes
Press MODE repeatedly to switch between DAB, FM, CD, USB, AUX and Bluetooth modes.
adjusting the volume
t Turn the VOLUME +/– dial on the unit or press VOLUME +/– on the remote control to
adjust the volume.
t MUTE on the remote control. Press MUTE again
or press VOLUME +/– on the remote control or turn VOLUME +/– to resume normal
listening.
auto setting the clock
The clock can be updated automatically if you can receive a DAB signal in your location.
In order to synchronise to the current local time you must leave it on the DAB station for a
short period of time.
manually setting the time
1. During Standby mode, press and hold CLOCK on the remote control. The hour digits
2. Press to adjust the hour digits, and then press CLOCK
3. Press to adjust the minute digits, and then press CLOCK
4. The time is now set.
15
MODE repeatedly on the unit or press
CD, USB, TUNER/DAB, AUDIO IN,
BLUETOOTH on the remote
With FM radio it may be necessary to ne tune each station by
pressing I◄◄ I ►► repeatedly. Each press/tap will adjust the
frequency by 0.05MHz. If reception is still poor adjust the position of
the aerial or try moving the radio to another location.

17
Preset stations
You can store up to 30 of your favourite stations to the memory. This will
enable you to access your favourite stations quickly and easily.
1. Tostoreapreset,youmustrstbelisteningtothestationthatyouwould
like to save, press and hold MEMORY. The display will show “Preset
Store <#: (Empty)>”.
2. Press PRESET to select your desired preset station number.Then
pressENTERconrm.
3. The station will be stored in few seconds and the screen will then show
“Preset # Stored“.
Recalling a stored station
1. Once you have saved a station to one of the preset buttons, you can
recall it by pressing MEMORY.
2. Press PRESET until your desired station show on the display; Then
pressENTERconrm.
FM display modes
Press DISPLAY on the remote control, the display will switch through the
following display modes.
The information of each display mode is displayed on the lower segment of
the display.
Radio Text
This is a scrolling message displaying information
about the current programme.
Programme Type
This describes the “style” or “genre” of the
programme that is being broadcast.
general operation
powering ON/OFF
Scan Time
00:00:00” and synchronize to the current local time if you can receive a DAB signal in your
location. After approximate one minute, it will switch to STANDBY mode.
tPress on the unit or press ON/STAND-BY on the remote control to switch the unit to
ON mode.
t Press to switch the unit back to STANDBY mode.
t
completely.
t When the unit is idle for approximately 15 minutes, it will automatically switch to standby.
t
selecting modes
Press MODE repeatedly to switch between DAB, FM, CD, USB, AUX and Bluetooth modes.
adjusting the volume
t Turn the VOLUME +/– dial on the unit or press VOLUME +/– on the remote control to
adjust the volume.
t MUTE on the remote control. Press MUTE again
or press VOLUME +/– on the remote control or turn VOLUME +/– to resume normal
listening.
auto setting the clock
The clock can be updated automatically if you can receive a DAB signal in your location.
In order to synchronise to the current local time you must leave it on the DAB station for a
short period of time.
manually setting the time
1. During Standby mode, press and hold CLOCK on the remote control. The hour digits
2. Press to adjust the hour digits, and then press CLOCK
3. Press to adjust the minute digits, and then press CLOCK
4. The time is now set.
15
MODE repeatedly on the unit or press
CD, USB, TUNER/DAB, AUDIO IN,
BLUETOOTH on the remote
The unit will automatically switch between stereo and mono mode,
but you can override this and switch this function manually. This is
helpful when receiving poor signal reception.
general operation
powering ON/OFF
Scan Time
00:00:00” and synchronize to the current local time if you can receive a DAB signal in your
location. After approximate one minute, it will switch to STANDBY mode.
tPress on the unit or press ON/STAND-BY on the remote control to switch the unit to
ON mode.
t Press to switch the unit back to STANDBY mode.
t
completely.
t When the unit is idle for approximately 15 minutes, it will automatically switch to standby.
t
selecting modes
Press MODE repeatedly to switch between DAB, FM, CD, USB, AUX and Bluetooth modes.
adjusting the volume
t Turn the VOLUME +/– dial on the unit or press VOLUME +/– on the remote control to
adjust the volume.
t MUTE on the remote control. Press MUTE again
or press VOLUME +/– on the remote control or turn VOLUME +/– to resume normal
listening.
auto setting the clock
The clock can be updated automatically if you can receive a DAB signal in your location.
In order to synchronise to the current local time you must leave it on the DAB station for a
short period of time.
manually setting the time
1. During Standby mode, press and hold CLOCK on the remote control. The hour digits
2. Press to adjust the hour digits, and then press CLOCK
3. Press to adjust the minute digits, and then press CLOCK
4. The time is now set.
15
MODE repeatedly on the unit or press
CD, USB, TUNER/DAB, AUDIO IN,
BLUETOOTH on the remote
The stored stations will be saved into the memory and power off will
not erase it. Storing a new staion into a preset location will erase
the previously station in that location.
recalling a stored station
1. Once you have saved a station to one of the preset buttons, you can recall it by pressing
MEMORY.
2. Press PRESET until your desired station show on the display; Then press ENTER
conrm.
a new station into a preset location will erase the previously stored station in that location.
FM display modes
Press DISPLAY on the remote control, the display will switch through the following display
modes.
The information of each display mode is displayed on the lower segment of the display.
Radio Text
This is a scrolling message displaying information
about the current programme.
Programme Type
This describes the “style” or “genre” of the
programme that is being broadcast.
Station Name
This displays the station name.
Audio Type
This displays if the station being received is in mono
or stereo.
Radio Text
Programme Type
Station Name
Audio Type
22

18
Station Name
This displays the station name.
Audio Type
This displays if the station being received is in mono or stereo.
Compatible disc types
CD operation
Press MODE repeatedly on the unit or press CD on the remote to select
CD mode.
Playback
1. Press “▲open/close ” to open the disc tray.
2. Place the CD with the label side up into the CD compartment, and then
press “▲open/close ” to close the disc tray.
3. If there is no disc or the disc can’t be read, “NO DISC” or “Unknown
Disc” will show on the display.
4. The total number of tracks will display on the display, then press
SCAN/►/IItoplaythersttrackoftheCD/MP3discautomatically.
• This unit can play CD, CD-R, CD-RW disc, 8cm.
To pause playback
1. Press SCAN/►/II to pause the playback.
2. To resume playback, press SCAN/►/II again.
To stop playback
Press ■to stop playback.
Skipping to another track
• Press I◄◄ I ►► to skip backwards to the beginning of the track or previ-
ous track or skip forwards to the next track.
• Press and hold I◄◄ I ►► to perform fast forward/reverse playback.
compatible disc types
Disc Types Disc Logo Recorded Content
CD-R (CD Recordable) AUDIO
CD-RW (CD-Rewritable) AUDIO
AUDIO-CD (Compact Disc Digital Audio) AUDIO
CD operation
Press MODE repeatedly to select CD mode.
playback
1. Press “ open/close ” to open the disc tray.
PUSH OPEN/CLOSE
2. Place the CD with the label side up into the CD compartment, and then press
“ open/close ” to close the disc tray.
3. If there is no disc or the disc can’t be read, “NO DISC” or “Unknown Disc” will show on
the display.
4. The total number of tracks will display on the display, then press SCAN/ to play the
t This unit can play CD, CD-R, CD-RW disc, 8cm.
to pause playback
1. Press SCAN/ to pause the playback.
2. To resume playback, press SCAN/ again.
to stop playback
Press to stop playback.
skipping to another track
t Press to skip backwards to the beginning of the track or previous track or skip
forwards to the next track.
t Press and hold to perform fast forward/reverse playback.
23
MODE repeatedly on the unit
or press CD on the remote

19
Repeat playback
1. During stop or playback mode, press REPEAT
once on the remote control, “REP_ONE” will
show on the display. The CD will play the
current track repeatedly.
2. Press REPEAT twice, “REP_ALL“ will show
on the display. The CD will play all tracks
repeatedly.
3. Press REPEAT once more again, the REPEAT function will turn off
Random playback
All tracks on the disc can be played in a random
order.
1. During playback mode, press RANDOM on the
remote control. The “RANDOM” indicator will show on the display.
All tracks will be played randomly.
2. Press I◄◄ I ►► to playback the next random track.
3. After all the tracks have played once, the playback will stop
automatically.
4. To cancel random playback, press RANDOM during RANDOM
playback. Normal playback will resume.
Programme setting
User can program up to 32 tracks in CD mode or 64 tracks in MP3 in any
desired order. Programme mode is activated while in STOP mode.
1. Press MEMORY to enter programme mode.
2. Press I◄◄ I ►► to select the track that you
want to preset.
3. Press MEMORYtocornrmthetrack.
4. Repeat steps 2-3 to programme more tracks. Once it is completed,
press SCAN/►/II to start playback of the programmed tracks.
Programme cancel
Press ■twice, or open the disk tray and close it again to erase the memory.
Intro playback
During playback mode
• During playback mode,press INTRO on the remote control. The
“INTRO”indicatorwillshowonthedisplay.Theunitwillplaytherst10
seconds of each track.
• Press INTRO on the remote control again to resume normal playback.
repeat playback
1. During stop or playback mode,press REPEAT once on the
remote control, “REP_ONE”will show on the display. The
CD will play the current track repeatedly.
2. Press REPEAT twice, “REP_ALL“ will show on the display.
The CD will play all tracks repeatedly.
3. Press REPEAT once more again, the REPEAT function will
random playback
All tracks on the disc can be played in a random order.
1. During stop or playback mode, press RANDOM on the
remote control. The “RANDOM” indicator will show on the
display. All tracks will be played randomly.
2. Press to playback the next random track.
3. After all the tracks have played once, the playback will stop
automatically.
4. To cancel random playback, press RANDOM during
RANDOM playback. Normal playback will resume.
programme setting
User can program up to 32 tracks in CD mode or 64 tracks in MP3 in any desired order.
Programme mode is activated while in STOP mode.
1. Press MEMORY to enter programme mode.
2. Press to select the track that you want to preset.
3. Press MEMORY
4. Repeat steps 2-3 to programme more tracks. Once it
is completed, press SCAN/ to start playback of the
programmed tracks.
programme cancel
Press twice, or open the disk tray and close it again to erase the memory.
intro playback
During playback mode
t During playback mode,press INTRO on the remote control. The “INTRO” indicator will show
on the display. The unit will play the rst 10 seconds of each track.
t Press INTRO on the remote control again to resume normal playback.
24

20
Bluetooth® operation
The unit has a Bluetooth function that can receive a signal within 8 metres.
Pairing the unit with a Bluetooth device to listen to music:
1. While in the ON mode, press MODE repeatedly on the unit or press
BLUETOOTH on the remote to select Bluetooth mode.
2. IftheunitisnotpairedwithanyBluetoothdevice,thedisplaywillash
“BT LINK”.
3. Activate your Bluetooth device and select the search mode.
4. “BT speaker N” will appear on your Bluetooth device list.
5. Select “BT speaker N” and enter “0000” for the password if necessary.
6. To disconnect the Bluetooth function, switch to another function on the
unit or disable the function from your Bluetooth device.
USB operation
1. When a USB device is connected to the unit, press MODE repeatedly
on the unit or press USB on the remote to select USB mode.
2. The unit will automatically display the total number of tracks.
3. All playback features are the same as if you were playing an MP3 CD.
general operation
powering ON/OFF
Scan Time
00:00:00” and synchronize to the current local time if you can receive a DAB signal in your
location. After approximate one minute, it will switch to STANDBY mode.
tPress on the unit or press ON/STAND-BY on the remote control to switch the unit to
ON mode.
t Press to switch the unit back to STANDBY mode.
t
completely.
t When the unit is idle for approximately 15 minutes, it will automatically switch to standby.
t
selecting modes
Press MODE repeatedly to switch between DAB, FM, CD, USB, AUX and Bluetooth modes.
adjusting the volume
t Turn the VOLUME +/– dial on the unit or press VOLUME +/– on the remote control to
adjust the volume.
t MUTE on the remote control. Press MUTE again
or press VOLUME +/– on the remote control or turn VOLUME +/– to resume normal
listening.
auto setting the clock
The clock can be updated automatically if you can receive a DAB signal in your location.
In order to synchronise to the current local time you must leave it on the DAB station for a
short period of time.
manually setting the time
1. During Standby mode, press and hold CLOCK on the remote control. The hour digits
2. Press to adjust the hour digits, and then press CLOCK
3. Press to adjust the minute digits, and then press CLOCK
4. The time is now set.
15
MODE repeatedly on the unit or press
CD, USB, TUNER/DAB, AUDIO IN,
BLUETOOTH on the remote
• If the signal strength is weak, your Bluetooth receiver may
disconnect, but it will re-enter pairing mode automatically.
• For better signal reception, remove any obstacles between the
unit and the Bluetooth device.
• TheunitsupportsA2DP(AdvancedAudioDistgributionProle)
andAVRCP(AudioVideoRemoteControlProle)functions.
This can only be paired with one Bluetooth device at one time.
• Compatibility with all devices and media types is not guaranteed.
• Some mobile phones with the Bluetooth funtion may connect
and disconnect as you make and end calls. This is not an
indication of a problem with your unit.
battery replacement for the remote control
The remote control requires a LR6 1.5V AA/AM3 battery.
1. Open the battery cover.
2. Insert the supplied battery according to the direction indicated in the battery compartment.
When inserting or removing the battery, push it towards the (–) battery terminals.
3. Close the cover.
Handling the Battery
t Improper or incorrect use of batteries may cause corrosion or battery leakage, which could
t Install the battery correctly in the battery compartment. Normally the battery’s positive
polarity (+) will face up.
t Use only the battery type indicated in this manual.
t Do not dispose of the used battery as domestic waste. Dispose of it in accordance with
local regulations.
t Small button cell batteries such as the one used in the remote control are easily swallowed
by young children and this is dangerous. Keep loose button cells away from young children
and make sure that the battery is secure in the remote control. Seek medical advice if you
believe a battery cell has been swallowed.
11
• TheunitcanonlyplayMP3leformatinUSBoperation.
• IfyourUSBdeviceisloadedwithMP3’sbutthedisplaykeeps
showing“NO”onthedisplay,theformatofyourdevicemightnotbe
compatiblewiththeunit.
• ThisunitsupportsUSBversions1.1and2.0.
• TheunitcansupportUSBdeviceswithupto32GBofmemory.
• TheunitmaynotbecompatiblewithallUSBdevicesandmemory
cards,thisisnotanindicationofaproblemwiththeunit.
Other manuals for DA310
2
Table of contents
Other Scansonic Stereo System manuals