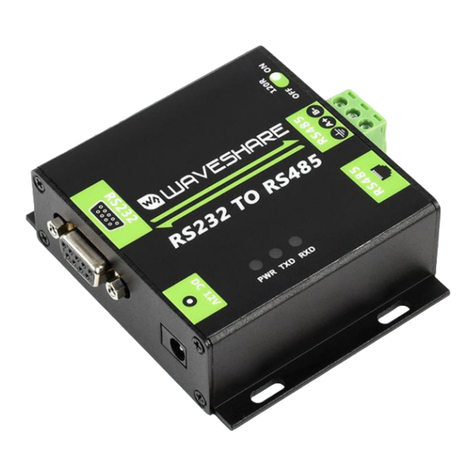
Waveshare RS485 TO ETH User manual

485 TO ETH (B) User Manual
2/36 www.waveshare.com
CONTENTS
1. Overview.................................................................................................................................3
2. JSON simple example.............................................................................................................3
2.1. Modbus RTU to JSON....................................................................................................... 3
2.2. Modbus table....................................................................................................................3
2.3. Device configuration........................................................................................................ 4
2.4. Create a new Modbus analog meter............................................................................ 10
3. JSON complex example....................................................................................................... 11
3.1. Enable NTP..................................................................................................................... 11
3.2. Nested JSON design....................................................................................................... 11
3.3. Read the bits of the byte register................................................................................. 13
3.4. 01 and 02 function codes...............................................................................................14
3.5. Show design results....................................................................................................... 15
3.6. Excel editing................................................................................................................... 16
3.7. Brackets and arrays........................................................................................................17
3.8. Cannot read and clear....................................................................................................21
3.9. Device offline................................................................................................................. 22
3.10. Pan and zoom...............................................................................................................23
3.11. Data change reporting................................................................................................. 23
3.12. JSON issuance...............................................................................................................24
3.13. 645 Timing of the agreement......................................................................................25
4. JSON to Modbus RTU...........................................................................................................26
5. MQTT.................................................................................................................................... 28
5.1. Device configuration......................................................................................................28
5.2. Data Test.........................................................................................................................33
6. MQTT+JSON to Modbus RTU.............................................................................................. 34
7. HTTP POST/GET+JSON....................................................................................................34

485 TO ETH (B) User Manual
3/36 www.waveshare.com
1. OVERVIEW
MQTT and JSON can be used alone or together. Among them, JSON supports Modbus
convert RTU format to JSON format.
The Main FEATURES:
1. Use the MQTT-based protocol to establish a connection with the server, and use the form
of subscription to publish data communication.
2. Support independent design and automatic collection of Modbus RTU registers.
3. Support the conversion of specific Modbus register content into JSON format and send it
regularly and actively.
4. Support adding device ID, time, and any string in JSON format.
5. Support nested writing method in JSON format.
6. Support NTP protocol, get the time automatically.
7. Support unsigned data and signed data, support decimal point representation, and
support 4-byte length data.
8. All configurations can be completed in interface configuration, and the user's independent
configuration does not need to be customized.
9. In addition to choosing MQTT, the protocol can support HTTP POST and GET methods.
2. JSON SIMPLE EXAMPLE
2.1. MODBUS RTU TO JSON
Modbus RTU to JSON can realize automatic collection of Modbus RTU tables, and
follow
The JSON format is automatically uploaded to the cloud server.
Here we explain this usage through a specific case.
2.2. MODBUS TABLE
Suppose there is a Modbus table with a function code of 3 and an address of 1. Its
register addresses and parameter names are as follows. Where the byte length is 4, it means
that 2 registers need to be read continuously.

485 TO ETH (B) User Manual
4/36 www.waveshare.com
Register
address
Parameter name
Byte
length
Remarks
0
Current total active
energy
4
Unsigned,keep 2 decimal
places
97
Phase A voltage
2
Unsigned, 1 decimal place is
reserved
98
Phase B voltage
2
99
Phase C voltage
2
100
Phase A current
2
Unsigned, 2 decimal place is
reserved
101
Phase B current
2
102
Phase C current
2
119
Frequency
2
356
A phase active power
4
Unsigned, 3 decimal place is
reserved
358
B phase active power
4
360
C phase active power
4
362
Total active power
4
The so-called signed means that the highest bit of 2 bytes or 4 bytes is the sign bit, for
example, 0xFFFF will be recognized as -1. Keeping 2 decimal places means that after the data
is converted as an integer, the decimal point moves from the rightmost to the left2 digits.
2.3. DEVICE CONFIGURATION
We configure the device as a client.
Use the serial port tool to monitor a TCP server on port 1883 of the local computer.

485 TO ETH (B) User Manual
5/36 www.waveshare.com
Figure 1 Socket simulated server receiving data
Use Vircom to configure the device.
Figure 2 Device configuration
Click Modify configuration to connect the device to the SocketDlgTest tool. Enter device
editing again dialog box. Click the "Firmware and Configuration" button.

485 TO ETH (B) User Manual
6/36 www.waveshare.com
Figure 3 Download interface
First click "Web Directory Download" to enter the configuration download mode. Then
select a new empty directory, such as the MQTTHTTPD directory. To prevent the previous
design from remaining, please click the "Clear All" button first, so that the previous design
content can be cleared. The design file will be saved in this directory and can be downloaded
to the device by clicking the "download" button later.
Click the "JSON Configuration" button.
Figure 4 JSON configuration main interface

485 TO ETH (B) User Manual
7/36 www.waveshare.com
The parameters here are as follows:
1. Server upload time: The default JSON data is sent to the server every time. The server is
the destination IP set in the device configuration interface just now, and the unit is
milliseconds.
2. Add/View: After clicking, you can design every JSON node, or you can view the currently
designed content.
3. Delete all: Delete all Modbus registers designed by the "Add/View" button to facilitate the
restart of the design.
4. Save JSON settings: After the design is completed, only click this button to save the data
to the download directory just now, and then download it to the inside of the device.
Now click the "Add/View" button. For the first row of the previous Modbus table:
Register
address
Parameter name
Byte
length
Remarks
0
Current total active
energy
4
Unsigned,keep 2 decimal
places
The corresponding configuration is as follows:
Figure 5 Register settings

485 TO ETH (B) User Manual
8/36 www.waveshare.com
The parameters here are as follows:
1. The figure below shows the first JSON keyword: "1." here means the first few JSON
keywords of the current design interface, if the second one is "2.", if it is a node nested
under the second JSON That is "2.1", and so on.
2. Already added: If it is checked, it means it has been added. When viewing the configured
information, a check will appear, indicating that it is in the editing state. If there is an
unchecked one, it is in the added state.
3. Corresponding JSON keyword: the name of this JSON node.
4. Data source: select the source of JSON data
a) Modbus RTU: For example, in the form of CurrentW: 123.45, it means that the data
comes from a certain Modbus RTU table and is collected through the serial port. The left
half of the figure is related to the design of Modbus RTU parameters.
b) Fixed string: For example, in the form of DevName: "MyDev", enter MyDev in the fixed
string on the right, and the JSON name is DevName, so that a fixed string of JSON nodes
can be generated.
c) Device ID: If the JSON node name is DevID, the string of the sent node is DevID:
"285301020304", where "285301020304" is the MAC address or unique number of the
device.
d) Current time: If the JSON node name is ColletTime, the uploaded string is ColletTime:
"2019-05-13 22:23:31". The time is the time obtained by the system through the NTP
protocol.
e) Embedding JSON: If the node name is Alarm, the format of its upload has
Alarm: {temp1: "25.1", temp2: "26.2"}, that is, the content of Alarm is still a JSON
collection
5. Modbus related settings
a) Slave address: Modbus table address.
b) Modbus function code: currently supports 03 and 04 function codes.
c) Register address: the corresponding 0 here.
d) Data length: This corresponds to 4 bytes.
e) Data format: This corresponds to an unsigned integer.
f) Keep the decimal point: 2 digits are reserved here.

485 TO ETH (B) User Manual
9/36 www.waveshare.com
g) Increase the unit after the data: For example, when "CurrentW": 25.6W, the W behind
25.6 is the large unit to increase. Write "W" into this box.
h) Add quotation marks to the data: if checked, change "CurrentW": 25.6W to "CurrentW":
"25.6W" form.
i) Serial port polling time: here is set to 100ms. Refers to the polling of this register and
the next register instead of the polling interval for this command.
6. Fixed string: When the source is selected as a fixed string, you can enter the content of
the string.
7. Button
a) Nested JSON: When the current node source is selected as "nested JSON" type, you
must click this button to enter the design of nested JSON, if it is currently "2.", it will enter
the design of the node "2.1" .
b) Return to the previous level: If the current node is nested at the Nth level, clicking this
button will return to the design of the N-1 level node and stay on a new node at the N-1
level.
c) Design the next one: Click to enter the next local JSON node. If there is no next node in
the previous design, the "Already Added" checkbox will be cancelled, indicating that it is a
new node.
d) Save the design: After completing the design, click "Save Design" at the last design node
interface. Then return to the main interface, and then click "Save JSON Configuration".
e) Cancel design: cancel all current designs, if you are viewing the design content, you can
click this button to exit
Here, click the "Design Next" button to continue designing other registers in the
Modbus table. After all the registers in the form are designed, click "Finish Design", and then
click "Save JSON Configuration" to exit. Then click the "download button" on the "download
web" page

485 TO ETH (B) User Manual
11 /36 www.waveshare.com
The test result shows that the meter simulated by the Modbus slave tool can be
collected by the gateway. at the same time,it can be sent to the server software simulated
by SocketDlgTest according to the json format regularly.
3. JSON complex example
3.1. ENABLE NTP
In order to be able to use JSON with time, you must first enable the NTP function of the
device. The NTP function can get the current time through the network.
In the web download directory, which is the directory where httpd.txt is located, create
an empty txt file with the content as down:
[NTP]
NTP_SERVER1=a1.a2.a3.a4
NTP_SERVER2=b1.b2.b3.b4
NTP_SERVER3=c1.c2.c3.c4
RE_ARUIRE_TIME=0
NTP_SERVER1, NTP_SERVER2, NTP_SERVER3 are the IP of the NTP time server
Address, fill in according to the actual situation. Up to 3 servers can be set up, but you must
NTP_SERVER1 starts to write, if there is only one, write NTP_SERVER1, if there are only two,
write
NTP_SERVER1 and NTP_SERVER2.
After saving, ntp.txt and other files are downloaded to the inside of the device.
3.2. NESTED JSON DESIGN
Suppose we need to design the following JSON:
{"header":{"DEVID":"285301020304",
"time":" 2019-05-13 22:23:31"},
"data": {"id":"MyData123456",
"alarm":{"alarm1":123.4C
"alarm2":567.8C
}
},

485 TO ETH (B) User Manual
12 /36 www.waveshare.com
"Value":2345
}
The design steps are as follows:
1. The keyword in step 1. is "header", then select "JSON Nesting" as the source, and then
click the "Design Nested JSON" button.
2. Enter step 1.1, here design "DEVID": "285301020304", enter the keyword as DEVID, select
"Device ID" as the source, and click "Design next".
3. Enter step 1.2, here design "time": "2019-05-13 22:23:31", enter the key word as time,
select "current time" as the source, it should be noted that although the first level has
been designed Finished, but you still need to click "Design Next". After entering step 1.3,
click "Return to the previous level". This 1.3 step will be automatically abandoned.
4. Go to step 2. Enter the keyword data here, then select "JSON Nesting" as the source, and
then click the "Design Nested JSON" button.
5. Go to step 2.1, here design "id": "MyData123456", enter the keyword id, select the source
as a fixed string, then enter "MyData123456" in the fixed string box, and click "Design
next".
6. Go to step 2.2, enter the keyword alarm here, select "JSON Nesting" as the source, and
then click the "Design Nested JSON" button.
7. Enter step 2.2.1 to design "alarm1": 123.4C, this is a Modbus data with unit, the function
code is 3, the register is 0, then the design is shown in the figure:
Figure 8 Register design

485 TO ETH (B) User Manual
13 /36 www.waveshare.com
Then click "Design Next".
8. Go to step 2.2.2 to design "alarm2": The method is similar to alarm1, and the register
address is set to 1. Similarly, first click "Design Next", and then in the "2.2.3" step, click
"Return to the previous level".
9. Enter section 2.3, because 2.3 does not need to be designed, click "return to previous
level" at this time. Because there is still "value": 2345 is not designed, otherwise you can
directly "save the design".
10. Enter section 3. Here, design a Modbus data with the keyword value. Now click "Save
Design". Note: If the "value": 2345 does not exist here, then you need to click save directly
in the previous step. If you have accidentally clicked "return to the previous level" to enter
the third here, but the third does not exist, you can use it at this time The new version of
vircom "Delete and go to the next" to delete this useless node.
11. Back to the JSON to Modbus RTU setting interface, click "Save JSON Settings". Then
download it to the inside of the device and use it.
When the TCP connection is established, the data is received:
{"header":{"DEVID":"2850002F0EEC","time":"2019-05-13
23:41:26"},"data":{"id":"MyData123456","alarm":{"alarm1": 123.4C," alarm2":"
567.8C"}},"value": 2345}
Note that if you are editing the current JSON design, you need to select the correct
destination on the web download interface first.In addition, click the button in accordance
with the design-time steps to fully browse all nodes.
3.3. READ THE BITS OF THE BYTE REGISTER
Sometimes the data read by Modbus using the 03/04 function code will also use bits to
express specific meanings. For example, the register of the 00 00 address read by the 03
function code is 0x8183, then bit16, bit9, bit8, bit2 and bit1 are included. All are 1. These
bits have different meanings. When they are 1, they indicate different alarms. So you also
need to upload with different json keywords. Methods as below:

485 TO ETH (B) User Manual
14 /36 www.waveshare.com
Figure 9 Byte register
The design method is basically the same as the previous method. The only thing to pay
attention to is that the data format is selected as "Boolean", and then where the Boolean
value is located, bit2 is the json variable in the 03 function code and the bit position in the 00
register. If the register value is 00 20, where 1 is in position 2, please note that you can set
the same Modbus station address, function code, and register for different json keywords.
Different variable contents can be obtained as long as the position of the Boolean value is
different. For example, we designed bit1, bit2, bit8, bit9, bit16, when the register content is
0x8183, we get the following json data return: {"bit1":1,"bit2":1,"bit8":1,"bit9" :1,"bit16":1}
3.4. 01 AND 02 FUNCTION CODES
You can set the JSON node for the bit register of the 01/02 function code, but each
JSON node needs to set the register address once, so the number of bits read each time is
one bit. The difference with the bit of the byte register is: the bit of the byte register is still
read through the 03/04 function code, but only the value of one of the 2 bytes is taken; the
01/02 function code itself is read For bit selection, since only 1 bit is read at a time, the
position of the Boolean value is generally written with 1, if it is 1, it will display '1', otherwise
it will display '0'.

485 TO ETH (B) User Manual
15 /36 www.waveshare.com
Figure 10 Byte register
When the Modbus function code is 01/02, the data length, data format, and the
number of reserved decimal places cannot be selected.
3.5. SHOW DESIGN RESULTS
Now click "Save JSON Design" to design and you can see the content of the designed
JSON format in the display box, which is convenient for overview of the design. At the same
time, there is an index for comparison when entering "Add/View".
Figure 11 shows the results

485 TO ETH (B) User Manual
16 /36 www.waveshare.com
3.6. EXCEL EDITING
Figure 12 Import and export CSV format
In order to facilitate editing, you can export the content of the design to CSV format,
then edit with EXCELL, then save it as CSV, and then import it.
However, CSV has formatting issues:
Figure 13 Data format error
At this time, you can save the CSV as XLS format for editing. After editing, save as CSV
format and import.

485 TO ETH (B) User Manual
17 /36 www.waveshare.com
3.7. BRACKETS AND ARRAYS
The new version of Vircom supports JSON array design. Give a simple example:
{
"reqBody":
[
0,1
]
}
In this example, there is only one JSON object reqBody, its content is an array, the first
element of the array is data 0, and the second element is data 1. Here we treat the
bracketed array similarly to nested JSON, but this nested JSON does not require keyword
names and colons. The design steps are as follows:
Figure 14 Array object
Since reqBody itself is an object, not an array unit, the node type is selected as an
object
Data, not array data. Since its content is an array, according to the brackets are braces
The idea is that the data source of this reqBody is "nested JSON". Then click "Design Nested
JSON".

485 TO ETH (B) User Manual
18 /36 www.waveshare.com
Figure 15 Array content
Next, design the first content of the array because it is the content of the array. So the
node type is array data. The data source is Modbus RTU collection, fill in the relevant
Modbus registers and other parameters. Then click "Go to Next" to design the second
element of the array, and the method is similar. After designing the second element, since
there is no more design, click "Save all and exit". Go back to the previous interface and click
"Save JSON Settings", then download it. The data posted is: {"reqBody":[2,3]}.
Now look at a more complicated example:
{
"reqBody":
[
{
"workshop_id:"1008",
"machine_code":"XS114"
},
{
"workshop_id:"1008",
"machine_code":"XS116"
}

485 TO ETH (B) User Manual
19 /36 www.waveshare.com
]
}
The content of the array here is not a simple data value, it is a JSON itself.
Figure 16 Step 1
Here in 1.1, the previous example 1 is to select the node type as "array data", and then
directly design the data in Modbus format, but the data content here is a JSON object, so
you need to select the data source as "nested JSON", and then click "Design nested JSON".
Figure 17 Step 1.1

485 TO ETH (B) User Manual
20 /36 www.waveshare.com
Then design two object types in steps 1.1.1 and 1.1.2, Modbus source data
workshop_id and fixed string source data machine_code.
Figure 18 Step 1.1.1
Figure 19 Step 1.1.2
Note here that you need to click "Go to the next", in the empty content node (that is,
1.1.3), click "Return to the previous level" to enter "1.2". 1.1.3 here is actually a non-existent
node.
"1.2" is also an array type, and the data source is nested JSON, please refer to step 1.1.
After that until "1.2.2", click "Save all and exit" directly.
Other manuals for RS485 TO ETH
1
Table of contents
Other Waveshare Media Converter manuals