Hi-Phone Maestro™ Back Panel
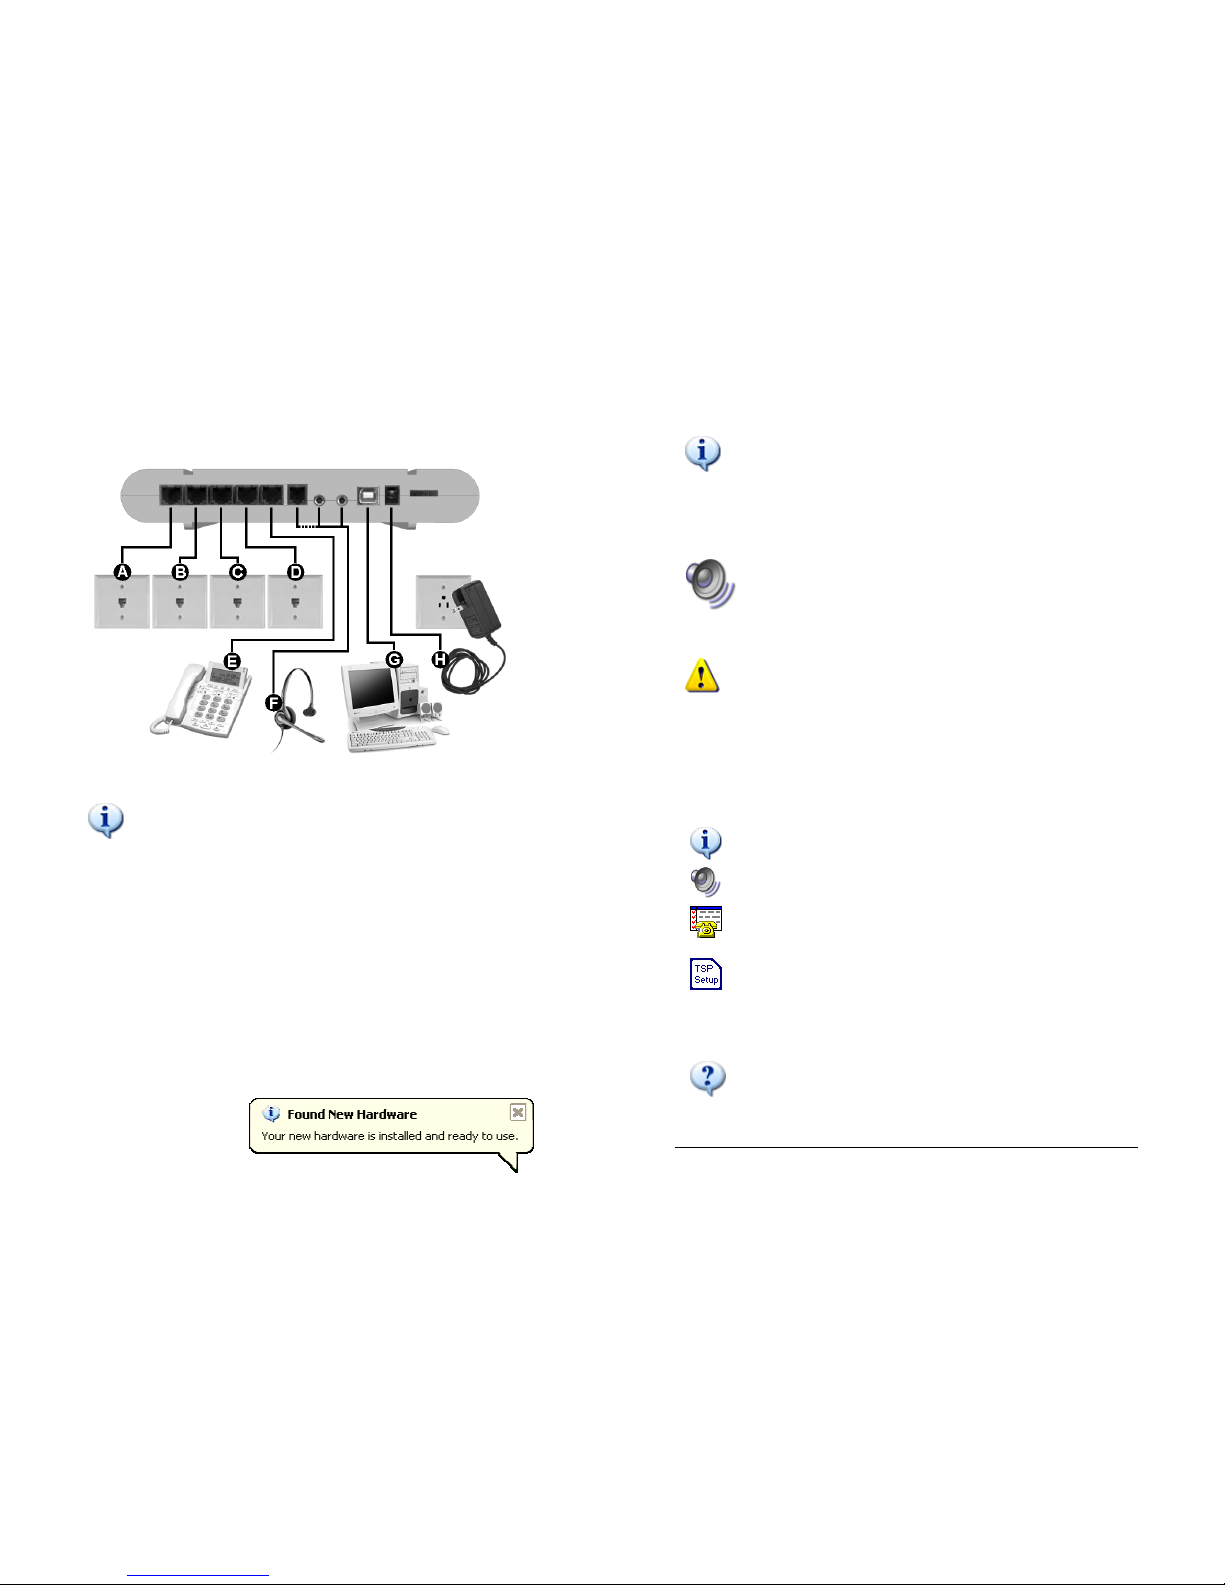
(1) Line Jack (line #4) (7) Headset Speakers Jack 3.5mm
(2) Line Jack (line #3) (8) Headset Microp one Jack 3.5mm
(3) Line Jack (line #2) (9) USB Jack
(4) Line Jack (line #1) (10) AC Power Adapter (7.5VDC) Jack
(5) P one Jack (11) T umb w eel assignable Control
(6) RJ-12 Headset Jack (default: Headset Volume)
Care and Maintenance
• Handle device wit care.
• Avoid dropping t e device.
• Do not open t e device’s cover. T is will void warranty.
• Do not use t e device in excessive temperature environment.
• Do not expose t e device to water or ig umidity.
Lightning storm warning
Lig tning storms can damage t e device t ru t e p one line wires.
It is recommended to avoid using electric appliances during storms.
P/N: DOC2017
A telep one wit Caller-ID display, a telep one wit an answering mac ine, Cordless p one,
etc., may also be used.
2 A standard eadset wit RJ-12 or a standard PC eadset wit two 3.5mm connectors can be
used wit t e Hi-P one Maestro™ device.
3 Analog line can be one of t e followings: A standard Analog line from your Telep one
Company, a standard extension from your PBX, a Centrex connection, etc. It cannot be a
digital PBX extension (usually 4 wires), ISDN, or any ot er digital connection.
Hi-Phone Maestro™
Quick Reference Guide
Version 3.0
Getting started
T ank you for c oosing t e Hi-P one Maestro™, one of our latest innovated CTI
(Computer Telep ony ntegration) products.
For more information about ot er products, latest drivers and SDK
(Software Development Kit), Please visit our web site at: www.way2call.com
Package Contents
• Hi-P one Maestro™ device
• RJ11 telep one cable
• USB cable
• AC power adapter
• T is Quick Reference Guide
• End User License Agreement
• Installation CD
System Requirements
• Pentium III processor or ig er
• Windows® 2000/XP/Vista 32 bit
• 10 MB free ard disk space
• Available USB port
• An analog telep one set1 (optional)
• A suitable eadset2 (optional)
• An analog telep one line3 (POTS) or
an analog extension of a PBX
Hi-Phone Maestro™ Front Panel
T e Hi-P one Maestro™ front panel as 8 LED ICONS indicators:
Icon Function Description
Power Lit: T e AC adapter is connected.
USB Lit: T e PC as configured t e device and loaded its drivers.
Blinking: T e USB cable is disconnected.
Fading: Power suspend mode.
Headset Lit: A eadset is connected and in use.
P one Lit: T e local p one is off- ook.
Line
1/2/3/4
Lit: T e device as opened t e line to make or answer calls.
Fast Blink: Incoming line ring follower.
Slow Blink: line is on old, or t e attac ed p one/ eadset is
muted.