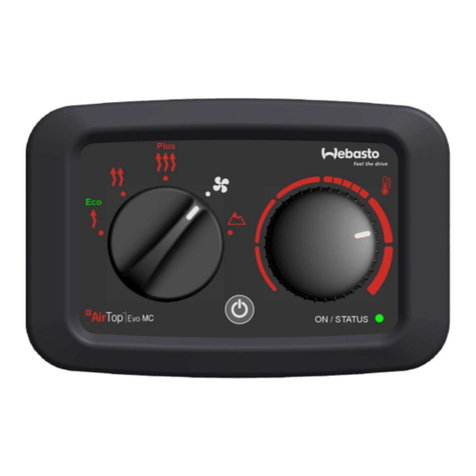
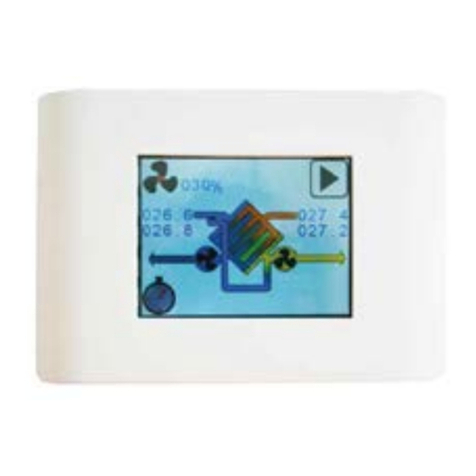
Webasto Dual Top Evo 6 User manual

Programmable Control Panel Operating Instructions
Dual Top Evo 6

Content Dual Top Evo 6
Content
1 Introduction ............................................................................................ 3
1.1 Additional documentation to be used .............................................. 3
2 Function description ............................................................................... 4
2.1 Summer mode (hot water only) ....................................................... 4
2.2 Winter mode (heating without hot water production) ..................... 4
2.3 Winter mode (heating with hot water production) ........................... 5
2.4 Advanced functions ......................................................................... 5
3 Operating Instructions ........................................................................... 6
3.1 General information ........................................................................ 6
3.1.1 Control Panel.................................................................................... 6
3.2 Before you start ............................................................................... 8
3.3 Normal operation ............................................................................ 8
3.3.1 Appliance is switched off.................................................................. 8
3.3.2 Switching on the heater.................................................................... 8
3.3.3 Switching off the heater ................................................................... 9
3.3.4 Setting desired interior temperature.................................................. 9
3.3.5 Summer mode (hot water only) ...................................................... 10
3.3.6 Winter mode (heating without hot water production)..................... 11
3.3.7 Winter mode (heating with hot water production) .......................... 11
3.3.8 Heating while driving...................................................................... 12
3.4 Settings setup ............................................................................... 13
3.4.1 Day, date, time ............................................................................... 13
3.4.2 Language, temperature unit, hour format, display contrast ............. 13
3.5 Programming timer ....................................................................... 14
3.5.1 Program setting .............................................................................. 14
3.5.2 Heating by timer............................................................................. 16
3.6 Remote control ..............................................................................17
3.6.1 Show actual mode...........................................................................17
3.6.2 Enabling and setting Telestart and Thermo Call ...............................17
3.6.3 Disabling Telestart and Thermo Call.................................................18
3.6.4 Start and stop heater operation using Telestart................................18
3.7 Frost ..............................................................................................19
3.7.1 Draining the boiler manually............................................................19
3.7.2 How to stop draining the boiler.......................................................20
3.7.3 Draining the boiler automatically .....................................................20
3.7.4 Frost protection mode .....................................................................21
4 Fault Message Output ..........................................................................22
4.1 Fuses .............................................................................................25
5 Worldwide warranty ............................................................................26
D

Dual Top Evo 6 Introduction
3
1 Introduction
Dear Customer,
Thank you for choosing this programmable Webasto Control Panel for the Integrated
Dual Top Evo Heater.
This product has been especially designed as a control panel for a Dual Top Evo heater
installed in motor homes. Please note that this control panel and the Dual Top Evo
heaters are intended exclusively for use in motor homes or similar vehicles.
An explanation of the mode of operation and function of your Webasto Dual Top Evo
unit is generally provided via the workshop or the Service Centre at which the
installation was carried out.
These operating instructions provides you with an overview of additional information
on using the programmable control panel. If you do not understand any information in
the manuals or if you misplace any of them, please contact your authorised Webasto
dealer immediately.
Please take the time to read this manual carefully. This enables you to use all features
and makes you feel comfortable and safe.
To ensure safe use of the Dual Top Evo heater, ALWAYS read and follow all instructions
in this manual.
It is very important that an authorised Webasto dealer carries out any repair or
maintenance not described in this manual.
1.1 Additional documentation to be used
These operating instructions contain the basic information and instructions generally
required for operating Integrated heaters of the type Dual Top Evo 6 using
programmable control panels.
in addition, the information in additional documentation materials must be observed.
The operating instructions for the Integrated Dual Top Evo 6 heater must also be
observed. These operating instructions are included in the delivery scope of the
Integrated heater, however can also be downloaded at the Internet address
http://dealers.webasto.com.
Then download the respective instructions as a PDF file in the desired language.

Function description Dual Top Evo 6
4
2 Function description
The Dual Top Evo 6 integrated heater from Webasto combines the benefits of an
interior heater with a water boiler and contributes to a gas-free motor home.
Depending on which function you wish to have, hot water in summer mode, just heat
or heat and hot water in winter mode, several options are available.
2.1 Summer mode (hot water only)
The heater is used for providing hot drinking water. The water is heated up to and kept
at 40 °C or 70 °C.
The device automatically selects the burner setting.
A water temperature sensor controls the water temperature. Due to variable operating
and environmental influences, small water temperature deviations are possible.
The hot air fan for heating the interior is not activated.
2.2 Winter mode (heating without hot water production)
The heater is used for providing hot air.
The desired interior temperature may be adjusted by pushing button (1) or button
(2) (5 to 35 °C).
The device automatically selects the burner setting modulating between 1,500 W and
6,000 W depending on the output requirement (calculated from difference between
selected temperature and current interior temperature).
The amount of heat is regulated to reach the pre-selected interior temperature quickly.
Then only a limited amount of power is needed to hold the interior temperature.
Heating the interior is always possible with or without water in the boiler.

Dual Top Evo 6 Function description
5
2.3 Winter mode (heating with hot water production)
The heater is used for heating the interior and production of hot water.
The heat is generated using a diesel powered burner.
The desired interior temperature may be adjusted by pushing button (1) or button
(2) (5 to 35 °C).
The water is heated up to 70 °C.
The device automatically selects the burner setting modulating between 1,500 W and
6,000 W depending on the output requirement (calculated from difference between
selected temperature and current interior temperature).
The amount of heat is regulated to reach the pre-selected interior temperature quickly.
Then only a limited amount of power is needed to hold the interior temperature.
A water temperature sensor controls the water temperature, while an interior
temperature sensor controls the interior temperature.
Due to variable operating and environmental influences, small water temperature
deviations are possible.
2.4 Advanced functions
• Menu driven user guidance in 6 languages.
• Programmable timer: The device offers two free programmable 7 days, 24 hours
heating programs.
See paragraph 3.5: "Programming timer".
• Remote control by Webasto Telestart and Thermo Call (optional controls).
See paragraph 3.6: "Remote control".
• Boiler drainage: possibility to drain the boiler manually with the control panel or
automatically as frost protection.
See paragraph 3.7: "Frost".
• Frost protection mode: protects the boiler against frost.
See paragraph 3.7.4: "Frost protection mode".
• Textual fault information: when a fault occurs, a fault message is displayed on the
control panel. A number and a brief description inform the user about the kind of
fault. See chapter 4: "Fault Message Output".

Operating Instructions Dual Top Evo 6
6
3 Operating Instructions
3.1 General information
Before starting the heater, observe the information in the operating
instructions for the integrated Dual Top Evo 6 heater (included in the delivery
scope of the integrated heater or available for downloading at the Internet
address http://dealers.webasto.com) and for the programmable control panel.
Pay particular attention to the sections "Maintenance and Safety Instructions"
and “Maintenance”.
The vehicle owner is responsible for the correct operation of the appliance.
3.1.1 Control Panel
Changes to the settings on the control panel are implemented after a short
delay!
See Fig. 1.
1 = Up - button
2 = Down - button
3 = START/STOP/OK - button
4 = MENU/BACK/CANCEL - button
5 = On/off - button
6 = Power indicator/fault indicator (green / red).
Fig. 1 Control Panel
61
2
4
5
3

Dual Top Evo 6 Operating Instructions
7
During normal operation you will see the status display. See Fig. 2.
7 = Indicator Heater ON/Heater OFF
8 = Remote indicator
9 = Drainage indicator
10 = Interior heating/temperature indicator
11 = Water heating/temperature indicator
ad 1 and 2: Press up button (1) to increase and down button (2) to
decrease desired temperature, set correct time and date, etc., move
blinking cursor and to scroll through menu.
ad 6: The power indicator lights up GREEN when the Dual Top Evo is
switched on and START (3) is pressed. Also Heater ON on display (7).
The heater is operating or in the standby mode.
Power indicator is off when STOP (3) is pressed or when Dual Top Evo
is switched off. Also Heater OFF on display (7). The heater is not
operating or is not in the standby mode.
The indicator flashing pulses RED if a fault has occurred.
ad 7: The heater is ON when the Dual Top Evo is switched on and START (3)
is pressed. The heater is operating or in the standby mode.
The heater is OFF when STOP (3) is pressed or Dual Top Evo is switched
off. The heater is not operating or is not in the standby mode.
ad 8: Symbol “ “ appears when device is ready to accept signals of remote
control.
ad 9: The “ ” symbol is shown when the electrical safety/drainage valve is
opened.
ad 10: Desired interior temperature is displayed, not actual temperature.
ad 11: Desired water temperature is displayed, not actual temperature.
Background lighting
The background lighting of the display lights up when the Dual Top Evo equipment is
switched on, no matter if there is heater operation or not.
It will fade out after some minutes if no button is pressed.
Backlight will light up again after pressing or .
NOTE
The display may become darker when the temperature of the control panel becomes
very high or when it is placed in direct sunlight.
Avoid that the control panel is exposed to high temperatures or direct sunlight.
In case aforementioned conditions could not be avoided, adjust display contrast in
“ Setup” (see paragraph 3.4.2: "Language, temperature unit, hour format, display
contrast").
Fig. 2 Status display
7 8
9
11
10

Operating Instructions Dual Top Evo 6
8
3.2 Before you start
After connecting the appliance to the 12 V DC power supply, language, day, date and
time have to be set.
1 Press and to select your preferred language:
“Deutsch”, "English”, “Español”, “Français”, “Italiano”, or “Svenska”.
2 Press OK.
3 Press and to select the correct day and date.
4 Press OK.
5 Press and to set the time.
6 Press OK.
Standard settings:
- Hour format: 24 h
- Temperature unit: °C
- Interior temperature: 21 °C
- Remote control: Disabled
- Timer programs: OFF for all 7 days
lower interior temperature T1 = 15 °C,
higher interior temperature T2 = 21 °C
3.3 Normal operation
3.3.1 Appliance is switched off
When the appliance is switched off, display shows ”Webasto Dual Top” as well as
actual time, day and date.
1 hour after switching off and touching buttons for the last time, display will go into
“sleep” mode and will become dark. When any button is touched, display described
above appears again for at least 1 hour.
3.3.2 Switching on the heater
1 Press the On/Off button to switch on the Dual Top Evo.
Display shows the last used heating mode.*
2PressSTART.
Then the heater starts up in the indicated operating mode.
Power indicator (6) lights green and “Heater ON” (7) on display.
* Exception: in case the last used heating mode was initiated by remote control
(Telestart or Thermo Call), the last non-remote control heating mode is shown.

Dual Top Evo 6 Operating Instructions
9
3.3.3 Switching off the heater
Proceed as follows to completely switch off the Dual Top Evo:
1 Press the On/Off button to switch off the device.
Now the heater will stop heating.
2 The fan can continue to run after switching off in order to cool down the
heater.
“Shutting down...” on display.
3 After the cooling phase the fan switches off.
For 1 hour the display shows text ”Webasto Dual Top” as well as actual
time, day and date.
Always drain the boiler if there is a risk of frost!
See paragraph 3.7: "Frost".
Stopping heating operation to select another mode:
1 Press STOP.
Now the heater will stop heating.
2 The fan can continue to run after switching off in order to cool down the
heater.
Display shows stopped heating mode.*
Power indicator (6) goes off and “Heater OFF” (7) on display.
3 Use menu to select another mode.
After the cooling phase the fan switches off.
When after some minutes no button is touched, the display shows text
”Webasto Dual Top” as well as actual time, day and date.
3.3.4 Setting desired interior temperature
When the appliance is switched on (see paragraph 3.3.2) and the status display is
visible, you can set the desired interior temperature.**
The status display shows the motor home and the current heating program. See Fig. 2.
Press to increase or to decrease the temperature.
NOTE
Desired temperature is displayed, not actual interior temperature.
Selected interior temperature can be changed, no matter if heater is ON or OFF. As soon
as heater is switched on (manually, by remote control or timer) in a cabin heating mode,
appliance will heat interior and keep it at this temperature.
* Exception: in case the last used heating mode was initiated by remote control
(Telestart or Thermo Call), the last non-remote control heating mode is shown.
** If actual heating mode is initiated by remote control, desired interior
temperature cannot be adjusted. Dual Top will heat up interior and keep the
temperature at preset value, selected when setting Thermo Call or Telestart.

Operating Instructions Dual Top Evo 6
10
3.3.5 Summer mode (hot water only)
Make sure that the boiler is filled with water.
Make sure the device is switched on.
1 Press MENU.
2 Press and to select " hot water".
3 Press OK.
4 Press and select
“ Eco 40°C” or “ Comfort 70°C”.
5 Press OK.
6“Selection completed” on display.
NOTE
When heater is already “ON”, text “Selection completed, press OK to change
operation mode” appears.
Press OK.
7 After 3 seconds power indicator (6) lights green and display changes to:
–“Heater ON”
–“ water 40°C“ or “ water 70°C“ (depending on selected water tem-
perature)
–“Diesel“
The power indicator (6) lights green as long as there is a demand for hot water. To end
this press STOP.

Dual Top Evo 6 Operating Instructions
11
3.3.6 Winter mode (heating without hot water production)
Make sure the device is switched on.
1 Press MENU.
2 Press and to select “ Heating Cabin”.
3 Press OK.
4“Selection completed” on display.
NOTE
When heater is already “ON”, text “Selection completed, press OK to change
operation mode” appears.
Press OK.
5 After 3 seconds power indicator (6) lights green and display changes to:
–“Heater ON”
–“Cabin“, “... °C“
(value depends on latest selected interior temperature; °C or °F depends on
setting)
–“Diesel“
6 Press or to adjust desired interior temperature.
NOTE
Please note that, in case the boiler has been filled, the water is automatically heated as
well. The water temperature may reach up to 80 °C depending on the power and the
duration of the heating.
3.3.7 Winter mode (heating with hot water production)
Make sure the device is switched on.
1 Press MENU.
2 Press and to select “ Heating Cabin + Hot Water”.
3 Press OK.
4“Selection completed” on display.
NOTE
When heater is already “ON”, text “Selection completed, press OK to change
operation mode” appears.
Press OK.
5 After 3 seconds power indicator (6) lights green and display changes to:
–“Heater ON”
–“Water 70°C”
–“Cabin“, “... °C“
(value depends on latest selected interior temperature; °C or °F depends on
setting)
–“Diesel“
6 Press or to adjust desired interior temperature.
The heater gradually reduces the power until the selected interior temperature is
reached. If the interior temperature has been reached, but the water temperature is still
too low, the blown air circulation fan switches off and the water continues to be heated
to a temperature of 70 °C.

Operating Instructions Dual Top Evo 6
12
The water temperature may reach up to 80 °C depending on the heating power that is
required to achieve the interior temperature.
NO WATER control
When winter mode (heating with hot water production) is selected, but the boiler is
without water, there will be a warning on the control panel.
Text ”Mode changed Low level sanitary water!“ blinks in a pop-up display.
The device automatically changes to winter mode, heating without hot water
production.
Choose one of the following options:
A. Press STOP to end current mode and select winter mode, heating without hot
water production. See paragraph 3.3.6.
B. Fill the boiler with water after changing to winter mode, heating with hot water
production.
3.3.8 Heating while driving
Heating the cabin and/or water while driving the vehicle is possible and allowed.
Attention when driving in cold conditions:
Run the Dual Top Evo in winter mode (heating with hot water production) to protect
the water pipes outside the vehicle against frost.

Dual Top Evo 6 Operating Instructions
13
3.4 Settings setup
This chapter describes how to setup your favourite Dual Top Evo system settings of day,
date, time, language, temperature unit, hour format and display contrast correctly.
3.4.1 Day, date, time
Make sure the device is switched on.
1 Press MENU.
2 Press and to select “ Setup”.
3 Press OK.
4 Press and to choose “Set Date + Day” or “Set Time”.
5 Press OK.
6 Day and date or time (depends on selection) on display.
Active field blinks.
7 Press or to adjust the value of the flashing field.
8 Press OK.
9 Now, the next field blinks. Repeat steps 7 and 8 until setting is correct.
10 Press BACK to return to main menu,
or continue with another setting as described from step 4 to 9.
3.4.2 Language, temperature unit, hour format, display contrast
Choose your favourite settings:
– Language: Deutsch/English/Español/Français/Italiano/Svenska
– Temperature unit: °C/°F
– Hour format: 12 h/24 h
– Display contrast: ... %
Make sure the device is switched on.
1 Press MENU.
2 Press and to select “ Setup”.
3 Press OK.
4 Press and to select “Set Language”, “Set Temperature Unit”,
“Hour Format” or “Set Contrast".
5 Press OK.
6 Press or to select the desired language, temperature unit, hour format
or display contrast.
7 Press OK.
8 Press BACK to return to main menu,
or continue with another setting as described from step 4 to 7.

Operating Instructions Dual Top Evo 6
14
3.5 Programming timer
This allows you to operate the system using a 24 hour 7 day programmable timer.
Within this there are 2 programs you can set for each day, hour by hour, whether the
interior has to be heated or not (off, lower temperature, higher temperature) and if hot
water (70 °C) has to be available or not.
3.5.1 Program setting
Temperature setting
Make sure the device is switched on.
1 Press MENU.
2 Press and to select “ Programming Timer”.
3 Press OK.
4 Press and to select “ Timer Program 1” or “ Timer Program 2”
(values T1 and T2 depend on program settings).
5 Press OK.
6 Press and to select “ Set Cabin Temperatures”.
7 Press OK.
8 Press or to set desired T1 (low interior temperature).
9 Press OK.
10 Press or to set desired T2 (high interior temperature).
Note: T2 has to be higher than T1.
11 Press OK.
12 Press BACK to return to main menu or continue with Day setting, step 6.
NOTE
Temperatures T1 and T2 may be programmed to different values in Timer Program 1
and Timer Program 2.
Day setting
In case you want to set the days after setting temperatures T1 and T2, continue with
step 6.
Make sure the device is switched on.
1 Press MENU.
2 Press and to select “ Programming Timer”.
3 Press OK.
4 Press and to select “ Timer Program 1” or “ Timer Program 2”
(values T1 and T2 depend on program settings).
5 Press OK.
6 Press and to select “Set Monday”, “Set Tuesday“, “Set
Wednesday“ etc..
7 Press OK.

Dual Top Evo 6 Operating Instructions
15
8 Press and to:
– select “Show 24 h Program“.
Matrix with day, programmed hours and interior temperatures T1 and T2 ap-
pears.
Press BACK to return to main menu.
–orselect“Modify 24 h Program“.
9 Press OK.
10 Selected day and hour appear on display.
Matrix with programmable hours and interior temperatures T1 and T2 appears.
Field of actual time and temperature blinks.
11 Press or to adjust desired temperature for selected day and hour: OFF,
T1 or T2.
12 Press OK.
13 Repeat step 11 and 12 until all 24 hours are programmed.
(You will see the hour period displayed at the bottom of the screen.)
14 “Programming 24 h successful” on display.
After 3 seconds, select another day as described in step 6 and continue to
program remaining days.
It’s also possible to copy programmed values from one day to another. See Day
copying, step 6.
When all days have been programmed, press BACK to return to main menu.
Day copying
Instead of programming each day individually, it’s also possible to copy programmed
values from one day to another.
After copying you can leave the values identical, but it’s also possible to make
adjustments (see Day setting, step 6).
In case you copy days after setting temperatures T1 and T2 or programming and setting
a day, continue with step 6.
Make sure the device is switched on.
1 Press MENU.
2 Press and to select “ Programming Timer”.
3 Press OK.
4 Press and to select “ Timer Program 1” or “ Timer Program 2”
(values T1 and T2 depend on program settings).
5 Press OK.
6 Press and to select “Set Monday”, “Set Tuesday“, “Set
Wednesday“ etc..
7 Press OK.
8 Press and to select “Copy Tuesday“, “Copy Wednesday“ etc.
9 Press OK.

Operating Instructions Dual Top Evo 6
16
10 “Copy of 24 h program successful” on display.
After 3 seconds, select another day as described in step 6 and continue to
program remaining days.
When all days have been programmed, press BACK to return to main menu.
3.5.2 Heating by timer
This paragraph describes how to select a program to heat the interior and to provide
hot water.
You can choose from 2 programs that define 7 days, 24 hours interior and water
heating.
To change the programs see paragraph 3.5.1: "Program setting".
Make sure the device is switched on.
1 Press MENU.
2 Press and to select “ Heating by Timer”.
3 Press OK.
4 Press and to select “ Timer Program 1” or “ Timer Program 2”
(values T1 and T2 depend on program settings).
5 Press OK.
6 Press and to select “ Heating Cabin” or “ Heating Cabin +
Hot Water”.
7 Press OK.
8“Selection completed” on display.
NOTE
When heater is already “ON”, text “Selection completed, press OK to change
operation mode” appears.
Press OK.
9 After 3 seconds power indicator (6) lights green and display changes to:
–“Heater ON” or “Heater OFF”
–“Water” (if "Hot Water" selected)
–“Cabin”
–“Diesel“
–Day
–Time
– Matrix with programmed hours and interior temperatures.
Field of actual time and temperature blinks.
NOTE
Press and to view program settings of another day.

Dual Top Evo 6 Operating Instructions
17
3.6 Remote control
Heater can be operated by remote control devices: Webasto Telestart and Thermo Call.
These controls are optional.
Signal of remote control over-rules commands of control panel, as long as remote
control is enabled.
3.6.1 Show actual mode
Make sure the device is switched on.
1 Press MENU.
2 Press and to select “ Setting ThermoCall/Telestart”.
3 Press OK.
4 Press and to select “Show actual Mode”.
5 Press OK.
6 On display appears following message, depending on disabled or enabled
remote control function:
– Disabled: “ThermoCall/Telestart disabled”
– Enabled: “ThermoCall/Telestart enabled Receiving a signal from
ThermoCall/Telestart system heats up cabin to ... °C and
provides hot water”.
NOTE
... °C or ... °F: value and unit depend on setting and set interior temperature.
NOTE
“and provides hot water” only appears when function “Heating Cabin + Hot Water” is
selected.
7 Press BACK to return to main menu.
3.6.2 Enabling and setting Telestart and Thermo Call
Make sure the device is switched on.
1 Press MENU.
2 Press and to select “ Setting ThermoCall/Telestart”.
3 Press OK.
4 Press and to select “ThermoCall/Telestart enabling and setting”.
NOTE
If text “ThermoCall/Telestart not connected Visit www.webasto-dualtop.com”
appears, remote control device is not connected.
Press BACK to return to main menu.
5 Press OK.
6 Press and to select “Heating Cabin” or “Heating Cabin + Hot
Water”.
7 Press OK.
8 Press and to set the desired interior temperature.
9 Press OK.
10 “Enabling ThermoCall/Telestart successful” on display.
After 3 seconds display changes to status of appliance at actual time.
“ “ (8) on display.

Operating Instructions Dual Top Evo 6
18
3.6.3 Disabling Telestart and Thermo Call
Make sure the device is switched on.
1 Press MENU.
2 Press and to select “ Setting ThermoCall/Telestart”.
3 Press OK.
4 Press and to select “ThermoCall/Telestart disabling”.
5 Press OK.
6“Disabling ThermoCall/Telestart” on display.
After 3 seconds display changes to status of appliance at actual time.
“ “ (8) disappears from display.
3.6.4 Start and stop heater operation using Telestart
To do this, Telestart must be available and activated. This can be recognised from an
indicated symbol “ “ (8).
Starting heater operation:
1 Press ON button of Telestart.
LED of Telestart lights green, showing that signal was transferred successfully.
2 The heater starts running in the (in paragraph 3.6.2: "Enabling and setting
Telestart and Thermo Call") selected mode, independent from the actual heater
status (heater off, heater on, drainage, ...).
Stopping heating operation:
1 Press OFF button of Telestart.
LED of Telestart lights red, showing that signal was transferred successfully.
2 The heater stops any heating operation and switches off, independent from the
actual heater status.
Exception: running drainage will be continued.
NOTE
If LED of Telestart blinks red after pressing ON or OFF button of Telestart, the signal was
not transferred successfully.

Dual Top Evo 6 Operating Instructions
19
3.7 Frost
There are several features that protect the water supply system against frost.
• Drain water contents manually when there is risk of frost and when storing the
vehicle for a longer period.
See paragraph 3.7.1: "Draining the boiler manually".
• The boiler is drained automatically in case you forgot to drain manually.
See paragraph 3.7.3: "Draining the boiler automatically".
• In case you don’t want to drain the water supply system and you don’t heat the
interior of the vehicle, you can select the frost protection mode.
See paragraph 3.7.4: "Frost protection mode".
3.7.1 Draining the boiler manually
Drain water contents manually when there is risk of frost and when storing the vehicle
for a longer period.
1 Interrupt power for vehicle system water pump (main switch or pump switch,
depending on instructions of the vehicle manufacturer).
2 Open hot water taps in kitchen, bathroom, shower, etc. (set pre-selecting mixing
taps or single-lever valves to "hot").
3 Make sure the device is switched on.
4 Press MENU.
5 Press and to select “ Draining Boiler”.
6 Press OK.
7“Press OK to confirm boiler drainage” on display.
8 Press OK.
9“Draining... Press MENU to select heating operation”and “Press STOP
to abort drainage” on display.
“ ” (9) on display.
NOTE
Any kind of heater operation will be stopped when manually starting boiler
drainage.
NOTE
To stop drainage, see paragraph 3.7.2: "How to stop draining the boiler".
The boiler content is now discharged to the outside through the electrical safety/
drainage valve.
Place a container beneath the outlet to check whether the water in the boiler has
completely drained away (approx. 10 litres!).
After approx. 90 min, text “Drainage completed” appears.
10 Press OK to end manual drainage.
NOTE
Any kind of water from the vehicle has to be discharged at a proper disposal facility.
NOTE
Be aware of drainage behaviour when starting a heating operation (by menu guidance)
without aborting or completing drainage procedure:
a) Drainage aborted when one of the following modes is selected:
- Summer mode (hot water only)
- Winter mode (heating with hot water production)
- Frost protection mode;
b) Drainage continued in case of
- Winter mode (heating without hot water production).

Operating Instructions Dual Top Evo 6
20
3.7.2 How to stop draining the boiler
Boiler drainage can be stopped, if circumstances require this.
Make sure the device is switched on.
1 Press MENU.
2 Press and to select “ Draining Boiler”.
3 Press OK.
4“Press OK to confirm boiler drainage” on display.
5 Press OK.
6“Drainage... Press MENU to select heating operation”and “Press STOP
to abort drainage” appears on the display.
“ ” (9) on display.
7 Press STOP.
“Drainage aborted” on display.
8 Press OK.
3.7.3 Draining the boiler automatically
The electrical safety/drainage valve is opened electrically.
If the water temperature at the electrical safety/drainage valve is less than 6 °C, the
boiler water contents may discharge automatically.
This function is active when:
• the appliance is switched "OFF";
• in winter mode (heating without hot water production) during a period when there
is no heating action in the heater (e.g.: selected interior temperature is reached, low
outside temperature);
• if battery power is too low;
• there is a failure!
NOTE
Note that it only works when a 12 V power supply is available!
During drainage, “ ” (9) appears on display.
After approx. 90 min, the electrical safety/drainage valve will be closed again.
The drainage outlet of the electrical safety/drainage valve must always be kept clear
(free from dirt, ice, leaves etc.)!
To avoid water loss and to protect the heater and boiler against frost, select the frost
protection mode (see paragraph 3.7.4: "Frost protection mode").
NOTE
Automatic drainage can not be stopped.
However, when you switch mode to manual drainage, it can be aborted.
(See paragraph 3.7.2: "How to stop draining the boiler").
NOTE
Draining the boiler as well as the frost protection mode protect the heater and boiler
against frost. Not all water lines in the vehicle can be protected against freezing due to
installation variations.
When storing the vehicle, either choose a place that is well protected against low
temperatures or drain the whole water system, including all lines and tubes.
There shall be no warranty claims for damage caused by frost!
Other manuals for Dual Top Evo 6
2
This manual suits for next models
2
Table of contents
Other Webasto Control Panel manuals
Popular Control Panel manuals by other brands
CAME
CAME Z Series instructions
ABB
ABB CP 600 Series Operating instruction
DSC
DSC PowerSeries PC1616 user manual
Terofire Products
Terofire Products Plus User & installation manual
Potter
Potter PFC-8000 Series Installation & operation manual
Setra Systems
Setra Systems SRPM Installation and operating manual
