5 - Plug in unit. Use the included power cord. You may need an
adapter or another C13 style cable for your country, but a transformer
should not be needed as it works anywhere with a 90v-240v AC supply."
6 - Power on mains. This is the switch on the back of the unit next to
where the cord plugs in. The display should read "0""
7 - Adjust the RPM level. Turn the black knob counterclockwise to
reduce!to the 500-700RPM range (a good starting point). Note that the
RPMs will display for just a second so they can be pre-set without
running the grinder.!"
8 - Using the On/OffButton. When the blades are spinning, the
button will illuminate and the button will remain depressed. Be sure
not to leave the grinder ON/Spinning for excessive periods of time.
The mains power in the back only needs to be shut down when you
wish to turn the LEDs off. The EG-1 will enter a sleep mode in 60
seconds and the LEDs will dim until the On/Offbutton is pressed
again, where it will awaken instantaneously to start grinding."
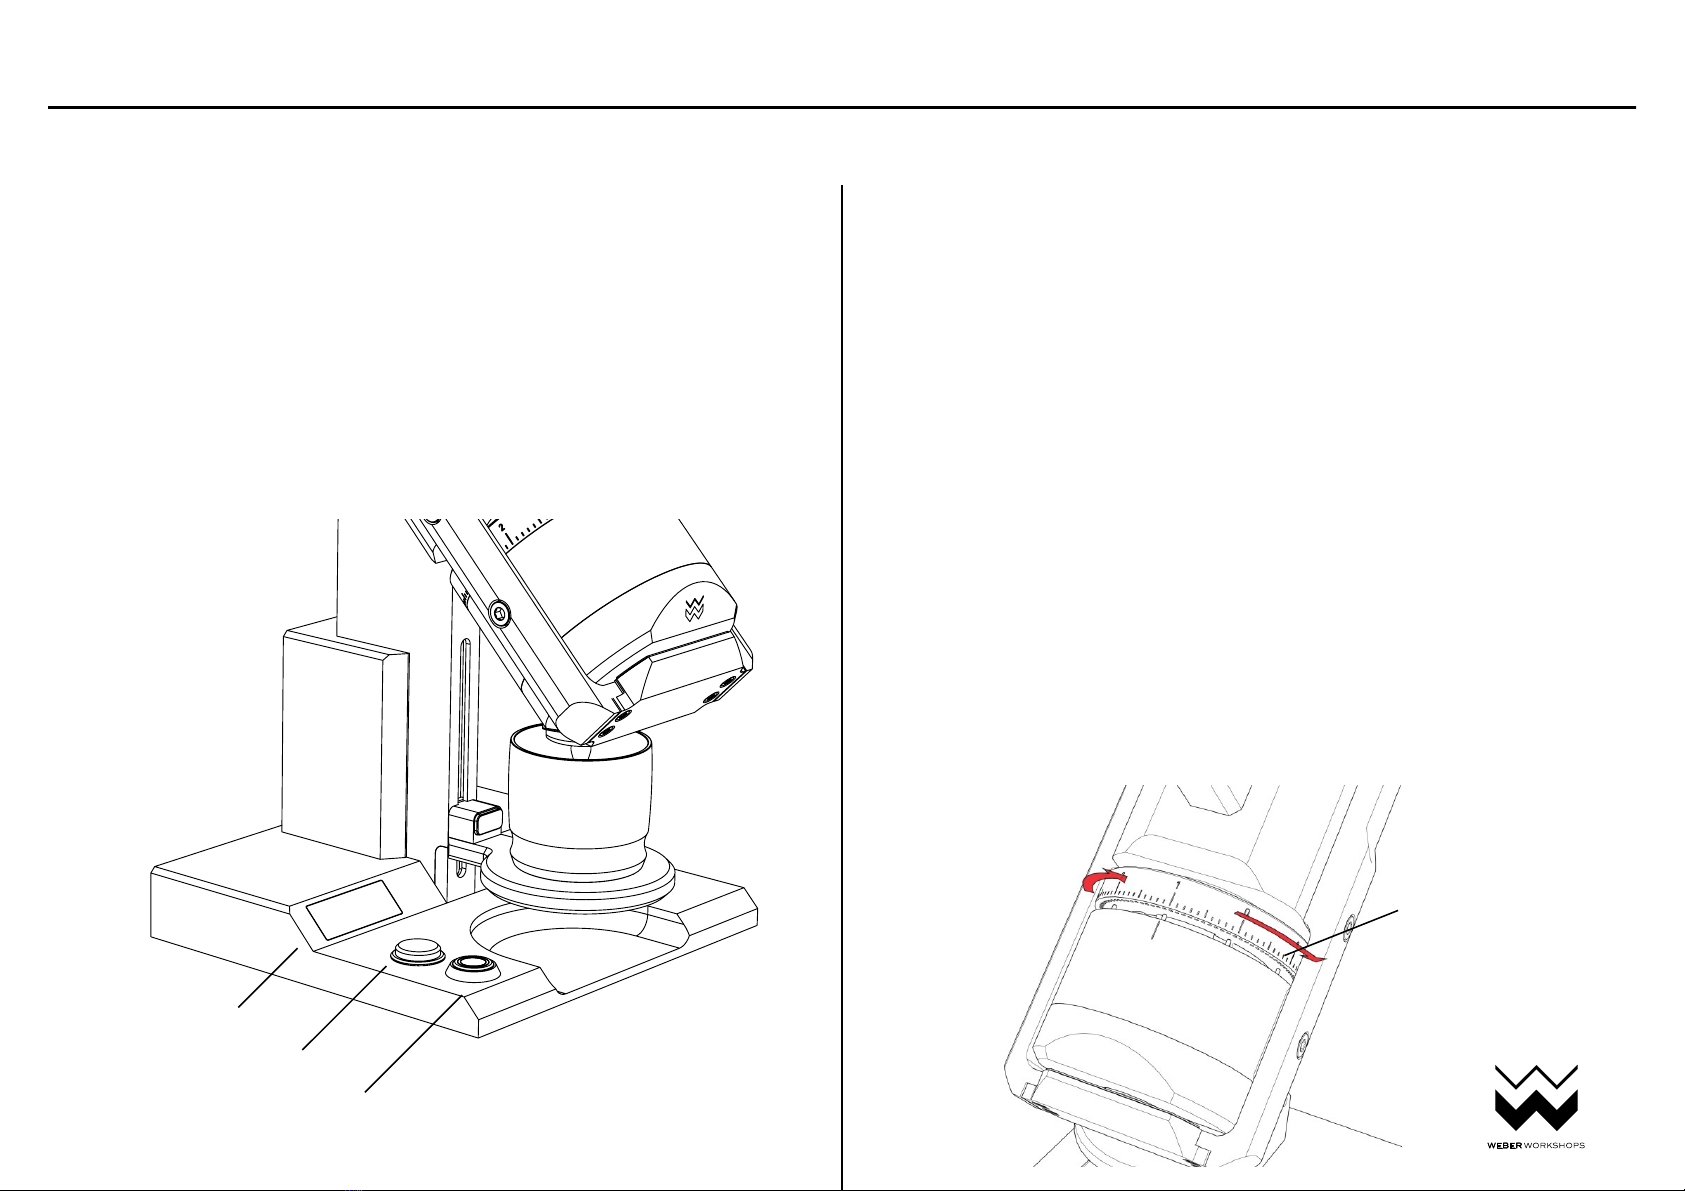
9 - Adjust the Grind. Test grind a small amount of coffee to verify
the initial setting. We usually ship with the grinder close to an
espresso setting, but it will need to be adjusted for your brewing
style and particular coffee. Adjustments coarser and finer are done
by lifting up the locking ring and turning. Larger numbers mean
larger particles, and each tick adjusts by 5 microns. There is no
absolute zero. There may be some small remnants of beans in the
grinder during shipping, as we test grind ~200g of coffee on each
unit before shipping. While we do clean,!small!amounts may remain
during shipping."
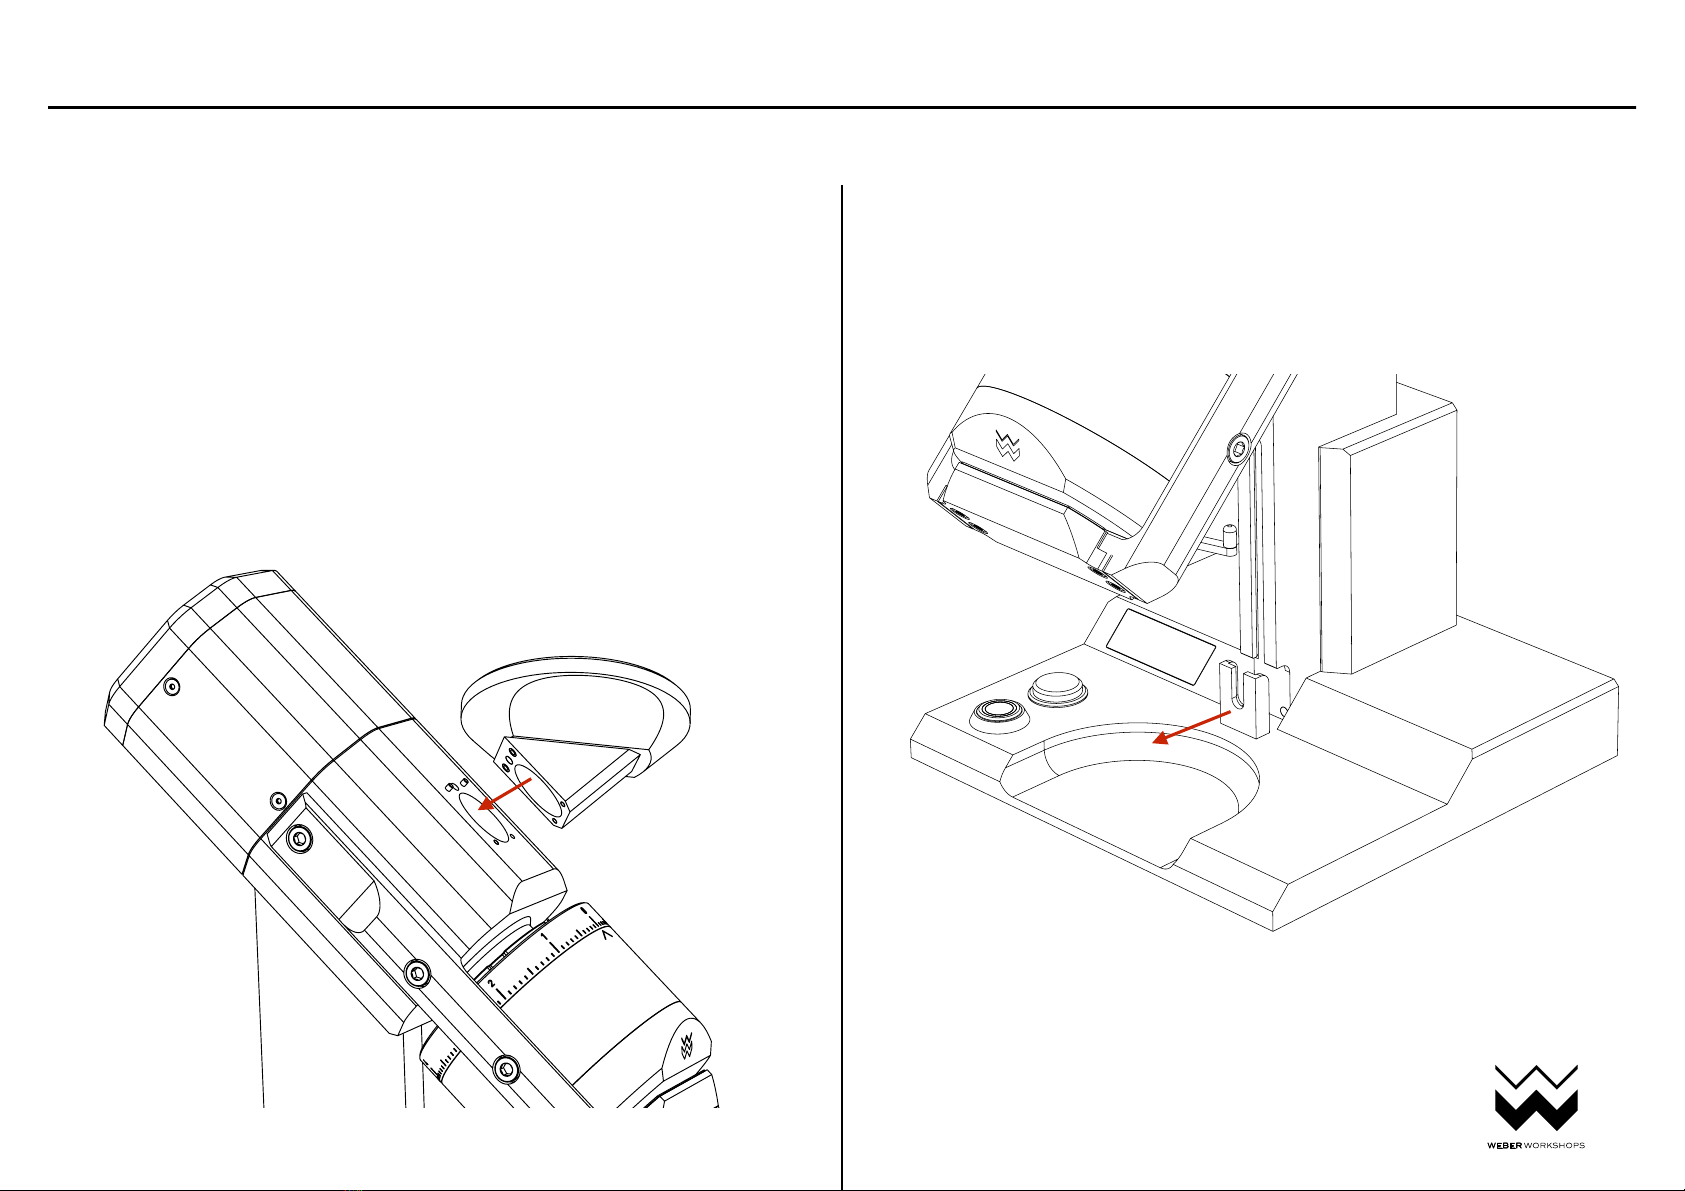
on/off button
rpm dial
rpm display
locking ring
4
quickstart | basic usage
Copyright 2020 Weber Workshops, manual version 1.0