Weber KEY User manual

KEY COFFEE GRINDER
INSTRUCTION MANUAL
Copyright 2023 Weber Workshops, manual version Mk ii
®

TABLE OF CONTENTS
what’s inbox | parts list
key grinder part names
quickstart | basic usage
-first steps
-attach magic/static wiper
-zeroing the burrs
-placing tumbler
-powering on/off
-adjusting rpm
-adjusting grind settings
-power off
-cleaning
warnings & safety information
electrical specifications
1
2
3
3
3
4
5
6
6
6
7
7
8
9
Copyright 2023 Weber Workshops, manual version Mk ii

INBOX | PARTS LIST
inside the KEY box you will find the following:
main unit
cleaning brush
bean cover
magic tumbler and wiper
standard tumbler (sold separately)
dosing cup
two spare stainless wipers
power cord
*use type C13 computer cable
1
MAGIC TUMBLER SETS
STANDARD TUMBLER
(sold separately)
cup
plug wiper
washer
plug wiper
cup funnel
bean cover
cleaning brush
+2 SPARE WIRES
share with
standard tumbler
Copyright 2023 Weber Workshops, manual version Mk ii

KEY GRINDER PARTS NAME 2
GEAR COVER
BEAN COVER
BURR MOUNT
ADJUSTMENT/LOCKING RING
BURR COLLAR
MAGIC WIPER
MAGIC TUMBLER
BASE
ON/OFF SWITCH
CLEANING BRUSH
RPM KNOB
BACK COVER
MAIN BODY
STANDARD TUMBLER
BOTTOM FUNNEL
MAINS POWER SWITCH (ON BACK)
WOOD PLATE
Copyright 2023 Weber Workshops, manual version Mk ii

QUICKSTART | BASIC USAGE 3
1 - Placement. Find a flat, dry counter space with access
to a power outlet. The KEY is made to be usable in 100v -
240v regions without the need for a separate
transformer. It uses a C13 style cable (like a computer
does) that can be purchased locally as needed.
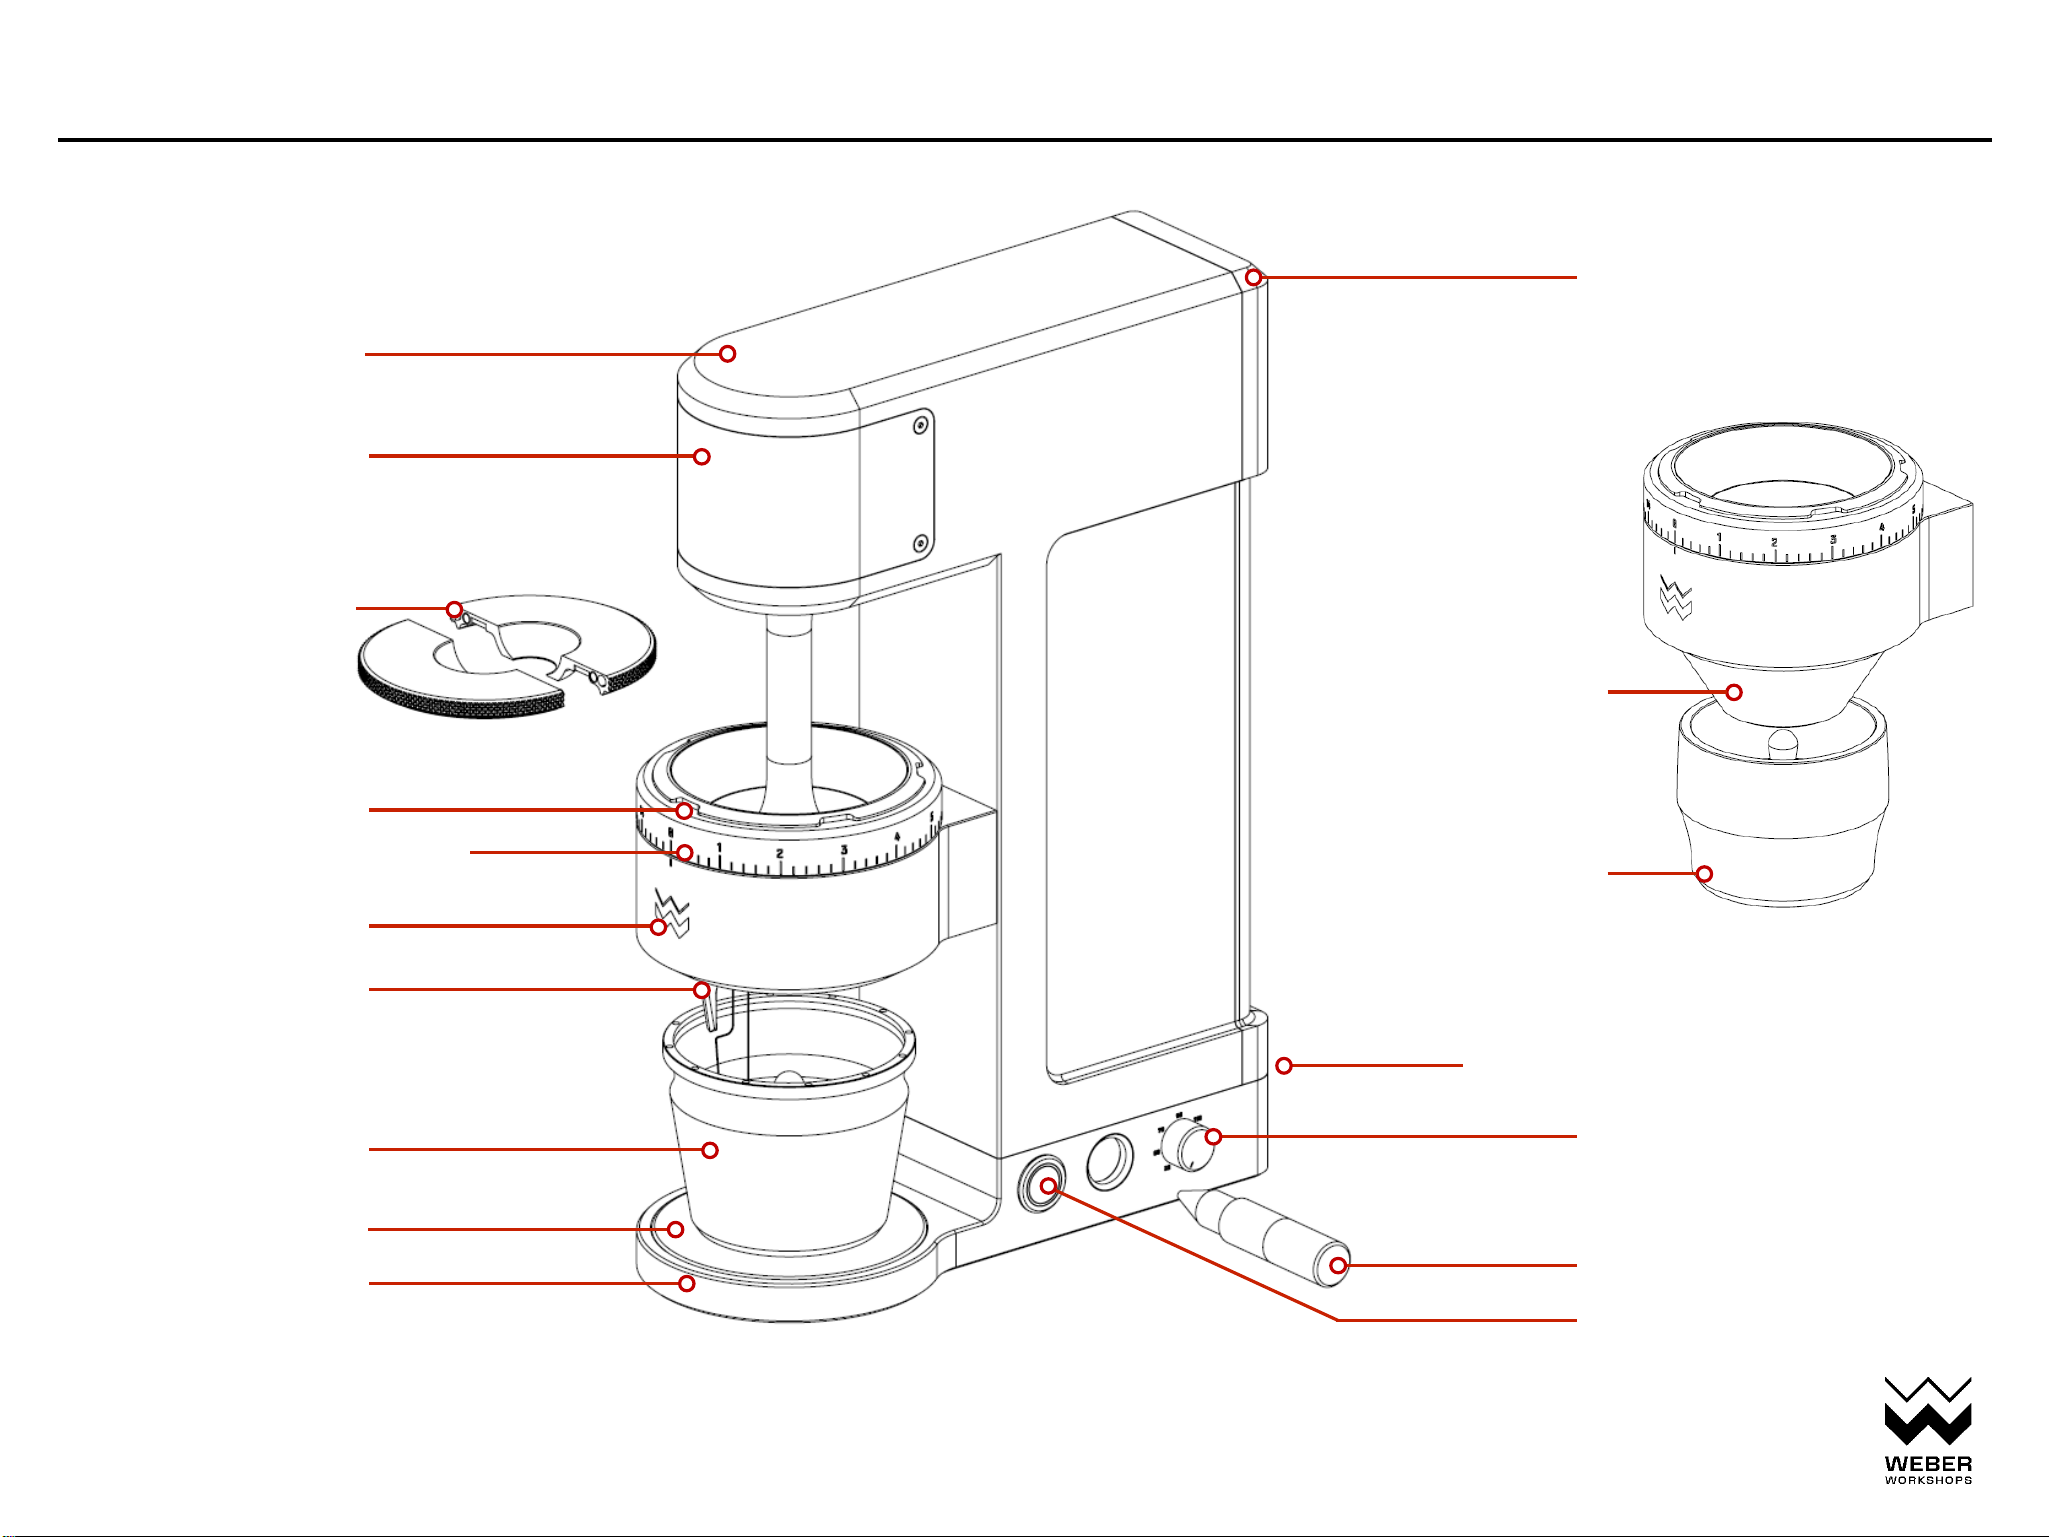
2 - Remove from box. Using both hands, carefully pull the
KEY straight out of the packaging. Use caution - it's heavy.
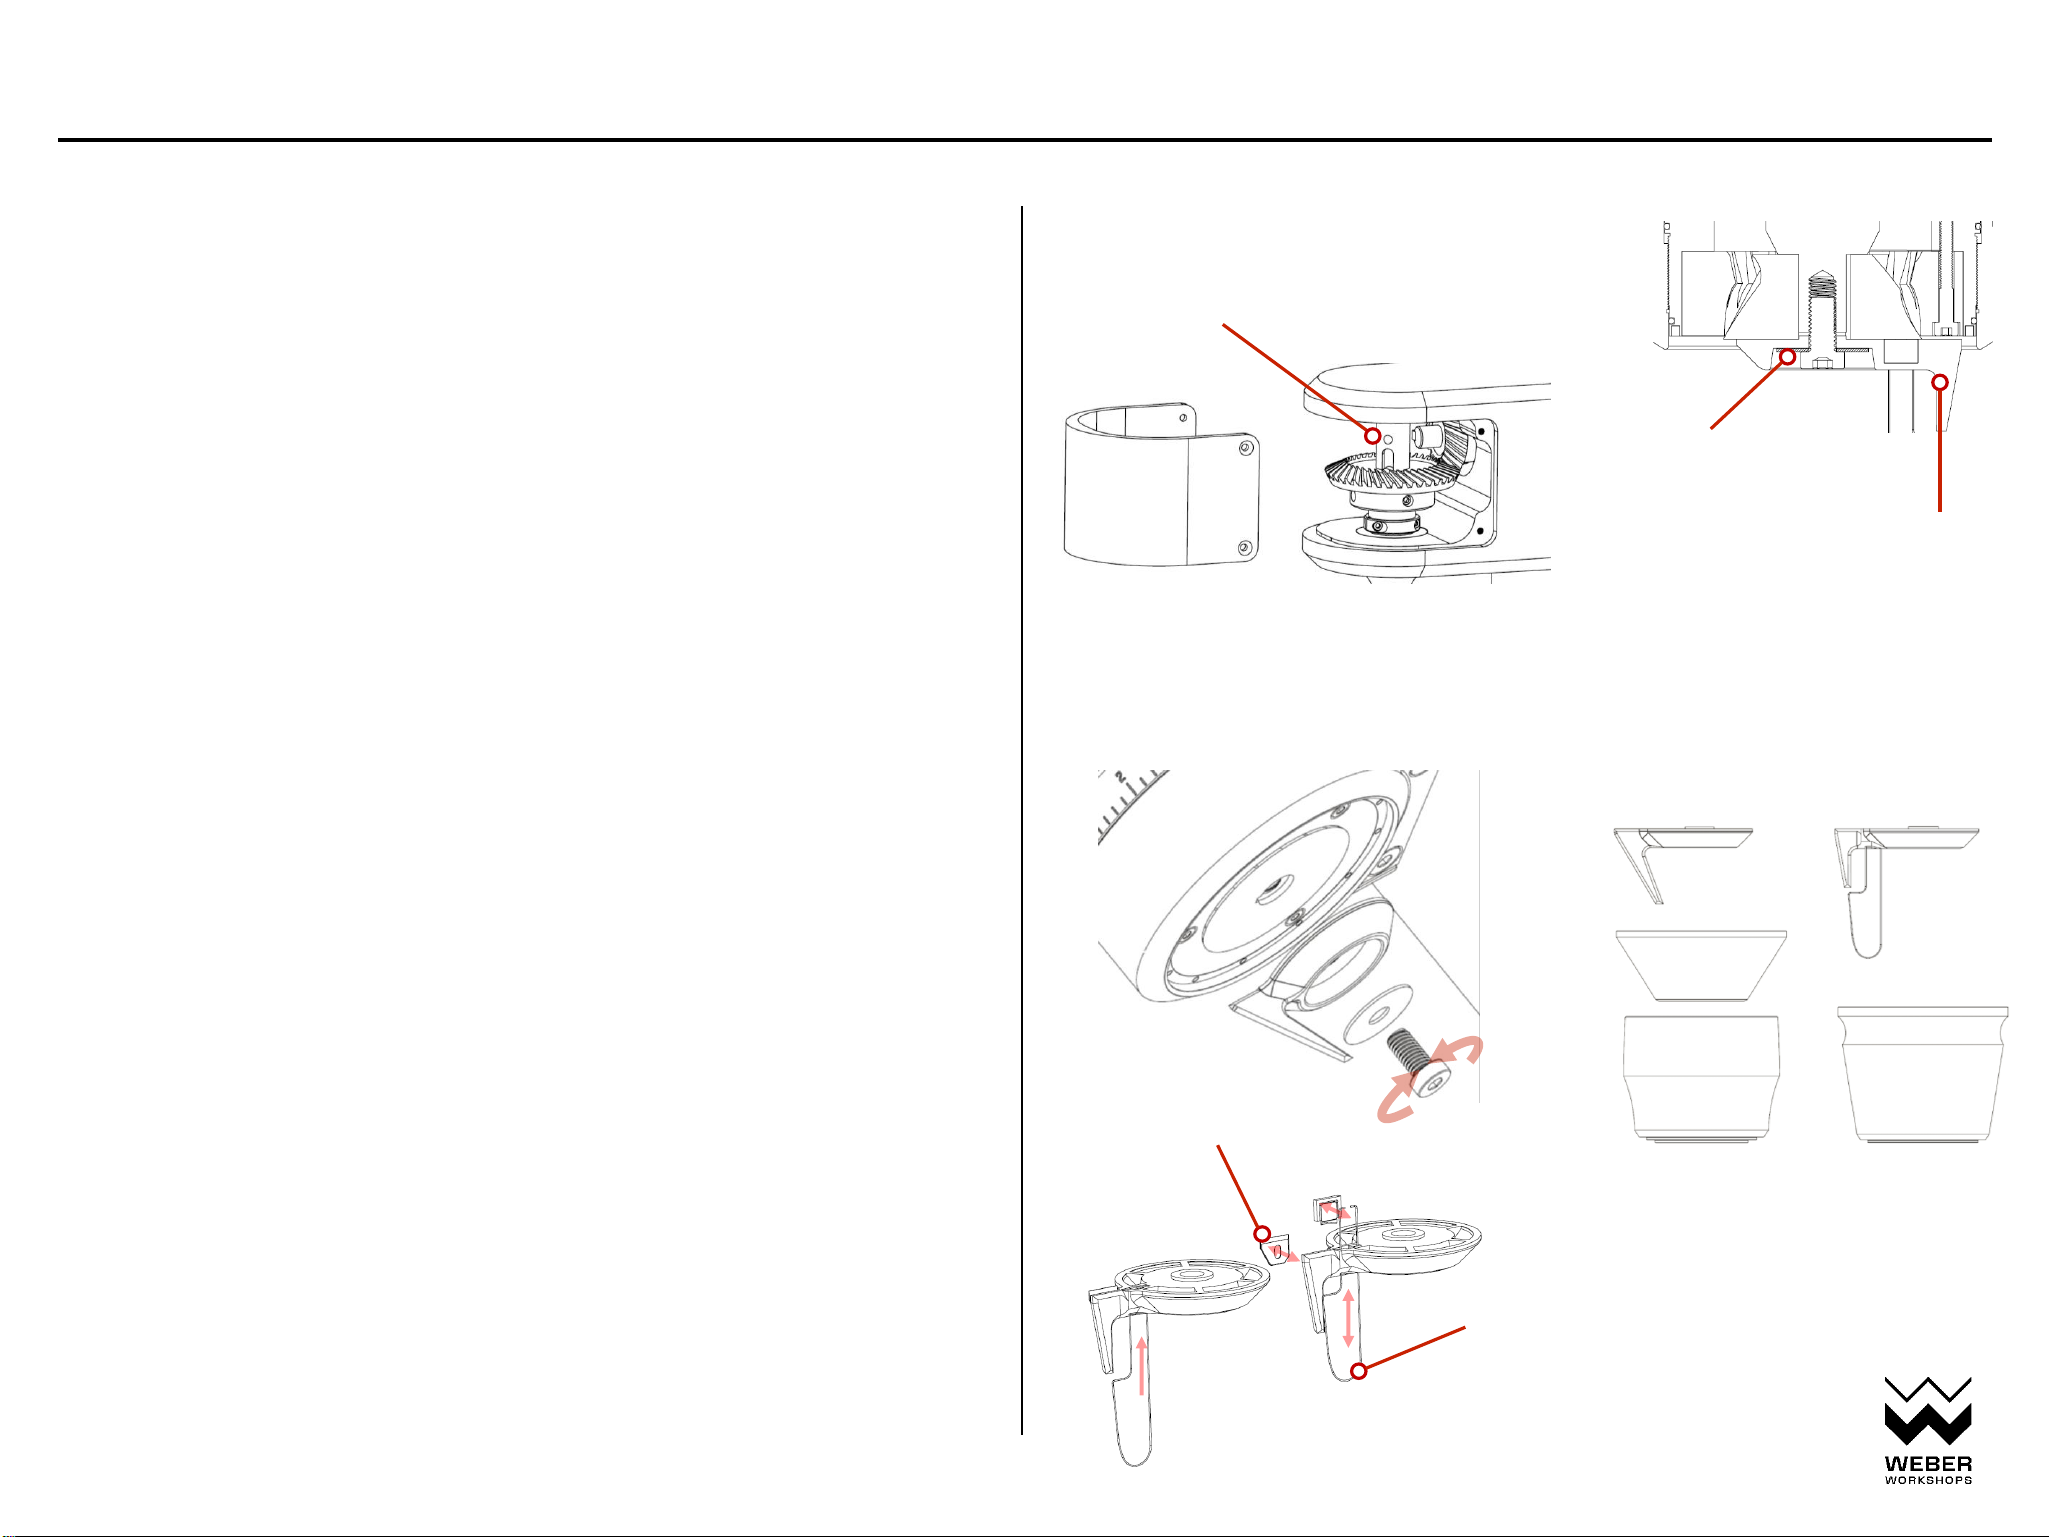
3 - Attach Magic/Static wiper. Lay the grinder on its side
on a clean towel or cloth. Use the included 5mm hex key to
remove the screw holding the lower axle cap in place.
Remove the axle cap and store for safekeeping. You may
need to dump some coffee beans into the funnel and use a
rubber glove to hold the shaft securely enough to remove
the screw (tapping the end of the allen key abruptly will
also help). Re-use the screw and thread it through the
washer and wiper; then using the 5mm hex key, securely
tighten the screw.
If the bottom bolt is stuck and cannot be
removed (the shaft turns with it), you can
remove the gearbox cover and place a metal
rod (or Allen key) through the hole in the
shaft to lock it in place.
the magic wiper has a replaceable stirring
rod in case it gets bent or damaged. Push
out the insert block on backside of wiper
(needs to be removed from machine) to
swap the stirring attachment.
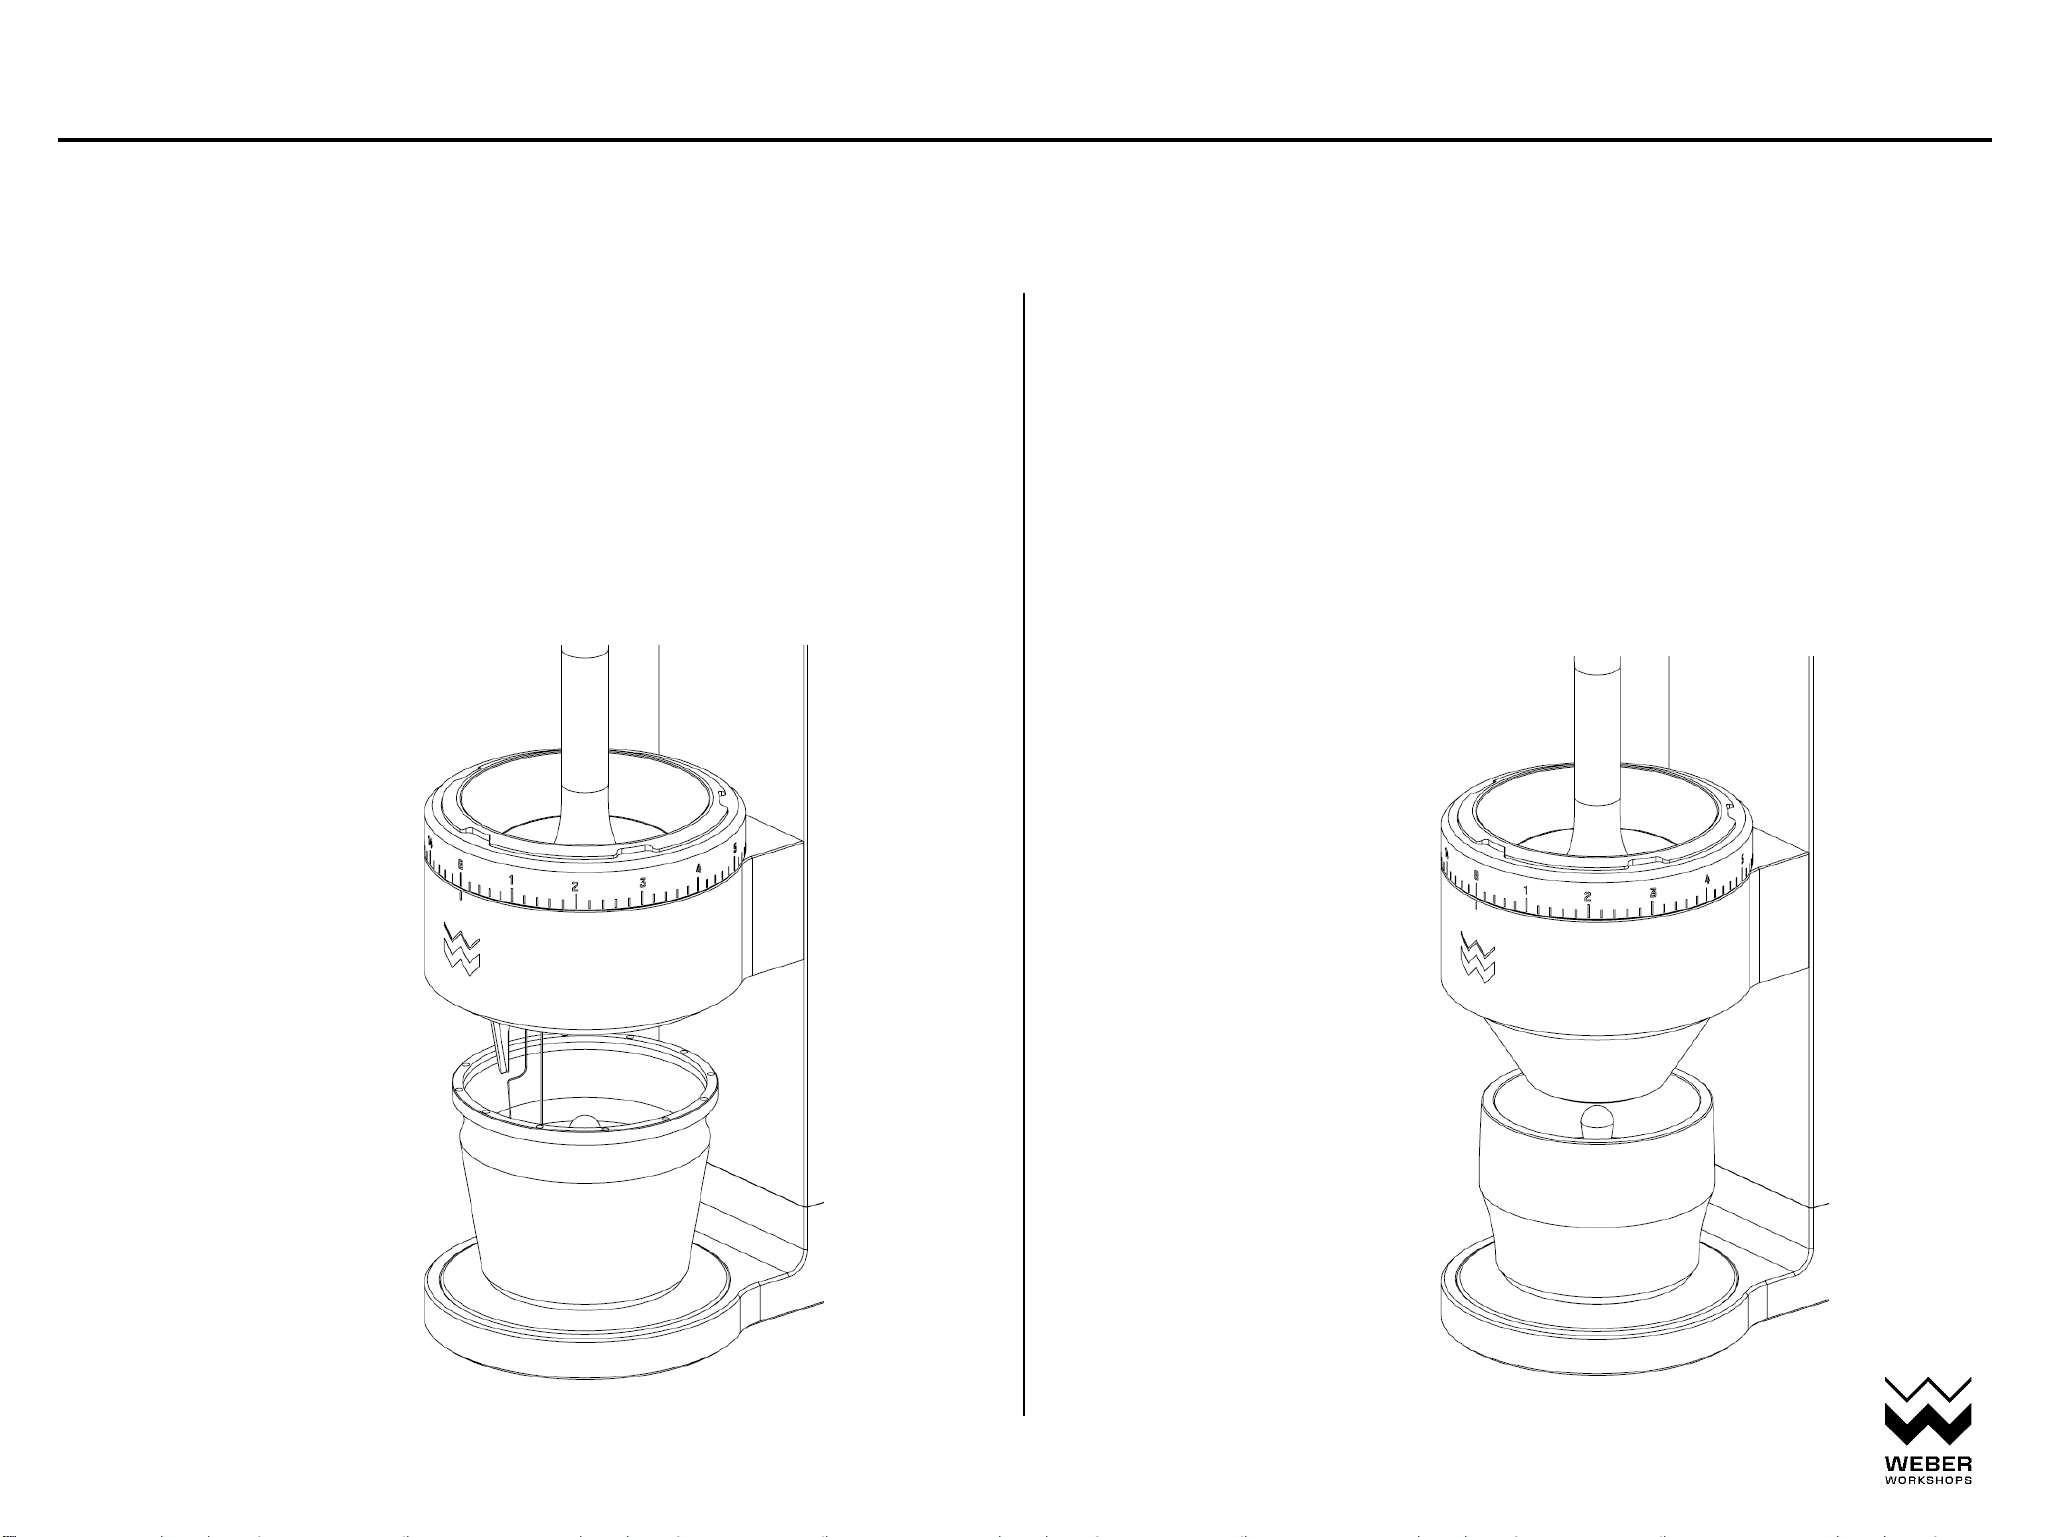
Choose magic tumbler or standard tumbler wiper
STANDARD MAGIC
release
tighten
WARNING: Shut down mains power before removing gearbox cover.
The gears can be a pinch-point for fingers when exposed.
standard or magic wiper
IMPORTANT! metal washer
swapable shim sticker
Copyright 2023 Weber Workshops, manual version Mk ii

QUICKSTART | BASIC USAGE 4
5. TBD
IMPORTANT! Verify the locking ring sits flush with the burr
collar, and the pins are completely engaged. Try to rotate
the locking ring to ensure the burrs are locked.
Copyright 2023 Weber Workshops, manual version Mk ii

QUICKSTART | BASIC USAGE 5
Magic tumbler: Ensure the tumbler plug is properly
seated inside the magic tumbler, then attach the magic
tumbler into the magnetic mount, being careful not to
damage the static wiper or the stirring rods. This gets
easy with practice.
Standard tumbler: Attach the lower funnel into the
magnetic mount. Ensure the tumbler plug is properly
seated inside the standard tumbler. Center the tumbler
directly beneath the lower funnel. It will self-center with
the magnets.
4. Choosing and placing tumbler.
Magic Tumbler
•58mm portafilter
•MOKA pot
•Pour-over
•etc.
Standard Tumbler
•58 or 49mm portafilter
•Pour-over
•etc.
Copyright 2023 Weber Workshops, manual version Mk ii

QUICKSTART | BASIC USAGE 6
5 - Plug in unit. Use the included power cord. You may
need an adapter or an alternative C13 style cable for your
country, but a transformer should not be needed as it
works anywhere with a 100v-240v (50 or 60Hz) electrical
service.
6 - Power on mains. This is the switch on the back of the
unit next to where the cord plugs in.
7 - Adjust the RPM level. Turn the knob counterclockwise
to reduce to the 50 -70 RPM range (a good starting point).
8 - Using the On/Off Button. When the burrs are
spinning, the button will illuminate and remain depressed.
Be sure not to leave the grinder ON/Spinning for
excessive periods of time.
9 - Adjust the Grind. Test grind a small amount of coffee
to verify the initial setting. The KEY ships pre-set to a
reasonable grind setting for espresso. You will need to
make appropriate adjustments for your particular coffee
and brewing method. Adjustments are made by lifting the
locking ring and turning. Larger numbers mean larger
particles (clockwise = coarser). Some coffee remnants
may remain in the grinder during shipping, as we test-
grind ~200gof coffee with each unit before shipping.
While we do clean, a small amount of coffee may remain.
RPM KNOB
ON/OFF BUTTON
CLEANING BRUSH
main power on main power off
Copyright 2023 Weber Workshops, manual version Mk ii

QUICKSTART | BASIC USAGE 7
10 - Grinding Coffee. When you are happy with your
grind setting, you can dump your coffee dose into the Bean
Dish. You may use either a "Hot Start" where the grinder is
on/spinning before the beans are introduced, or a "Cold
Start" where the beans are added before turning the
grinder on.We typically recommend using a Hot Start when
operating the KEY. A typical dose takes around 20-30s for a
20g dose to finish grinding (depending on grind size and
RPM setting).
11 - Power Off.We recommend powering down at mains
overnight for cafes, or during any prolonged period without
use in the home.
12 - Cleaning the Grinder. Use the brush to clean the burr,
funnel, base-plate, etc. To replace the brush in the base, first
pull the brass outer sleeve to cover the bristles before re-
insertion. Upon re-insertion, the cap will be pushed back for
immediate use upon removal.
REMOVABLE
BRUSH HEAD
Copyright 2023 Weber Workshops, manual version Mk ii

WARNINGS and SAFETY INFORMATION 8
Misuse of the grinder or use other than for the intended purpose may result in serious
injury. Adult supervision is required.
Before servicing, inspecting, or cleaning the grinder, unplug from mains electricity.
Do NOT operate the grinder without the Magic tumbler or the Funnel in place.
Do NOT at any time place fingers or foreign objects inside the grind chamber.
Copyright 2023 Weber Workshops, manual version Mk ii

warnings and safety information 9
product name: key coffee grinder
model number: key-v2 model
rated voltage: 100-240V
frequency: 50/60Hz
power: 315-385W
Copyright 2023 Weber Workshops, manual version Mk ii
Table of contents
Other Weber Coffee Grinder manuals