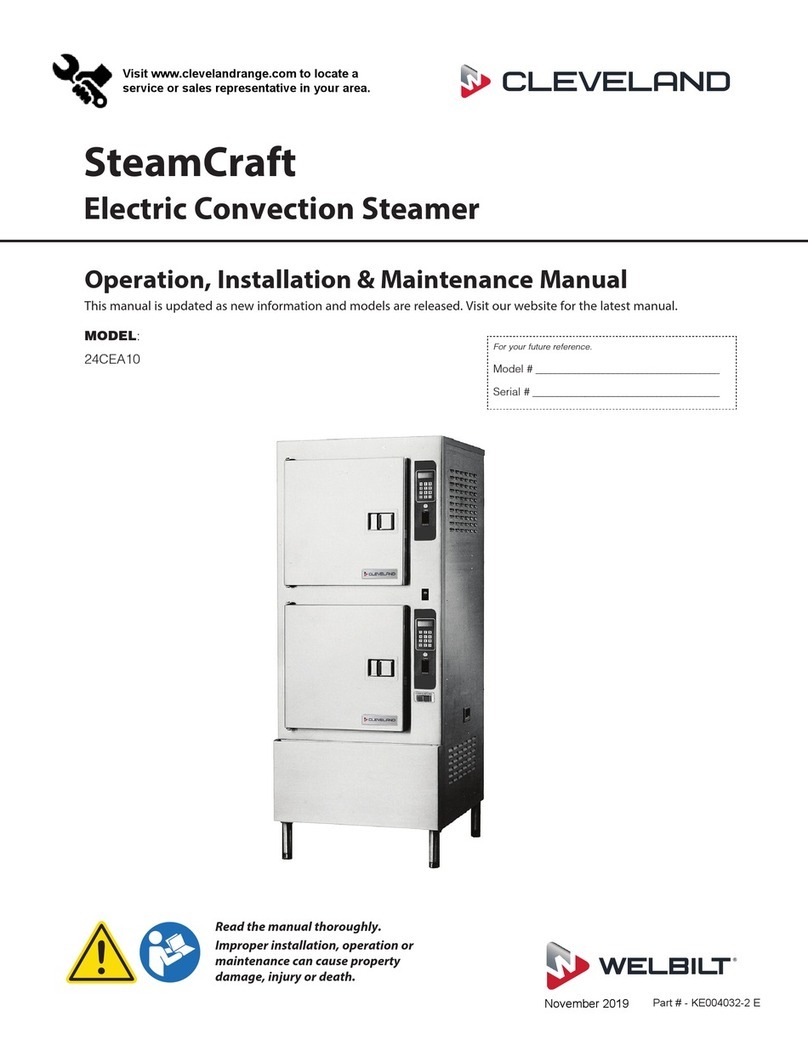
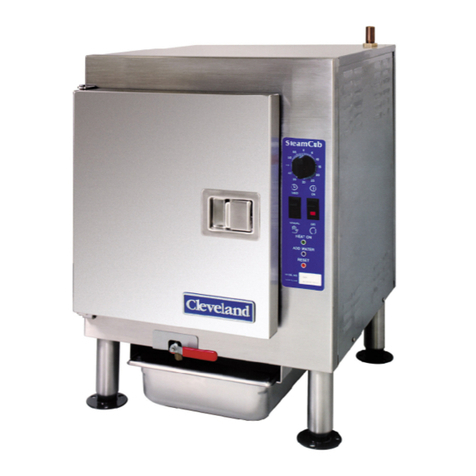
Welbilt CLEVELAND SteamCraft 24CGA10 Instruction Manual

Read the manual thoroughly.
Improper installation, operation or
maintenance can cause property
damage, injury or death.
!
SteamC aft
Gas Convection Steame
November 2019 Part # - KE004036-2 D
Ope ation, Installation & Maintenance Manual
This manual is updated as new information and models are released. Visit our website for the latest manual.
MODEL:
24CGA10
For your future reference.
Model # ______________________________________
Ser al # _______________________________________
Visit www.clevelandrange.com to locate a
service or sales representative in your area.

STATEMENT OF RESPONSIBILITIES /
DÉCLARATION DES RESPONSABILITÉS /
DECLARACIÓN DE RESPONSABILIDADES
This document is for use y experienced
and trained Qualified Cleveland Range,
LLC Authorized Service Representatives
who are familiar with oth the safety
procedures, and equipment they
service. Cleveland Range, LLC assumes
no lia ility for any death, injury,
equipment damage, or property damage
resulting from use of, improper use of,
or failure to use the information
contained in this document. Cleveland
Range, LLC has made every effort to
provide accurate information in this
document, ut cannot guarantee that
this document does not contain
unintentional errors and omissions.
The information in this document may
e su ject to technical and
technological changes, revisions, or
updates. Cleveland Range, LLC
assumes no lia ility or responsi ility
regarding errata, changes, revisions, or
updates.
Qualified Cleveland Range, LLC
Authorized Service Representatives are
o ligated to follow industry standard
safety procedures, including, ut not
limited to, OSHA regulations, and
disconnect / lock out / tag out
procedures for all utilities including
steam, and disconnect / lock out / tag
out procedures for gas, electric, and
steam powered equipment and / or
appliances.
All utilities (gas, electric, water and
steam) should e turned OFF to the
equipment and locked out of operation
according to OSHA approved practices
during any servicing of Cleveland Range
equipment
Qualified Cleveland Range, LLC
Authorized Service Representatives are
o ligated to maintain up-to-date
knowledge, skills, materials and
equipment.
Ce document est destiné à l’usage des
Représentants de Service qualifiés et
autorisés de Cleveland Range, LLC qui
possèdent l’expérience et la formation ainsi
que la onne connaissance des mesures
de sécurité et du matériel qu’ils
entretiennent.
Cleveland Range, LLC décline toute
responsa ilité pour tout cas de décès,
lessure, dommage matériel ou dommage
aux iens résultant de l'utilisation, de la
mauvaise utilisation ou du manquement
d’utilisation des renseignements contenus
dans ce document.
Cleveland Range, LLC s’est efforcé à
fournir des renseignements précis dans ce
document mais ne peut garantir que ce
document soit exempt d’erreurs et
d’omissions non intentionnelles.
Les renseignements contenus dans ce
document peuvent être assujettis à des
changements techniques et technologiques,
des révisions ou des mises à jour.
Cleveland Range, LLC décline toute
o ligation ou responsa ilité concernant les
errata, modifications, révisions ou mises à
jour.
Les Représentants de Service qualifiés et
autorisés de Cleveland Range, LLC sont
tenus de se conformer aux mesures de
sécurité normalisées de l’industrie, y
compris, mais sans s'y limiter, les
réglementations de l'OSHA, les procédures
de dé ranchement / verrouillage /
étiquetage relatives à tous les services
pu lics, dont l’approvisionnement en
vapeur, et les procédures de
dé ranchement / verrouillage / étiquetage
relatives aux équipements et/ou appareils
fonctionnant au gaz, à l’électricité et à la
vapeur.
Au cours de tout entretien d’un appareil
Cleveland Range, tous les services pu lics
(gaz, électricité, eau et vapeur) doivent être
FERMÉS au niveau de l’appareil et le
dispositif de fonctionnement doit être
verrouillé suivant les pratiques approuvées
de l’OSHA.
Les Représentants de Service qualifiés et
autorisés de Cleveland Range, LLC sont
tenus d’actualiser en permanence leurs
connaissances, compétences, matériel et
équipement.
Este documento está destinado para el uso
de los Representantes de Servicio
calificados y autorizados de Cleveland
Range, LLC quienes cuentan con la
experiencia y la capacitación así como el
uen conocimiento de las medidas de
seguridad y de los equipos que mantienen.
Cleveland Range, LLC, declina toda
responsa ilidad en caso de cualquier
fallecimiento, lesiones, daños al equipo o
daños a la propiedad resultantes de la
utilización, del uso inde ido o de la falta de
utilización de la información provista en este
documento.
Cleveland Range, LLC se ha esforzado en
suministrar información precisa en este
documento, pero no puede garantizar que
este documento esté exento de errores y de
omisiones no intencionales.
La información contenida en este
documento podría estar sujeta a cam ios
técnicos o tecnológicos, revisiones o
actualizaciones. Cleveland Range, LLC
declina toda o ligación o responsa ilidad
con respecto a erratas, modificaciones,
revisiones o actualizaciones.
Los Representantes de Servicio calificados y
autorizados de Cleveland Range, LLC tienen
la o ligación de seguir los procedimientos
estándar de seguridad de la industria; los
cuales incluyen pero no se limitan a los
reglamentos de la OSHA (La Administración
de la Seguridad y Salud Ocupacionales), los
procedimientos de desconexión, cierre y
etiquetado relativos a todos los servicios
pú licos incluyendo el suministro de vapor y
los procedimientos de desconexión, cierre y
etiquetado para los equipos y/o aparatos
que funcionan a ase de gas, electricidad o
vapor.
Cuando se esté dando servicio o
mantenimiento a un aparato de Cleveland
Range, todos los servicios pú licos (gas,
electricidad, agua y vapor) de en estar
APAGADOS para el equipo en cuestión y se
de e seguir el procedimiento de cierre de
operaciones de acuerdo con las prácticas
apro adas por la OSHA.
Los Representantes de Servicio calificados y
autorizados de Cleveland Range, LLC tienen
la o ligación de actualizar constantemente
sus conocimientos, destrezas, materiales y
equipamiento.

WARNING: Improp r
installation, op ration,
adjustm nt, alt ration,
s rvic or maint nanc
can caus prop rty
damag , injury or d ath.
R ad th installation
and op rating
instructions thoroughly
b for installing,
op rating or s rvicing
this quipm nt.
FOR YOUR SAFETY
Do not stor or us
gasolin or any oth r
flammabl liquids and
vapours in th vicinity of
this or any oth r
applianc .
AVERTISSEMENT : Tout
mauvais pratiqu n matièr
d’installation, d
fonctionn m nt, d réglag ,
d modification, d’ ntr ti n ou
d maint nanc p ut caus r
d s dommag s matéri ls, d s
bl ssur s ou la mort. Lis z la
totalité d s instructions
d’installation t d’utilisation
avant d’install r, d’utilis r ou
d’ ntr t nir c t équip m nt.
POUR VOTRE SÉCURITÉ
N pas ntr pos r ou
utilis r d' ss nc ou
d'autr s liquid s ou
vap urs inflammabl s à
proximité d c t appar il
ou d tout autr appar il.
Ne pas pulvériser des aérosols dans le
voisinage de cet appareil alors qu'il est en
fonctionnement.
Cet appareil ne doit pas être utilisé par des
personnes dont les capacités physiques,
sensorielles ou mentales sont réduites, ou
des personnes dénuées d'expérience ou de
connaissance, sauf si elles ont pu énéficier,
par l'intermédiaire d'une personne
responsa le de leur sécurité, d'une
surveillance ou d'instructions préala les
concernant l'utilisation de l'appareil.
Cet appareil n'est pas destiné à être utilisé
par des enfants et ils doivent être surveillés
pour s'assurer qu'ils ne jouent pas avec
l'appareil.
Conservez ce manuel pour votre référence.
ADVERTENCIA: La ind bida
instalación, op ración,
ajust , modificación,
s rvicio o mant nimi nto
pu d ocasionar daños a la
propi dad, l sion s o
mu rt . L a d t nidam nt
las instruccion s d
instalacion y d op ración
ant s d instalar, pon r a
funcionar o dar s rvicio a
st quipo.
PARA SU SEGURIDAD
No guard ni us gasolina
o cual squi ra otros
líquidos o vapor s
inflamabl s n las
c rcanías d ést o
cualqui r otro aparato.
No pulverice aerosoles en las
proximidades de este aparato
mientras está en funcionamiento.
Este aparato no de e ser utilizado por
personas con capacidades físicas,
sensoriales o mentales reducidas, o
que no tengan la experiencia y los
conocimientos adecuados, a menos
que estas personas hayan reci ido
supervisión e instrucciones en cuanto
al uso del aparato por la persona
responsa le de la seguridad de ellas.
Guarde este manual para su
referencia.
FOR YOUR SAFETY / POUR VOTRE SÉCURITÉ /
PARA SU SEGURIDAD
Do not spray aerosols in the vicinity of
this appliance while it is in operation.
This appliance is not to e used y
persons with reduced physical, sensory
or mental capa ilities, or lack of
experience and knowledge, unless they
have een given supervision or
instruction concerning use of the
appliance y a person responsi le for
their safety.
This appliance is not for use y children
and they must e supervised not to play
with it.
Retain this manual for your reference.
The boiler base Tabletop is NOT a
supporting surface. Death, Injury or
Equipment Damage will result from
mounting or placing anything on the
Tabletop.
When the ON/OFF lever is turned to the
OFF position, Steamer will remain HOT
for some time. Avoid contact with hot
surfaces and steam.
Death, Injury or Equipment Damage can
result from touching any component inside
this appliance when the power is
connected.

Improper installation, operation, adjustment, alteration,
service or maintenance can cause property damage,
injury or death. Read the installation and operating
instructions thoroughly efore installing, operating or
servicing this equipment. / Toute mauvaise pratique en
matière d’installation, de fonctionnement, de réglage, de
modification, d’entretien ou de maintenance peut causer des dommages
matériels, des lessures ou la mort. Lisez la totalité des instructions
d’installation et d’utilisation avant d’installer, d’utiliser ou d’entretenir cet
équipement. / La inde ida instalación, operación, ajuste, modificación,
servicio o mantenimiento puede ocasionar daños a la propiedad, lesiones o
muerte. Lea detenidamente las instrucciones de instalacion y de operación
antes de instalar, poner a funcionar o dar servicio a este equipo.
Surfaces and product may e hot! Wear protective
equipment. /Les surfaces et le produit peuvent être
chauds! Portez un équipement de protection. / ¡Las
superficies y el producto pueden estar calientes!
Utilice equipo protector.
Stand clear of product discharge path
when discharging hot product. /
Écartez-vous du chemin de décharge
d’un produit chaud. / Permanezca
alejado de la ruta de descarga del
producto al vaciar producto caliente.
Keep hands away from moving parts and pinch points.
/ Gardez les mains loin des pièces mo iles et des
points de pincement. / Mantenga las manos lejos de
piezas movi les y puntos de presión muy localizada.
Hot product and surfaces. / Produit et
surfaces chaudes. / Producto y
superficies calientes.
Do not touch. / Ne pas toucher. / No
la toque
Do not clim , sit or stand on equipment. / Il ne faut pas
monter, s'asseoir ni se tenir de out sur l'équipement. /
No su irse, ni sentarse ni pararse so re el equipo.
Pressurized device. / Appareil sous pression. /
Dispositivo de presión.
Keep clear of pressure relief discharge. / Restez à
l'écart de la soupape de sureté. / Permanezca alejado
de la descarga de presión.
Do not lean on or place o jects on the equipment. /
Ne vous penchez pas sur oune placez pas des
o jets sur la lèvre. / No se apoye ni coloque
o jetos en el la io.
Inspect unit daily for proper operation. / Inspectez
l’unité tous les jours pour son on fonctionnement. /
Inspeccione diariamente el funcionamiento correcto de
la unidad.
Have a qualified service technician maintain your
equipment. / Demandez à un technicien en entretien
et en réparation qualifié d’effectuer l’entretien de votre
équipement. / Haga que un técnico de servicio
calificado mantenga su equipo
Floor may ecome slippery from product spillage. /
Déversement de produit peut causer de plancher à
être glissante. / Derrame de producto puede causar
piso a ser res aladizo.
Do not fill kettle a ove recommended level marked on
outside of kettle. / Ne remplissez pas la chaudière en
excès du niveau recommandé marqué sur la
chaudière. / No llene la marmita arri a del nivel
recomendado marcado fuera de la marmita.
Unit must e anchored as per manual. / Unité doit être
ancrée selon les directives du manuel. / Unidad de e
estar fijado según el manual.
Heavy / Lourd / Pesado
Team or mechanical lift. / Équipe ou remontée
mécanique. / Equipo o elevador mecánico.
0
Ensure kettle is at room temperature and pressure
gauge is showing zero or less prior to removing any
fittings. / Assurez-vous que la chaudière est à
température am iante et que le manomètre est à zéro
ou moins avant de retirer des accessoires. /
Asegúrese de que la marmita esté a temperatura
am iente y el manómetro esté mostrando cero o
menos antes de retirar cualquier accesorio.
SERVICING / ENTRETIEN / SERVICIO
WARNING / AVERTISSEMENT / ADVERTENCIA
!
Remove electrical power prior to servicing. / Coupez
l'alimentation électrique avant l'entretien. / Desconecte
la energía eléctrica antes de darle servicio.
Risk of electric shock. / Risque de choc électrique. /
Riesgo de choque eléctrico.

OPERATION, INSTALLATION & MAINTENANCE MANUAL
SteamCraft 24CGA10
Table of Contents
Chapter.....................................................................................................................Page
1 General Safety............................................................................................................ 1
A. Laws, Codes, and Regulations ..........................................................................................................1
B. Gas Leak Instructions.........................................................................................................................1
C. Operational Safety...............................................................................................................................1
2 Product Information................................................................................................... 3
A. Product Information............................................................................................................................3
B. Model Numbers and Serial Numbers ................................................................................................3
C. Product Information Plate ..................................................................................................................3
D. Heat Standby Feature .........................................................................................................................3
3 Before Each Use......................................................................................................... 4
A. Inspecting the Cooking Compartment..............................................................................................4
B. Optional Compartment Door Steam Shut Off Switch (SCS) ...........................................................4
4 Cooking....................................................................................................................... 5
A. Quick Reference Lighting and Shutdown Summary Instructions..................................................5
B. Control Panel Switches ......................................................................................................................6
C. Operating and Cooking Procedure....................................................................................................7
D. Timed Mode Operating and Cooking Procedure .............................................................................7
E. Manual Mode Operating and Cooking Procedure............................................................................7
F. Dial Timer Control Panel .....................................................................................................................8
G. Keypad Timer Control Panel ..............................................................................................................9
5 Cleaning.................................................................................................................... 10
A. Steam Generator Blowdown ............................................................................................................10
B. Shutdown and Cleaning ...................................................................................................................10
6 General Installation Information ............................................................................. 12
A. Inspect for Shipping Damage ..........................................................................................................12
7 Installation ................................................................................................................ 12
A. Select a Location...............................................................................................................................12
B. Exhaust Hood Requirements...........................................................................................................13
C. Position and Level the Appliance....................................................................................................13
D. Slide Racks (Pan Racks) ..................................................................................................................13
E. Gas Supply.........................................................................................................................................14
F. Water Supply ......................................................................................................................................15
G. Electric Power Supply.......................................................................................................................17
H. Free Air Vented Drain Line ..............................................................................................................18
I. Installation Checklist..........................................................................................................................19

8 Startup Procedure.................................................................................................... 20
A. Lighting Instructions.........................................................................................................................20
B. Shutdown Instructions .....................................................................................................................21
9 Operating Tests ........................................................................................................ 22
A. Startup Procedure with the Appliance De-Energized ....................................................................22
B. Steam Generator Drain and Rinse Cycle Inspection.....................................................................23
C. Operating Test Procedures ..............................................................................................................23
D. Timer Test for Dial Timer Control Panel..........................................................................................24
E. Timer Test for Keypad Control Panel ..............................................................................................25
F. General Information about the Compartment Door Optional Steam Cut Off Switch ..................25
G. Function Test for the Compartment Door Optional Steam Cut Off Switch..................................26
10 Preventative Maintenance ..................................................................................... 26
A. General Information..........................................................................................................................26
B. Maintenance and Service Records..................................................................................................26
C. Daily Maintenance.............................................................................................................................27
D. Weekly Maintenance.........................................................................................................................27
E. Monthly Maintenance........................................................................................................................27
F. Yearly Maintenance............................................................................................................................30
11 Troubleshooting Guide .......................................................................................... 31

1
Post instructions to be followed if the user smells gas.
Display the instructions in a prominent location.
Obtain the instructions from the local gas supplier.
CHAPTER 1 GENERAL SAFETY
A. Laws, Codes, and Regulations
1. The installation of this appliance must conform with:
a. The National Fuel Gas Code, ANSI Z223.1 / NFPA 54 (latest edition), or the Natural Gas and
Propane Installation Code CSA B149.1, or local codes, as applicable.
b. The National Electrical Code, ANSI/NFPA 70 (latest edition), or the Canadian Electrical Code,
CSA C22.2, or local codes, as applicable.
•When installed, the appliance must be electrically grounded in accordance with the
above.
•NOTE: This appliance is not GFI (GFCI) compatible.
c. The Food Code (latest edition) of the Food and Drug Administration (FDA).
2. This equipment is to be installed to comply with the applicable federal, state, or local plumbing
codes.
3. Instructions must be read in their entirety before starting this appliance.
4. Installation must comply with all local fire and health codes.
B. Gas Leak Instructions
Until the leak is stopped, observe the following precautions in addition to the posted instructions.
•Do not light or start any appliance.
•Do not touch any electrical switch.
•Do not use any phone in the building.
•Immediately call the gas supplier from a phone away from the building. Follow the gas supplier’s
instructions.
•If the gas supplier cannot be reached, call the fire department.
C. Operational Safety
The Operational Safety section outlines minimum safety policies and procedures for operating one or
more Cleveland Range appliances.
1. Do not store anything on top and underneath the appliance.
2. KEEP THE APPLIANCE AREA FREE AND CLEAR OF COMBUSTIBLES.
3. Proper air supply for ventilation and combustion is REQUIRED for and CRITICAL to safe, efficient
operation of this appliance.
4. Place non-slip draining anti-fatigue mats rated for use in wet, greasy, or dry work areas on the
floor in front of the appliance and other locations as needed. Obtain the best mats for your needs
from your local supplier.
5. Wear BOOTS appropriate to the work area to help protect feet, and to help prevent slips and falls.
6. Allow only qualified Cleveland Range authorized service representatives to service the appliance.
7. Use only factory authorized repair parts.
a. Maintain written records of appliance service, maintenance, and repair. See Chapter 6.

2
DO NOT TRY TO LIGHT BURNERS WITH A FLAME.
This appliance has an electronic ignition system, which automatically lights
burners, senses flame, and controls gas flow. Burners cannot be lit with a flame.
DEATH, INJURY, OR EQUIPMENT DAMAGE may result.
DEATH, INJURY OR EQUIPMENT DAMAGE may result from an
improperly adjusted gas control and ignition system. Do not alter any
adjustments on the electronic control or gas valve.
If adjustment is required, contact an authorized service center. Cleveland
Range is in no way responsible for the operation or safety of this
equipment if the controller, valve, or igniter probe are adjusted by anyone
other than a qualified Cleveland Range authorized service representative.
BURN and SCALD HAZARD
Exposure to steam, condensate, and hot surfaces can cause death, burns, and scalds.
To help avoid injury:
•Do NOT breathe steam or condensate.
•Stand on the hinge side and away from the appliance and slowly open the cooking compartment door.
•Open the door slightly to allow steam, condensate, and heat to vent before looking or reaching into the
cooking compartment.
•Always wear DRY heatproof gloves when reaching into the cooking compartment or handling hot items.
Wet or damp gloves conduct heat and may cause burns when handling hot items.
Failure to follow these precautions can result in death, burns, and scalds.
This appliance is not GFI (GFCI) compatible.
Do not use a GFI (GFCI) circuit.
Using a GFI (GFCI) circuit can result in injury, equipment damage, and property damage.

3
CHAPTER 2 PRODUCT INFORMATION
A. PRODUCT INFORMATION This manual covers the operation of Cleveland Range model 24CGA10
(Ultra 10) and the standard features and options available on this appliance.
•Other than the selection of options, there are presently no significant design, parts, or operating
differences among appliances with this model numbers.
•For further information, contact your Cleveland Range sales representative or Cleveland Range.
B. MODEL NUMBERS AND SERIAL NUMBERS
1. Cleveland Range, LLC assigns two product identification numbers to each appliance: a model
number and a serial number.
2. Please provide this information when you contact Cleveland Range or a qualified Cleveland
Range authorized service representative:
•Model Number____________________________________________________________
(Write the Model Number of your appliance here.)
•Serial Number____________________________________________________________
(Write the Serial Number of your appliance here.)
C. PRODUCT INFORMATION PLATE
The Product Information Plate on the left side of the appliance lists:
•Model
•Serial Number
•Clearances
•Power and Wiring Requirements
•Fuel Gas Type and Requirements
D. HEAT STANDBY FEATURE
The steamer has a Heat Standby Feature to keep the Steam Generator near steaming temperature
between cooking operations. When timed models have the timer set to zero, the Heat Standby Feature
will turn the burners on every 6 minutes for 20 seconds as long as the steamer is ON and has water in
it.
•Do not work near or above the exhaust flue whenever power is on.
•There is no warning to Heat Standby burner ignition.

4
BURN AND SCALD HAZARD WARNING FOR STEAMERS WITH OPTIONAL
COMPARTMENT DOOR STEAM SHUT OFF SWITCH (SCS):
COMPARTMENT DOOR STEAM SHUT OFF SWITCHES ARE NOT INSTANT OFF!!!
•Even though the release of steam from the steam generator ends as soon as a
door is opened, residual steam in the system may take up to a minute to clear from
the steam lines and the cooking compartment.
•To help prevent injury, follow all the standard precautions for opening the cooking
compartment door and reaching into the cooking compartment.
Failure to do so can result in death, burns, and scalds.
BURN, SCALD AND EQUIPMENT DAMAGE HAZARD
If the drain is blocked, hot water can fill the cooking compartment and spill out when the
cooking compartment door is opened.
Signs of blocked drains include steam or water leaks around the cooking compartment door,
and reduced cooking performance.
To help avoid injury:
•When checking inside the cooking compartment: always stand to the hinge side and away
from the appliance and open the door slowly.
•Inspect the drain(s) before each use and clean them if needed.
Failure to follow these precautions can cause burns, scalds, and equipment damage.
CHAPTER 3 BEFORE EACH USE
A. INSPECTING THE COOKING COMPARTMENTS
1. Before every steaming operation, inspect the cooking compartments and remove any food scraps
or debris. See Chapter 5.
2. Inspect and clean the drains and drain screens before each use. See Figure 3-1.
3. Be sure the screens cover the drains. The screens prevent large pieces of food from entering and
blocking the drains.
4. If the drains are slow, see Chapter 5.
B. COMPARTMENT DOOR STEAM SHUT OFF SWITCH (SCS)
•Steam Shut Off Switches (automatic steam cutoffs) turn OFF the release of steam to a cooking
compartment when the door to that compartment is opened.
Figure 3-1
Compartment
Drain Screen
Drain Screen

5
Press switches and keys with fingertips only.
Injury and equipment damage can result from pressing
switches and keys with anything else.
CHAPTER 4 COOKING
A. QUICK REFERENCE LIGHTING AND SHUTDOWN SUMMARY INSTRUCTIONS
•The following START-UP and SHUTDOWN SUMMARY is for quick reference ONLY.
•For safe operation and use of this equipment, the operators must comply with all safety and
operating instructions in this manual.
Lighting
1. Close the cooking compartment doors.
2. Refer to Spec sheet.
•For Timer controls: Set the mode to Timed and the Timers to 0 minutes.
3. Turn ON the ON/OFF switch. See Figure 4-1.
•The steam generator fills with water in about 6 minutes.
4. Turn ON one or both cooking compartments.
•ON/OFF controls: Turn ON.
•Dial Timer: Set to Manual Mode OR set a time in Timed Mode.
•Keypad Timer: Set a time and press the START/STOP key.
5. The blower starts and the pilot attempts to light for 90 seconds.
•If no ignition occurs, the system will reset in 6-7 minutes.
•To manually reset the system: Turn the ON/OFF switch OFF for 5 minutes and then back ON.
6. Cook as usual.
Shutdown
1. Open the cooking compartment doors.
•If water runs out of the steam ports during blowdown, call for service at once.
2. Turn OFF the ON/OFF Switch.
3. The drain opens, the automatic blowdown cycle starts, and the controls de-energize.
4. Wait for the 3-minute automatic blowdown cycle to run.
5. Clean as usual.
6. Leave the cooking compartment doors open to help increase gasket life and help prevent odor buildup.

6
1. POWER ON and GENERATOR FILL
Switch with Power On Indicator Light
•This is the ON/OFF switch.
•Turn this switch ON to power the
control panel and fill the steam
generator.
B. CONTROL PANEL SWITCHES
Figure 4-1
ON
OFF

7
Some foods drip juices.
Use a solid catch pan under perforated pans when steaming food that may drip juices.
Failure to use a catch pan can cause clogged drain screens and drains.
C. OPERATING AND COOKING PROCEDURE
1. Inspect and clean the drain and the cooking compartment as required. See Chapter 3.
2. Preheat: If necessary, preheat the cooking compartment.
a. Turn ON the appliance by following the Lighting instructions.
b. Close the cooking compartment doors.
c. Steam for 5 minutes.
d. Cook as usual.
3. Cook:
a. Slide pans of food into the slide racks in the cooking compartment
b. Do not place pans or anything else on the bottom of the compartment.
c. See “Timed Mode” and “Manual Mode,” and the Control Panels (refer to spec sheet) as required.
4. After Cooking:
a. If the appliance will be used again in a few minutes, shut door to maintain cooking
compartment temperature.
b. If another use is not planned for more than half an hour, leave the cooking
compartment door open slightly.
c. If the appliance will not be used again during this shift, go to Chapter 5, “Cleaning.”
D. TIMED MODE –OPERATING AND COOKING PROCEDURE
1. Set the TIMED/MANUAL switch to TIMED.
2. Set the cooking time.
3. When the Timer reaches zero and the buzzer sounds, open the cooking compartment door, and
remove the pans from the slide racks.
E. MANUAL MODE –OPERATING AND COOKING PROCEDURE
•In Manual Mode, the Operator starts and stops steaming operations.
•Use Manual Mode for:
oMaintaining cooking compartment temperature between cooking batches.
oContinuous supply of steam.
1. Set the TIMED/MANUAL switch to MANUAL. Steaming starts at once.
2. To stop Manual Mode steaming:
a. Turn the timer OFF or set it to ZERO.
b. Press the TIMED end of the TIMED/MANUAL rocker switch.
3. When the food is ready, open the cooking compartment door, and remove the pans from
the slide racks.

8
1. TIMER
•The Dial Timer sets the operating time from 0 to
60 minutes.
•Turn the knob clockwise until it points to the
required time.
•When the Timer reaches 0, a buzzer sounds for
3 seconds.
•The Dial Timer does NOT work in Manual Mode.
2. TIMED/MANUAL Switch
•The TIMED/MANUAL switch selects the Timed
or Manual Mode.
F. DIAL TIMER CONTROL PANEL
1
Figure 4-4
Figure 4-4
2

9
1. TIMER Display
•This four-digit display shows the minutes and
seconds remaining in the countdown.
•The display reads from zero (00:00) to 99 minutes
and 99 seconds (99:99).
•Pause (PAUS) appears when the count down is
stopped by the START/STOP key or by the
temperature compensating circuit.
2. Number Keys 0-9
•These keys set the number of minutes and seconds
in the timer count down.
•Example: Pressing the number keys 1, 2, 3, 4, sets
the timer for 12 minutes and 34 seconds (12:34).
3. CLEAR Key
•Press and hold this key for 5 seconds to zero
(00:00) the timer after it has been stopped.
•The Timer must be reset to zero (00:00) (“zeroed”)
by pressing this key before a new time can be set.
4. START/STOP Key
•Press this key to start and stop the Timer.
•Press and hold for 5 seconds to stop functions.
•In TIMED mode, press this key to start and stop
both the Timer and steam flow.
•In MANUAL mode, the steaming functions are
independent of the Timer.
•Press this key to silence the buzzer.
5. TIMED/MANUAL Switch
•The TIMED/MANUAL switch selects the Timed or
Manual Mode.
Note: Using the KEYPAD Timer in Manual Mode:
•The Timer does NOT start or stop steaming in
Manual Mode.
1) Set and start the Timer.
2) The KEYPAD Timer counts down only when the
cooking compartment is at cooking temperature.
3) The buzzer sounds when the Timer reaches zero.
G. KEYPAD TIMER CONTROL PANEL
Figure 4-5
1
2
4
5
3

10
CHAPTER 5 CLEANING
A. STEAM GENERATOR BLOWDOWN
1. Power Off
•When the appliance is turned OFF at the ON/OFF switch, blowdown starts automatically.
The generator is drained, and the drain valve is rinsed with fresh water to help prevent scale.
2. Blowdown Frequency
a. Based on the water quality analysis done before installation, and the amount of use,
make, and post a blowdown schedule.
•Contact your qualified Cleveland Range authorized service agency or Cleveland Range
for more information about maintenance scheduling, products, and services.
b. Blowdown Schedule Guidelines:
1) When using water that does not meet the minimum water quality standards (see the
Warranty), blowdown must be performed after every 4 hours of operation, or more
frequently as required, and at the end of each shift.
2) For appliances using water that meets the minimum water quality standards, blowdown
must be performed at the end of each shift.
3. Blowdown Procedure
a. Follow the Shut Down instructions in Chapter 4.
b. EITHER restart the appliance by following “Lighting”instructions in Chapter 4, OR if the
appliance will not be used again this shift, go to “Shut Down and Cleaning.”
B. SHUTDOWN AND CLEANING
•Perform the Shutdown and Cleaning Procedure at the end of each shift or more
often if needed.
Shutdown and Cleaning Procedure for the End of Each Shift:
1. Follow the Shutdown instructions in Chapter 4.
2. Open the cooking compartment doors and allow the appliance to cool.
3. Remove the slide racks. Wash, and rinse them according to health and sanitation requirements.
4. Remove spilled food from inside the compartments. Use a soft bristle brush to remove stuck food.
5. Clean but do not remove the drain screens.
ELECTRIC SHOCK HAZARD
Do not clean this appliance with hoses or water jets!
Doing so can cause injury and equipment damage.
HIGH HEAT HAZARD
Wait for this appliance to cool before cleaning!
Attempting to clean a hot appliance can cause
DEATH, INJURY, BURNS, and SCALDS.

11
6. Clean the interior of the compartment thoroughly.
•Do NOT use abrasive cleaning compounds or steel wool.
7. Rinse the inside of the cooking compartments with clean water.
8. Clean the door gasket assemblies:
a. Remove the door gasket assembly (see Figure 5-1) by holding the gasket assembly at the sides
and lifting and away from the door.
b. Wipe the gasket assembly with a damp cloth.
c. Wipe the inside of the door with a damp cloth.
d. Rotate the gasket assembly 180. This makes the gasket last longer.
e. Replace the gasket assembly by sliding the retaining pins into the keyhole slots.
9. Replace the cleaned slide racks.
10. Wipe the exterior with a damp cloth.
11. Leave cooking compartment doors open until the next use to help prevent compartment odor buildup
and help increase gasket life.
Figure 5-1
Door Gasket Assembly
Retaining Pins
Keyhole Slots

12
Operating this appliance out of level can cause DEATH, INJURY, and EQUIPMENT DAMAGE.
This appliance must be level both front-to-back and side-to-side in all installations.
NEVER operate this appliance out of level.
If this appliance is suspected to be out of level, shut it down at once and call your qualified
Cleveland Range authorized service agency immediately.
CHAPTER 6 GENERAL INSTALLATION INFORMATION
A. Inspect for Shipping Damage
•If the appliance is damaged or damage is suspected:
1. Submit a Damage Claim to the Shipper immediately.
2. Inform your dealer at once.
3. Inform Cleveland Range in writing within three (3) days.
CHAPTER 7 INSTALLATION
A. Select a Location
1. For safe and efficient operation:
a. Installation must comply with all local fire and health codes.
b. The location selected must be capable of supporting this appliance.
•The operating weight of a 24CGA10 is 780 lbs.
c. Position the appliance so it will not tip or slide.
d. The operating surface must be level enough to allow leveling with the adjustable legs.
This appliance MUST be level both front to back and side to side before operation.
e. A suitable drain must be available within 12 feet of this appliance. Do NOT install the
appliance directly over a drain.
f. The location must include space for Operating and Service/Secondary Clearances and
the Exhaust Hood. Refer to spec sheet for more details.
g. KEEP THE APPLIANCE AREA FREE AND CLEAR OF COMBUSTIBLES.
h. Proper air supply for ventilation and combustion is REQUIRED for and CRITICAL to safe,
efficient operation of this appliance.
i. Make sure the air vents of this appliance are not blocked with or by anything.
All clearance requirements above, below, and around this appliance are the same for
non-combustible locations as for combustible locations.
Failure to maintain required clearances and additional distances as needed can result in
INJURY and EQUIPMENT DAMAGE.
Consult manufacturers’ literature, and sales and service agencies as needed.

13
j. Allow for sufficient extra distance if a "high heat source," e.g. a broiler, is located next to
this appliance. Contact Cleveland Range at 216-481-4900 or 1-800-338-2204 for
recommendations.
k. Do NOT install this appliance directly over a drain. Steam rising up out of the drain will
adversely affect operation, hamper cooling air circulation, and damage electrical and
electronic components.
B. Exhaust Hood Requirements
1. This gas fired appliance must be installed under a suitable ventilation hood as required by the
National Fuel Gas Code, ANSI Z223.1/NFPA 54 and ANSI Z83.11-2004 / CSA 1.8-2004.
2. The ventilation hood system must include an interlock to prevent the operation of this
appliance without the operation of the ventilation hood.
3. The exhaust hood must extend over the gas flue opening and meet the following
requirements:
a. This gas fired appliance must be vented in accordance with all local, state and national
codes for venting gas fired appliances.
b. The exhaust hood must be sized for the cumulative ventilation requirements of all the gas-
fired appliances in the area under the hood, including this appliance.
•The BTU/HR for a 24CGA10 is 125,000.
c. If an existing hood does not meet all specifications, a new one must be
constructed.
d. When determining hood size, include operating clearances. Refer spec sheet for more
details.
C. Position and Level the Appliance
1. Move the appliance into position.
2. Place a level along the bottom edge of the appliance.
3. Use the adjustable legs of the appliance to level it front-to-back and side-to-side.
D. Slide Racks (Pan Racks)
1. Refer to Figure 3-1. Each rack has four
loops: two top, and two bottom. Hold the
slide rack so the ends of the hanger loops
are towards compartment wall, as shown in
Figure 3-1.
2. Slide one rack into compartment with the
loop side closest to the compartment wall
and rack slots horizontal.
3. Hook the loops over the top and bottom pins
4. Repeat steps a, b, c for the other racks.
Figure 3-1
Slide Rack Installation

14
E. Gas Supply
Post instructions to be followed if the user smells gas.
Display the instructions in a prominent location.
Obtain the instructions from the local gas supplier.
1. Gas Supply Requirements
•Gas supply type MUST match the type of gas shown on the rating plate.
•Gas supply pressure must NOT exceed 14” water column (1/2 psi), and fall within the
pressure range shown below when using 3/4” NPT line and a 1/2” NPT connection
oNatural gas pressure at 1000 BTU/CF must be 5 1/2” – 14” water column.
oPropane gas pressure must be between 11” – 14” water column.
•If the gas or propane supply pressure exceeds 14” water column, a pressure regulating valve
(pressure regulator) must be installed in the gas supply line to reduce pressure to this
appliance. See Figure 3-2.
2. Gas Supply Line Requirements
The Installer/Owner is responsible for furnishing and installing gas supply lines, valves,
regulators, and accessories.
When installing gas supply lines and accessories, observe the following:
a. Refer to Figure 3-2 for the recommended layout of the gas supply lines.
b. Use non-hardening pipe thread sealant resistant to LP gas.
c. The ¾” NPT gas inlet is on the bottom of the 24CGA10. See Figure 3-2
d. Install main manual shut off valve between the gas supply and the appliance. See Figure 3-2.
This main manual shut off valve is called the “Main Manual Gas Valve.”
e. Install a sediment trap (drip leg) in gas supply line. See Figure 3-2.
3. Test Gas Supply Lines
a. Check all connections for proper tightness.
b. Remove the control side panel to inspect internal gas connections. Do not replace the panel
until installation is complete.
c. Open the gas supply valves.
24CGA10
GAS MANIFOLD
CONNECTION
DRIP LEG
MAIN GAS
SUPPLY
MAIN MANUAL
GAS VALVE
PRESSURE REGULATING
VALVE (IF REQUIRED)
Gas Supply Line Layout
Figure 3-2
Table of contents
Other Welbilt Electric Steamer manuals