WeP BOUNTI BP20BOUNTI BP20T User manual

BOUNTI BP20/20T/25T/50T/85T
USER GUIDE
Version 1.1.3

Dear Customer,
Congratulations !
You are now a proud owner of BOUNTI BP-20/20T/25T/50T/85T
Billing has never been more of a pleasure, designed at the cutting
edge of technology BP-20/20T/25T/50T/85T is easy to operate,
effortless to maintain with low running costs.
Enjoy our fantastic service spread across the country through well
networked Authorised Service Providers. To unlock the tech
fantasy inside your BP-20/20T/25T/50T/85T, use this guide and
harness the maximum your personal printer has to offer.
Should you need usage clarification, or perhaps have a suggestion
Note : Product visual shown on this User Manual is for
general reference only. Product may vary in some of its details.

CONTENTS Page #
BOUNTI BP-20/20T/25T/50T/85T
09.0 INSTRUCTIONS TO USE THE USB TO SERIAL PORT CONVERTER 42
1.0 YOUR AT A GLANCE 1
1.1 Features 1
2.0 LET'S GET STARTED 3
2.1 Unpacking the Product 3
2.2 Site Planning Guidelines 3
2.3 Power Conditioning Equipment 3
3.0 SAFETY PRECAUTIONS 3
4.0 OPERATIONS 4
4.1 Connecting the Power Supply 4
4.2 Connectingyourproduct toComputer 4
4.3 4
4.4 Installing Paper Roll 5
4.5
4.6 DownloadData Base/ Header-Footerfrom Utility fromComputer 8
4.7 User Login Mode 8
4.8 How to operate ? 9-39
5.0 DO'S & DON'TS 34-39
5.1 Do's 39
5.2 Don'ts 39
6.0 USING SPECIAL FEATURES 39
7.0 TROUBLE SHOOTING 40
8.0 TECHNICAL SPECIFICATION 41
10.0 USB TO SERIAL CONVERTER CONFIGURATION PROCEDURE 43
FOR
11.0 REPORT UPLOADER (For BP85T/25T only) 44
12.0 WEIGHING SCALE CALIBRATION (For BP85T/25T only) 44
13
14
Operation of product in Battery Mode
How to install Driver, Utiltiy & user manual from Wepmyshop 6-7
BP-20/20T/25T/50T/85T
.0 APPENDIX 45
.0 New features of BP20/ BP20T/BP50T/BP85T 46-55

1.1 Features
LCD Module :
Displays all transactional entries & data keyed in.
Key Pad :
It contains alphanumeric and function keys required for item entries, modification
and search items in data base.
Keyboard interface is available (Only Mains mode )
Ready Switch :
When in Ready mode ( Ready LED ON), your device is ready to use. To get into
OFF LINE mode, press Ready switch again.
Paper Feed Switch :
On pressing this switch, the stationery moves forward by a line. This switch is
active in OFF LINE mode only.
ON / OFF Switch :
To power ON/OFF the unit.
Front Panel :
It contains LCD & Key Pad.
Serial Interface :
This interface is used normally during data download / data upload. Cable from
this interface has to be connected to Computer serial port.
USB Interface :
This interface is used normally for standard Pen drive during data download / data
upload.
Adaptor Connector :
Used for connecting output of power supply adaptor.
1.0 YOUR AT A GLANCEBOUNTI BP-20/20T/25T/50T/85T
LCD
ON/OFF Switch
Key Pad
Ready Switch
Paper Feed Switch
Front
Panel
Adaptor
Cable
Serial Interface
Cable USB
Interface
For BP 85T/25T only
1

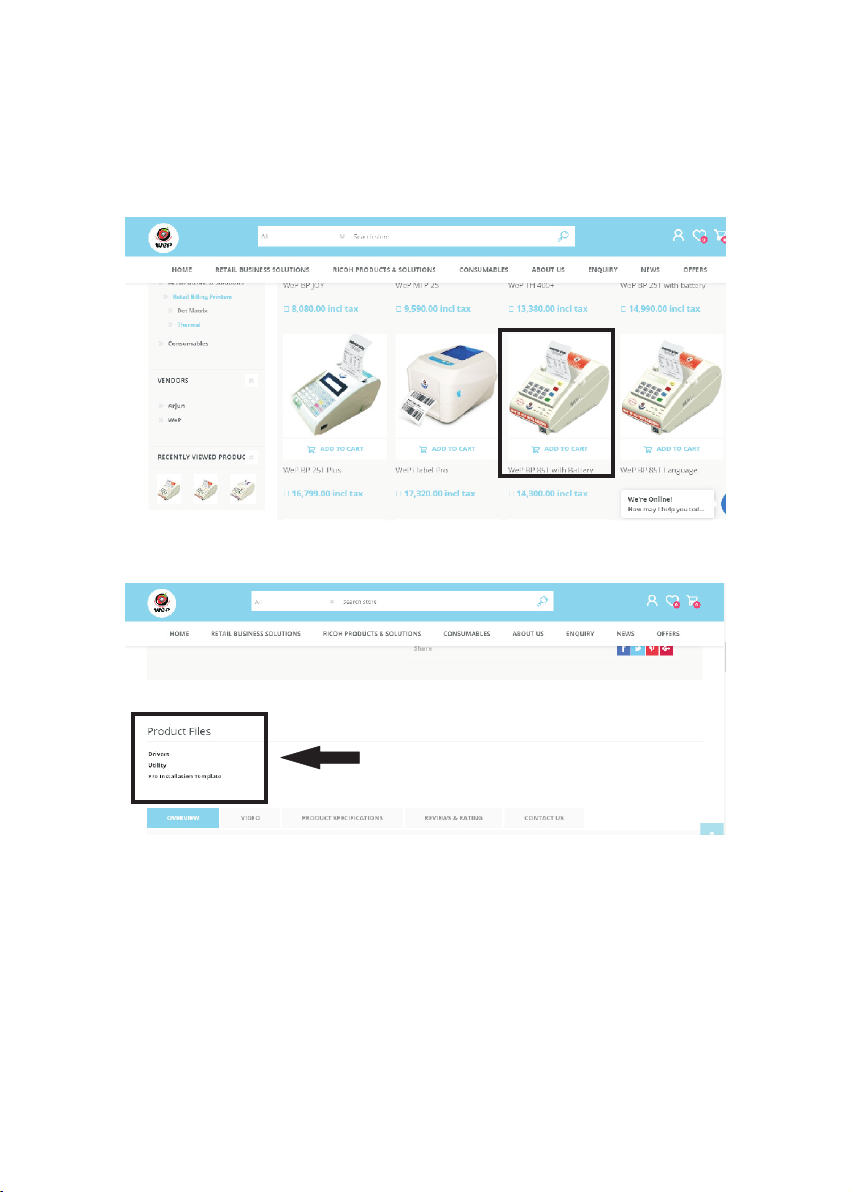
• Download Items, Header/Footer (Shop name, address etc) to printer from
utility.
• Entering new Items/Header or Footer through Panel.
• Search mode for the items, through the panel.
• Modify price/TAX/discount of existing item.
• Automatic TAX & discount calculation.
• On LCD, time/ date/ day is displayed.
• On Bill printout, date/ time is printed.
• Billing mode (Item no, Qty, Rate, Discount) can be entered.
• Item entered in a bill can be removed, cannot be changed to a different item.
• Browsing through the Items in Bill.
•
• Automatic Bill number generation(Option to set the bill no. to be continuous
or daily reset).
• Automatic Storage of Complete Current & Previous day Bill.
• Restaurant billing option available (KOT/Save KOT/Edit can be done).
• Item wise stock update/view.
• Printing of cash tally in bill is possible.
• Generation of reports like
• Billwise/void/Itemwise/TAX for current & previous day.
• Daywise summary for last 467 days.
• Monthly summary report for last 60 months.
• Yearly summary report for last 5 years.
• Hourly summary report for current and previous day.
• Stock report for each item.
• UDF wise report for current and previous day
( If UDF field enabled in settings)
• User bill/rate wise/user wise report for current & previous day.
• Duplicate Bill report
• UDF itemwise report of current and previous day.
•
• 4 digit secured password protection.
• Retail Utility software for convenient item creation
• Choice between quantity billing or billing by amount.
• Round off/Discount/Price change/Cash Tally/ Other charge/TAX option
available.
•
•
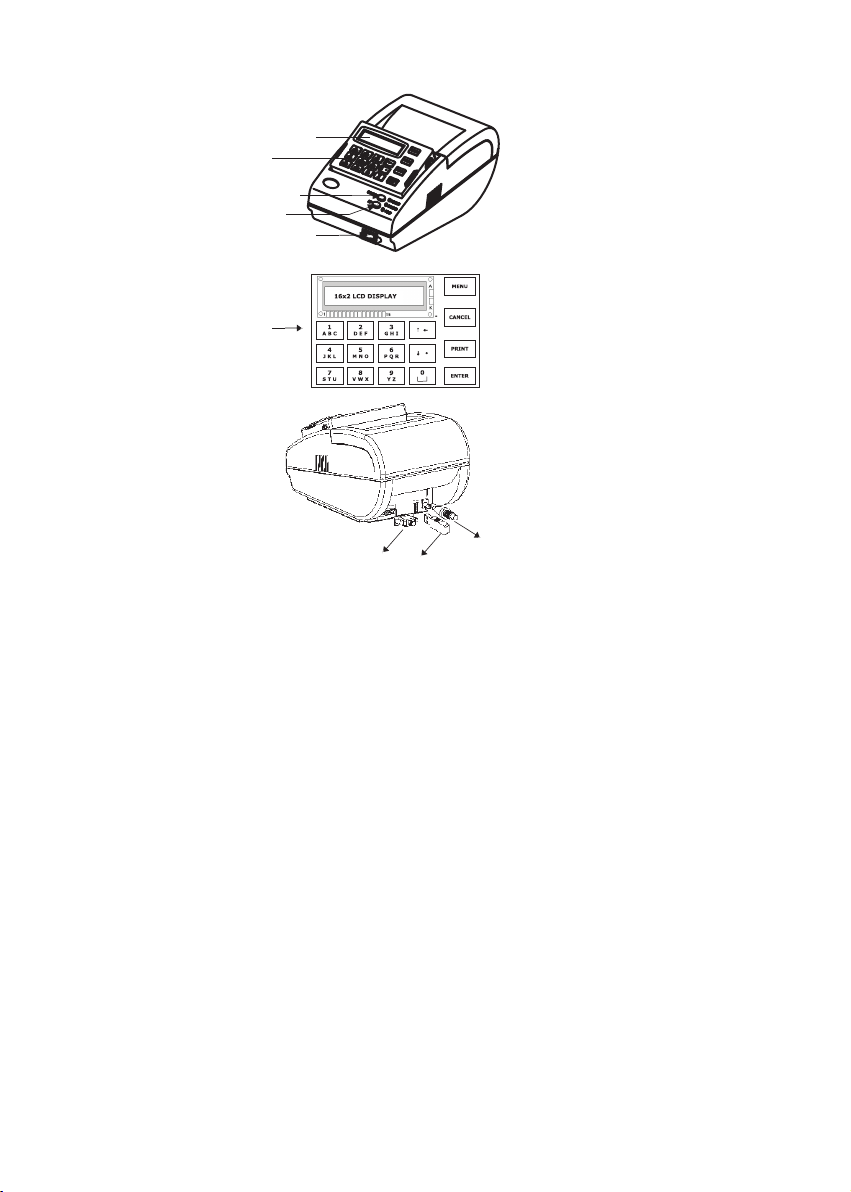
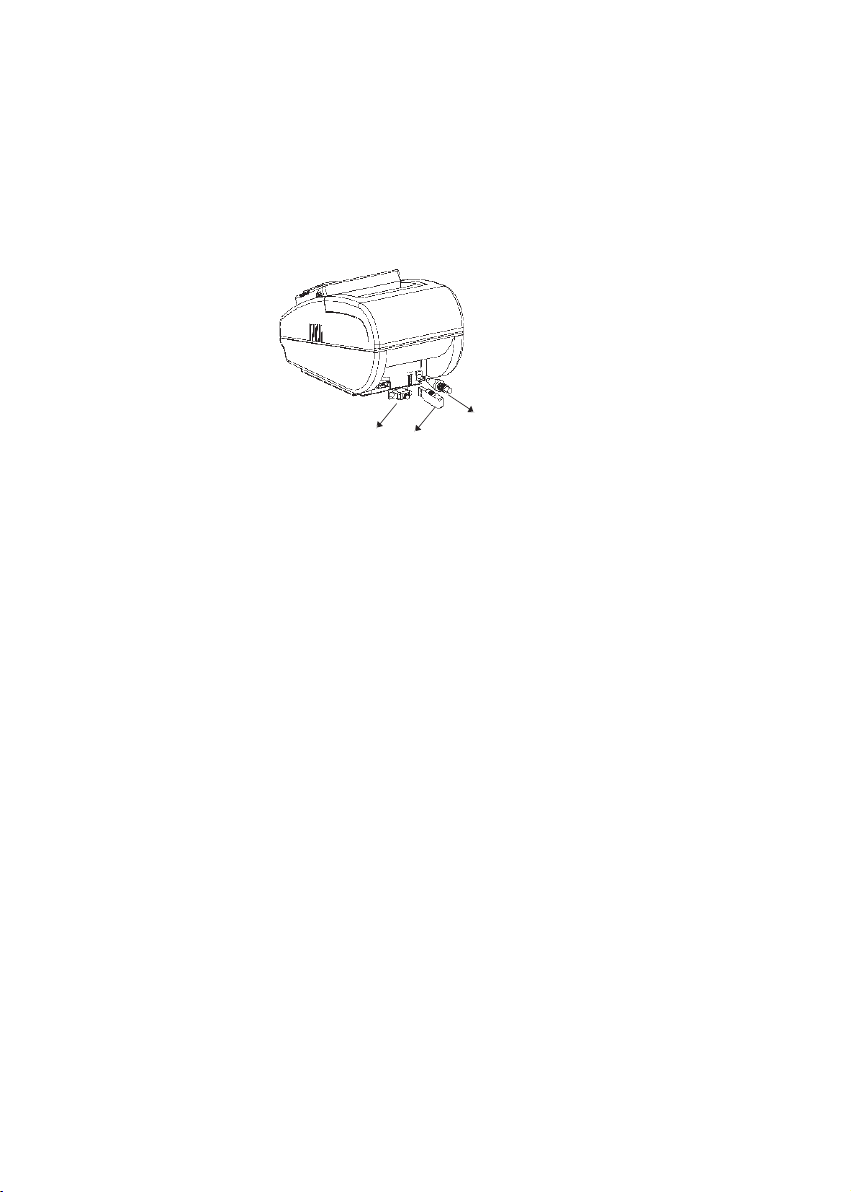
• Maximum 15 users are allowed and configured through USER ID - 1.
Supports Standard USB Pen drive for report and Item database backup
without PC and also can be upload firmware, item database, bill format and
stock from Standard Pen drives to BP 85T.
Generation of Calculator report
Upload reports to PC through Upload Utility.
Weighing scale interface is possible (Essae teraoka, Digi Point, Eagle,
Sansui, Prince, Phoenix, GiriTronics).
For BP 85T only/25T
For BP-20T/25T/50T/85T
2

2.0 LET'S GET STARTED
2.2 Site Planning Guidelines
2.1 Unpacking your BOUNTI
As you unpack the , check that you have all the
parts shown below and that none have been damaged during transportation.
1.
2. Paper roll ( Stationery )
3. Power Adaptor
4. User Guide
5. Serial Interface Cable
6. Warranty Manual
After removing the parts, save the packing materials in case you need to
transport your
BP20/20T/25T/50T/85T
BOUNTI
BOUNTI
product.
• Place the product on a flat and stable surface.
• Leave adequate room around product for easy operation,
maintenance and proper ventilation.
• Avoid connecting product to plug points where any other equipment
like large motors, AC or other appliances which might cause
fluctuations in the voltage .
• Recommended to place the product where the dust level is minimum.
2.3 Power conditioning equipment
• Ensure that the input supply to your product is within the specified
limits as given below:
a. Nominal voltage : 220VAC
b. Voltage range : 150 to 270 V AC
c. Ground to Neutral Voltage : Less than 3 VAC
d. Frequency : 47 to 53 Hz
• Recommended to use voltage stabilizer/CVT/UPS to ensure regulated
power supplytoyour product.
3.0 SAFETY PRECAUTIONS
Please read the manual before using the
to avoid dust collection and to reduce noise
during printing.
Do not remove Key Pad Module while printing & ensure that it does not
hang with the cable to avoid damage to the cable.
Do not insert or remove the interface cable when the is in
ON condition.
Do not insert or remove the interface cable when the is in ON
condition during program download.
•
•Ensure that the protective materials are removed before installation.
•Do not expose your to direct sunlight, excessive heat, moisture or
dust.
•In case of printing abnormality, do not dismantle any part from . Call
your nearestAuthorised Service Provider listed in Warranty Booklet.
•Keep Key Pad Module intact
•
•
•
product.
product
product
product
product
3

4.0 OPERATIONS
4.1 Connecting the Power Supply
This product is being equipped with an external PowerAdaptor,
which works under the following conditions.
• Nominal Voltage : 220 VAC
• Voltage range : 150 to 270 VAC
• Frequency : 47 to 53 Hz
CAUTION: Use of an incorrect power supply may cause fire or electrical shock
4.2 Connecting your product to Computer :
• The Serial interface cable from the Computer has to be connected as shown in
Adaptor
Cable
Serial Interface
Cable USB
Interface
For BP 85T/25T Only
4.3 Operation of product in Battery Mode :
(Applicable to Product BP25T/BP-50T & BP85T only)
When product is in ON condition, blinking of “Paper out LED” indicates that
machine is working in battery mode. If battery voltage is dropped to 60% then
buzzer will start beeping at regular interval of 5 minutes. If battery voltage drops
below 50% then machine will go to power saving mode and stop working till power
is retained or battery is charged.
4.3.1 Battery backup time:
90 Minutes with 100% duty cycle approx.
4.3.2 Safety Precautions for Lithium Ion Battery Pack
1. Replace the batteries with the same rating as present in the unit.
The Battery type and rating is mentioned on
the Battery Cover under the unit.
2. Do not remove the battery from the Machine.
3. Do not remove the battery seal
4. Never dispose the batteries in a fire. They may explode. Never
short-circuit the Battery
5. In the event battery fluid leaks and get in to eye, do not rub the eye. rinse
well with water and immediately seek medical care. If left untreated
otherwise the battery fluid can cause damage to eye.
4.3.3 Li-Ion Battery Specification:
Comes with shrink-wrapped re-chargeable battery pack
Capacity: 2 cells 8.4V, 2200mAh.
Dimension: 69.5 x 37.5 x 19.5 (W x H x T) in mm.
Note : Programming of product through PC cannot be done in Battery mode.
4

4.4 Installing Paper Roll
·Open the paper cover as shown in below figure.
·Remove the Groove shaft from Cup holder.
·Hold the paper roll in hand and place it into cup holder using groove
shaft.
·Drag the paper little and insert it into Paper cover slot.
·Close the paper cover firmly and ensure that it has locked properly.
·Now your Product is ready to print.
Note: Ensure coated side of paper is facing you (Refer picture shown above)
Groove Shaft
Paper
Roll
Paper cover
Cup Holder
Coated side
Paper cover
5

4.5 How to install Driver, Utiltiy & user manual from Wepmyshop
Step 1: Go to following link on browser;
For 85 T:
https://www.wepmyshop.com/wep-bp-85t-with-batterysmall-all-in-one-billing-printer
For 25 T:
https://www.wepmyshop.com/wep-bp-25t-with-battery
Step 2: Scroll down to Product file option & download the files;
OR
Step 1: Open browser and search for www.wepmyshop.com
Step 2: Scroll to Retail Billing Solutions>Retail Billing Printers>Thermal. Click on
Thermal.
6

How to install Driver, Utiltiy & user manual from Wepmyshop
Step 3: Select the product whose driver/Utility/manual you want to download.
Step 4: Scroll down to Product file option & download the files;
7

READY TO PROGRAM
4.6 Download Data Base / Header-Footer from Utility from Computer
• Connect Serial interface cable.
• Switch ON the Printer holding the READY button.
Display shows:
• Both READY and POWER LED will be glowing.
• Ensure BP series driver installed and should be selected as default.
• Create database and download it using BOUNTI BP-20/25T/50T/85T Retail Utility.
4.7 USER login mode
• During power ON, panel will display
• USER need to enter user ID (1 to 15)
1 - Manager
2 to 15 - Clerks (Common users)
• Press ENTER to continue
• While downloading the database from Retail Utility. Display Shows…
• Then the unit reinitialses.
• Now product is ready for use.
• Repeat the above steps for downloading the header/footer to product
Note 1: The Serial Interface cable should be removed from product after the data transfer.
Note 2: Before any data is downloaded to product, the following settings are required in personal
computer.
1. The default printer driver port : Serial port 4. Parity : None
2. Baud Rate : 19200 Bits per second 5. Stop bits : 1
3. Data bits : 8 6. Flow control :
None
PROGRAMMING..
WAIT...
USER ID:
ENTER PASSWORD
UDF NO.
Panel will display
• (default password “0000”)
• Type the Password and press ENTER
• Panel will be display
• Type the UDF (User Defined Field) no. & press ENTER
For BP25T/BP50T & BP 85T only
8

ITEM NO:1
RICE
4.8 How to Operate ? - Billing Options
Billing Option 1 : Billing by quantity option
• Enter the item number, item name will be displayed next to the number
and press ENTER to proceed
• If you want to modify the item number before pressing ENTER
use (backspace).
And if already ENTER is pressed use CANCEL to cancel the
entry.
• Item name and cost will be displayed. Cursor will blink at Quantity
position
• Enter quantity and press ENTER
áß
RICE
Kg 20.00
Note 1: If weighing scale (in powered ON condition and weight should be
more than 4.5gm) is interfaced with Bounti BP 85T, then the quantity is
read from weighing scale.
• Press ENTER to proceed further.
• Cursor will be blinking at first position, it is ready to accept the next Item.
• Repeat the above steps for required items
• Once you have entered all items to be billed, Press PRINT to take print-
out of the bill.
Note 2: * Changing the price change in bill/cash reception/service tax option
can be enabled or disabled through MENU
* Different type of Round off/Discount option can be selected
through MENU
* If the printer is idle for 30 seconds it goes to screen saver mode,
press any key to come out of that mode.
* USER ID - 2 to 15 should be configured through MENU
(Using USER ID - 1 Login) otherwise login process can’t happen.
* For quantity, 3 digits are allowed in fraction part.
Note 4 : Serial port settings for,
Data download Weighing scale
1. Baudrate :9600 (Default)
Databits: 8
Parity: None
Stop bit:1
Flow control: None
Mode – continuous
Following makes of weighing scale are supported & tested: Contech,
Essae teraoka, Digi Point, Eagle, Sansui, Prince, Phoenix, GiriTronics
Note 3: * If in Data Base, discount is entered, while printing Bill it prints the real
value on the Bill & shows discount separately, also
TAX will be after discount.
* In Billing it will show the real value only.
* For item with Price 10Rs. Discount 10% and VAT10%, If we bil for1
qty it will display amount 10 Rs. only, but in TOTAL amount it will
show Value including VAT/TAX and DISCOUNT.
2. Baudrate :2400
Databits: 8
Parity: None
Stop bit:1
Flow control: None
Mode – continuous
For BP 85T/25t only For BP25T/BP50T & BP 85T only
9

RICE
Rs 20.00
RICE
100 RS 20.00
• Now press MENU for Rs Billing. On pressing MENU ‘Kg’ changes to
‘Rs’ as below.
• EnterAmount in Rupees at cursor & press ENTER . On entering the
amount, it is ready to accept the next item or the cursor moves to the
‘Price’ field (if price change is enabled).
• Now you can edit the Price if required or just press ENTER
Note : Fraction is not allowed while entering amount in Rupees billing.
• Cursor will be blinking at first position, it is ready to accept the next Item
• Repeat the above steps for required items
• Press PRINT to take print-out of the bill
Billing Option 2 : Rupee Billing option
• Enter the item number, item name will be displayed next to the number
and press ENTER to proceed
• If you want to modify the item number before pressing ENTER
use (backspace). And if already ENTER
is pressed use CANCEL to cancel the entry
• Item name and cost will be displayed. Cursor will blink at Quantity position.
áß
RICE
Kg 20.00
ITEM NO:1
RICE
Search an Item
• To search an item, Press ENTER while in sleep mode, idle condition or
during billing.
• The first item name on the item database will be displayed
• To scroll through the item list, use down arrow â§
• To search for an item starting with a specific alphabet or enter the specific
string through the key pad.
• The first item starting with that particular alphabet/string would be displayed
on the LCD which can be scrolled down using arrow keys.
• Use âkeys to look at all items starting with that particular alphabet/string.
WH
WHEAT
RICE
10

ITEM NO
TOTAL:100.50
COCONUT OIL
1.500 Lt 30.00
Browsing Through Bill
• Browsing through the Items in bill is possible before printing the bill
• Press up arrow áßwhile item number is ready to accept.
• If any Item is present in current bill, the Items will be displayed
• Press down arrow â§or up arrow áßto browse through all Items
entered in the bill
NOTE: It is possible to browse through the Items only before the bill is printed. The cursor will
not be seen during browsing.
Edit Mode
• This mode is to edit any item in a bill before print.
Press ENTER in Browse mode to edit the item and the cursor will reappear
• By pressing ENTER button continuously, you can go to quantity and price.
It can be edited at the same time
NOTE:* Item name cannot be edited. *If rate is occupied full length (w.r.t digits) cursor
will not appear.
• To change the quantity / rate / discounts, move the cursor to the
corresponding position by pressing ENTER and then follow the
same steps as billing mode.
• After the modificaion of a coomplete after entering the quantity
/rate/discounts, it goes back to browsing mode (Cursor will appear again)
• Press CANCEL and rthen PRINT , it will print the bill
• To delete an item completely, keep the cursor at the item name
position and press CANCEL .Awarning message is asked for
confirmation.
• Press ENTER to confirm or CANCEL to abort deleting
OCONUT OIL
1.500 Lt 30.00
COCONUT OIL
1.5 Lt 30.00
COCONUT OIL
2 Lt 30.00
ARE YOU SURE?
ENTER / CANCEL
11

1. KOT 2. BILL
3. SAVE KOT?
TABLE NO:
ITEM NO:
IDLI
Pk 10
KOT / Resturent Billing
• When KOT and UDF is enabled (UDF Name, Eg. Table No.)
• Panel will display
• Enter the Table number you want to give kitchen order tocken (KOT) (eg. 5)
• Press ENTER to select item no.
• Panel will display
• Enter theitem number you want to give KOT (eg.2-IDLI)
• Press ENTER tochoose quantity.
• Panel will display
• Enter the quantity and press ENTER to add different Item.
• Panel will display
ITEM NO:
TOTAL : 10.00
• After adding items, press PRINT to give kitchen order token (KOT)
or Bill for particular UDF no. (Table no.) or to "save KOT”
• Panel will display
• Press '1' for printing KOT for particular UDF no. (Table no.). Press '2' for
final bill [Bill considers previous and existing KOT items for particular UDF
number (Table no.)]. Press '3' to save KOT items in panel(It saves without
printing the KOT).
Note : Only after printing the KOT or saving the KOT edit option will be appeared.
• Type the UDF no. for which KOT is printed or saved. Press ENTER
• Panel will display
• Press PRINT
• Panel will display
ITEM NO:
1.KOT, 2.BILL
3.SAVE KOT, 4.EDT
12
For BP50+ & BP 85/25T only

• Press 4 to edit & then Press ENTER
• Cursor will be blinking on the item you have selected
• Press CANCEL to delete that particular item from the KOT list.
• Panel will display
DLI
1 Pk 10
ARE YOU SURE
ENTER/CANCEL
• If CANCEL is pressed it will come back to "KOT- ITEM- EDIT/BROWSE”
mode or press ENTER to remove the selected item from the KOT.
• Panel will display
Note : Maximum 10 items can be deleted from the KOT list.
SELECTED ITEM
REMOVED FROM KOT
SOME KOT BILLS
ARE PENDING
1-KEEP 2-CLEAR
3-PRINT DETAIL?
Note : • When you are doing KOT billing if bill is not printed and power is lost.
After power comes, if you switch ON printer.
• Panel will display
• Press '1' to retain KOT for particular UDF no. or press '2' to clear all
pending KOT for particular UDF no. or press '3'
to print details of UDF nos. for which pending KOT details are available.
• Press ENTER to continue.
REPORTS
NEXT ↓PREV ↑
MENU
• When product is in idle condition (Screen saver like time & date or
it is ready to accept for item No.)
press MENU for viewing the Menu options.
• Use up arrow or down arrow (áor â) to browse through the Menu options.
• Press MENU or CANCEL to exit from Menu mode.
• When menu button is pressed, Panel will display
• Use up arrow or down arrow ( or ) to browse the Menu structure.↑ ↓
13

MENU STRUCTURE For BP 20 & BP20T
Menu Options are given below
14
vREPORTS
ØDetailed Reports
§Bill wise Report
·Current day
·Previous day
§Day wise Report
§Void bill Report
·Current day
·Previous day
§Item wise Report
·Current day
·Previous day
§Duplicate Bill Report
·Current day
·Previous day
§TAX Report
·Current day
·Previous day
ØSummary Reports
§Monthly Report
§Yearly Report
vITEM DATABASE
ØEdit Database
ØAdd New Item
ØPrint Database
§Save Bill
·Enable
·Disable
§Print Time
·Enable
·Disable
§Change Bill No
·Continuous
·Daily reset
§Other charge
·Enable
·Disable
§Print User Name
·Enable
·Disable
ØRestore Defaults
vHEADER/FOOTER
ØEdit Header
ØEdit Footer
vBATTERY STATUS
(for BP20T only)
vSETTINGS
ØSet Time & Date
ØChange Password
§Common Password
§Admin Password
ØRound Off
§No Round Off
§Round Off to 50p
§Round Off to 25p
§Round Off to 1Re
ØDiscount Option
§No Discount
§Item Wise Disc %
§Post Tax Disc %
§Post Tax Disc Rs.
§Pre Tax Disc %.
ØBill Format
§Price Change
·Enable
·Disable
§Cash Reception
·Enable
·Disable

Note : USER ID - 1 will have full rights & USER ID 2 to 15 will have access
for billing, printing reports & database.
MENU STRUCTURE For BP 50T
Menu Options are given below
15
vREPORTS
ØDetailed Reports
§Bill wise Report
·Current day
·Previous day
§Day wise Report
§Void bill Report
·Current day
·Previous day
§Item wise Report
·Current day
·Previous day
§Stock Report
§User Bill Report
·Current day
·Previous day
§TAX Report
·Current day
·Previous day
§Duplicate Bill Report
·Current day
·Previous day
ØSummary Reports
§Monthly Report
§Yearly Report
§Rate wise Report
·Current day
·Previous day
§UDF wise Report
·Current day
·Previous day
§Hourly Report
·Current day
·Previous day
§User wise Report
·Current day
·Previous day
vITEM DATABASE
ØEdit Database
ØAdd New Item
ØPrint Database
ØStock Update
§Add to Stock
§Replace Stock
ØStock View
ØErase Database
vSETTINGS
ØSet Time & Date
ØChange Password
ØRound Off
§No Round Off
§Round Off To 50p
§Round Off To 25p
§Round Off To 1Re
ØDiscount Option
§No Discount
§Item Wise Disc %
§Post Tax Disc %
§Post Tax Disc Rs
§Pre Tax Disc %
ØBill Format
§Price Change
·Enable
·Disable
§Cash Reception
·Enable
·Disable
§Bill No. Type
·Select Continuous
·Select Daily Reset
§Other charge
·Enable
·Disable
§UDF Field
·Enable
·Disable
§KOT option
·Enable
·Disable
§Print User Name
·Enable
·Disable
§Stock Option
·Bill without Stock
·Bill with Stock
ØSelect Rate Slab
ØRestore Defaults
ØMachine ID
vCONFIGURE USER
vHEADER/FOOTER
ØEdit Header
ØEdit Footer
vBATTERY STATUS

16
vREPORTS
ØDetailed Reports
§
·
·
§
·
·
§Bill wise Report
·Current day
·Previous day
§Day wise Report
§Void bill Report
·Current day
·Previous day
§Item wise Report
·Current day
·Previous day
§Stock Report
§User Bill Report
·Current day
·Previous day
§TAX Report
·Current day
·Previous day
§Duplicate Bill Report
·Current day
·Previous day
§UDF Item Report
·Current day
·Previous day
§Item Bill Report
·Current day
·Previous day
§Returned Items
·Current day
·Previous day
ØSummary Reports
§Monthly Report
Item Bill Report
Current day
Previous day
Returned Items
Current day
Previous day
§Yearly Report
§Rate wise Report
·Current day
·Previous day
§UDF wise Report
·Current day
·Previous day
§Hourly Report
·Current day
·Previous day
§User wise Report
·Current day
·Previous day
vITEM
ØEdit Database
ØAdd New Item
ØPrint Database
ØStock Update
§Add to Stock
§New Stock
ØStock View
ØErase Database
vSETTINGS
ØSet Time & Date
ØChange Password
ØRound Off
§No Round Off
§Round Off To 50p
§Round Off To 25p
§Round Off To 1Rs
ØDiscount Option
§No Discount
§Item Wise Disc %
§Post Tax Disc %
§Post Tax Disc Rs
§Pre Tax Disc %
ØBill Format
§Price Change
·Enable
·Disable
§Cash Reception
·Enable
·Disable
§Bill No. Type
·Select Continuous
·Select Daily Reset
§Other charge
·Enable
·Disable
§UDF Field
·Enable
·Disable
§KOT option
·Enable
·Disable
§Print User Name
·Enable
·Disable
§
·
·
§
·
·
§
·
·
§
·
·
§
·
·
§
·
·
§
·
·
§
ØSelect Rate Slab
ØRestore Defaults
ØMachine ID
ØUpload to PC
ØSelect Baudrate
§9600 Baudate
§2400 Baudate
vCONFIGURE USER
vHEADER/FOOTER
ØEdit Header
ØEdit Footer
v
vCHECK FOR DRIVE
ØBP 85T/25T to USB
§Reports
§Item Database
ØUSB to BP 85T
§Firmware
§Stock
§Bill Format
§Item Database
Stock option
Bill W/O Stock
Bill With stock
Report for clerk
Enable
Disable
Report Save
Enable
Disable
Reverse Tax
Enable
Disable
Rupee Symbol
Enable
Disable
Bill Save option (BP25T only)
Enable
Disable
Return billing (BP25T only)
Enable
Disable
Bill no Caption (BP25T only)
Battery Status
MENU STRUCTURE FOR BP 25T/BP 85T
Menu Options are given below
Note : USER ID - 1 will have full rights & USER ID 2 to 15 will have access for billing,
printing reports & database.

BILL WISE REPORT
NEXT ↓PREV ↑
DAY WISE REPORT
NEXT ↓PREV ↑
Printing Bill wise Report
• From menu, select “BILL WISE REPORT”
• Press ENTER
• Select the current or previous day using up or down arrows.
• Press ENTER to print current or previous day Bill wise sales report.
Printing day wise report
• From menu, select “DAY WISE REPORT” option
(Refer Menu structure for more details)
• Press ENTER
• Panel will display
• Enter the Start date and End date like
• “DD/MM/YY” to “DD1/MM1/YY1”
• Press ENTER to print Day wise sales report.
↑ ↓
START - / /
END - / /
VOID BILL REPORT
NEXT ↓PREV ↑
Printing Void bill report
• From menu, select “VOID BILL REPORT” option
(Refer Menu structure for more details).
• Press ENTER
ITEM WISE REPORT
NEXT ↓PREV ↑
• Select the current or previous day using up or down arrows.
• Press ENTER to print current or previous day Void bill report.
Printing Item wise report
• From menu, select “ITEM WISE REPORT” option
(Refer Menu structure for more details).
• Press ENTER
• Select the current or previous day using up or down arrows.
• Press ENTER to print current or previous day Item wise sales report.
↑ ↓
↑ ↓
NOTE 1 : If item data base or setting like Other charge gets changed after printing the
bill, Item wise report may lead to error
NOTE 2 : In Item wise report it will print Total Amount, Total Amount limit is 42949672.95"
if total amount exceeds this limit it will display message"G.TOTAL >> LIMIT
CANT PRINT TOTAL" and also it will print "----" instead of "total amount" and
ERROR message ("ERROR!!! TOTAL AMOUNT EXCEEDS LIMIT!") at the end
of report.
17
This manual suits for next models
3
Table of contents
Other WeP Cash Register manuals