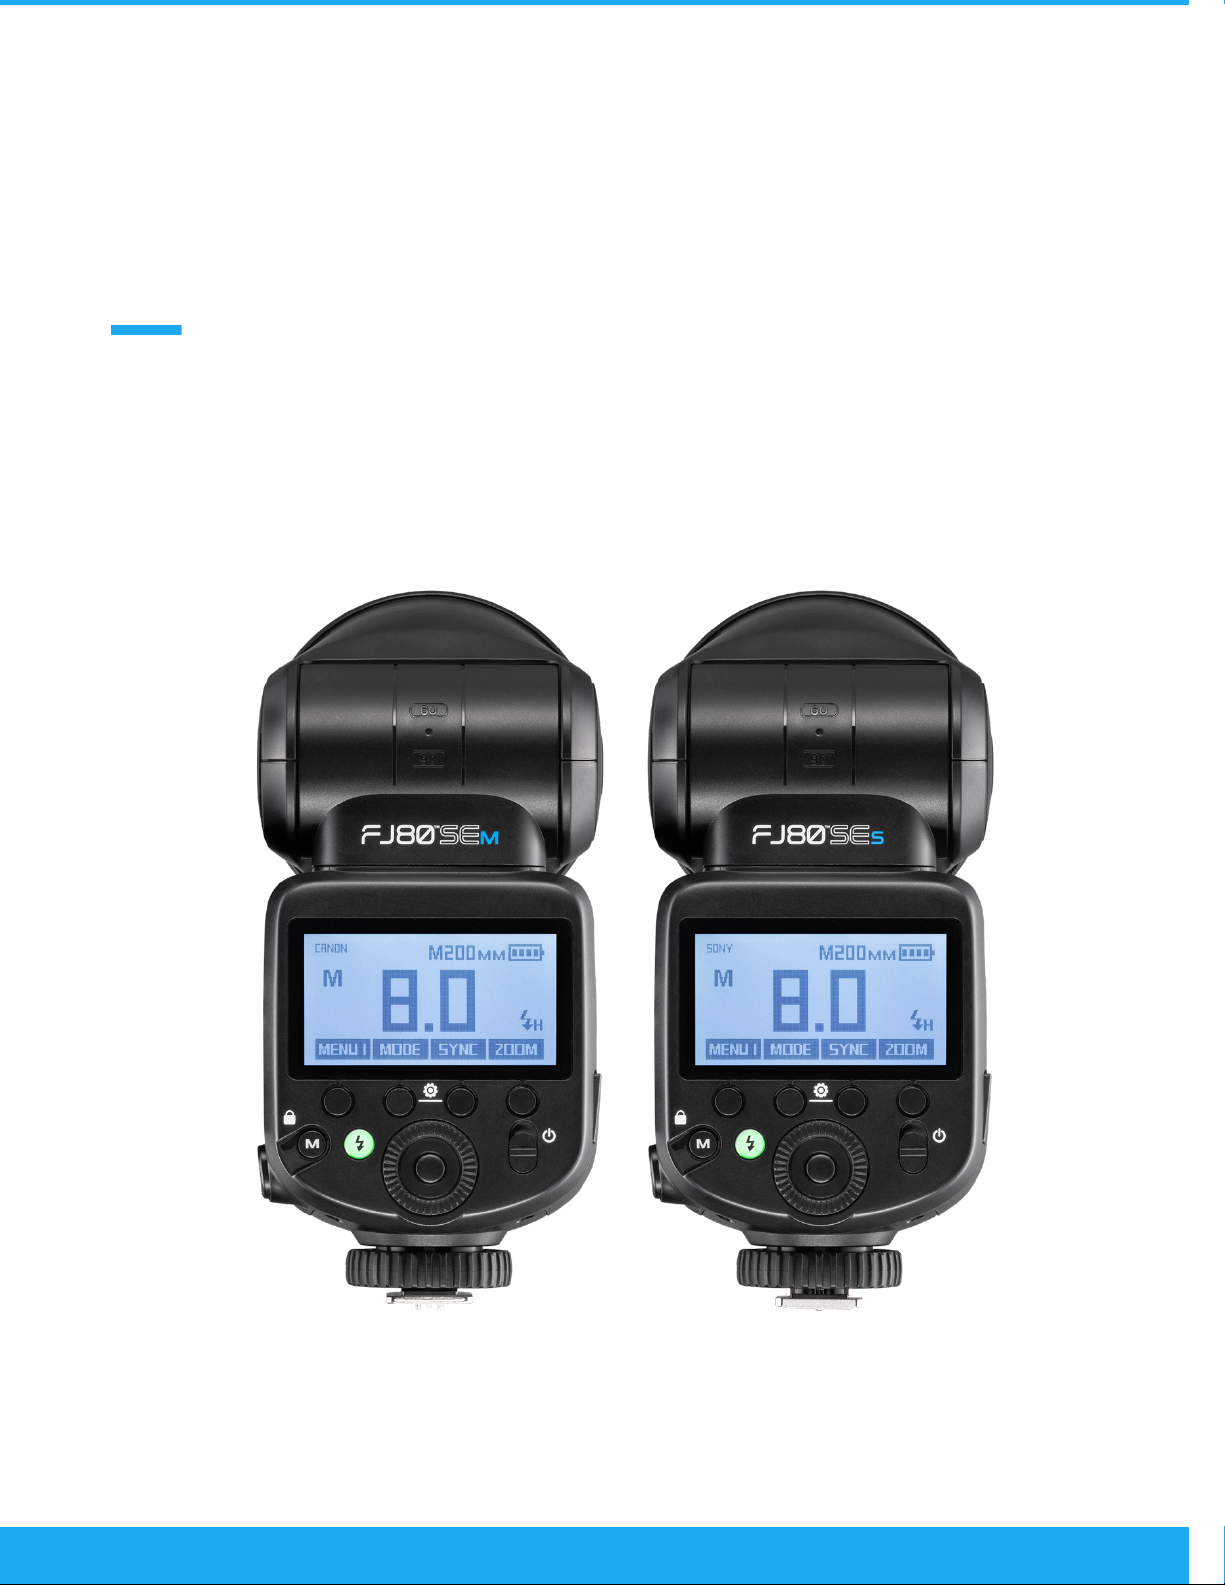
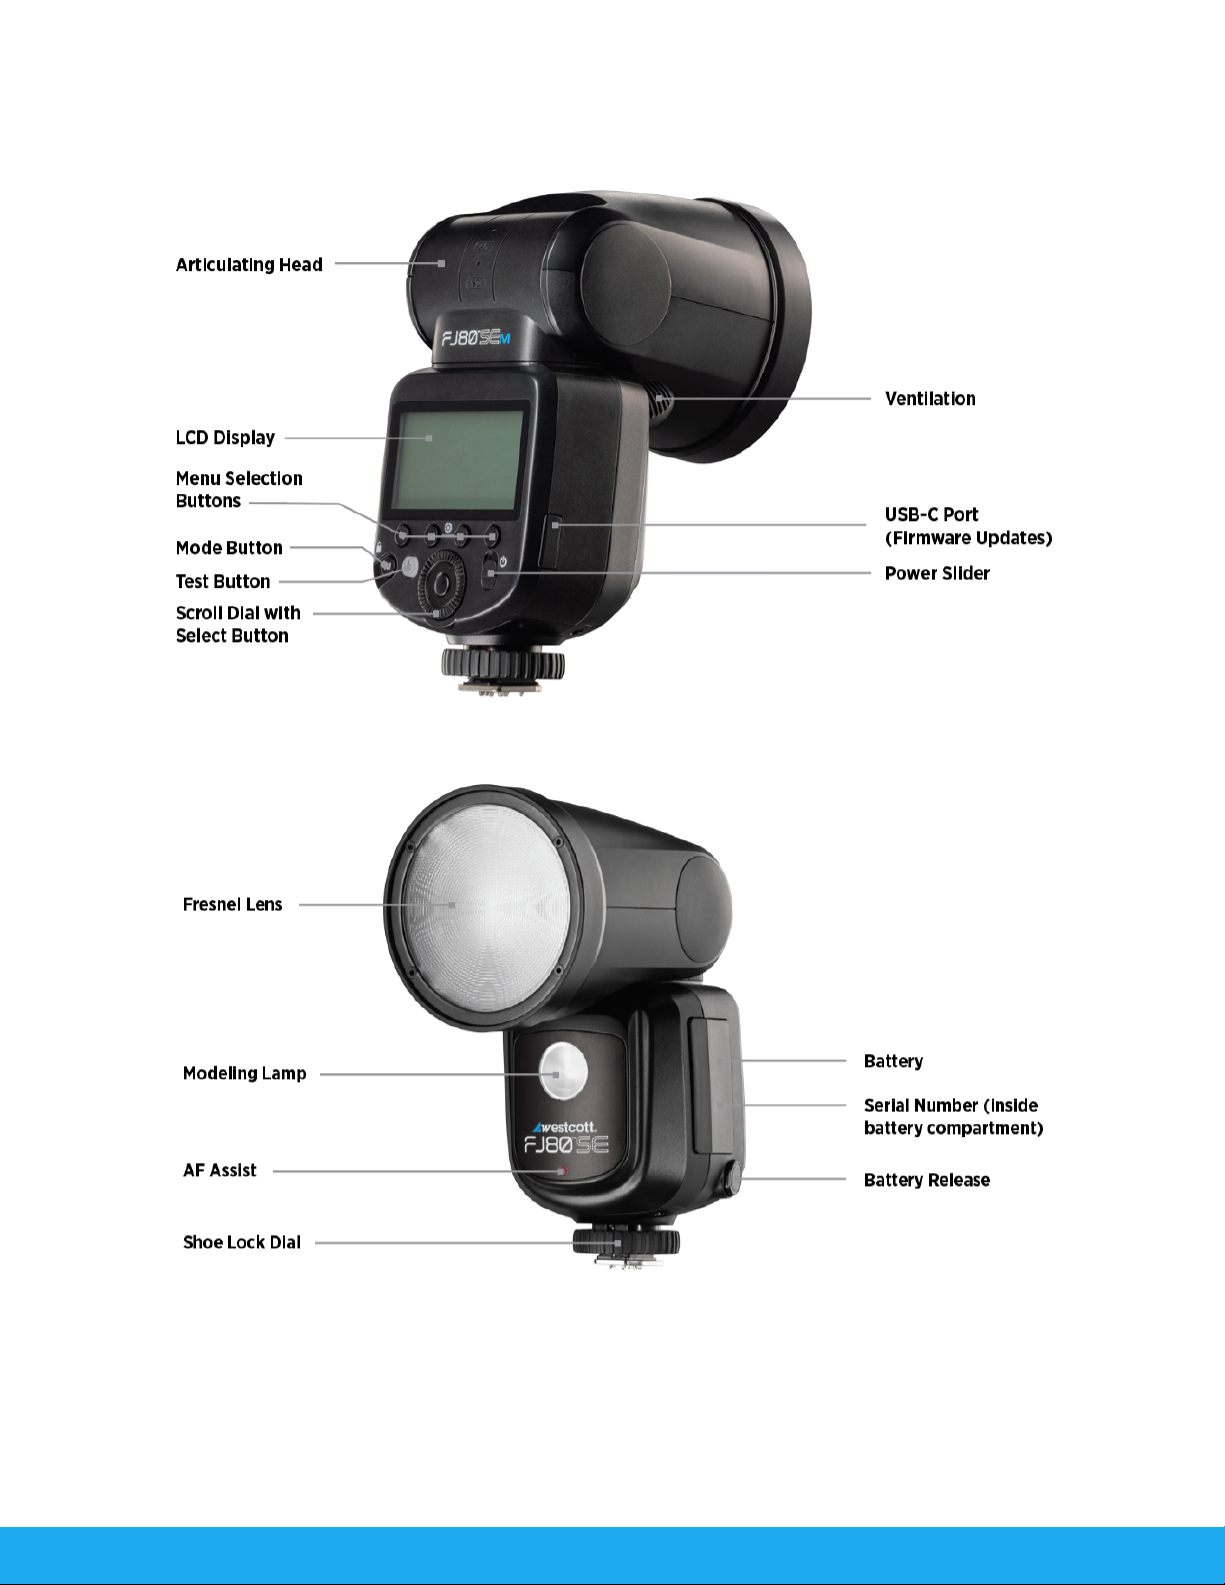
Westcott FJ80-SE Series User manual

FJ80-SE Series Speedlight
User Manual
v 1.0
12/14/2023

1
CONTENTS
CONTENTS 1!
Introduction 3!
Components (Included) 4!
Important things to know before starting… 4!
Reviewing Firmware Files 4!
TTL ±3 Flash Exposure Compensation 4!
Canon Continuous Mode 4!
FJ80-SE Speedlight: Overview 5!
FJ80-SE Speedlight: Display & Menus 6!
FJ80-SE Speedlight: Warnings 7!
Caution 7!
FJ80-SE Heat Protection System 7!
FJ80-SE Speedlight: Firmware Updates 9!
FJ80-SE Speedlight: Getting Started 9!
Charging the FJ80-SE Lithium-ion Battery 9!
Battery Charger LED Indicator Lights 9!
Powering On 9!
FJ80-SE Speedlight: Mounting 10!
FJ80-SE Speedlight: Powering & Testing 10!
FJ80-SE Speedlight: Attaching & Removing Accessories 11!
FJ80-SE Cold Shoe Stand: Mounting & Removing 11!
FJ80 Series Magnetic Modifiers: Attaching & Removing [
sold separately
] 11!
FJ80-SE Speedlight: Speedlight
On-camera
Operation 11!
Enable SPEEDLIGHT Mode 11!
SPEEDLIGHT: Digital Screen Button Selections 11!

2
Auto-Focus (AF) Assist Beam 12!
FJ80-SE Speedlight:
HOST
Wireless Operation 12!
HOST: Enable HOST Mode 12!
HOST: Digital Screen Button Selections 13!
FJ80-SE Speedlight:
CLIENT
Wireless Operation 14!
CLIENT: Enable CLIENT Mode 14!
CLIENT: Enable Group SLP (Sleep) Mode 14!
CLIENT: Digital Screen Button Selections 14!
Full-stop Increments in Manual Mode with the FJ Wireless Trigger 14!
FJ80-SE Speedlight: SYNC Functions 15!
Enabling Front or Rear Curtain Sync 15!
Enabling HSS (High-speed Sync) 15!
Enabling Freeze Sync 15!
FJ80-SE Speedlight: ZOOM Control 16!
FJ80 Series: Remote ZOOM Control [Single Group] 16!
FJ80 Series: Remote ZOOM Control [All Groups] 16!
FJ80-SE: Settings Menu 16!
SETTINGS Menu: Locating 16!
FJ80-SE Battery: Performance and Care 17!
FJ80-SE Battery Performance 17!
FJ80-SE Charging & Life Expectancy 17!
FJ80-SE Speedlight: Technical Specifications 17!
Warranty Information 20!
Legal Information 20!

3
Introduction
Thank you for purchasing the Westcott FJ80-SE Speedlight. The FJ80-SE is the perfect addition to the
growing family of FJ Series Wireless products; FJ400 Strobe, FJ200 Strobe, FJ80 Speedlights, FJ
Wireless Triggers, and FJ-XR Wireless Receiver (
all sold separately
). The original FJ80 was the
industry’s first-round head speedlight and transceiver equipped with multi-brand compatibility and
controls.
The FJ80-SE provides an experience, unlike any other flash. The round head provides a more natural
light output mimicking the sun, leading to more appealing catchlights in your subject’s eyes and evenly
filling up cylindrical modifiers from the center to the edge. It’s compact, lightweight, and performance-
driven, which makes it perfect for on-camera and off-camera photography.
The FJ80-SE also doubles as a transceiver, meaning the ability to send and receive wireless
communication with select FJ devices. With the ability to receive wireless communications from the
FJ80 II, FJ80, FJ-X Triggers and Canon RT devices, the compact FJ80-SE allows you to squeeze into
the smallest spaces or reach new heights to achieve your desired lighting effect.
One last thing, and this is the important one. Don’t forget that Westcott HQ is based in Maumee, OH,
and our team’s available to answer your questions, Monday-Friday 9 am-5 pm ET. We also have a
community of loyal Westcott users who are ready to share their tips and tricks via the Westcott
Lighting Community on Facebook during the week or on the weekend.
We hope you’re excited to get started with your new lighting tool because we’re excited to see what
you create.
Thank you for your business.
-Team Westcott

4
Components (Included)
● FJ80-SE Speedlight
● FJ80-SE Rechargeable Lithium-ion Battery
● FJ80-SE Battery Charger, USB Cable & AC Adapter
● FJ80-SE Magnetic Gel Ring
● FJ80-SE Color Correction Gel
● FJ80-SE Shoe Stand
● FJ80-SE Travel Case
Important things to know before starting…
Reviewing Firmware Files
Firmware updates will be made available on the Westcott Firmware Update page:
(https://www.fjwestcott.com/firmware.) Firmware updates often improve the overall performance of
the device or allows for minor updates to the GUI of the FJ Wireless product. Please review ALL
documentation included with each firmware download to ensure all of the necessary preparation steps
are complete before installing the firmware.
TTL ±3 Flash Exposure Compensation
±3 TTL Flash Exposure Compensation (FEC) on FJ Wireless Triggers or host FJ80 Speedlights
(when
used as a transmitter
) is independent of the Flash Exposure Compensation (FEC) displayed on FJ
Wireless lights (
when used as a client
). Meaning, a change of the FEC ±3 on FJ Wireless Triggers or a
host FJ80-SE Speedlight will adjust the light output in TTL mode; however, a client FJ80-SE’s will not
visually indicate the FEC changes made on an FJ Wireless Trigger or host FJ80-SE Speedlight. FJ80-SE
Speedlight’s FEC can be further adjusted ±3 on the client light directly.
Canon Continuous Mode
When photographing in Canon Continuous Mode, two overlapping squares will be visible on FJ Wireless
Triggers & FJ80 Speedlight displays.
Note: When Canon Continuous Mode is enabled, the FJ80SE will do 20 FPS (dependant on camera model) at
power level 4 and below. Choosing a power level above 4 or using TTL can cause misfires if the FJ80SE is not
allwed to fully recycle.

5
FJ80-SE Speedlight: Overview

6
FJ80-SE Speedlight: Display & Menus

7
FJ80-SE Speedlight: Warnings
Caution
• IMPORTANT: During operation, the temperature of the speedlight lens and various
components of the FJ80-SE speedlight may increase. Please use caution while using to avoid
severe burns or injuries.
• Do not touch the speedlight lens after immediate use to avoid potential injury.
• Use only with the Westcott FJ80-SE Lithium-ion Battery and Charging Base.
• Always confirm proper installation, locking, and unlocking when adding or removing from the
camera hot shoe. (NOTE: Failure to completely rotate the dial to lock and unlock could
permanently damage the locking pin.)
• Always remove the FJ80-SE Lithium-ion Battery from the FJ80-SE Speedlight during
travel/storage to avoid accidental operation, which could lead to overheating or permanent
damage.
• Do not force adjust or add excessive weight to the speedlight head.
• Only use the FJ80-SE Speedlight with compatible FJ80 mounts, brackets, modifiers, and/or
accessories.
• Avoid drastic temperature changes before, during, or after use.
• The operating temperature range is 14°~131°F / (-10~55°C).
• Never leave unattended around children and/or pets.
• Keep away from fire, water, and moisture.
• Do not submerge in water.
• Do not attempt to disassemble or modify any Westcott products. Contact Westcott for
assistance.
FJ80-SE Heat Protection System
The FJ80-SE is equipped with a self-monitoring system ensuring safe operation during continued full-
power use during a short timeframe.
Stage 1: Once the speedlight reaches an internal operating temperature of 185°F (85°C), the
screen will display [OH]. The recycle time will also increase by 3.2 seconds in an effort to cool
the unit while allowing for continued operation.

8
Stage 2: Once the speedlight reaches and internal operating temperature of 215ºF (102ºC),
the screen will display [OH]. The recycle time will also increase by an additional 3 seconds in an
effort to cool the unit while allowing for continued operation.
Stage 3: Once the speedlight reaches and internal operating temperature of 221ºF (105ºC),
the screen will display [OH]. The recycle time will also increase by an additional 8 seconds in an
effort to cool the unit while allowing for continued operation.
NOTE: The LED modeling lamp will be disabled during OH to assist in minimizing the internal temperature.

9
FJ80-SE Speedlight: Firmware Updates
The FJ80-SE Speedlight is designed with a USB-C port to allow for firmware updates only. Future
firmware updates will result in performance enhancements, modified menu options, and improved
menu layouts. Please visit https://www.fjwestcott.com/firmware to confirm your speedlight has the
latest firmware before using it.
FJ80-SE Speedlight: Getting Started
Charging the FJ80-SE Lithium-ion Battery
1. Ensure the FJ80-SE is powered off by sliding the Power slider down until the screen turns off.
2. Remove the battery by locating and pressing the release button on the left side of the device.
3. Gently pull the battery away from the FJ80-SE battery well.
4. Connect one end of the USB cable to the battery charger.
5. Connect the other end into the AC adapter.
6. Plug the AC adapter into a wall outlet.
7. Align the gold contacts on the back of the FJ80-SE battery with the contacts on the FJ80-SE
charger.
8. Carefully insert the battery into the charger and gently press until it locks into place, causing
the LED indicator to start blinking red.
9. You can safely remove the battery from the charger once the LED indicator light turns solid
green.
10. Remove the battery from the charger by gently pulling it upwards.
11. Reinsert the charged battery by aligning the gold contacts on the battery with those in the
battery bay. Gently press the battery back into the FJ80-SE.
Battery Charger LED Indicator Lights
• Blinking Green Indicator LED
o No Battery Inserted: The charger is connected to a power outlet and is prepared to
charge the FJ80-SE Lithium-ion Battery.
• Solid Green Indicator LED
o Battery Inserted: The FJ80-SE Battery is fully charged and can be removed from the
charger.
• Solid Yellow Indicator LED
o
Battery Inserted:
The FJ80-SE Battery is correctly inserted and at 50% charge level.
• Solid Red Indicator LED
o Battery Inserted: The FJ80-SE Battery is correctly inserted and is currently charging.
Powering On
1. Verify that the FJ80-SE battery is fully charged.
2. Ensure the battery is securely inserted to the FJ80-SE battery bay.

10
3. Turn the speedlight ON by sliding the physical power slider upwards. The FJ80-SE will power on
and a start-up screen will appear.
NOTE: The FJ80-SE LCD screen may have a removable clear screen protector. You can remove this protector at
your convenience by gently pulling it away from the display.
NOTE: The FJ80-SE is capable of 550+ full-power flashes with the modeling lamp disabled and screen brightness
set to Minimum Brightness (1).
FJ80-SE Speedlight: Mounting
Mounting to a Camera
1. Confirm the FJ80-SE is OFF.
2. While looking at the display screen, rotate the FJ80-SE's locking dial clockwise (left to right) to
loosen.
3. Slide the base of the FJ80-SE into the camera’s hot shoe with the display facing the same
direction as the rear of the camera.
4. Rotate the FJ80-SE locking dial counterclockwise (right to left) until its securely mounted to the
camera.
5. Turn the camera on and lightly press the shutter release button. The Link icon ( ) will display
on the speedlight screen under the selected camera brand, signifying the proper connection
between the camera and the speedlight.
NOTE: FJ80SE-M (#4660) is compatible with Sony Cameras in Manual Mode. The Adapter for Sony cameras
(#4711) sold separately, allows for TTL and HSS. Dedicated FJ80-SE for Sony cameras also available (#4664).
Detaching from a Camera
1. Confirm the FJ80-SE is OFF.
2. Rotate the FJ80SE’s locking dial clockwise (left to right).
3. Securely grasp the sides of the FJ80-SE Speedlight, gently slide the speedlight towards the rear
of the camera to remove it from the hot shoe.
IMPORTANT: Ensure the locking pin is fully retracted before inserting or removing the FJ80-SE from a camera,
shoe stand, or any brackets to avoid damaging the locking pin.
FJ80-SE Speedlight: Powering & Testing
• Powering On: Slide the Power slider upwards, the screen will illuminate and the FJ80-SE start-
up screen will appear.
• Test Fire: Quick-press the white Test button [backlit green] once to test-fire the FJ80-SE. When
the Test button is pressed, the backlit button may illuminate red until the speedlight has
recycled and is ready for the next burst.
• Powering Off: Slide the Power slider down to power OFF.

11
FJ80-SE Speedlight: Attaching & Removing Accessories
FJ80-SE Cold Shoe Stand: Mounting & Removing
1. While looking at the display screen, rotate the FJ80-SE's locking dial clockwise (left to right) to
loosen.
2. Slide the metal base of the FJ80-SE into the cold shoe stand with the display facing the same
direction as the channel opening on the back of the shoe stand.
3. Rotate the FJ80-SE locking dial counterclockwise (right to left) until it’s securely mounted to the
cold shoe stand.
4. Remove the FJ80-SE Speedlight by rotating the FJ80-SE locking dial clockwise (left to right).
5. Securely grasp the sides of the FJ80-SE Speedlight, gently slide the speedlight towards the rear
of the cold shoe stand, and remove it from the cold shoe stand.
FJ80 Series Magnetic Modifiers: Attaching & Removing [
sold separately
]
1. Ensure the FJ80-SE’s articulating flash head and lens are free from obstructions.
2. Grasp the edges of the modifier's magnetic ring, align it with the FJ80-SE’s face, and gently
affix it into place. [NOTE: The magnetic ring may require a slight turn to ensure proper
seating].
3. Remove the magnetic modifier by grasping the magnetic ring and pulling away from the
speedlight head.
NOTE: Ensure the FJ80-SE has cooled before adding and removing modifiers.
FJ80-SE Speedlight: Speedlight
On-camera
Operation
Enable SPEEDLIGHT Mode
1. Quick-press the Mode button (M) to toggle between the different shooting modes.
2. To enable speedlight mode, press the M button until only the camera brand of your choosing,
the mode type, the zoom setting, and the battery are displayed at the top of the screen.
3. Adjust the speedlight settings by rotating the round scroll wheel at the base of the FJ80-SE.
SPEEDLIGHT: Digital Screen Button Selections
Menu 1 Options
• MENU 1
• MODE
• SYNC [Front Curtain Sync, Rear Curtain Sync, High-speed Sync (HSS)]
• ZOOM [A 24MM – 200MM]
Menu 2 Options
• Menu 2
• Modeling Lamp [OFF, AUTO, 1-3]

12
• STDBY
Auto-Focus (AF) Assist Beam
The FJ80-SE is equipped with an integrated AF Assist Beam which is compatible with various camera
models. Review your camera’s owner’s manual and familiarize yourself with the settings that need to
be adjusted to take advantage of this feature.
1. Press and hold the two round buttons indicated by a gear symbol directly below the LCD
screen.
2. Rotate the control dial and locate the AF Beam option.
3. Quick-press the center dial button and rotate the dial to toggle the Auto-Focus beam selection
to ON or OFF.
4. Short press the center dial button to select the desired setting.
5. Press the button that corresponds to the Return icon to return to the previous mode screen.
NOTE: When the AF selection is turned to AUTO, it will lock the FJ80-SE’s shutter speed at 1/200th of a second.
It’s important to note that this will disable HSS. This setting is best used in scenarios with little ambient light.
NOTE: When the AF selection is turned OFF, the HSS functionality will perform as normal and will allow you to
change your shutter speed higher than 1/200th of a second. Please note that the HSS functionality depends on
whether your camera is listed on the compatibility chart. https://www.fjwestcott.com/wireless-compatibility.
NOTE: AF Assist Beam functionality is not compatible with all cameras. Review your camera’s owner’s manual and
familiarize yourself with the settings that need to be adjusted to take advantage of this feature with compatible
cameras.
FJ80-SE Speedlight:
HOST
Wireless Operation
HOST: Enable HOST Mode
1. Quick-press the physical M button to toggle between the different shooting modes.
2. Enable Host mode by pressing the physical M button until three groups of letters between A-F
appear on the display.
3. Adjust the settings using one of the following methods:
a. Method 1:
i. Quick-press the center dial button on the desired group.
ii. Depending on the mode selected, the light output or exposure compensation will
begin to blink.
iii. Rotate the dial to change the number.
iv. Press the center button again to lock in your settings or wait four seconds until
the number stops blinking.
b. Method 2:
i. Quick-press the button directly under the +/- icon.
ii. Depending on the mode selected, the light output or exposure compensation will
begin to blink.
iii. Rotate the dial to change the number.

13
iv. Press the center button again to lock in your settings or wait four seconds until
the number stops blinking.
HOST: Enable Group SLP (Sleep) Mode
FJ Wireless flashes can be placed into SLP (sleep) mode from any FJ Transmitter, disabling the unit’s
ability to flash while other flash groups continue operating normally.
1. Determine the Group [A-F] that the CLIENT FJ Wireless Flash Device is assigned to.
2. Quick-press the corresponding MODE button icon continuously until SLP (sleep) appears on the
display. (Note: Any flash units assigned to this Group will also enter into SLP (sleep) mode.)
3. Exit the SLP (sleep) mode by pressing the corresponding MODE button icon until the screen
displays TTL or M.
NOTE: Ensure the Exposure Mode type is updated from the HOST FJ80-SE; otherwise, the CLIENT flash unit(s)
will re-enter SLP (sleep) mode once the HOST FJ80-SE transmits the next signal to the CLIENT devices.
HOST: Digital Screen Button Selections
Menu 1 Options
• MENU 1
• MODE
• +/- [Power Adjustment Icon]
• ZOOM [A, 24MM – 200MM]
Menu 2 Options
• MENU 2
• SYNC [Front Curtain Sync, Rear Curtain Sync, High-speed Sync (HSS)]
• [FLASH ICON] [Enables or Disables the FJ80-SE from firing on Camera]
• Modeling Lamp [OFF, AUTO, 1-3]
Menu 3 Options
• MENU 3
• TTL-ALL/C-RT [Wireless Radio Frequency]
• CH [CHANNELS 1-31]
• STDBY
NOTE: The Modeling Lamp control button for each group serves two functions for assigned HOST and CLIENT
units:
• Function 1: Adjusting the output settings Minimum [1] ~ Maximum [3] will control the HOST
FJ80-SE’s modeling lamp brightness.
• Function 2: The modeling lamp of FJ CLIENT flash/strobe units assigned to the same Group(s)
as the HOST FJ80-SE can also be controlled via this control button. However, the modeling
lamp output of CLIENT units are limited, meaning the light output can only be set to OFF [0] or
ON [1~3].

14
FJ80-SE Speedlight:
CLIENT
Wireless Operation
CLIENT: Enable CLIENT Mode
1. Quick-press the physical M button to toggle between the different shooting modes.
2. Enable Client mode by pressing the physical M button until the Client symbol ( ) appears on
the FJ80-SE’s digital screen.
NOTE: It’s important that the desired power settings are updated from the transmitter; otherwise, the flash
unit(s) will default to the selected power on the transmitter when the next transmission signal is received.
CLIENT: Enable Group SLP (Sleep) Mode
FJ Wireless Flashes can be placed into SLP (sleep) mode from any FJ transmitter device. This disables
the unit’s ability to flash while other flash groups continue operating normally.
1. Determine the Group [A-F] that the FJ Wireless Flash Device is assigned to.
2. Press the corresponding FJ Wireless Triggers Group Selection Button or the MODE Function icon
[HOST mode] continuously until SLP (sleep) appears on the transmitter and the connected
FJ80SE next to the Group display. [Note: Flash units assigned to this Group will also enter SLP
(sleep) mode.]
3. Exit the SLP (sleep) mode by pressing the corresponding FJ Wireless Triggers Group Selection
Button or MODE Function icon [HOST mode] until the screen displays TTL or M.
NOTE: It’s important that the Exposure Mode type is updated from the transmitter; otherwise, the flash unit(s)
will re-enter SLP (sleep) mode when the next transmission signal is received from an FJ transmitter.
CLIENT: Digital Screen Button Selections
Menu 1 Options
• MENU 1
• GR [Group Selection]
• CH [Channel Selection]
• TTL-ALL/C-RT [Wireless Radio Frequency]
Menu 2 Options
• MODE
• ZOOM
• Modeling Lamp Button: [OFF, AUTO, 1-3]
Full-stop Increments in Manual Mode with the FJ Wireless Trigger
NOTE: Please refer to your specific FJ Wireless Trigger manual to learn how to utilize this feature.

15
FJ80-SE Speedlight: SYNC Functions
Enabling Front or Rear Curtain Sync
Front or Rear Curtain Sync is ideal in normal scenarios and when color consistency (6500°K ±200), full-
power output (80 Ws), and the fastest recycling are essential.
1. Press the Sync selection button repeatedly until three arrows appear at the bottom right of the
screen.
2. Front Curtain will show three arrows, with the first arrow filled in black.
3. Rear Curtain will show three arrows, with the third arrow filled in black.
NOTE: Utilize HSS (see below) when choosing to use shutter speeds above your camera’s maximum normal sync
speed (typically: 1/200s, 1/250s, or 1/320s ).
Enabling HSS (High-speed Sync)
High-speed Sync is ideal for mixing a substantial amount of available light and flash when proper
exposure with a shallow depth of field/wide aperture requires a flash sync speed above the camera’s
maximum normal sync speed (typically: 1/200s, 1/250s or 1/320s). HSS allows compatible cameras to
achieve flash sync speed up to 1/8000s.
1. Press the Sync Selection button repeatedly until an appears at the bottom right of the
screen.
NOTE: HSS requires an FJ-X Transmitter or FJ80 Series Speedlight.
Enabling Freeze Sync
Freeze Sync is ideal for freezing fast-moving objects lit by the speedlight.
[Available in Manual Mode
only.]
1. Press and hold the two round buttons indicated by a gear symbol directly below the LCD
screen.
2. Rotate the control dial and locate the Freeze option.
3. Quick-press the center dial button and rotate the dial to toggle the Freeze selection to ON or
OFF.
4. Press the return icon located at the bottom right corner of the screen to return to the main
screen.
5. Freeze flash is now enabled; a freeze icon will appear at the bottom right of the screen.
NOTE: Freeze flash will only work in Front and Rear Curtain Sync.
Freeze Sync Flash Durations
Flash Duration (t0.1)
• Normal: 1/266~1/3,300s
• Freeze: 1/500~1/16,670s

16
Flash Duration (t0.5)
• Normal: 1/800~1/10,000s
• Freeze: 1/1500~1/50,000s
FJ80-SE Speedlight: ZOOM Control
FJ80 Series: Remote ZOOM Control [Single Group]
NOTE: Please refer to the Remote ZOOM section in your FJ Wireless Trigger manual to learn how to
use this feature.
FJ80 Series: Remote ZOOM Control [All Groups]
NOTE: Please refer to the Remote ZOOM section in your FJ Wireless Trigger manual to learn how to
use this feature.
FJ80-SE: Settings Menu
SETTINGS Menu: Locating
1. Press and hold the two round buttons indicated by a gear symbol directly below the LCD
screen.
2. Navigate the Settings menu by using the control dial.
3. Rotate the dial to scroll through the settings.
4. Quick-press the dial center button to highlight the setting in black, allowing you to change your
setting by rotating the dial.
5. Quick-press the center button again to lock in your selection.
6. Quick-press the button directly below the return icon to return to the main screen.
SETTINGS Menu: Selectable Options
• Camera: Canon, Nikon, Sony, Fuji, Olympus, Lumix
• RT ID#: [00-99]
• Screen: [MIN,MID,MAX)]
• Auto-Off: [OFF, 5 minutes, 15 minutes, 30 minutes]
• X-Sync: [OFF,ON]
• Beep: [OFF,ON]
• Freeze: [OFF,ON]
• Display: [DECIMAL (1.0), FRACTION (1/256)]
• AF Beam: [OFF,ON]
• Reset
• Return

17
FJ80-SE Battery: Performance and Care
FJ80-SE Battery Performance
The FJ80-SE Lithium-ion Battery (7.4V 18.5Wh, 2500mAh) is capable of 550+ full-power flashes with
the modeling lamp disabled and screen brightness set to Minimum Brightness (1).
FJ80-SE Charging & Life Expectancy
• The average charge time is ~3 hours from complete discharge.
• The FJ80-SE Lithium-ion Battery (7.4V 18.5Wh, 2500mAh) will achieve at least 200 full-charge
cycles (@80% capacity after 200). Usage beyond charge cycles may result in diminished
performance and the ability to hold a charge for extended periods.
• Avoid charging and using the battery outside of the stated operating temperatures (14~131°F /
-10°~55°C) as it will affect the overall performance of the battery and speedlight.
• Preserve the battery’s longevity by storing at roughly ~40% capacity at room temperature in a
dry environment and recharge to this capacity at least once every three months when not being
used.
FJ80-SE Speedlight: Technical Specifications
FJ80-SE: Speedlight
Maximum Power (Ws)
80 Ws
Energy Range (Power Output)
9 f-stop (0.3Ws to 80 Ws)
Flash Duration (t0.1)
Normal: 1/266-3,300s
Freeze: 1/500-16,670s
Flash Duration (t0.5)
Normal: 1/800-10,000s
Freeze: 1/500-1/50000s
Recycle Time
.05s - 1.8s (DC Battery)
Color Temperature Stability
Normal/TTL/HSS: 6500K±200
Freeze: 6500K -±400K (E.R. 1-9)
Mounting System
FJ80 Magnetic Mount
Auto Multi-Voltage
Yes
Flash Increments
0.1-stop; 1.0-stop
Flash Modes
Manual / TTL
Continuous Capture
20 fps (Camera Model & Speedlight Settings
Dependent)
IGBT
Yes
Flash Exposure Compensation (FEC)
±3

18
Modeling Lamp (Output)
LED 3 Watts (4600K ±200K)
Flash Tube
Line; 120° Beam Angle
Sync Functions
Normal, HSS, Freeze
Sync Speed
Normal: 1/250s
HSS: 1/8000s
Wireless Radio Frequency
2.4GHz
Wireless Channels
01-31
Wireless Groups
16 [A, B, C, D, E, F, G, H, I, J, L, O, P, Q, S,
U]
Wireless Range
Up to 328' (100m)
Power Source
FJ80-SE Battery
Battery Type
Lithium-ion
Battery Capacity
18.5Wh, 2500mAh
Voltage
7.4V
Charger Voltage
8.4V
Continuous Discharge Current
10A
Charge Current
≤ 1.5A
Charge Temperature
32° to 113° F / 0° to 45° C
Discharge Temperature
14° to 131° F / -10° to 55° C
Flashes Per Charge
550+ at Full Power
Recharge Time
≤3 hours
Battery Charge Cycles
200 (@80% after 200)
FJ80-SE: General
Display
LCD Display
Mount
Hot Shoe
Auto-Dump
Yes
Cooling
Passive
Voltage Stabilization
Yes
Firmware Port Type
USB-C (Firmware)

19
Auto Memory Recall
Yes
Test Button
Yes
Auto-Power Off
Yes
Audible Beep Control
Yes
Optical Slave
N/A
FJ80-SE: Dimensions & Weight
Weight (FJ80 with Battery)
1.21 lbs (0.55kg)
Length
7.68 in (19.5cm)
Height
3.10 in (7.9cm)
Operating Temp
14° - 131°F / -10° - 55°C
NOTE: Speedlight performance, available features, and menu items are subject to change without notice with
future firmware updates or physical product changes during manufacturing. Information and specifications found
in this document may change without notice.
This manual suits for next models
2
Table of contents
Other Westcott Camera Accessories manuals

Westcott
Westcott 1864 Manual

Westcott
Westcott 1856 Manual

Westcott
Westcott FJ400 User manual

Westcott
Westcott Mini Apollo 2218 Manual

Westcott
Westcott 1869 Manual

Westcott
Westcott PokerLite 7054 Manual

Westcott
Westcott 1868 Manual

Westcott
Westcott 1873 Manual

Westcott
Westcott 1880 Manual

Westcott
Westcott 2025 Manual