___________________________________________________________________________________
4
Note: A readily accessible disconnect device shall
be incorporated in the building installation wiring.
4.4. Remove the distribution fuse feeding the
input cables that are to be connected to the new
panel. Attach the input cables to the input
terminal block in accordance to the National
Electrical Code, ANSI/NFPA, and Canadian
Electrical code. Hook up the input cables to the
input terminal block on the fuse panel (“BAT” &
“RTN” for each bus). Each high current input
terminal uses a two hole compression lug (1/4” on
5/8”, torque to 5.5 ft-lbs). A two hole lug must be
used for proper operation (see fig 4.4.1)
Note: The supply source must be limited to an
instantaneous short-circuit current not to exceed
450 Amps.
1415
1415
BAT
RTN
B
Figure 4.4.1
4.5. The battery outputs (“BAT”) are available at
the terminal blocks (#6 screw torque to 9 in-lbs,
up to 10awg fork) at the rear of the panel. Each
fuse position is numbered and that circuit is
available at the terminal block position with the
same number.
4.6. All battery return (“RTN”) connections are
also terminated on barrier strips (#6 screw, up to
10awg fork). Note, these returns are isolated
from the chassis frame.
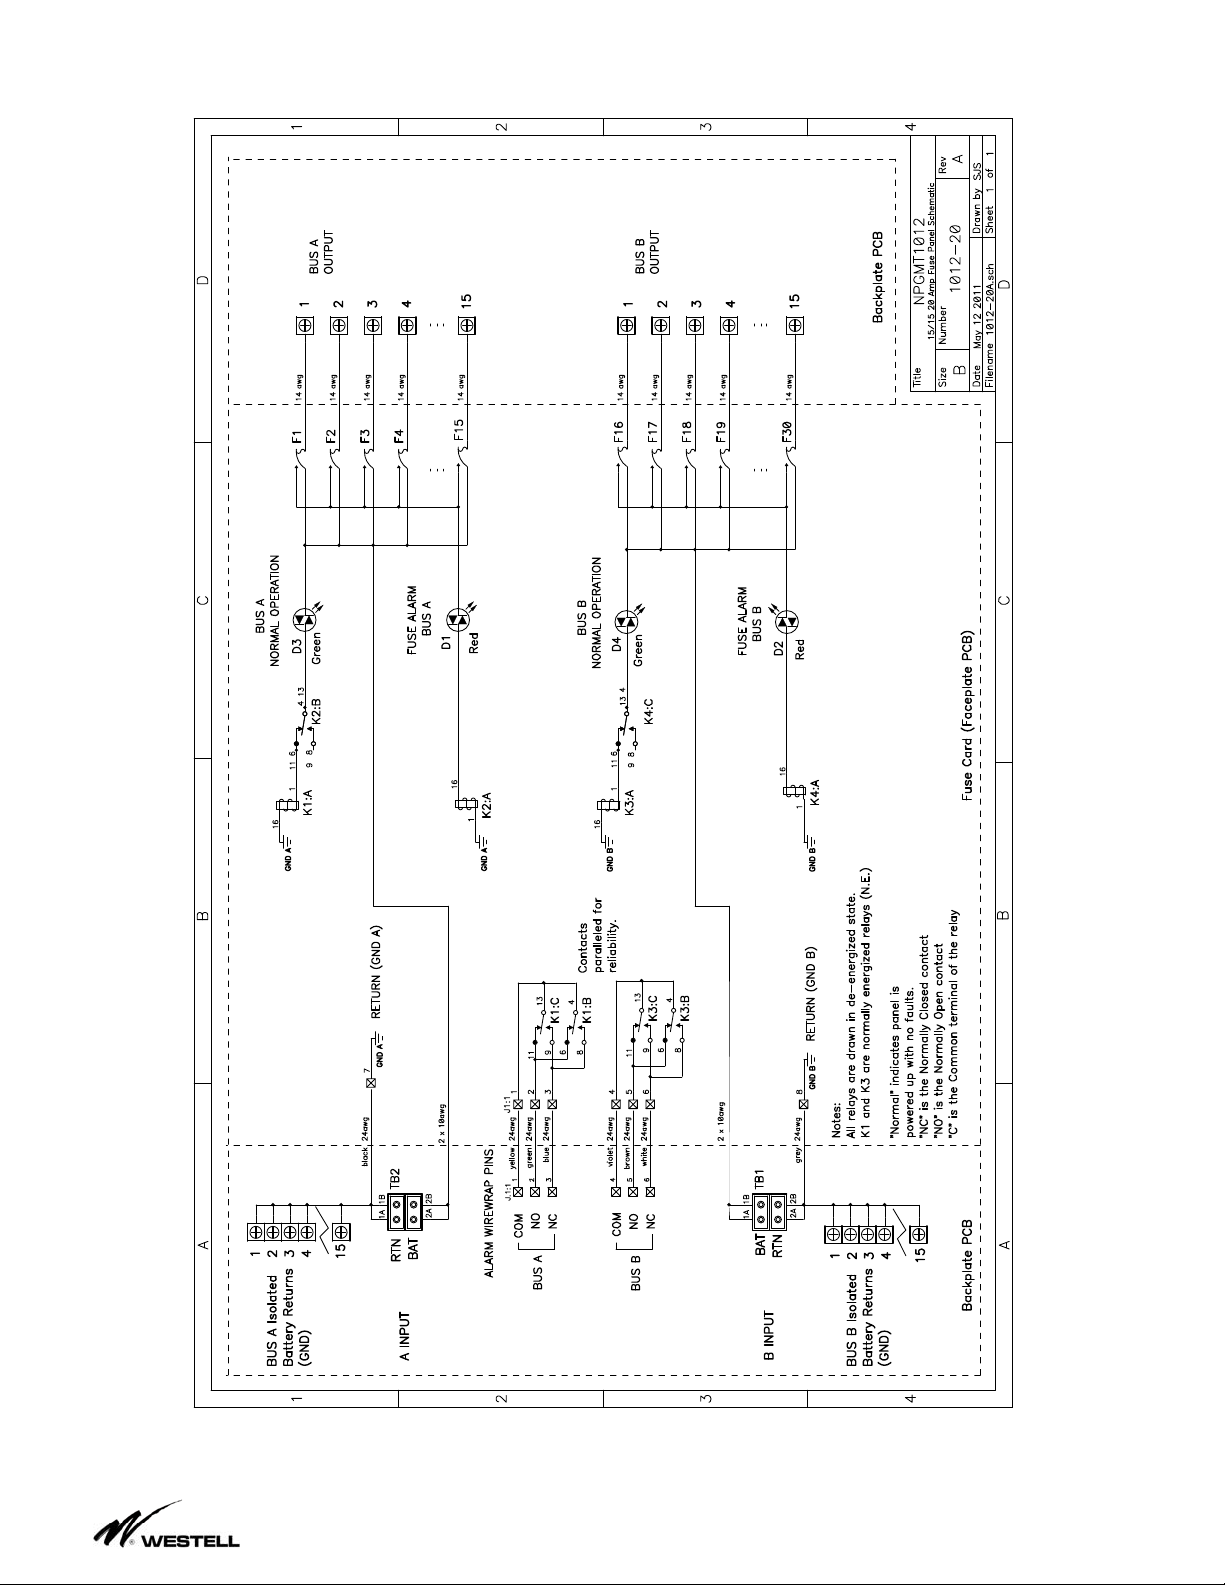
4.7. This panel has Bus A, and Bus B alarm
contacts. Each alarm has a common (C),
normally open (NO) and normally closed (NC)
alarm contact. In an alarm the “C” contact will
short to the “NO” contact, and the “NC” will open.
Wire-wrap the alarm connections as per your
alarm system requirements. Noran Tel
recommends you fuse the alarm battery supply
(ABS) to 1A or less to protect the alarm wiring and
circuitry.
4.8. CHASSIS GROUND; For safety reasons,
and as recommended by NEBS, the chassis
should be electrically connected to the rack
ground. From step 4.3. the panel should already
be ground to the rack via the #12-24 thread
forming rack screws and outside tooth lock
washers. In addition to grounding via the
mounting brackets, it is recommended you ground
the chassis using a ground cable and the two ¼”
bolts and locks on back of chassis (1/4” bolt
torque; 5.5ft-lbs or 7.5Nm). Consult the National
Electric Code, ANSI/NFPA, and Canadian
Electrical code for AWG sizes.
4.9. The input wiring feeding this panel should be
protected by a Listed fuse/breaker rated for at
least 60Vdc, with a trip rating of 125 Amps Max.
With input wiring connected and this input fuse
installed, the panel should power up with the
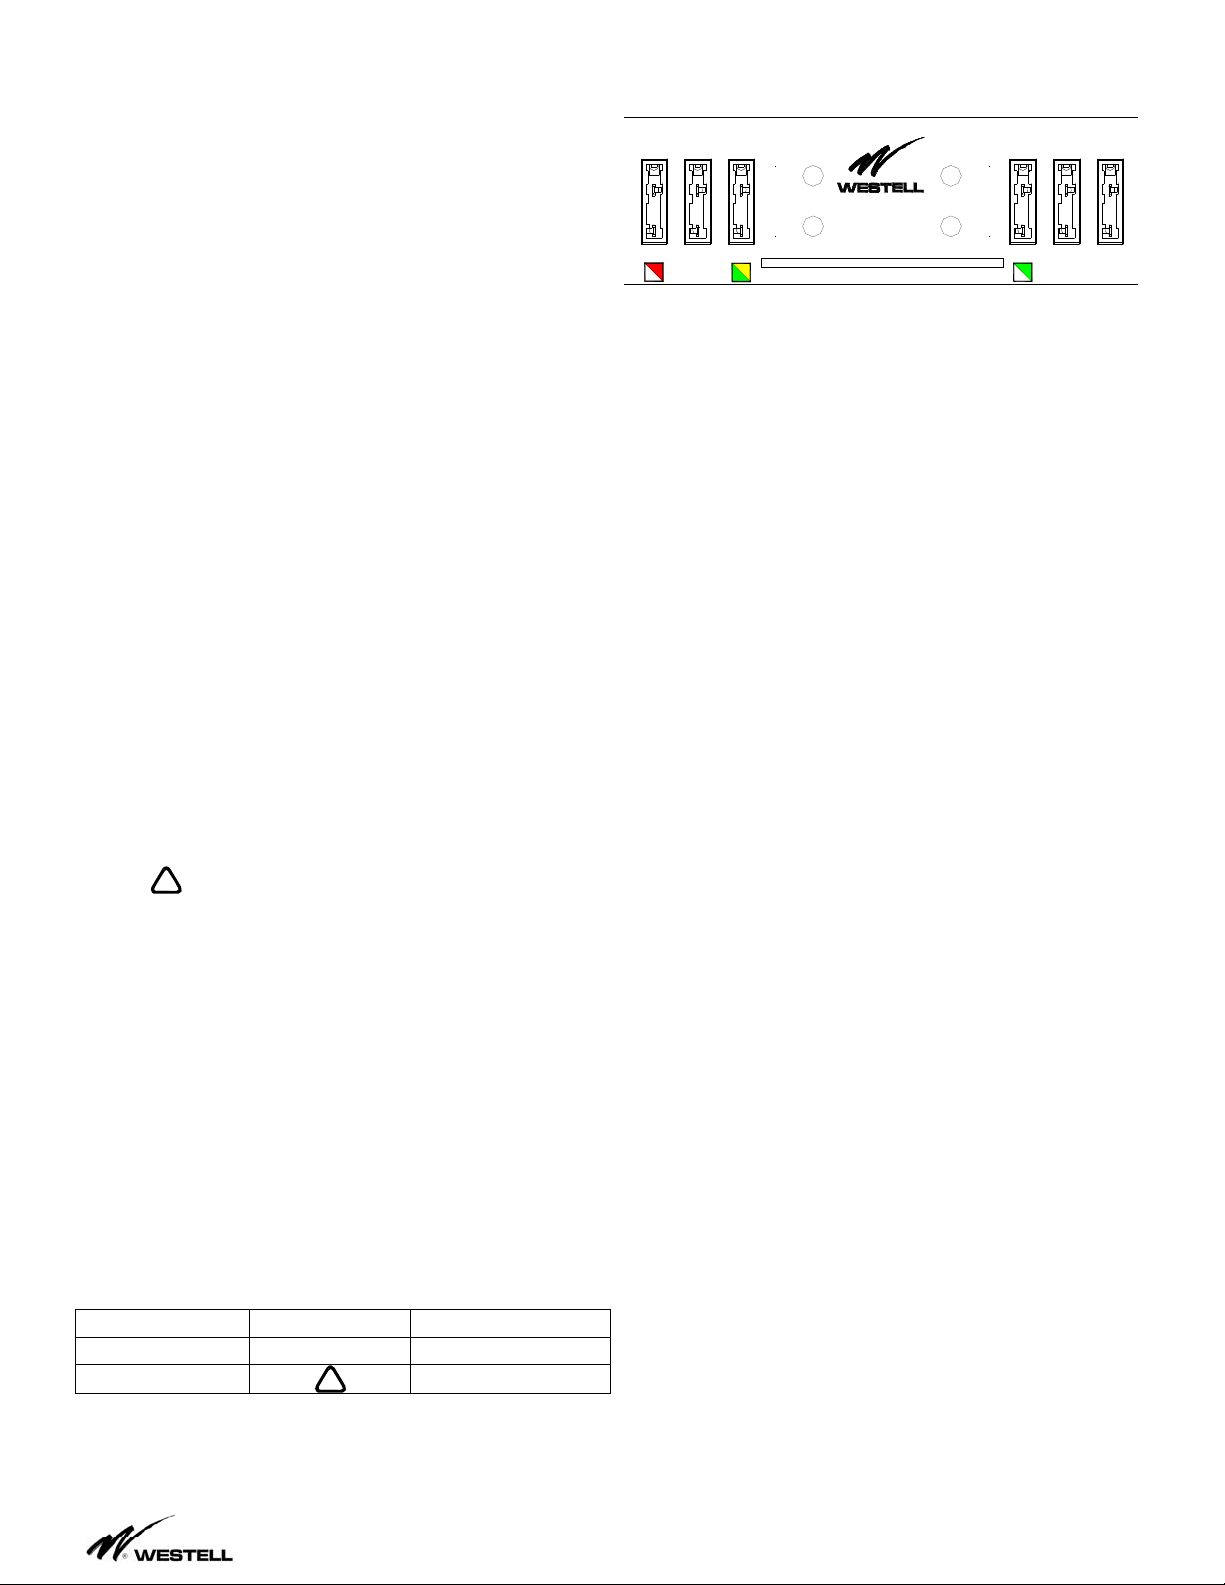
Normal Operation LED 9illuminated and without
any red LEDs !illuminated, and the relays
should be in the “Normal” state (“C” connected to
“NC”).
4.10. If you wish to verify the fuse alarm circuit,
you can insert a blown fuse into one of the empty
fuse holders. The red Fuse Alarm
LED !should light and the Normal Operation
LED 9should extinguish and the appropriate
alarm extension relay should change states to
extend the alarm.
4.11. Install panel output distribution fuses as
required. Be sure to size fuses to no more than
70% of their rating (14A max for a 20A fuse).
Fuses are not included with this panel. Fuse
ratings should be selected to match the load
equipment ratings. Once the appropriate fuses
have been selected, the fuse information for F1-
F15 on BUS A and F1-F15 on BUS B is to be
recorded at the time of installation. Use the
provided designation card to keep a record of
which equipment is connected to which circuit and
what the fuse rating is. Be careful not to overload
the panel bus or BDFB fuse position rating
supplying the panel.
4.12 Install amperage marking labels as required
below each fuse for identification of circuit rating
(see fig 1.4.1). For fuse color codes please see
table 4.12.1