The microscope is housed in a moulded styrofoam container.
First take the container out of the carton, and lay the container
on its side. Open the container carefully and don’t let the optical
items drop down, avoiding them being damaged. Check carefully
to ensure the arm and accessories are intact.
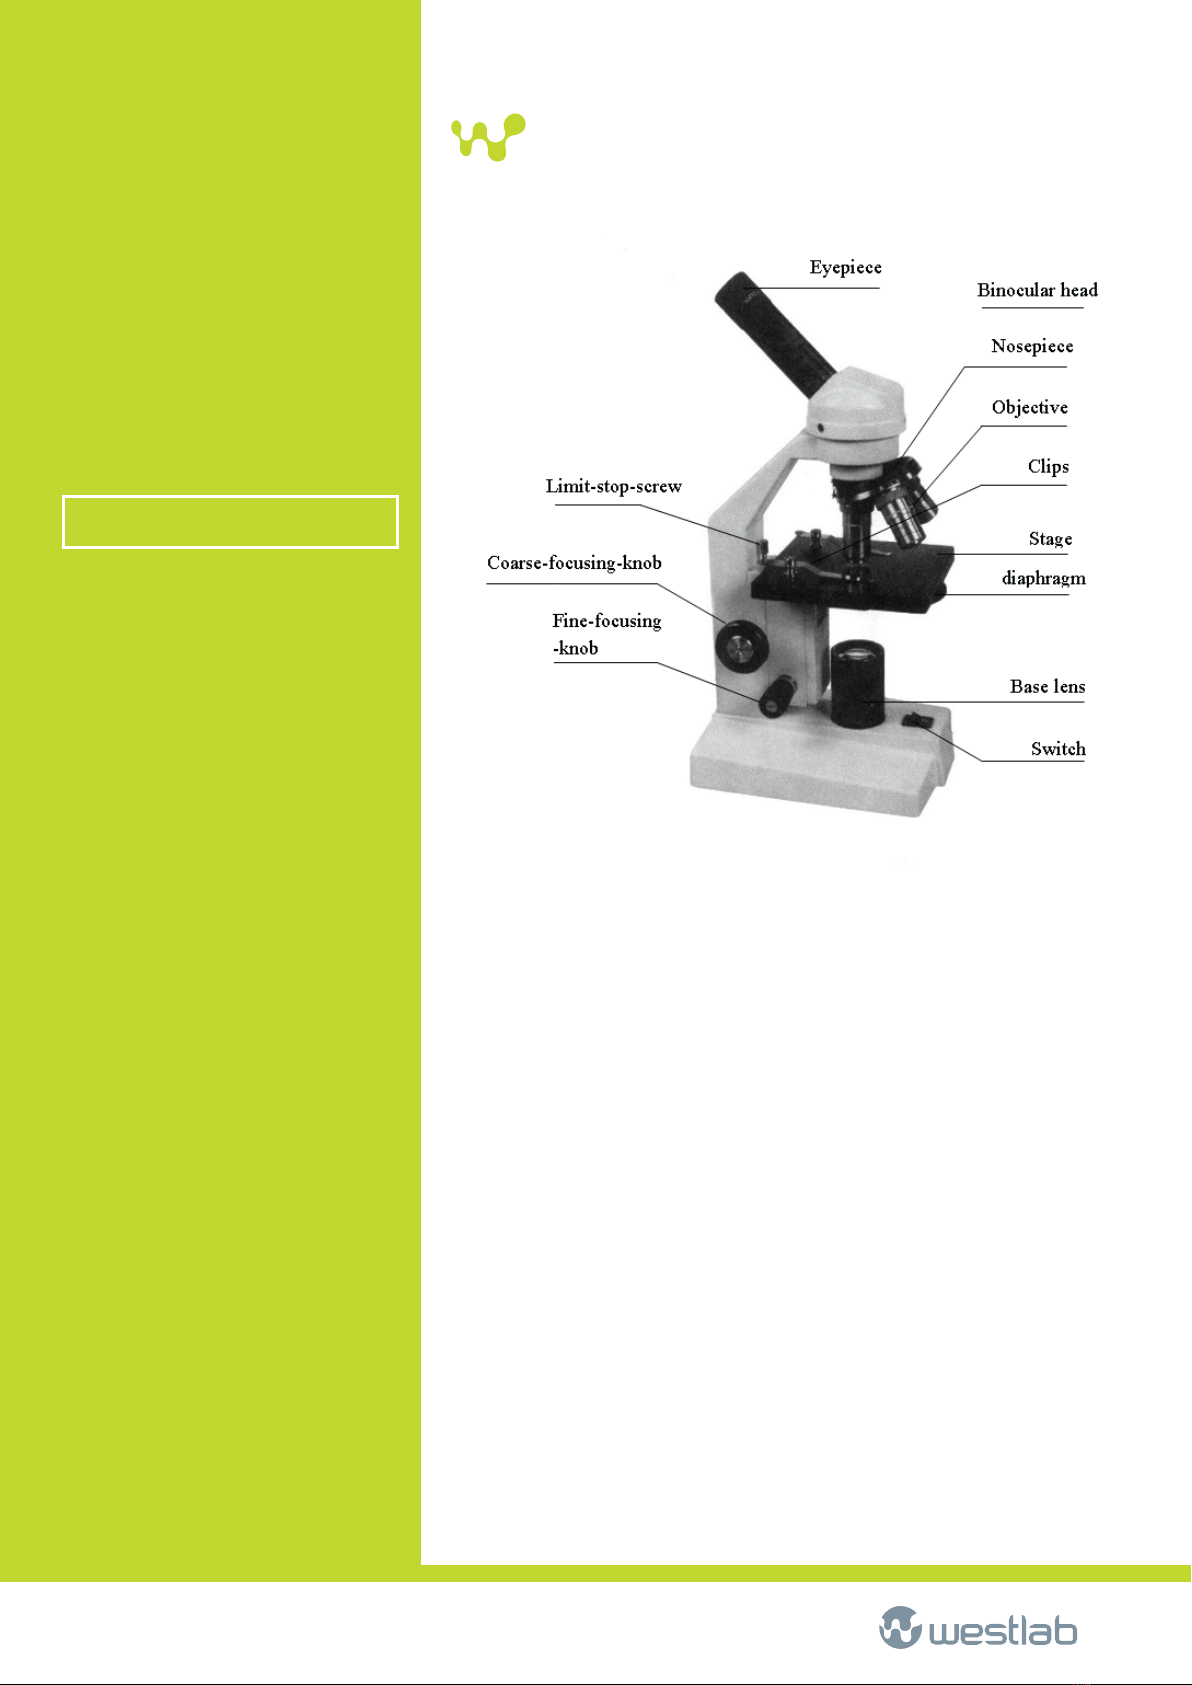
Install the objective into the microscope nosepiece from the lowest
magnification to the highest, in a clockwise direction from the rear.
Insert the eyepiece into the eyepiece tube.
2-1 Set the specimen slide
Place the specimen to be studied on a glass slide, and fix it with
the slide-holder of the mechanical stage. If we use the movable
specimen holder, fix the specimen by slide-holder of the
movable specimen holder. Adjust its position by the switch of
the movable specimen holder.
2-2 Set illumination
2-3 Adjust focus
Adjust the coarse-focusing-knob to bring the slide into focus.
Then lock the limit-stop-screw to avoid impact between the
objective and slide. Adjust the fine-focusing-knob to get the
image sharper and clearer.
2-4 Adjust diaphragm
Turn the disc diaphragm to select a aperture to get the
background brightness suitable.
2-5 Choose the objective
Turn the nosepiece to choose the objective. Objective selected
should be set vertically right to the slide. Generally, first use the
objective 4X to focus to reveal general structural image. Then
use the high power objective to reveal smaller details.
2-6 Change the lamp
Before changing the lamp, first pull the plug out off the electrical
socket and wait for a while until the lamp cools down to avoid
being burnt. Then screw off the base lens in an anti-clockwise
direction and insert a new lamp and screw on the base lens.
For the microscope with built-in electrical illuminator, insert
the plug of the main cable into the power socket and turn on
the light switch to get the specimen illuminated.
2. OPERATION
WESTLAB
EXTREME
MONOCULAR
MICROSCOPE,
RECHARGEABLE,
LED
USER MANUAL
CODE 663-540 & 664-089