3-Bow Bimini Assembly InstructionsBimini Top Installation Instructions
Each bow part is labeled with
a number. For example:
####12
All bow parts in your bimini
will have the same first four
numbers. The fifth number
determines the bow
number, in this example
bow 1. When assembling
each bow keep
corresponding bow
numbers together, such as
all 1’s together, all 2’s
together, etc. This will
help you identify which
bow the pieces belong to.
The last number relates how
the bow parts go together.
For bow 1, 11 goes into 12,
12 goes into 13, etc. For
bow 2, piece 21, goes into
22, 22 goes into 23, etc.
Important!
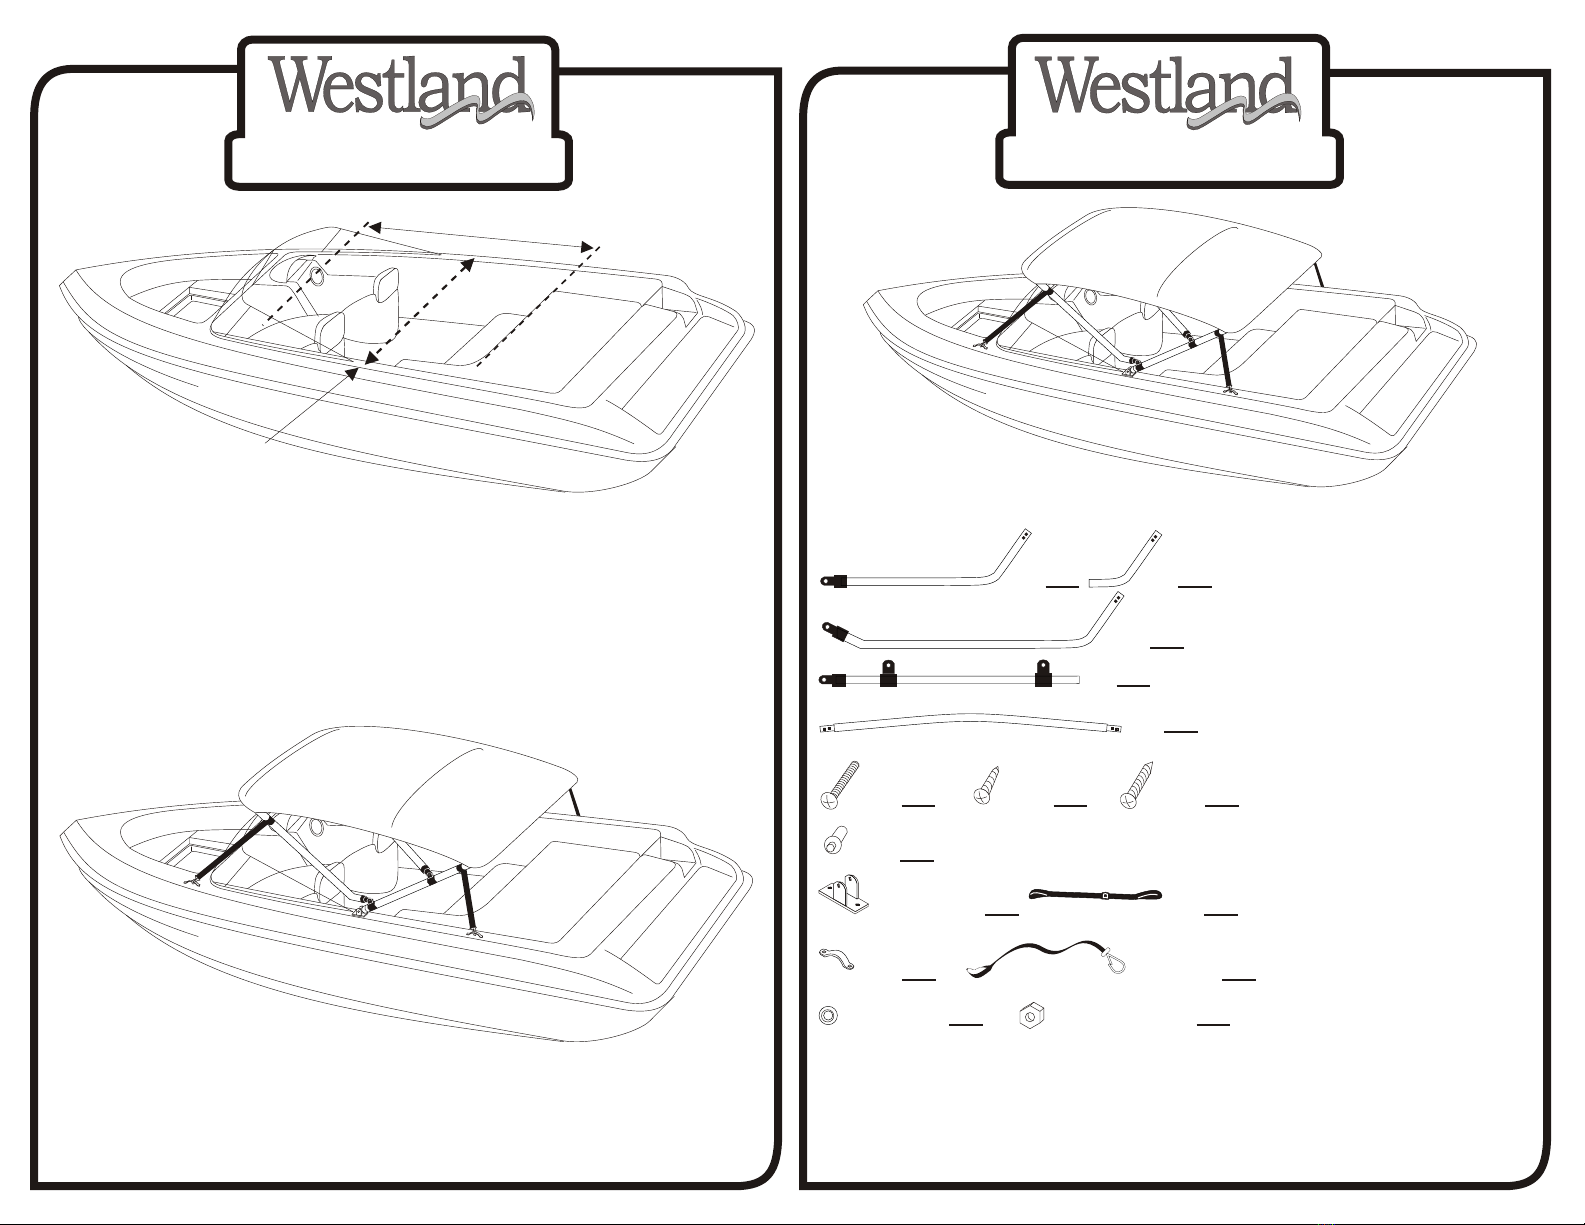
Package Contents
If your bimini is missing any of these parts,
contact Westland Industries customer support
center at (800) 874-6824. Packed by:______
(x2)
(x2)
(x2)
#8 11/4” bolt
(x2)
#8 5/8” screw
(x14)
(x3)
Bimini mount
w/ knob (x2)
Strap eyes
(x4)
Bow strap
(x2)
Hold down
strap (x4)
Washer (x2) Locking nut (x2)
Total Bimini
Coverage
Bimini Mounts
(x2)
#8 1” screw
(x12)
Hammer rivet if applicable
(x12)
12
13
Determine what area of boat you want to cover and where to mount the
bimini. Bimini mount locations are approximately half the distance of the
total length of the bimini. Measure where you want to place mounts and mark
them. Make sure the mounts are parallel to each other. Use a 9/64” drill bit to
make holes for #8 1” mounting screws. Screw in mounts. Determine best
position for hold down strap eyes. They should be put onto a flat surface
whenever possible and straps should maintain and angle between 30 and 60
degrees. Drill holes for eyes using 9/64” bit and secure eyes to boat with #8 1”
screws provided.
It is much easier to install the assembled bimini with two people, one to
hold each side while positioning it onto mounts. Secure bimini to mounts
with screws provided. Adjust hold down straps and bow straps to achieve
desired tightness. If you have any questions or additional parts are needed for
your specific boat application, please call (800) 874-6824.
Westland Industries is not responsible for any injuries to persons or damages to the boat during
assembly and installation of this product. Installation of this product may void your boat warranty,
check with your dealer. Replace any worn parts to increase the life of your product.


