Dock Doctors SLIDING BOARDING STEP User manual

PART NAME QTY
A. BOARDING PLATFORM FRAME...........1
B. DECKING PANELS ................................2
C. CENTER RAIL........................................1
(mounted to the underneath of the platform frame)
D. SLIDING MOUNT .................................1
E. HANDRAIL 3 pieces)..........................1
F. HANDRAIL SLEEVES ............................2
SLIDING BOARDING STEP
Assembly Instructions
HARDWARE BAG QTY
DECKING SCREWS ....................................16
(for attaching decking to the platform frame)
¼” × 2 ¼”PAN HEAD BOLT .........................4
¼” LOCK NUT .............................................4
(for assembling handle)
BLACK SAFETY CAPS .................................2
IMPORTANT: You will need 4 anchoring bolts (not included)
for attaching the sliding mount (qty 4). The length and style of
these will vary based on your mounting location.
ASSEMBLY TOOLS NEEDED: #2 PHILLIPS HEAD SCREWDRIVER AND 7/16” WRENCH
Toll Free: 1-800-870-6756 | info@thedockdoctors.com | www.thedockdoctors.com 1
© 2021 The Dock Doctors - V6-0221
LLC
®
Dock Doctors
The
Waterfront Specialists
A
B
D
C
E
F

Sliding Boarding Step assembly instructions
IMPORTANT: You will need 4 anchoring bolts (not included)
for attaching the sliding mount (qty 4). The length and style of
these will vary based on your mounting location.
Toll Free: 1-800-870-6756 | info@thedockdoctors.com | www.thedockdoctors.com 2
© 2021 The Dock Doctors - V6-0221
LLC
®
Dock Doctors
The
Waterfront Specialists
Sliding Boarding Step Disclaimers
CAUTION
It is critical that surface that your Sliding Boarding Step attaches to is substantial enough
to carry the weight of the sliding boarding step and its occupant. Do not mount to rotten
wood, crumbling concrete or other insecure surface.
Personal Injury & Property Disclaimer:
Please note that The Dock Doctors will not be held responsible for damages or injuries
caused by or due to misuse, overloading, or improper mounting of the Sliding Boarding
Step. The Dock Doctors does not accept liability ensuing from faulty assembly or
installation if such assembly was not performed by our Company or an authorized
Company dealer.
ASSEMBLY OVERVIEW
Temporarily remove decking:
• Remove Sure-Step decking from frame to access sliding mount
Mount Frame to Surface:
• Position boarding step in it’s permanent location
• Secure sliding mount to your dock surface with mounting hardware (not provided)
Attach Handrail and Decking:
• Attach handrail to platform (can mount on either side)
• Attach decking to platform

STEP 1: Attach sliding mount to your dock or other surface:
1. Remove the Sure-Step decking from the frame and place to the side.
2. Position the platform frame so the sliding mount is facing down
and the bumper is facing up (see Figure B).
3. Position the sliding mount in it’s permanent location and
mark the 4 holes on the mounting bracket.
4. Pre-drill the holes for your mounting bolts (not included), then
install your mounting bolts, making sure the sliding mount is
securely attached to your mounting surface.
Step 1
Parts Needed Quantity
Boarding Platform Frame 1
Mounting Hardware 4
(not provided)
Sliding Boarding Step assembly instructions
Based on the design of this product, it is critical that the structure that it attaches to is substantial enough to
carry the weight of the sliding boarding step and occupant.
Do not mount to rotten wood, crumbling concrete or other insecure surface, the boarding
step could fail resulting in potential bodily injury and/or property damage.
CAUTION
SLIDING
MOUNT CENTER RAIL
✎
Sure-Step decking
IMPORTANT: You will need 4 anchoring bolts (not included) for attaching the sliding mount.
The length and style of these will vary based on your mounting location.
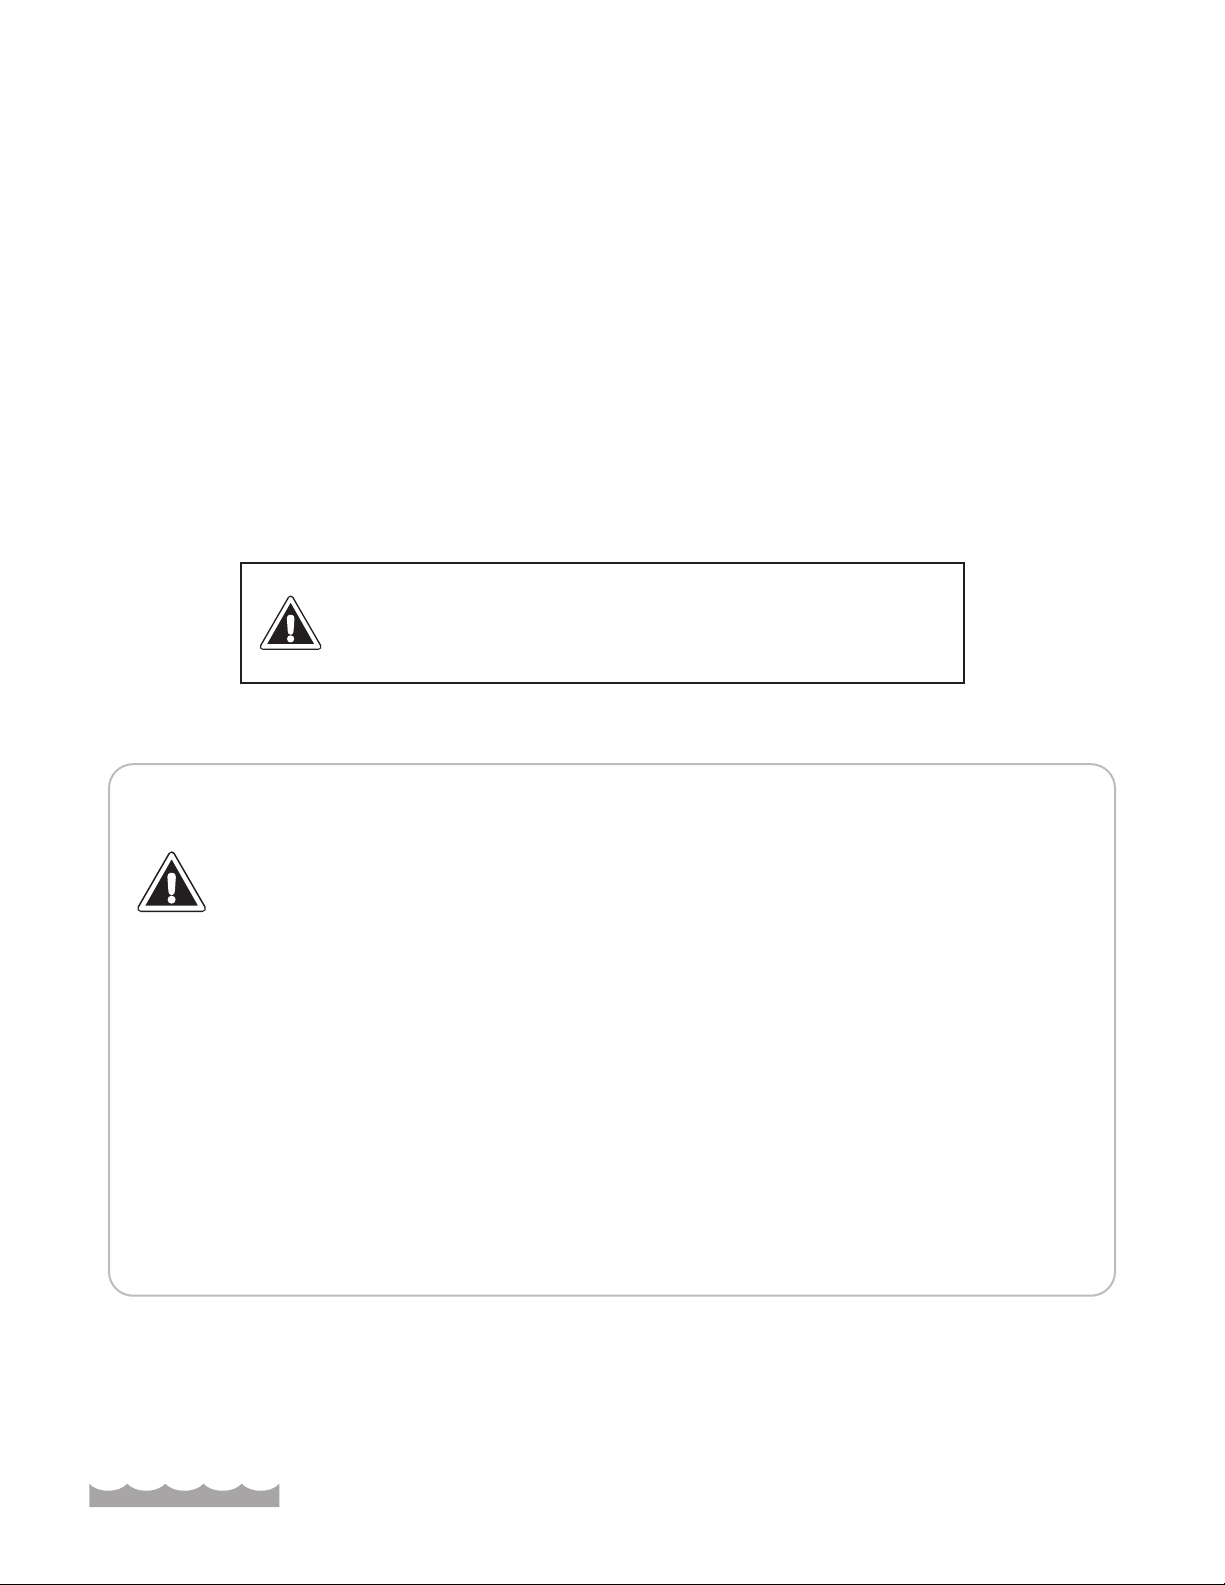
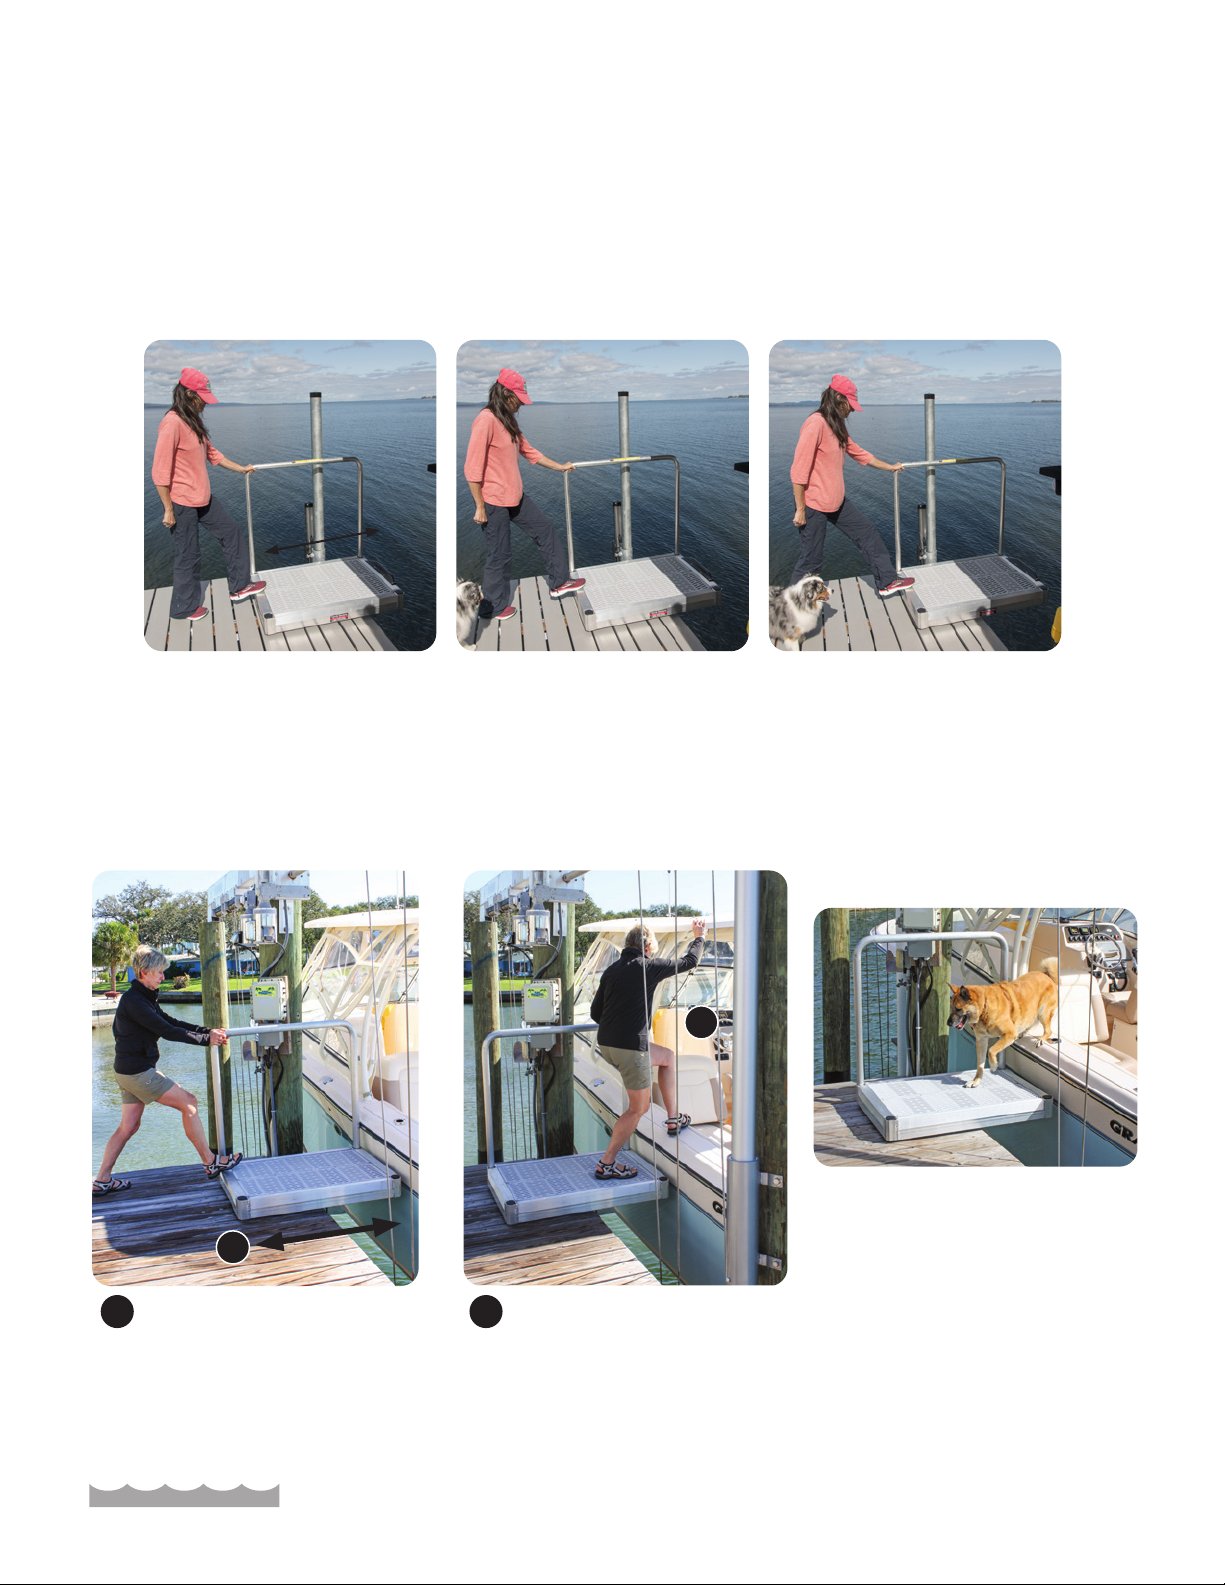
extend and retract to determine best mounting position
To determine the best mounting location for your sliding boarding step,
we suggest placing the frame with sliding mount attached in it’s approximate
location, then fully extend and fully retract the frame. Make adjustments to
your mounting location based on these two positions (see Figure B).
TIP
MOUNTING
BRACKET
Toll Free: 1-800-870-6756 | info@thedockdoctors.com | www.thedockdoctors.com 3
© 2021 The Dock Doctors - V6-0221
LLC
®
Dock Doctors
The
Waterfront Specialists
B
A
bumper
sliding
mount
mounting
bracket

STEP 2: Assemble Handrail:
1. Take the (2) handrail sleeves and insert them to the top of the (2) straight
pieces of the boarding handle. Attach each sleeve with (2) 2 1⁄4”pan head
bolts and (2) 1⁄4”lock nuts.
2. Take the top top curved section of the handrail and attach to the handrail
sleeves. Secure with (2) 2 1⁄4” pan head bolts, and (2) 1⁄4”lock nuts.
Step 2
Parts Needed Quantity
Handrail 1
(3 pieces)
Handrail Sleeves 2
1⁄4” ×2 1⁄4” Pan Head Bolts 4
1⁄4” Lock Nuts 4
Sliding Boarding Step assembly instructions
HANDRAIL SLEEVES
Toll Free: 1-800-870-6756 | info@thedockdoctors.com | www.thedockdoctors.com 4
© 2021 The Dock Doctors - V6-0221
LLC
®
Dock Doctors
The
Waterfront Specialists
boarding
handrail
sleeve
1
2
boarding
handrail
sleeve

Sliding Boarding Step assembly instructions
STEP 3: Attach handle to frame:
1. Decide which side of the platform you want your handrail.
If you need to move the safety caps, they can easily be removed
using a at head screwdriver (see Figure A).
2. Insert the handrail into the sleeves in the boarding step frame
(Figure B).
3. To secure the handle to the frame, tighten the tension bolt on
the side of the sleeve (see Figure C).
4. Insert the (2) safety caps into the handrail sleeves on the
opposite side of the frame.
Step 3
Parts Needed Quantity
Boarding Step Frame 1
Handrail 1
Safety Caps 2
C
tighten tension bolts on the
side of the handrail sleeve
A
B
Safety Label
Toll Free: 1-800-870-6756 | info@thedockdoctors.com | www.thedockdoctors.com 5
© 2021 The Dock Doctors - V6-0221
LLC
®
Dock Doctors
The
Waterfront Specialists

Step 6
Parts Needed Quantity
Decking Panel 2
Decking Screws 16
STEP 6: Attach decking to boarding platform frame:
1. Place the decking panels back into the boarding platform frame,
then secure with decking screws.
Once self-tapper pushes through
aluminum, let up on pressure and
slowly seat screw to plastic.
CAUTION:
Sliding Boarding Step assembly instructions
Toll Free: 1-800-870-6756 | info@thedockdoctors.com | www.thedockdoctors.com 6
© 2021 The Dock Doctors - V6-0221
LLC
®
Dock Doctors
The
Waterfront Specialists

1Slide unit into place
1
2
Ideal for pets too!
OPERATION TIPS:
1. To slide the unit into place, push on the center edge of the platform to slide the unit into place
Do not push/pull using the boarding handle (the underneath sliding mechanism will lock up).
2. To avoid damage to unit or boat, push unit back to dock after boarding.
SAFTEY TIPS:
• Step with caution • Keep clear when sliding • Persons not to be on unit when sliding
Sliding Boarding Step assembly instructions
2Step safely across onto boat
To slide the boarding step, push on the center edge of platform, do NOT push/pull with handle.
Toll Free: 1-800-870-6756 | info@thedockdoctors.com | www.thedockdoctors.com 7
© 2021 The Dock Doctors - V6-0221
LLC
®
Dock Doctors
The
Waterfront Specialists
Table of contents
Other Dock Doctors Boating Equipment manuals
Popular Boating Equipment manuals by other brands

NUCANOE
NUCANOE 7152 Mount instructions

Floe
Floe 510-27300-00 Assembly instructions and owner's manual

SureShade
SureShade Power Bimini Installation and owner's manual

BRNKL
BRNKL Mate quick start

Lectrotab
Lectrotab ELECTROMECHANICAL TRIM TAB SYSTEMS Operation and installation manual

Gumotex
Gumotex AIRGO manual