Whelen Engineering Company SmartArrow MGM01 Owner's manual

1
®
ENGINEERING COMPANY INC.
Route 145, Winthrop Road,
Chester, Connecticut 06412
Phone: (860) 526-9504
Fax: (860) 526-4078
Internet: www.whelen.com
Sales e-mail: autosale@whelen.com
Canadian Sales e-mail: autocan@whelen.com
Customer Service e-mail: custserv@whelen.com
Automotive: Other
Programming Procedures
SmartArrow Messenger™
Safety First
This document provides all the necessary information to allow your Whelen product to be properly and safely installed.
Before beginning the installation and/or operation of your new product, the installation technician and operator must
read this manual completely. Important information is contained herein that could prevent serious injury or damage.
• Proper installation of this product requires the installer to have a good understanding of automotive
electronics, systems and procedures.
• If mounting this product requires drilling holes, the installer MUST be sure that no vehicle components or
other vital parts could be damaged by the drilling process. Check both sides of the mounting surface
before drilling begins. Also de-burr the holes and remove any metal shards or remnants. Install grommets
into all wire passage holes.
• If this product is mounted with tape or Velcro™, clean the mounting surface with a 50/50 mix of isopropyl
alcohol and water and dry thoroughly.
• Do not install this product or route any wires in the deployment area of your air bag. Equipment mounted
or located in the air bag deployment area will damage or reduce the effectiveness of the air bag, or
become a projectile that could cause serious personal injury or death. Refer to your vehicle owners
manual for the air bag deployment area. The User/Installer assumes full responsibility to determine proper
mounting location, based on providing ultimate safety to all passengers inside the vehicle.
• For this product to operate at optimum efficiency, a good electrical connection to chassis ground must be
made. The recommended procedure requires the product ground wire to be connected directly to the
NEGATIVE (-) battery post.
• If this product uses a remote device to activate or control this product, make sure that this control is
located in an area that allows both the vehicle and the control to be operated safely in any driving
condition.
• Do not attempt to activate or control this device in a hazardous driving situation.
• If this product contains strobe light(s), halogen light(s) or high-intensity LEDs, do not stare directly into
these lights at a close distance. Momentary blindness and/or eye damage could result.
• If this product contains strobe light(s), halogen light(s) or high-intensity LEDs, use only soap and water to
clean the lamp lens. Use of other chemicals could result in premature lens cracking (crazing) and
discoloration. Lenses in this condition have significantly reduced effectiveness and should be replaced
immediately. Inspect and operate this product regularly to confirm its proper operation and mounting
condition. Do not use a pressure washer to clean this product.
• It is recommended that these instructions be stored in a safe place and referred to when performing
maintenance and/or reinstallation of this product.
• FAILURE TO FOLLOW THESE SAFETY PRECAUTIONS AND INSTRUCTIONS COULD RESULT IN DAMAGE
TO THE PRODUCT OR VEHICLE AND/OR SERIOUS INJURY TO YOU AND YOUR PASSENGERS!
©1997 Whelen Engineering Company Inc.
Form No.13099A (050102)

2
Contents
Introduction........................................................................................................................... 3
Section I: Installing and Operating the Programming Software............................................. 3
Installing the Messenger Programming Software ................................................................... 3
Windows 3.x ................................................................................................... 3
Windows 95.................................................................................................... 3
Starting the Messenger Software....................................................................................... 4
Windows 3.x ................................................................................................... 4
Windows 95.................................................................................................... 5
Selecting the proper Messenger Display................................................................................................. 5
Creating a Message File or Library File ............................................................................... 6
Section II: Designing a Message.......................................................................................... 8
Message Characteristics ................................................................................................. 8
Display Characteristics ...................................................................................... 8
Functional Characteristics................................................................................... 8
Exercise I: Creating a Message ...................................................................................... 10
Exercise II: Font Justification......................................................................................... 11
Exercise III: Font Effects ............................................................................................... 13
Mirror ............................................................................................................ 13
Reverse......................................................................................................... 13
Bold.............................................................................................................. 14
Exercise IV: Message Timing ......................................................................................... 15
Continuous Mode ............................................................................................. 15
On-Off Mode ................................................................................................... 15
Exercise V: Scrolling .................................................................................................... 16
On-Off Mode ................................................................................................... 16
Continuous Mode ............................................................................................. 17
Section III: Additional Features............................................................................................. 19
Exercise VI: Copying & Pasting a Message from one file to another...................................... 19
Exercise VII: Copying & Pasting multiple Messages from one file to another.......................... 19
Exercise VIII: Deleting Messages .................................................................................... 19
Exercise IX: Uploading a Message File to the Messenger display ......................................... 20
Section IV: Trouble-Shooting................................................................................................ 22
Illustrations
Figure 1 - “Searching for Messenger” Window.............................................................................. 5
Figure 2 - “Setup” sub-menu......................................................................................................... 6
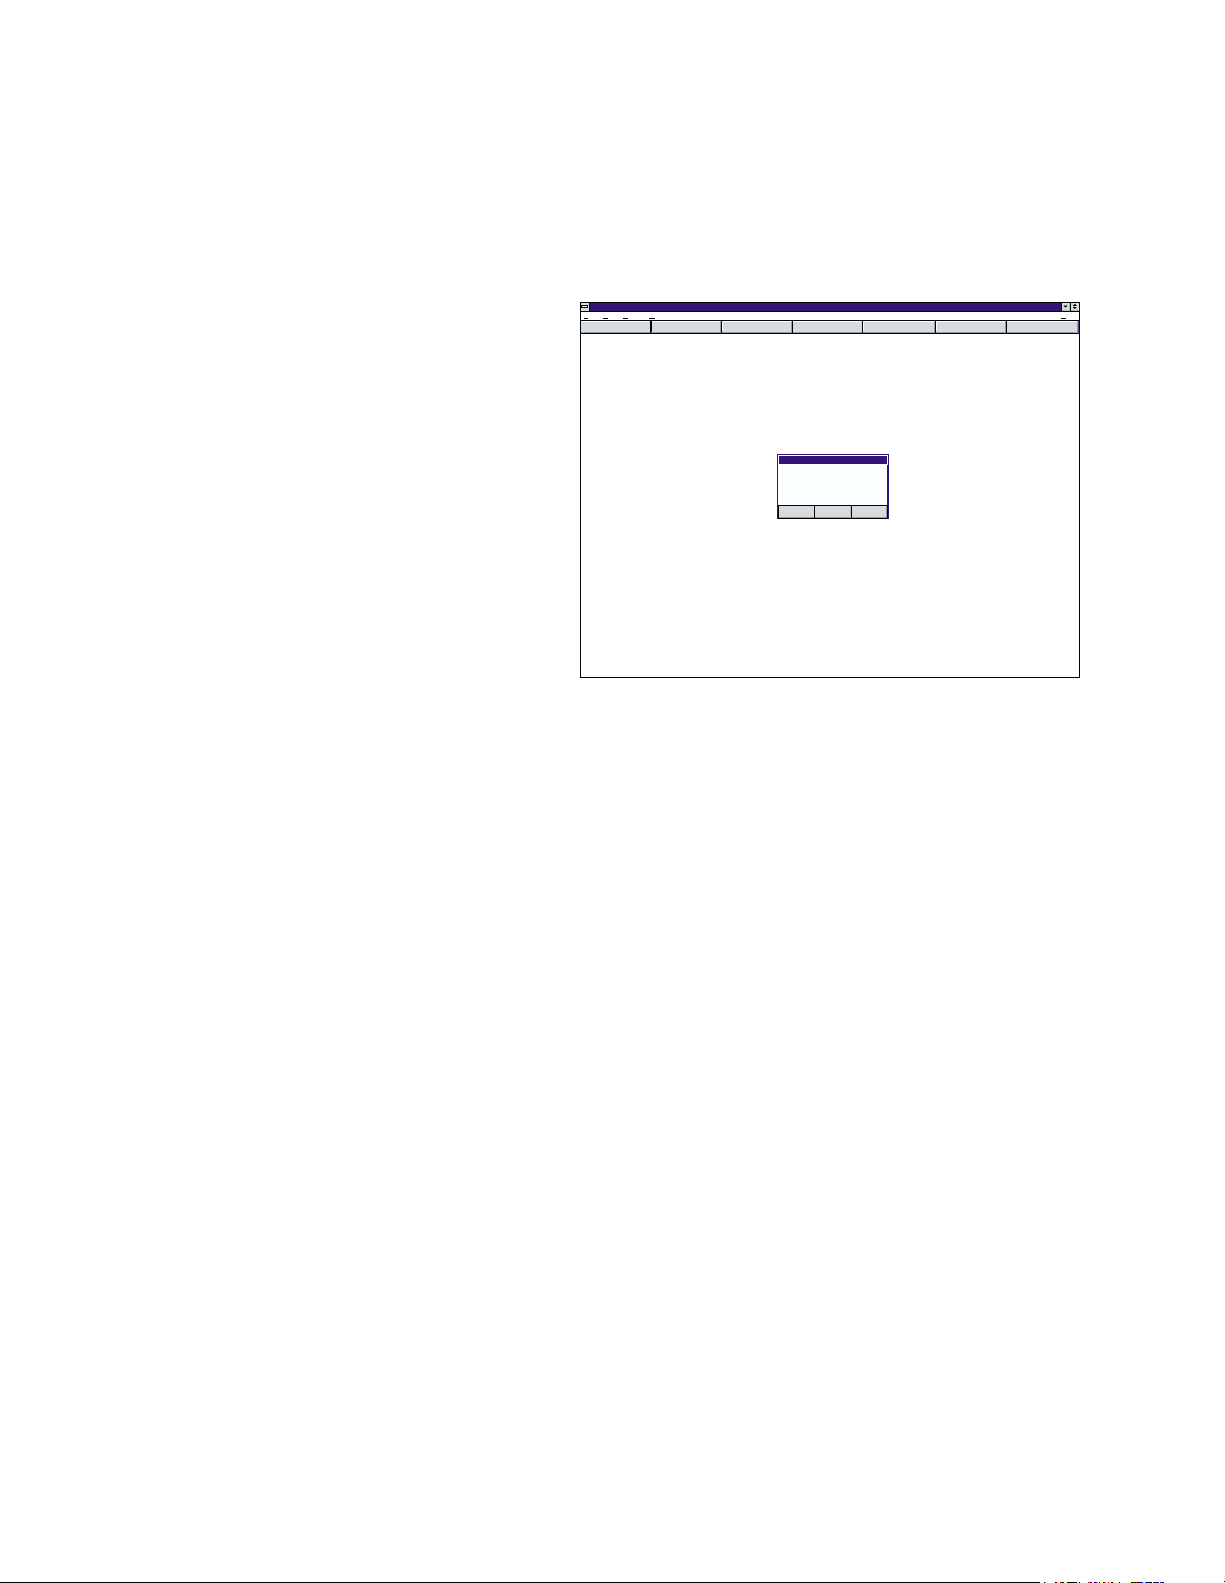
Figure 3 - “Display Model Selection” window................................................................................ 6
Figure 4 - “File” sub-menu............................................................................................................. 7
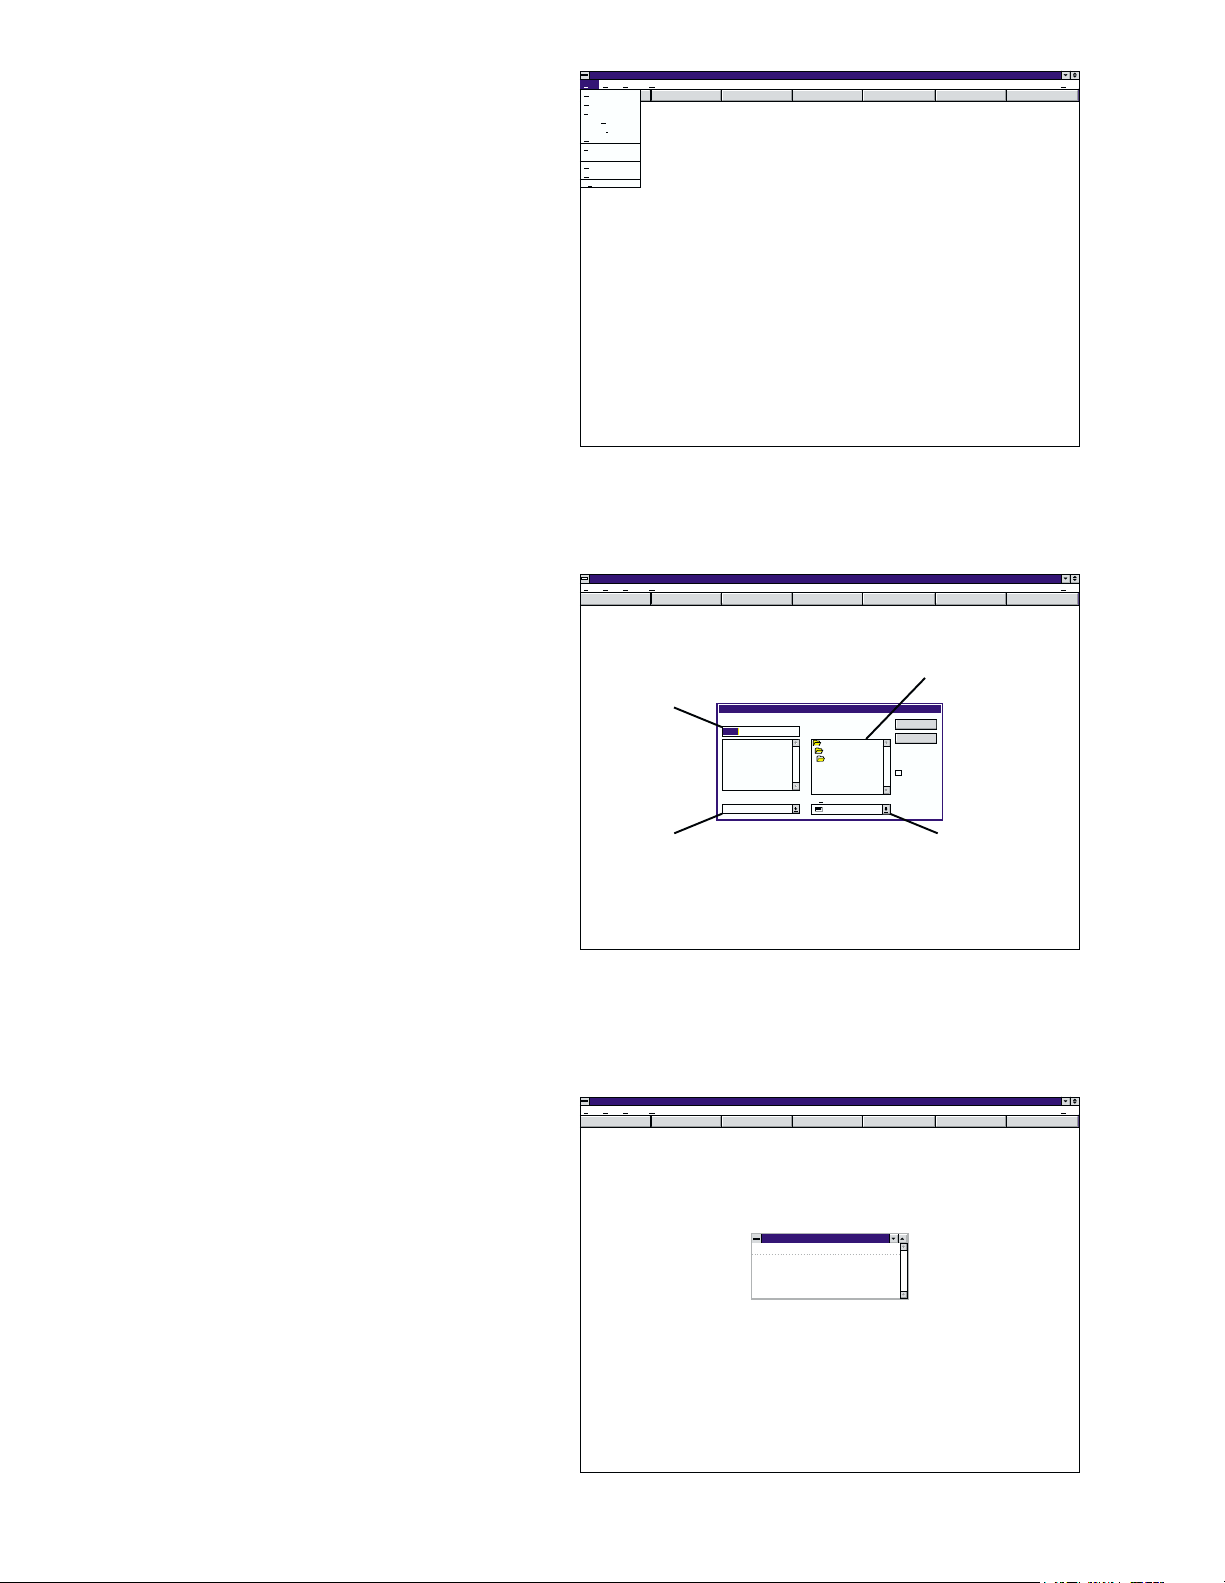
Figure 5 - “Create a New Message File” window.......................................................................... 7
Figure 6 - “TEST.MSG” ................................................................................................................. 7
Figure 7 - “Messenger Editor” window .......................................................................................... 8
Figure 8 - “Segment Scrolling Parameters” window (On-Off Mode).............................................. 8
Figure 9 - “Segment Scrolling Parameters” window (Continuous Mode)...................................... 8
Figure 10 - “Messenger Editor” window (“Caution Ahead”)............................................................. 11
Figure 11 - “Test.MSG” (with “Caution Ahead” message)............................................................... 11
Figure 12 - Left Justification............................................................................................................ 11
Figure 13 - Center Justification ....................................................................................................... 12
Figure 14 - Right Justification.......................................................................................................... 12
Figure 15 - Mirrored Display............................................................................................................ 13
Figure 16 - Reverse Display............................................................................................................ 14
Figure 17 - Normal Font.................................................................................................................. 14
Figure 18 - Bold Font ...................................................................................................................... 14
Figure 19 - “Message Uploading” window....................................................................................... 20
Figure 20 - “Message Uploading” window (shown in process)........................................................ 21
Overview - Messenger Connections Layout................................................................................... 24

3
Introduction...
This manual will outline the procedures necessary for programming the Whelen Messenger
Display (models MGM01, MGM02 and MGM03), with the Whelen Programming Software. The
Messenger is capable of generating messages in a wide variety of styles, however this does not
mean that programming the Messenger is overly difficult or complicated. It does mean that the
programmer must pay close attention to the procedures outlined herein. Do not “skim” over any
portions of this manual. It is important for the programmer to understand the entire manual before
attempting to actually program the Messenger.
Section I:
Installing and Operating the Programming Software
Before using the configuration software, it must first be installed on a PC or notebook computer
(hereafter referred to as the “host”) that utilizes either Windows 3.1, Windows 3.11 (collectively
referred to as Windows 3.x in this manual) or Windows 95 as its operating system. The person
operating the host computer will be referred to as the “operator”. The following steps explain
how to install the programming software on your host computer. Please note that although this
manual has been written in a simple, straight-forward format, it is necessary for the operator to
have a basic understanding of the Windows operating system.
Installing the Messenger programming software...
When the operator installs the Whelen Messenger programming software onto the host computer,
a setup program transfers files from the release disk to a directory which the setup process creates
on the hard drive. The setup program (setup.exe) is run from a 3.5” floppy disk drive. On most
systems this is drive A:. The following steps assume that drive A: is the 3.5” floppy drive.
Windows 3.x Installation
1. Insert the Messenger software program disk into drive A:.
2. Choose Run from the File menu of the Program Manager window. Enter the following text
in the Command Line box:
a:\setup
3. When the installation is complete, the operator will have the option of restarting Windows
or continuing the current Windowssession without restarting. Windows should be restarted
before using the Messenger software.
Windows 95 Installation
1. Insert the Messenger software program disk into drive A:.
2. Choose Run from the Start menu and enter the following text in the Command Line box:
a:\setup
3. When the installation is complete, the operator will have the option of restarting Windows
95 or continuing the current Windows session without restarting. Windows 95 should be
restarted before using the Messenger software.
Now that the software is successfully installed in the host computer, it is easier to understand its
functionality and operation by defining some of the terms used herein:

4
Messenger - The LED panel that is used to display Messages. This is available in three different
models; Model MGM01 (8-character display), Model MGM02 (16-character display) and Model
MGM03 (24-character display).
Messenger Controller - The panel used to control the functions of the Messenger. This controller,
located within the vehicle, enables the vehicle operator to turn the Messenger on or off, as well as
to select the message to be displayed. If multiple Messengers are present on the vehicle, it also
allows the operator to choose which Messenger will display a selected Message. For example,
Messenger #1 could display one Message, while Messenger #2 displays a completely different
Message.
Message - a phrase or pattern created for viewing on the Messenger.
Message File - a data file comprised of various messages that is uploaded to the Messenger. Using
the controller, the Messenger operator can then select a message to be displayed on the Messenger.
The Messenger is designed to store one Message File.
The messages in a Message File are usually oriented towards a specific vehicle and are based on
the needs and/or function of that vehicle. Message files are identified by the extension MSG and
are typically given names that reflect the specific use for which the message file was designed. For
example, UNIT_123.MSG would contain messages designed for use on Police Unit 123.
UNIT_047.MSG would contain messages designed for use on Police Unit 47.
A Message File can contain up to 128 messages.
NOTE: A Message file must adhere to the 8.3 file name structure. In other words, the name of the
Message File (which can not be longer than 8 characters) comes first, followed by a dot (a period)
and then the 3-letter extension that identifies the file to the computer. Example: 12345678.MSG
Library File - A data file that contains specific types of messages. Library files are identified by
the extension LIB. Libraries are usually given a name that describes the type of messages that can
be found within that Library. For example, a POLICE.LIB library would contain messages and/or
patterns oriented towards the Police Department and their particular message needs. A FIRE.LIB
library would contain messages and/or patterns oriented towards the Fire Department and their
particular message needs.
A Library File can contain up to 128 messages.
NOTE: A Library file must adhere to the 8.3 file name structure. In other words, the name of the
Library file (which can not be longer than 8 characters) comes first, followed by a dot (a period)
and then the 3-letter extension that identifies the file to the computer. Example: 12345678.LIB
Starting the Messenger Software...
Since this software is compatible with both Windows 3.Xand Windows 95, the process of
launching the software on either platform will be outlined. However, once the software is running,
its operation and functionality are identical, regardless of what version of Windows is running on
the host computer. Please note that the screen shots shown in this manual demonstrate the program
on a Windows 3.X platform. On computers with Windows 95, the software will have a slightly
different appearance.
Windows 3.X
In Windows 3.X, locate the “Messenger Programmer” icon. This can be found in the
“Messenger” program group that was created when the programming software was installed on the
host computer. Double-clicking this icon will start the Messenger Programming Software.

5
Windows 95
In Windows 95, click the “START” button and highlight “Programs”. Now highlight
“Messenger”. From the fly-out window, click on “Messenger Programmer” to start the Messenger
Programming Software.
As the software is launched, it will search to see if a Messenger is connected to the host computer.
After it has searched each address, the software will display a window stating the results of its
search. If the search was successful, a message box will be displayed that should be similar to the
following:
If there is no Messenger connected to the host computer, or if the Messenger is improperly
connected to the host computer, the message box will state that there was no Messenger found. It
is not necessary for the host computer to be connected to the Messenger in order to create a
Message, Message File or Library File. However, in order to preview any message, or to upload a
Message File to the Messenger, the host computer does need to be connected to the Messenger.
If the host computer is connected to the Messenger and the message box indicates that no
Messenger was found, click on the “Retry” button. If a Messenger is still not found, please refer to
the troubleshooting section of this manual.
Click “OK” to close the message box.
Selecting the proper Messenger Display...
There are three different Messenger Displays available; The MPG01 8-character display,
the MPG02 16-character display and the MPG03 24-character display. Before any programming
can begin, the operator must first identify which display unit will be used to display the Message.
1. Launch the programming software.
2. In the main programming window, click on “Setup”. Now click on “Model” from the list (see
Fig. 2.
Messenger Programmer
Config Addr Edit UpLoad Display Clear Help
File Edit Setup Window
Searching for Messenger
Messenger found at Address #X
Help
OK Cancel Retry
Fig. 1

6
3. This will open the “Display Model Selection” window (Fig. 3). From this window, the
operator will identify which type of Messenger the Message is to be designed around.
4. To select, click on the circle adjacent the desired model. As shown in the above illustration,
model MGM02 has been selected. When the desired model has been selected click the “OK”
button to close the window.
IMPORTANT NOTE: Each of the three available models display a different amounts of
characters (8, 16 or 24). Because of this, a Message designed for use on one display may not
function properly on another type of display. For example, a Message designed for use on an
MGM02, would have to be redesigned for use on an MGM01 or an MGM03.
Creating a Message File or Library File...
As explained earlier in this manual, a Message can only exist within a Message File or Library file.
Therefore before the operator can create a message, a Message File or Library File must first be
created.
1. Launch the programming software.
2. In the main programming window, click on “File”. Now click on “New” from the list (Fig. 4).
Fig. 2
Messenger Programmer
Window
Config Addr Edit UpLoad Display Clear Help
File Edit ComPort
Address
Confi ureg
Connect
Model
Setup Help
Fig. 3
Messenger Programmer
Config Addr Edit UpLoad Display Clear Help
File Edit Setup Window
Display Model Selection
MGM01 (8 Char.)
MGM02 (16 Char.)
MGM03 (24 Char.)
Select Model
Help
OK Cancel

7
3. This will open the “Create a New Message File” window (Fig. 5). From this window, the
operator will assign a name to the Message File or Library File being created. Refer to Fig. 5
to see where to enter this name.
4. The operator must also determine where the Message File or Library File is to be placed. See
Fig. 3 to specify the file destination. The default directory is whelen\messnger on drive C:.
5. After the file name and destination have
been selected, press “OK” (Figure 6).
6. In this example, a Message File named
TEST.MSG has been created. A
Message can now be created within this
Message File.
NOTE: The process for creating a
Library File is identical, except that the
operator must select “Library Files
(*.lib)” from the “Save File as Type:”
pull-down menu (see Fig. 5).
Messenger Programmer
Edit Setup Window
Config Addr Edit UpLoad Display Clear Help
File
New... Ctrl+N
Ctrl+O
Ctrl+S
Ctrl+P
Ctrl+U
Alt+X
Open...
Save...
Save s...A
Save A ll
Close
Print
Print Setup...
Upload
Eitx
Download
Help
Fig. 4
Fig. 5
c:\
Directories:
File Name:
Save File as Type:
Message Files (*.msg)
Unit_123.msg
c:\whelen\messnger
whelen
messnger
Read Only
Dri es:v
C:\
*.msg
OKOK
Cancel
Create a New Message File
Messenger Programmer
File Edit Setup Window Help
Config Addr Edit UpLoad Display Clear Help
Enter the name of the
Message File or Library File
you wish to create here.
Select the type of file
(Message File (msg) or Library File (lib))
you wish to create here.
Select drive letter
where the file
will be stored here.
Select directory and sub-directory
where the file
will be stored here.
Messenger Programmer
Config Addr Edit UpLoad Display Clear Help
File Edit Setup Window Help
TEST.MSG
<new>
Fig. 6

8
Section II:
Designing a Message...
Message Characteristics...
As defined earlier, a Message can consist of text, graphics or a combination of the two. Every
Message has two major characteristics that must be defined by the operator: Display and
Functional.
Display characteristics determine the way the Message looks on the Messenger. Display
effects include the following:
• The font size (default or Bold)
• The type of background (default or Reverse)
• The font layout (default or Mirror)
• The font justification (default, Center or Right)
Functional characteristics determine the way the Message enters and exits the Messen-
ger. These characteristics are configured in the “Scrolling Parameters” window. This window is
opened by clicking on any of the “Functional Effects” buttons in the “Messenger Editor” window.
A “Functional Effects” button can only set characteristics for the Data Field to which it is
adjacent (Fig. 7).
The functions of the “Scrolling Parameters” window are different, depending on whether the
On-Off/Continuous button is set to the On-Off setting, or to the Continuous setting. In their
respective modes, the windows will look like this:
Fig. 7
Messenger Programmer
Config Addr Edit UpLoad Display Clear Help
File Edit Setup Window
Messenger Editor
Edit Help
On-Off
ON | OFF
D S T | D S T Bold
Reverse
Mirror
Left
Center
Right
Terminate
Reformat
OK
Cancel
ID:
No 0 000 No 0 000
No 0 000 No 0 000
No 0 000 No 0 000
No 0 000 No 0 000
No 0 000 No 0 000
No 0 000 No 0 000
No 0 000 No 0 000
No 0 000 No 0 000
No 0 000 No 0 000
No 0 000 No 0 000
No 0 000 No 0 000
No 0 000 No 0 000
No 0 000 No 0 000
No 0 000 No 0 000
No 0 000 No 0 000
No 0 000 No 0 000
Help
Enter “Message”
name here
On-Off/Continuous
button
“On” Column
D = Direction
S = Speed
T = Time
“Off” Column
D = Direction
S = Speed
T = Time
“Terminate”
button
“Reformat”
button
“OK”
button
“Cancel”
button
Functional
Effects
buttons
Visual
Effects
buttons
Data entry
areas
On-Off Mode Continuous Mode
Fig. 8 Fig. 9
Segment Scrolling Parameters
NONE Very Fast
0.000 sec
0
Left Fast
Right Slow
Up Very Slow
Down
In
Out
OK Cancel
Clear
ON Dir ON Speed
Time ON
Segment Scrolling Parameters
NONE NONEVery Fast Very Fast
0.000 sec
0
0.000 sec
0
Left LeftFast Fast
Right RightSlow Slow
Up UpVery Slow Very Slow
Down Down
In In
Out Out
OK Cancel
Clear Clear
ON Dir OFF DirON Speed OFF Speed
Time ON Time OFF

9
In ON-Off Mode, there are 6 parameters that the operator can change. NOTE: These
settings only effect the data in the field adjacent to the specific Functional Effects
button that opened the “Scrolling Parameters” window.
ON Dir - This determines how the data will first appear on the Messenger Display.
NONE (default) = The data appears immediately on the display
Left = The data scrolls onto the display from right to left
Right = The data scrolls onto the display from left to right
Up = The data scrolls onto the display from the bottom
Down = The data scrolls onto the display from the top
In = The data scrolls onto the display from the end
Out = The data scrolls onto the display from the center
ON Speed - This determines how fast the data will scroll onto the Messenger Display. The
available speeds are Very Fast (default), Fast, Slow and Very Slow.
Time ON - This determines how long the data will remain on the Display. The duration is
increased or decreased with the arrow keys adjacent to the numeric display. The
“Clear” button resets the duration to 0.000 seconds. The default Time ON is 0.000.
OFF Dir - This determines how the data will exit the Messenger Display.
NONE (default) = The data disappears immediately from the display
Left = The data scrolls off to the left
Right = The data scrolls off to the right
Up = The data scrolls up and off the display
Down = The data scrolls down and off the display
In = The data scrolls inwards from both the left and right until display is blank
Out = The data scrolls outwards towards both the left and right until display is blank
OFF Speed-Thisdetermineshow fastthedata will scroll off the MessengerDisplay.Theavailable
speeds are Very Fast (default), Fast, Slow and Very Slow.
Time OFF- Thisdetermineshowmuchtimewill elapsebeforethenextdatasegmentisprocessed.
The duration is increased or decreased with the arrow keys adjacent to the numeric
display. The “Clear” button resets the duration to 0.000 seconds. The default Time
OFF is 0.000.
In Continuous Mode, the only parameters that can be configured are ON Dir, ON Speed
and Time ON. To understand the difference between On-Off mode and Continuous mode, it is
necessary to see how the different modes process the data fields.
On-Off Mode
If this parameter is set to On-Off, the data fields are processed in this fashion:
• Messenger is blank.
• The data in field 1 appears on the Messenger in a set fashion (as determined by ON Dir and
ON Speed).
• The data remains on the Messenger for a set duration (as determined by Time ON).
• The data exits the Messenger Display in a set fashion (as determined by OFF Dir and
OFF Speed).
• The Messenger Display stays blank for a set duration (as determined by Time OFF).

10
The cycle then repeats itself using the data in field 2, then 3, etc., until all of the fields that contain
data have been displayed. NOTE: Fields that do not contain any data are not included in this
cycle.
Continuous Mode
If this parameter is set to Continuous, the fields are processed in this fashion:
• Messenger is blank.
• The data in Field 1 appears on the Messenger in a set fashion (as determined by ON Dir and
ON Speed).
• The data remains on the Messenger for a set duration (as determined by Time ON).
• The data in Field 2 appears on the Messenger in a set fashion (as determined by ON Dir and
ON Speed).
• The data remains on for a set duration (as determined by Time ON).
This process then repeats itself using the data in Field 3, then 4, etc., until all of the fields that
contain data have been displayed. NOTE: Fields that do not contain any data are not included
in this cycle. After all available data fields have been processed, the entire Message (beginning
with Data Field 1) is then repeated. A more detailed explanation is provided in Exercise IV:
Message Timing.
It will be easier to understand how a Message is structured by creating a sample Message. In the
following exercises, generic Messages will be created, each with different effects and
characteristics. These exercises will assume that the host computer is connected to a MGM02
8-Character Messenger Display.
EXERCISE I: Creating a Message
NOTE: For these exercises, the MGM02 16-character display will be used to represent a
typicalMessenger.Keep inmindthat the MGM01can only display8 characters at atime and
the MGM03 can display up to 24 characters at a time.
In this exercise, the operator will create a Message named “Caution Ahead”.
NOTE: When instructed to enter data in a Data Field, do NOT enter quotation marks.
1. Start the Messenger Programming Software.
2. Click on File, then Open. Select the TEST.MSG Message File created earlier. If this file does
notexist,create it by following the stepsoutlined in“Creating a Message File or LibraryFile...”
in Section I.
3. Double-click on <new> in the TEST.MSG window. This will open the “Message Editor”
screen.
4. Enter the name “Caution Ahead” in the box adjacent to “ID:”.
NOTE: The data entered in the “ID:” field will not only serve as the name of the Message,
but will also be displayed on the Messenger Controller’s display screen. Although this name
may be from 1 to 24 characters in length (including spaces), the display screen on the
Messenger Controller will only display the first 8 characters.
5. Set the mode selection button to “On-Off”.
6. In Data Field 1, enter the words “CAUTION AHEAD”. The Messenger Editor screen should
look like this:

11
7. Click the “OK” button to close the message editing screen. The host computer’s screen should
appear as shown in Fig. 11.
8. Click the “Display” button in the Main Programming Window. The words “Caution Ahead”
will appear on the Messenger in normal size, Left Justified.
To end the display, click the “Clear” button. Now save your Message File by clicking “File”, and
then “Save”.
Congratulations! A complete, functional message has been created. In the next exercise, font
justification procedures will be demonstrated.
EXERCISE II: Font Justification
It is important for the operator to understand that configuring the justification properties for a
specific data field will not only determine the justification settings for that field, but for all of the
subsequent, used fields as well. For example, if a message contains 7 used fields, and the
justification for field 1 is center, then fields 1 through 7 will be center justified.
In the same message, with Field 1 still center justified, configuring Field 4 to Right
justification will result in the message being processed as follows:
Messenger Editor
Edit Help
On-Off
Bold
Reverse
Mirror
Left
Center
Right
Terminate
OK Cancel Reformat
ID:
No 0 000 No 0 000
No 0 000 No 0 000
No 0 000 No 0 000
No 0 000 No 0 000
No 0 000 No 0 000
No 0 000 No 0 000
No 0 000 No 0 000
No 0 000 No 0 000
No 0 000 No 0 000
No 0 000 No 0 000
No 0 000 No 0 000
No 0 000 No 0 000
No 0 000 No 0 000
No 0 000 No 0 000
No 0 000 No 0 000
No 0 000 No 0 000
Caution Ahead
CAUTION AHEAD
Fig. 10
Messenger Programmer
Config Addr Edit UpLoad Display Clear Help
File Edit Setup Window Help
TEST.MSG
<new>
Caution Ahead
Fig. 11
Fig. 12

12
• Fields 1 through 3 are displayed with Center justification
• Fields 4 through 7 are displayed with Right justification
NOTE:Although each data field within a message can have its own style of justification, a
single field can not have multiple justifications.
In this exercise, the operator will change the justification properties of the “Caution Ahead”
message created in Exercise I.
NOTE: When instructed to enter data in a Data Field, do NOT enter quotation marks.
1. Open TEST.MSG and highlight the “Caution Ahead” message. Click the “Edit” button in the
Main Programming Window to open the Message Editing screen.
2. Click in Data Field 1 and position the cursor so that it precedes the data in that field.
3. Click the “Center” button. This will add “/C” ahead of the data in Field 1.
4. Click the “OK” button to close the message editing screen.
5. Click the “Display” button in the Main Programming Window. The words “Caution Ahead”
will appear on the Messenger in normal size, Center Justified.
6. Click the “Clear” button to end the display.
In the next procedure, the justification will be changed from Center to Right.
1. Highlight the “Caution Ahead” message. Click the “Edit” button in the Main Programming
Window to open the Message Editing screen.
2. Click in Data Field 1, highlight the “/C” and delete those characters.
3. Position the cursor so that it precedes the data in that field.
4. Click the “Right” button. This will add “/R” ahead of the data in Field 1.
5. Click the “OK” button to close the message editing screen.
6. Click the “Display” button in the Main Programming Window. The words “Caution Ahead”
will appear on the Messenger in normal size, Right Justified.
7. Click the “Clear” button to end the display.
Fig. 13
Fig. 14

13
EXERCISE III: Font Effects
In addition to the various justifications that can be applied to data, there are 3 visual effects that
can be implemented to effect a message’s appearance. In this exercise, not only will these effects
be applied to the “Caution Ahead” message, but the operator will begin to learn how to handle data
that spans multiple data fields.
Mirror...
The Mirror effect configures data so that it appears backwards on the Messenger. This allows
drivers to read these mirrored messages in their rear view mirrors. Applying the Mirror effect to
data also can require other settings to be changed. Read this section carefully before attempting to
create a Mirrored message for actual use.
1. Highlight the “Caution Ahead” message in TEST.MSG. Click the “Edit” button in the Main
Programming Window to open the Message Editing screen.
2. Click in Data Field 1, highlight the “/R” and delete those characters.
3. Highlight “CAUTION AHEAD” in the field.
4. Click the “Mirror” button. This will add a “/M” ahead of the data in Field 1 and a “/m” at the
end of the data in Field 1.
5. Click the “OK” button to close the message editing screen.
6. Click the “Display” button in the Main Programming Window. The words “Caution Ahead”
will appear on the Messenger normal size, Left Justified, but mirrored.
7. Click the “Clear” button to end the display.
In step 4, a “/M” was placed at the beginning of Field 1. This configured the message to mirror all
data in all fields, including any used fields subsequent to its location in Field 1. However, the “/m”
placed at the end of Field 1 returns the remainder of the data to normal display. Think of “/M” and
“/m” as switches that turn the Mirror effect on and off.
NOTE: If a message that would normally scroll left is also configured to be mirrored, make
sure that the direction choice is set to right.
Reverse...
By default, the Messenger displays illuminated characters against a non-illuminated background.
The Reverse effect reverses that arrangement so that non-illuminated characters are displayed
against an illuminated background.
1. Highlight the “Caution Ahead” message in TEST.MSG. Click the “Edit” button in the Main
Programming Window to open the Message Editing screen.
2. Click in Data Field 1, highlight the “/R” and delete those characters.
3. Highlight “CAUTION AHEAD” in the field
Fig. 15

14
4. Click the “Reverse” button. This will add a “/I” ahead of the data in Field 1 and a “/i” at the
end of the data in Field 1.
5. Click the “OK” button to close the message editing screen.
6. Click the “Display” button in the Main Programming Window. The words “Caution Ahead”
will appear on the Messenger normal size, Left Justified, but reversed.
7. Click the “Clear” button to end the display.
Bold...
The Messenger display unit is comprised of Light Emitting Diodes (LED’s). In its default
configuration, a single character (text, symbol or space) is 7 H x 6 W. This allows the MGM01 to
display up to 8 characters, the MGM02 to display 16 characters and the MGM03 to display 24
characters at any given time.
Bold characters are larger than normal characters, having a 7 H x 12 W size. As a result, only 8
bold characters can be displayed at any given time.
1. Highlight the “Caution Ahead” message in TEST.MSG. Click the “Edit” button in the Main
Programming Window to open the Message Editing screen.
2. Click in Data Field 1, highlight the “/I” and delete those characters.
3. Highlight “CAUTION AHEAD” in the field
4. Click the “Bold” button. This will not only add a “/B” ahead of the data in Field 1, but also
moves all of the data after the 8th character from Field 1 and places it in Field 2, followed by
“/b”. This is because, as stated earlier, the Messenger in question can not display more than 8
bold characters at one time. In the case of our test message, the data is broken after the space
between “CAUTION” and “AHEAD” (7 characters in the word “CAUTION” plus the space
character). NOTE:Be aware of the fact that although in our case the message was broken be-
tween words, other messages may split a word in half.
5. Click the “OK” button to close the message editing screen.
6. Click the “Display” button in the Main Programming Window.
The display now shows a series of rapidly flashing characters. This is a result of the data in Field
1 (“CAUTION”) and Field 2 (“AHEAD”) being alternately displayed at a very high rate. As
Fig. 16
Fig. 17
Fig. 18

15
discussed earlier, the default duration for Time ON and (in On/Off mode) Time OFF is 0.000
seconds. This means that as soon as the data in Field 1 is displayed, it is immediately replaced with
the data from the next available field, which in this message is Field 2. As soon as the data in Field
2 is displayed, it also is immediately replaced with data from the next available field. As no
subsequent fields contain data, the data from Field 1 is displayed and the cycle begins again. With
thesedefaultsettings,the messageisuseless.Thereforethe operator must alterthe durationtimes, a
process covered in the next exercise.
EXERCISE IV: Message Timing
Continuous Mode...
As demonstrated in Exercise III, when certain effects are applied to data, other default settings
must be changed in order to make the message legible. In the case of the test message, applying the
Bold effect has necessitated a change in the default duration setting.
1. Open the TEST.MSG Message File.
2. Highlight the “Caution Ahead” message and click on the “Edit” button. This will open the mes-
sage editing screen.
3. Set the mode selection button to “Continuous”.
4. Click on the Functional Effects button in front of Data Field 1. This will open the Segment
Scrolling Parameters window for Field 1.
5. In the “Time ON” section, increase the setting from 0.000 seconds to 0.693 seconds by using
either of the two “increase” or “up” arrows. The single arrow increases duration in increments
of approximately 0.017 seconds. The double arrow increases duration in increments of approx-
imately 0.173; roughly the equivalent of 10 clicks on the single arrow.
6. After setting the “Time ON” duration to 0.693 seconds, click “OK” to close this window.
7. Click the “OK” button to close the message editing screen.
8. Click the “Display” button in the Main Programming Window.
As you will see, the word “CAUTION” is displayed for 0.693 seconds, but the word “AHEAD” is
flashed on the display for such a brief period, it is perceived as just a flash of characters. This
situation is remedied by increasing the duration for Data Field 2 in the exact same manner as
applied to Data Field 1. Follow steps 4 through 8 as outlined above, only apply them to Data Field
2. After step 8, the message should appear as follows:
“CAUTION” is displayed for 0.693 seconds
“AHEAD” replaces “CAUTION” and is displayed for 0.693 seconds
At this point the display goes blank for a brief period and the cycle begins again with Data Field 1.
The blank period between the last used Data Field and Data Field 1, is equal in length to the “Time
ON” setting for the last used Data Field. In this case, 0.693 seconds. This only applies when the
message display isin “Continuous” mode.The following section willoutline timing characteristics
in “On-Off” mode.
On-Off Mode...
In the previous section, the impact that “Continuous” mode has on timing events was outlined.

16
Now, the effects of “On-Off” mode will be examined.
1. Open the TEST.MSG Message File.
2. Highlight the “Caution Ahead” message and click on the “Edit” button. This will open the mes-
sage editing screen.
3. Set the mode selection button to “On-Off”.
4. Click on the Functional Effects button in front of Data Field 1. This will open the Segment
Scrolling Parameters window for Field 1.
5. In the “Time ON” section, increase the setting from 0.000 seconds to 0.693 seconds.
6. After setting the “Time ON” duration to 0.693 seconds, click “OK” to close this window.
7. Click the “OK” button to close the message editing screen.
8. Click the “Display” button in the Main Programming Window.
As you will see, the word “CAUTION” is displayed for 0.693 seconds, but the word “AHEAD” is
flashed on the display for such a brief period, it is perceived as just a flash of characters, as with
“Continuous” mode. This situation is remedied by increasing the duration for Data Field 2 in the
exact same manner as applied to Data Field 1. Follow steps 4 through 8 as outlined above, only for
Data Field 2. After step 8, the message should appear as follows:
“CAUTION” is displayed for 0.693 seconds (Time ON), after which a blank screen is
displayed for 0.000 seconds (Time OFF)
“AHEAD” is displayed for 0.693 seconds (Time ON), after which a blank screen is
displayed for 0.000 seconds (Time OFF)
Atthispointthe, cycle begins againwithData Field1. Unlike “Continuous”mode,the display does
not have a blank period following the last used Data Field. In “On-Off” mode, the cycle repeats
itself immediately after the last, used, Data Field’s “Time OFF” instruction has been executed. To
gain further understanding of the “On-Off” mode and how different ON and OFF durations effect
message displays, enter different times into these fields and observe the results. Remember, the ON
and OFF times do not have to be alike. In fact, varying the ON time from the OFF time, can have
a dramatic effect on the overall message.
EXERCISE V: Scrolling
Earlier in this manual, the “ON Dir” and “OFF Dir” parameters were discussed. As outlined, the
default setting for all messages is “NONE”, meaning that data appears on the display
instantaneously. In this exercise, the basic “CAUTION AHEAD” message will be reconfigured in
several different ways, so that the operator will see how a message looks when different ON and
OFF directions and effects are applied. The operator will also gain a more practical understanding
of the differences between “On-Off” mode and “Continuous” mode, and which is the best choice
for a given message.
On-Off Mode...
1. Open the TEST.MSG Message File.
2. Highlight the “Caution Ahead” message and click on the “Edit” button. This will open the mes-
sage editing screen.
3. Set the mode selection button to “On-Off”.

17
4. Click on the Functional Effects button in front of Data Field 1. This will open the Segment
Scrolling Parameters window for Field 1.
5. Set the “ON Dir” to “Left”.
6. Set the “ON Speed” to “Very Fast”.
7. Set the “Time ON” to 0.693 seconds.
8. Set the “OFF Dir” to “NONE”.
9. Set the “OFF Speed” to “Very Fast”.
10. Set the “Time OFF” to 0.000 seconds.
11. Set the same parameters for Data Field 2 and press “Reformat”.
12. Click the “OK” button to close the message editing screen.
13. Click the “Display” button in the Main Programming Window.
As a result of this configuration, the following events transpire:
•The data in Data Field 1 (the word “CAUTION”) scrolls onto
the display from right to left (“ON Dir”= Left)
•The data scrolls at its fastest rate (“ON Speed” = Very Fast)
•The data scrolls to the left end of the display and stops
(The default font justification = Left)
•The data is displayed for a brief period (“Time ON” = 0.693)
•The data disappears from the display without scrolling in
any direction (“OFF Dir” = NONE)
•The display is blank for 0.000 seconds (“OFF Time” = 0.000)
•The data from Data Field 2 (the word “AHEAD”) scrolls onto
the display from right to left (“ON Dir” = Left)
•The data scrolls at its fastest rate (“ON Speed” = Very Fast)
•The data scrolls to the left end of the display and stops
(The default font justification = Left)
•The data is displayed for a brief period (“Time ON” = 0.693)
•The data disappears from the display without scrolling in
any direction (“OFF Dir” = NONE)
•The display is blank for 0.000 seconds (“OFF Time” = 0.000)
At this point the next available Data Field is processed, in this case that is Data Field 1, and the
cycle begins again.
Continuous Mode...
Now configure this message to “Continuous” mode and observe the results. You will note that just
by changing the mode, the message behaves in a distinctly different manner. By changing to

18
“Continuous” mode, the message is now processed as follows:
•The data in Data Field 1 (the word “CAUTION”) scrolls onto
the display from right to left (“ON Dir”= Left)
•The data scrolls at its fastest rate (“ON Speed” = Very Fast)
•The data scrolls to the left end of the display and stops
(The default font justification = Left)
•The data is displayed for a brief period (“Time ON” = 0.693)
•The data from Data Field 2 (the word “AHEAD”) scrolls onto
the display from right to left (“ON Dir” = Left), forcing the
previous data to scroll off the display in the same direction
•The new data scrolls at its fastest rate (“ON Speed” = Very Fast)
•This data scrolls to the left end of the display and stops
(The default font justification = Left)
•The data is displayed for a brief period (“Time ON” = 0.693)
•The data scrolls off the display to the left, the same direction configured
in the “ON Dir” parameter.
•The display is blank for 0.693 seconds.
In Continuous mode, the display remains blank for a time equal to the “ON Time” of the last Data
Field used. In this example, the last Data Field used is Data Field 2, so the display remains blank
for 0.693 seconds. This demonstrates one of the significant differences between “On-Off” and
“Continuous” mode. Tofurther understand these differences, try changing the scrolling parameters
and observe how the message is displayed in the various modes.

19
Section III:
Additional Features
At this point, the operator should have a firm understanding of a Message’s creation and design
process, including:
†What a Message File is and how to create one.
†What a Library File is and how to create one.
†What a Message is.
†What font characteristics are and how they can effect a Message.
†What the difference is between On-Off and Continuous mode.
†How the Scrolling parameter works.
In this section we will examine some of the additional features of the software. These features do
not directly relate to creating a new Message, but are extremely helpful in building Message Files
and Library Files.
Exercise VI: Copying and pasting a Message from one file to another
In this exercise, the operator will create a new Message File and copy a Message from a Library
File into this new Message File.
1. Create a new Message File named “Test2.MSG”.
2. Open the Library File “POLICE.LIB” located in C:\whelen\messnger.
3. Highlight the Message named “FL CAUTION”.
4. Select “Copy” from the “Edit” menu in the Main Programming Window. This copies the
Message to the Windows clipboard.
5. Now open the “Test2.MSG” Message File created in step 1 and highlight “<New>”.
6. Select “Paste” fromthe “Edit” menu in the Main Programming Window. Thispastes a copy
of the Message from the clipboard into “Test2.MSG”.
Exercise VII: Copying and pasting multiple Messages from one file to another
In this exercise, the operator will copy multiple Messages from a Library File into “Test2.MSG”.
1. Open the Library File “POLICE.LIB” located in C:\whelen\messnger.
2. While holding down the “Ctrl” button on your keyboard, click on the Messages “SLOW”,
“KEEP IN LANE” and “ACC AHEAD”.
3. Select “Copy” from the “Edit” menu in the Main Programming Window. This copies the
Message to the Windows clipboard.
4. Open “Test2.MSG”.
5. Select “Paste” from the “Edit” menu in the Main Programming Window. This pastes the
Messages selected in step 2 from the clipboard into “Test2.MSG”.
Exercise VIII: Deleting Messages
In this exercise, the operator will delete or “Cut” Messages from “Test2.MSG”. In this instance,
assume that the Message “KEEP IN LANE” was mistakenly placed in “Test2.MSG” and must now
be removed.
1. Open the Message File “Test2.MSG”.

20
2. Highlight the Message “KEEP IN LANE”.
3. Select “Cut” from the “Edit” menu in the Main Programming Window. This cuts, or
deletes, the Message and is not retrievable.
IMPORTANT NOTE: Adeleted Message is irretrievable. Do not delete a Message unless you
are sure that it is no longer needed.
Exercise IX: Uploading a Message File to the Messenger Display
This is the final exercise. At this point, the operator has learned all of the skills needed to create
and edit Messages. This section will outline the procedure for uploading a Message File from its
location on the host computer to the storage area on the Messenger display.
1. Disconnect the communication cable plug that connects the Messenger Display to the
Messenger controller. The communication cable is identified by its 2-conductor (Blue &
Grey), twisted-pair configuration.
2. Connect the end of the communication cable coming from the Messenger, to the
communication plug coming from the RS24C adapter connected to the serial port on the
host computer.
3. Start the messenger software on the host computer. As the software starts, it will search for
the Messenger. When it has located the bar, it will display a window stating “Messenger
found at Address #X”, where X represents the address where the bar was found.
4. Click on FILE. From the menu, click on OPEN. This will open the “Open Message File”
window.
5. Go to the directory where the Message Files are stored on the host computer and highlight
the desired Message File. Click OK to open the file.
6. Click the UPLOAD button located on the button bar.
A window will now appear confirming the upload of the Message File.
By pressing “Cancel”, the operator can abort the upload process before any changes are made to
the Message File currently loaded in the Messenger display. Pressing “OK” begins the upload pro-
cess. As the Message File is uploaded, theprogress will bedisplayed in a window, as shown in Fig.
20.
Fig. 19
Messenger Programmer
Config Addr Edit UpLoad Display Clear Help
File Edit Setup Window
Message Uploading
OK to Start Uploading from
TEST.MSG?
CancelOK
Help
This manual suits for next models
2
Table of contents