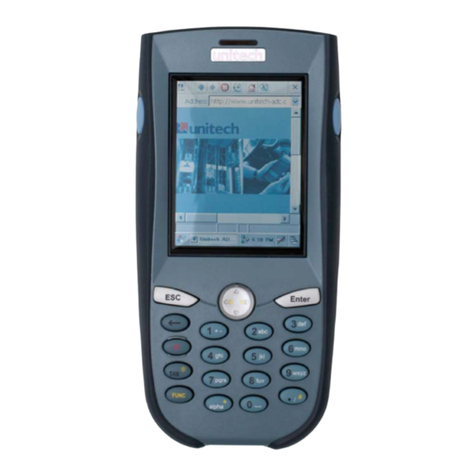
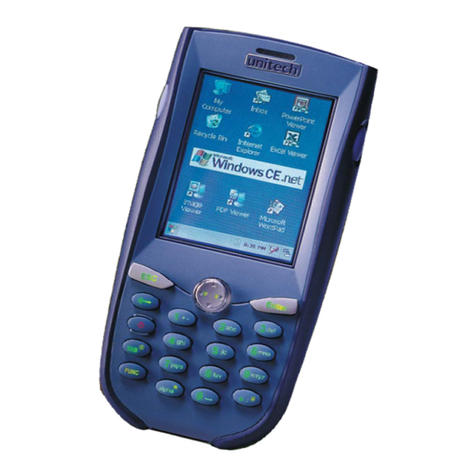
Unitech PT630 User manual

PT630 Programming Reference Guide Page 1 of 59
------------------------------------------------------------------------------------------------------------------
PT630 Portable Terminal
Programming Reference Guide
V1.1

PT630 Programming Reference Guide Page 2 of 59
------------------------------------------------------------------------------------------------------------------
CHAPTER 1. BIOS AND SYSTEM FUNCTIONS ...................................................................................................5
1.1 INTERRUPT VECTOR ASSIGNMENT FOR I/OS.................................................................................................5
1.2 DISPLAY FONT FUNCTIONS ( INT 09H ) ......................................................................................................5
2.4.1 Select Large Font .......................................................................................................................................5
2.4.2 Select Small Font .......................................................................................................................................5
2.4.3 Set Font Type..............................................................................................................................................6
2.4.4 Get Font Type ..............................................................................................................................................6
2.4.5 Set User-Defined Font for All Characters...................................................................................................6
2.4.6 Get Font Data for All Characters ...............................................................................................................7
2.4.7 Set User-Defined Font for One Character ..................................................................................................7
2.4.8 Get Font Data for One Characters .............................................................................................................8
1.3 KERMIT SERVER FUNCTION ( INT 0FH ) ......................................................................................................8
1.4 LCD CONTROL FUNCTIONS ( INT 10H ) .......................................................................................................9
2.4.1 Clear LCD Screen .......................................................................................................................................9
2.4.2 Enable/Disable Screen Scroll......................................................................................................................9
2.4.3 Set Cursor Position .....................................................................................................................................9
2.4.4 Get Cursor Position ..................................................................................................................................10
2.4.5 Display 16x16 Bitmap ...............................................................................................................................10
2.4.6 Set Cursor On/Off......................................................................................................................................12
2.4.7 Enable/Disable Power-on Logo Display...................................................................................................12
2.4.8 Display Character.....................................................................................................................................13
2.4.9 Display 16*16 Bitmap at Current Cursor Position...................................................................................13
2.4.10 Read Pixel from screen .........................................................................................................................13
2.4.11 Write Pixel to screen.............................................................................................................................14
1.5 SYSTEM FUNCTIONS ( INT 21H ) .................................................................................................................15
2.4.1 Terminate Program ...................................................................................................................................15
2.4.2 Read Keypad (wait if no key) and Write to LCD .......................................................................................15
2.4.3 Write LCD .................................................................................................................................................15
2.4.4 Read RS232 (wait if no character) ............................................................................................................15
2.4.5 Write RS232...............................................................................................................................................16
2.4.6 Direct Console I/O ....................................................................................................................................16
2.4.7 Read Keypad (wait if no key) ....................................................................................................................16
2.4.8 Read Keypad (wait if no key) ....................................................................................................................17
2.4.9 Write Character String to LCD .................................................................................................................17
2.4.10 Buffered Keypad Input..........................................................................................................................17
2.4.11 Check Keypad Status ............................................................................................................................17
2.4.12 LCD Backlight ON/OFF Control ........................................................... Error! Bookmark not defined.
2.4.13 Buzzer ON/OFF Control ........................................................................ Error! Bookmark not defined.
2.4.14 Beeper Volume......................................................................................................................................18
2.4.15 Enable/Disable RS232 Port..................................................................................................................19
2.4.16 Enable/Disable Key or Key Function...................................................................................................19
2.4.17 Set Keypad Language...........................................................................................................................20
2.4.18 Check Main Battery Status ...................................................................................................................21
2.4.19 Check Backup Battery Status................................................................................................................21
2.4.20 Set Good-read LED ..............................................................................................................................21
2.4.21 Set Laser Scanner Trigger Mode ..........................................................................................................22
2.4.22 Enable/Disable Double Verification When Read Bar Code Label........................................................22
2.4.23 Check Laser Scanner............................................................................................................................22
2.4.24 Get Scanner Port Status .......................................................................................................................23
2.4.25 Get MULTIPOINT Address ..................................................................................................................23
2.4.26 Set Communication Parameters ...........................................................................................................24
2.4.27 Software Control Flow .........................................................................................................................25
2.4.28 Hardware Control Flow .......................................................................................................................26
2.4.29 Set Communication Protocol................................................................................................................26
2.4.30 Get MULTIPOINT Address ..................................................................................................................26

PT630 Programming Reference Guide Page 3 of 59
------------------------------------------------------------------------------------------------------------------
2.4.31 Set MULTIPOINT Address ...................................................................................................................27
2.4.32 Set File-Uploading Message ON/OFF .................................................................................................27
2.4.33 Set Terminal ID.....................................................................................................................................28
2.4.34 Set ONLINE/LOCAL in Terminal Mode ...............................................................................................28
2.4.35 Set ECHO ON/OFF in Terminal Mode.................................................................................................28
2.4.36 Set AUTOLF ON/OFF in Terminal Mode.............................................................................................29
2.4.37 Set CHARACTER/BLOCK in Terminal Mode ......................................................................................29
2.4.38 Define LINE Character in Terminal Mode ...........................................................................................29
2.4.39 Define Page Character in Terminal Mode............................................................................................30
2.4.40 Set User-defined Key-map ....................................................................................................................30
2.4.41 Get System Key-map.............................................................................................................................31
2.4.42 Enable/Disable Decoding of a Barcode Symbology.............................................................................32
2.4.43 Get Decoding Status of a Barcode Symbology .....................................................................................32
2.4.44 Code 39 Settings...................................................................................................................................32
2.4.45 Interleaved 2 of 5 Settings ....................................................................................................................33
2.4.46 Codabar Settings ..................................................................................................................................33
2.4.47 Code 128 Setting ..................................................................................................................................33
2.4.48 EAN 128 Setting ...................................................................................................................................34
2.4.49 Code 93 Setting ....................................................................................................................................34
2.4.50 UPC-A Settings.....................................................................................................................................34
2.4.51 UPC-E Settings.....................................................................................................................................34
2.4.52 EAN-13 Settings ...................................................................................................................................34
2.4.53 EAN-8 Settings .....................................................................................................................................35
2.4.54 User Code 1 Setting (TRIOPTIC Code) ...............................................................................................35
2.4.55 User Code 2 Setting (TOSHIBA code)..................................................................................................35
2.4.56 Set Interrupt Vector...............................................................................................................................36
2.4.57 Get System Date ...................................................................................................................................36
2.4.58 Set System Date ....................................................................................................................................36
2.4.59 Get System Time ...................................................................................................................................37
2.4.60 Set System Time ....................................................................................................................................37
2.4.61 Set Alarm Date .....................................................................................................................................37
2.4.62 Set Alarm Time .....................................................................................................................................38
2.4.63 Get DOS and Firmware Version Number .............................................................................................38
2.4.64 Get Interrupt Vector..............................................................................................................................39
2.4.65 Get Free Disk Cluster...........................................................................................................................39
2.4.66 Create File with Handle .......................................................................................................................39
2.4.67 Open File with Handle .........................................................................................................................40
2.4.68 Close File with Handle.........................................................................................................................40
2.4.69 Read File with Handle..........................................................................................................................41
2.4.70 Write File with Handle .........................................................................................................................41
2.4.71 Delete File ............................................................................................................................................42
2.4.72 Move File Pointer.................................................................................................................................42
2.4.73 Search Character Beginning at the Current File Position ...................................................................43
2.4.74 Search String in Formatted Data File Beginning at the Current Position ...........................................43
2.4.75 Insert / Delete Data Block to / from File at the Current Position.........................................................44
2.4.76 Allocate Memory ..................................................................................................................................45
2.4.77 Free Allocated Memory ........................................................................................................................45
2.4.78 Modify Allocated Memory Block ..........................................................................................................46
2.4.79 Run specified program..........................................................................................................................46
2.4.80 End Program ........................................................................................................................................46
2.4.81 Read Data from Scanner Port ..............................................................................................................47
2.4.82 Set Scanner Port...................................................................................................................................47
2.4.83 Rename File..........................................................................................................................................44
2.4.84 Create New File....................................................................................................................................44
2.4.85 Receive Data from RS232 Port in MULTIPOINT Protocol..................................................................48
2.4.86 Send Data to RS232 Port in MULTIPOINT Protocol (Buffered Output)...........................................48
2.4.87 Check RS232 Output Buffer Status in MULTIPOINT Protocol ............................................................49
1.6 POWER MANAGEMENT FUNCTION ( INT 22H )...........................................................................................50
PT630 Programming Reference Guide Page 4 of 59
------------------------------------------------------------------------------------------------------------------
1.7 BEEPER CONTROL FUNCTION ( INT 31H ) ..................................................................................................51
1.8 RS232 CONTROL FUNCTIONS ( INT 33H ) ..................................................................................................52
2.4.1 Set Communication Parameters................................................................................................................52
2.4.2 Get Character from RS232 Port................................................................................................................53
2.4.3 Send Character to RS232 Port ..................................................................................................................54
2.4.4 Enable RS-232 Port...................................................................................................................................54
2.4.5 Disable RS-232 Port..................................................................................................................................54
2.4.6 Set RTS/DTR Signal of RS232 Port...........................................................................................................55
2.4.7 Get CTS Signal Status of RS232 Port........................................................................................................55
CHAPTER 2. MULTIPOINT COMMUNICATION...............................................................................................59
2.1 MULTIPOINT COMMUNICATION PROTOCOL ............................................................................................59
2.4.1 Symbols in Transmission Packet ...............................................................................................................59
2.4.2 Host Transmission Packet .........................................................................................................................59
2.4.3 PT630 Transmissions Packet.....................................................................................................................60
2.4.4 Data Conversion Rules in Packet..............................................................................................................60
2.4.5 Data Checksum Calculation in Packet......................................................................................................60
2.4.6 Example packet of command to send the file named A.EXE to PT630 with address ‘A’...........................60
2.2 DATA COMMUNICATION IN MULTIPOINT PROTOCOL..............................................................................62
2.2.1 Host Send Data to PT630 (ESC 0)...........................................................................................................62
2.2.2 Host Requests Data from the PT630 ( Polling ) ......................................................................................62
2.3 FILE COMMUNICATION IN MULTIPOINT PROTOCOL...............................................................................62
2.3.1 Host Send File to PT630 ( Download )....................................................................................................62
2.3.2 Cancel Current Downloading File Command (ESC z)...........................................................................63
2.3.3 Host Requests File from the PT630 ( Upload )........................................................................................63
2.3.4 Cancel Current Uploading File Command (ESC y)................................................................................63
2.4 HOST COMMANDS ..........................................................................................................................................64
2.4.1 Set MULTIPOINT Address ( ESC 5) ......................................................................................................59
2.4.2 Warm Start ( ESC A )..............................................................................................................................64
2.4.3 Enable/Disable Barcode Symbologies ( ESC B ) ...................................................................................64
2.4.4 Communication Configuration ( ESC C ) ..............................................................................................65
2.4.5 Get File Directory in RAM Disk ( ESC D ) .........................................................................................65
2.4.6 Get Program Name in FLASH Memory (ESC D/ROM)............................................................................66
2.4.7 Erase File ( ESC E )..................................................................................................................................66
2.4.8 Change EXEC Area Size (ESC F) .............................................................................................................66
2.4.9 Get RAM Memory Configuration (ESC G) ...............................................................................................66
2.4.10 Get FLASH Memory Configuration (ESC G/ROM) .............................................................................66
2.4.11 Cold Start ( ESC H ) ..........................................................................................................................66
2.4.12 Get the Name of Current Running Program (ESC I)............................................................................67
2.4.13 Check whether File/Program Exists (ESC J)........................................................................................67
2.4.14 Enter Kermit Server Mode (ESC k) ......................................................................................................67
2.4.15 Set Date/Time ( ESC M ) ................................................................................................................68
2.4.16 Set Buzzer Volume (ESC N) ..................................................................................................................68
2.4.17 Change Password ( ESC P )...........................................................................................................68
2.4.18 Get Terminal ID (ESC R)......................................................................................................................68
2.4.19 Terminal Mode Configuration ( ESC T ) ..............................................................................................69
2.4.20 Device Configuration ( ESC V ) ........................................................................................................69
2.4.21 Get Portable Model Number and BIOS Version Number (ESC v)........................................................70
2.4.22 Run Program in RAM or FLASH memory ( ESC X ).........................................................................70
2.4.23 Run Program in FLASH memory (ESC X/ROM)..................................................................................70

PT630 Programming Reference Guide Page 5 of 59
------------------------------------------------------------------------------------------------------------------
Chapter 1. BIOS and System Functions
The PT630 operating system supports DOS/BIOS function calls that a programmer can access when
developing an application for the portable.
1.1 Interrupt Vector Assignment for I/Os
Vector BIOS Function
09 H Display Font
0F H Kermit Server
10 H LCD Control
21 H System Functions
22 H Power Manager
31 H Beeper Control
33 H RS232 Control
1.2 Display Font Functions ( INT 09H )
1.2.1 Select Large Font
Entry Parameter: AH = 0 ; select 8*16-dot character font (4 lines * 16
; columns display)
Return Value: None
void TL_font(int status)
{
regs.h.ah = (unsigned char)status;
int86(0x09,®s,®s);
}
1.2.2 Select Small Font
Entry Parameter: AH = 1 ; select 6*8-dot character font (8 lines * 20 columns display)
Return Value: None
void TL_font(int status)
{
regs.h.ah = (unsigned char)status;
int86(0x09,®s,®s);
}

PT630 Programming Reference Guide Page 6 of 59
------------------------------------------------------------------------------------------------------------------
1.2.3 Set Font Type
Entry Parameter: AH= 2
AL= 0/1 ; set to large/small font
Return Value: None
void TL_font(int status)
{
regs.h.ah = (unsigned char)status;
regs.h.al = 2;
int86(0x09,®s,®s);
}
1.2.4 Get Font Type
EntryParameter:AH=3
Return Value: AL= 0/1 ; large/small font
int TL_get_font_type()
{
regs.h.ah = 3;
int86(0x09,®s,®s);
return(regs.h.al);
}
1.2.5 Set User-Defined Font for All Characters
Entry Parameter: AH= 4
AL= 0/1 ; large/small font
DS:DX ; pointer to the buffer with font data
; ( for large font: buffer size = 16*256 =4096 bytes
; for small font: buffer size = 6*256 =1536 bytes )
Return Value: None
void TL_change_all_ASCII_font(int type,unsigned char *str)
{
regs.h.ah=4;
regs.h.al=(unsigned char)type;
segregs.ds = FP_SEG(str);
regs.x.dx = FP_OFF(str);
int86x(0x9,®s,®s,&segregs);
}

PT630 Programming Reference Guide Page 7 of 59
------------------------------------------------------------------------------------------------------------------
1.2.6 Get Font Data for All Characters
Entry Parameter: AH= 5
AL= 0/1 ; large/small font
DS:DX ; pointer to the buffer
; ( for large font: buffer size = 16*256 =4096 bytes
; for small font: buffer size = 6*256 =1536 bytes )
Return Value: Font data in the buffer
Example:
void TL_get_all_ASCII_font(int type,unsigned char *str)
{
regs.h.ah=5;
regs.h.al=(unsigned char)type;
segregs.ds = FP_SEG(str);
regs.x.dx = FP_OFF(str);
int86x(0x9,®s,®s,&segregs);
}
1.2.7 Set User-Defined Font for One Character
Entry Parameter: AH= 6
AL= 0/1 ; large/small font
CL =0 - 255 ; character
DS:DX ; pointer to the buffer with font data
;(forlargefont:buffersize=16bytes
; for small font: buffer size = 6 bytes )
Return Value: None
Example:
void TL_change_one_ASCII_font(int type,int ascii_code,unsigned char *str)
{
regs.h.ah=6;
regs.h.al=(unsigned char)type;
regs.h.cl=(unsigned char)ascii_code;
segregs.ds = FP_SEG(str);
regs.x.dx = FP_OFF(str);
int86x(0x9,®s,®s,&segregs);
}
1.2.8 Reverse character display (only available on small font mode)
Use printf or character display to output “%c7r[“ to force PT600 to display reverse
character display. E.x
printf("%c7r[",27); ---- show REVERSE character
Use printf or character display to output “%c8r[“ to force PT600 to show normal
character. E.x
printf("%c0r[",27); ---- show normal character

PT630 Programming Reference Guide Page 8 of 59
------------------------------------------------------------------------------------------------------------------
1.2.9 Get Font Data for One Characters
Entry Parameter: AH= 7
AL= 0/1 ; large/small font
CL =0 - 255 ; character
DS:DX ;pointertothebuffer
; ( for large font: buffer size = 16 bytes
; for small font: buffer size = 6 bytes )
Return Value: Font data in the buffer
Example:
void TL_get_one_ASCII_font(int type,int ascii_code,unsigned char *str)
{
regs.h.ah=7;
regs.h.al=(unsigned char)type;
regs.h.cl=(unsigned char)ascii_code;
segregs.ds = FP_SEG(str);
regs.x.dx = FP_OFF(str);
int86x(0x9,®s,®s,&segregs);
}
1.3 Kermit Server Function ( INT 0FH )
Entry Parameter: None
Return Value: None
When INT 0FH is called in user application, PT630 will enter Kermit server. Pressing [CMD]
key then [Exit] key to leave it and return to user application.
Example :
void TC_kermit_mode()
{
int86(0x0F,®s,®s);
}

PT630 Programming Reference Guide Page 9 of 59
------------------------------------------------------------------------------------------------------------------
1.4 LCD Control Functions ( INT 10H )
1.4.1 Clear LCD Screen
Entry Parameter: AH = 0
Return Value: None
Example:
void TL_clrscr()
{
regs.h.ah= 0;
int86(0x10,®s,®s);
}
1.4.2 Enable/Disable Screen Scroll
Entry Parameter: AH = 1
AL = 0/1 ; disable/enable screen scroll
Return Value: None
Example:
void TL_scroll(int status)
{
regs.h.ah = 1;
regs.h.al = (unsigned char)status;
int86(0x10,®s,®s);
}
1.4.3 Set Cursor Position
Entry Parameter: AH = 2
DH = Row
DL=Column
PT630
6x8 8x16
Row 0~7 0~3
Column 0~19 0~15
Return Value: None
Example :
void TL_gotoxy(int x,int y)
{
regs.h.ah = 2;
regs.h.dh = (unsigned char)y;
regs.h.dl = (unsigned char)x;
int86(0x10,®s,®s);
}

PT630 Programming Reference Guide Page 10 of 59
------------------------------------------------------------------------------------------------------------------
1.4.4 Get Cursor Position
Entry Parameter: AH = 3 ;
Return Value: DH = Row
DL = Column
Example :
void TL_getxy(int *x,int *y)
{
regs.h.ah = 3;
int86(0x10,®s,®s);
*y = regs.h.dh;
*x = regs.h.dl;
}
1.4.5 Display 16x16 Bitmap
Entry Parameter: AH = 4
DH = Row
DL = Column
DS:BX ; pointer to bitmap ( 32-bytes pattern data )
Return Value: None
Note: This function is available only in large font.
Example :
void TL_display_16x16_location(int x,int y,unsigned char *str)
{
regs.h.ah=4;
regs.h.dh=(unsigned char)y;
regs.h.dl=(unsigned char)x;
segregs.ds = FP_SEG(str);
regs.x.bx = FP_OFF(str);
int86x(0x10,®s,®s,&segregs);
}

PT630 Programming Reference Guide Page 11 of 59
------------------------------------------------------------------------------------------------------------------
Sample C program to display 16x16 graphic pattern.
1 2 3 4 5 6 7 8 9 10 11 12 13 14 15 16
content FF FF 3E 1C C9 E3 F7 FF FF FF FF FF FF FF FF FF
7 ██████████ █ ███
6 ████ █ █ █ █ █ █ █ ███
Bit 5 █████ █ █ █ █ █ █ ███
Count 4 ████ █ █ █ █ █ █ █ ███
3 █████ █ █ █ █ █ █ ███
2 ████ █ █ █ █ █ █ █ ███
1 ███ █ █ █ █ █ █ █ █ ███
0 ███ █ █ █ █ █ █ █ █ █ ███
7 ████ █ █ █ █ █ █ █ █ █ █
6 █████ █ █ █ █ █ █ █ █
Bit 5 ████ █ █ █ █ █ ██
Count 4 ████ █ █ █ █ ██
3 ████ █ █ █ █ █ █
2 ████ █ █ █ █ █ █ █ █ █
1 ████ █ █ █ █ █ █ █ █ █ █ █ █
0 ████ █ █ █ █ █ █ █ █ █ █ █ █
Byte count 17 18 19 20 21 22 23 24 25 26 27 28 29 30 31 32
Content FF FF FF FE FC F9 F3 E7 CF CF E7 F3 F9 F3 E7 CF
#include <stdio.h>
#include <stdlib.h>
#include <dos.h>
#include <conio.h>
unsigned char logo[32]={0xFF,0xFF,0x3E,0x1C,0xC9,0xE3,0xF7,0xFF,
0xFF,0xFF,0xFF,0xFF,0xFF,0xFF,0xFF,0xFF,
0xFF,0xFF,0xFF,0xFE,0xFC,0xF9,0xF3,0xE7,
0xCF,0xCF,0xE7,0xF3,0xF9,0xF3,0xE7,0xCF};
void main()
{
void far *buff;
union REGS regs;
struct SREGS sregs;
regs.h.ah=0;
int86(0x10, ®s, ®s); /* clear screen */
regs.h.ah=0;
int86(0x9, ®s, ®s); /* set large font */

PT630 Programming Reference Guide Page 12 of 59
------------------------------------------------------------------------------------------------------------------
regs.h.ah=5;
regs.h.al=0;
int86(0x10, ®s, ®s); /* set cursor off */
buff=logo;
regs.h.ah=4;
regs.h.dh=1; /* Row */
regs.h.dl=2; /* Column */
regs.x.bx=FP_OFF(buff);
sregs.ds=FP_SEG(buff);
int86x(0x10, ®s, ®s, &sregs);
getch();
}
1.4.6 Set Cursor On/Off
Entry Parameter: AH = 5
AL = 0/1 ; set cursor OFF/ON
Return Value: None
Example :
void TL_cursor_type(int status)
{
regs.h.ah = 5;
regs.h.al = (unsigned char)status;
int86(0x10,®s,®s);
}
1.4.7 Enable/Disable Power-on Logo Display
Entry Parameter: AH = 6
AL = 0/1 ; disable/enable
Return Value: None
Example
void TL_cursor_type(int status)
{
regs.h.ah = 5;
regs.h.al = (unsigned char)status;
int86(0x10,®s,®s);
}

PT630 Programming Reference Guide Page 13 of 59
------------------------------------------------------------------------------------------------------------------
1.4.8 Display Character
Entry Parameter: AH = 0AH
AL = 0 - 255 ; character to display
Return Value: None
Example
regs.h.ah = 0x0A;
regs.h.al = cc;
int86(0x10,®s,®s);
1.4.9 Display 16*16 Bitmap at Current Cursor Position
Entry Parameter: AH = 4FH
DS:BX ; pointer to bitmap (32-bytes pattern data)
Return Value: None
Note: This function is available only in large font.
Example :
void TL_display_16x16(unsigned char *str)
{
regs.h.ah=0x4F;
segregs.ds = FP_SEG(str);
regs.x.bx = FP_OFF(str);
int86x(0x10,®s,®s,&segregs);
}
1.4.10 Read Pixel from screen
Entry Parameter: INT 0x10
AH= 0x40
Return DH=row ;0-63
DL=column ; 0-127
AL=0 ; No Pixel
1 ; With Pixel
Example:
int TL_get_pixel(int x, int y)
{
regs.h.ah= 0x40;
regs.h.dl= (unsigned char)x;
regs.h.dh= (unsigned char)y;
int86(0x10,®s,®s);
return(regs.h.al);
}

PT630 Programming Reference Guide Page 14 of 59
------------------------------------------------------------------------------------------------------------------
1.4.11 Write Pixel to screen
Entry Parameter: INT 0x10
AH= 0x41
AL=0 ; No Pixel
1 ; With Pixel
Return DH=row ;0-63
DL=column ; 0-127
Example:
void TL_set_pixel(int x,int y,int status)
{
regs.h.ah= 0x41;
regs.h.al= (unsigned char)status;
regs.h.dl= (unsigned char)x;
regs.h.dh= (unsigned char)y;
int86(0x10,®s,®s);
}

PT630 Programming Reference Guide Page 15 of 59
------------------------------------------------------------------------------------------------------------------
1.5 System Functions ( INT 21H )
1.5.1 Terminate Program
Entry Parameter: AH = 0
Return Value: None
Example:
void TS_exit_program()
{
regs.h.ah= 0;
int86(0x21,®s,®s);
}
1.5.2 Read Keypad (wait if no key) and Write to LCD
Entry Parameter: AH = 1
Return Value: AL = 0 – 255 ; ASCII character
Example:
unsigned char TS_stdin()
{
regs.h.ah= 1;
int86(0x21,®s,®s);
return(regs.h.al);
}
1.5.3 Write LCD
Entry Parameter: AH = 2
DL = 0 – 255 ; ASCII character
Return Value: None
Example:
void TS_stdout(unsigned char ch)
{
regs.h.ah= 2;
regs.h.dl= ch;
int86(0x21,®s,®s);
return;
}
1.5.4 Read RS232 (wait if no character)
Entry Parameter: AH = 3
Return Value: AL = 0 – 255 ; ASCII character
Note: Only for NONE communication protocol
Example:
unsigned char TS_stdaux_in()
{
regs.h.ah= 3;
int86(0x21,®s,®s);
return(regs.h.al);
}

PT630 Programming Reference Guide Page 16 of 59
------------------------------------------------------------------------------------------------------------------
1.5.5 Write RS232
Entry Parameter: AH = 4
DL = 0 – 255 ; ASCII character
Return Value: None
Note: Only for NONE communication protocol
Example:
void TS_stdaux_out(unsigned char ch)
{
regs.h.ah= 4;
regs.h.dl= ch;
int86(0x21,®s,®s);
return;
}
1.5.6 Direct Console I/O
Entry Parameter: AH = 6
DL = 0 – 254 ; write ASCII character in DL to LCD
255 ; read ASCII character from keypad
Return Value: 1) When read (DL <> 255):
Character in AL if ZERO flag is cleared
No input if ZERO flag is set
2) When write (DL= 255):
None
Example:
unsigned char TS_stdin_out(unsigned char ch)
{
regs.h.ah= 6;
regs.h.dl= ch;
int86(0x21,®s,®s);
if (ch == 0xFF)
{
if ((regs.x.cflag & 0x40) == 0) return(regs.h.al);
else return(0);
}
return(0);
}
1.5.7 Read Keypad (wait if no key)
Entry Parameter: AH = 7
Return Value: AL = 0 – 255 ; ASCII character
Example:
unsigned char TS_stdin_noecho()
{
regs.h.ah= 7;
int86(0x21,®s,®s);
return(regs.h.al);
}

PT630 Programming Reference Guide Page 17 of 59
------------------------------------------------------------------------------------------------------------------
1.5.8 Read Keypad (wait if no key)
Entry Parameter: AH = 8
Return Value: AL = 0 – 255 ; ASCII character
1.5.9 Write Character String to LCD
Entry Parameter: AH = 9
DS:DX ; pointer to string buffer
Return Value: None
Example:
void TS_stdout_string(unsigned char *str)
{
segregs.ds = FP_SEG(str);
regs.x.dx = FP_OFF(str);
regs.h.ah= 9;
int86x(0x21,®s,®s,&segregs);
return;
}
1.5.10 Buffered Keypad Input
Entry parameter: AH = 0AH
DS:DX ; pointer to data buffer
Return value: DS:DX ; pointer to data buffer
Data format in buffer:
Input buffer with CR at last
number of characters actual input
number of characters requested to be inpu
t
nm
Example:
void TS_stdin_string(unsigned char *str)
{
segregs.ds = FP_SEG(str);
regs.x.dx = FP_OFF(str);
regs.h.ah= 0x0a;
int86x(0x21,®s,®s,&segregs);
return;
}
1.5.11 Check Keypad Status
Entry Parameter: AH = 0BH
Returned Value: AL = 0 ; no keys were pressed
0FFH ; key was pressed and input character is Ready
Example:
unsigned char TS_kbhit()
{
regs.h.ah= 0x0b;
int86(0x21,®s,®s);
return(regs.h.al);
}

PT630 Programming Reference Guide Page 18 of 59
------------------------------------------------------------------------------------------------------------------
1.5.12 Device control function
1.5.12.1 LCD Backlight ON/OFF Control
Entry Parameter: AH = 1AH
BH=0
AL = 0/1 ; set LCD backlight OFF/ON
Return Value: None
Example:
void TL_backlight(int status)
{
regs.h.ah= 0x1A;
regs.h.bh= 0;
regs.h.al= (unsigned char)status;
int86(0x21,®s,®s);
}
1.5.12.2 Buzzer ON/OFF Control
Entry Parameter: AH = 1AH
BH=1
AL = 0/1 ; set Buzzer OFF/ON
Return Value: None
Example:
void TD_buzzer(int status)
{
regs.h.ah= 0x1A;
regs.h.bh= 1;
regs.h.al= (unsigned char)status;
int86(0x21,®s,®s);
}
1.5.12.3 Beeper Volume
Entry parameter: AH = 1AH
BH=3
AL = 0/1/2 ; set LOW/MEDIUM/HIGH beeper volume
Return Value: None
Example:
void TD_beeper_vol(int status)
{
regs.h.ah= 0x1A;
regs.h.bh= 3;
regs.h.al= (unsigned char)status;
int86(0x21,®s,®s);
}

PT630 Programming Reference Guide Page 19 of 59
------------------------------------------------------------------------------------------------------------------
1.5.12.4 Enable/Disable RS232 Port
Entry Parameter: AH = 1AH
BH=4
AL = 0/1 ; disable/enable
Return Value: None
Example:
void TD_serial(int status)
{
regs.h.ah= 0x1A;
regs.h.bh= 4;
regs.h.al= (unsigned char)status;
int86(0x21,®s,®s);
}
1.5.12.5 Enable/Disable Key or Key Function
Entry Parameter: AH = 1AH
BH=5
AL = 0 ; All keys
1 ; Supervisor mode
2;Coldstart
3 ; Warm start
4 ; User mode (press [CMD] for 2 seconds)
5 ; ALPHA key
BL = 0 ; Disable key or key function
1 ; Enable key or key function
Return Value: None
Example:
void TD_keylock(int type,int status)
{
regs.h.ah= 0x1A;
regs.h.bh= 5;
regs.h.al= (unsigned char)type;
regs.h.bl= (unsigned char)status;
int86(0x21,®s,®s);
}

PT630 Programming Reference Guide Page 20 of 59
------------------------------------------------------------------------------------------------------------------
1.5.12.6 Set Keypad Language
Entry Parameter: AH = 1AH
BH=7
AL= 0 ;English
1 ;Sweden/Finland
2 ;Danish
3 ;Spanish
4 ;French
5 ;German
6 ;Italian
Return Value: None
Note: The functions defines input characters in ALPHA mode for key [0]:
Language Mode Hex Code Display
ALPHA-1 5B @
0.English ALPHA-2 5C ?
ALPHA-3 5D &
ALPHA-1 8F Å
1.Sweden/Finland ALPHA-2 8E Ä
ALPHA-3 99 Ö
ALPHA-1 92 Æ
2.Danish ALPHA-2 9D Ø
ALPHA-3 8F Å
ALPHA-1 AD ¡
3.Spanish ALPHA-2 A5 Ñ
ALPHA-3 A8 ¿
ALPHA-1 F8 º
4.French ALPHA-2 87 Ç
ALPHA-3 26 &
ALPHA-1 8E Ä
5.German ALPHA-2 99 Ö
ALPHA-3 9A Ü
ALPHA-1 F9 •
6.Italian ALPHA-2 5C \
ALPHA-3 82 É
‘¥’ (9DH) in ASCII is replaced with ‘Ø’ when Danish is selected.
Example:
void TD_key_language(int status)
{
regs.h.ah= 0x1A;
regs.h.bh= 7;
regs.h.al= (unsigned char)status;
int86(0x21,®s,®s);
}
Other manuals for PT630
5
Table of contents
Other Unitech PDA manuals

Unitech
Unitech PT630 User manual

Unitech
Unitech EA520 User manual

Unitech
Unitech HT682 User manual

Unitech
Unitech PA500II User manual

Unitech
Unitech PA970 User manual

Unitech
Unitech PA600 User manual

Unitech
Unitech PA600 II Standard User manual

Unitech
Unitech HT580 User manual

Unitech
Unitech PA820 User manual

Unitech
Unitech EA502 User manual

Unitech
Unitech PA600 User manual

Unitech
Unitech EA320 User manual

Unitech
Unitech HT682 User manual

Unitech
Unitech PA600 Owner's manual

Unitech
Unitech PA963 Installation and operation manual

Unitech
Unitech PA600 User manual

Unitech
Unitech PA820 User manual

Unitech
Unitech PA600 User manual

Unitech
Unitech PA600 User manual

Unitech
Unitech PT630 User manual