manuals.online logo
Brands
  1. Home
  2. •
  3. Brands
  4. •
  5. Whirlpool
  6. •
  7. Microwave Oven
  8. •
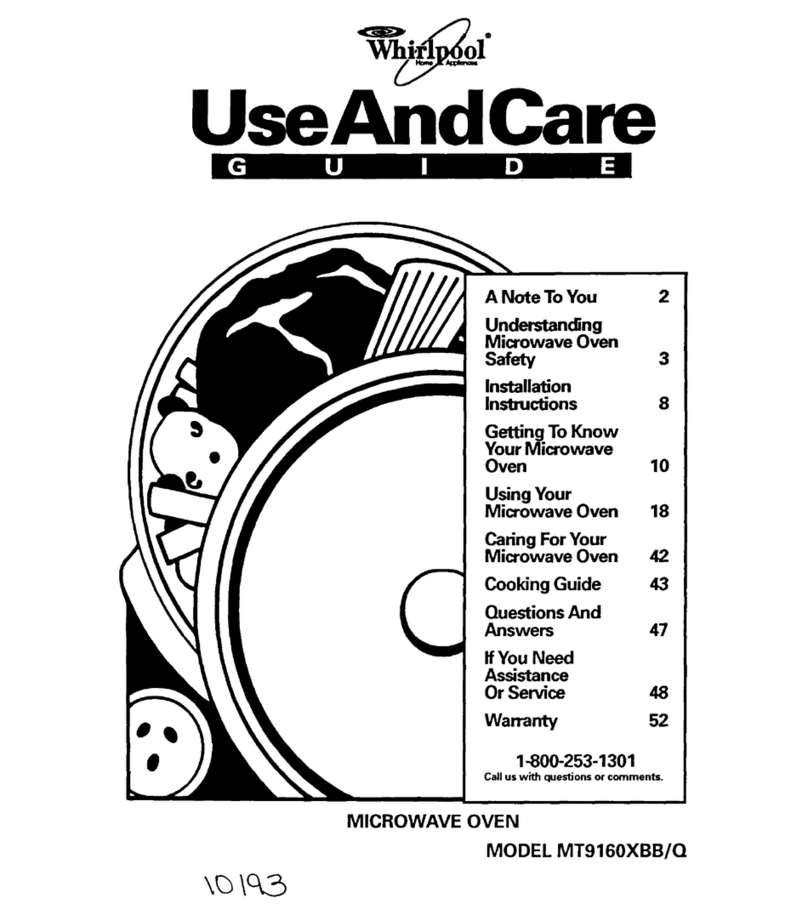
  9. Whirlpool 8113P027-60 Installation instructions

Whirlpool 8113P027-60 Installation instructions

GSC
+j4nd
JCare
Instructions for your ElectricWall Oven and Microwave Oven
CONTENTS
SAFETY INSTRUCTIONS...................... 1-5 Tosetoven................................. 11
Wall oven .................................. 1-3 Common baking problem chart ................ 11
Microwave oven ............................ 4-5 How to broil ................................. 12
Precautions to avoid possible exposure to Broiling chart ................................ 12
microwave energy .......................... 4 Cooking tips ................................. 12
ELECTRONIC CONTROLLER .................... 6 CARE AND CLEANING CHART ................. 13
SELF-CLEAN OVEN ............................ 7 TROUBLESHOOTING CHART FOR WALL OVEN . 14
AUTOMATIC OVEN COOKING ................... 8 Expranationof fault codes ..................... 14
MICROWAVEOVEN INSTRUCTIONS......... 16-33
USINGYOUR OVEN ......................... 9-12 Tableof contents ............................. 16
Ovendoor ................................... 9
Ovenlight .................................... 9 SERVICE (wall oven & microwave oven) .......... 33
Ovenvent .................................... 9
Fan ......................................... 9 WARRANTY (wall oven & microwave oven) ....... 34
Oven characteristics .......................... 10
Oven racks .................................. 10
Hints ....................................... 10
Preheating .................................. 10
8113P027-60
(10/92)
SAFETY INSTRUCTIONS
(WALL OVEN)
STORAGE IN,ON OR NEAR APPLIANCE - Donot
store or use gasoline or other flammable materials, va-
pors and liquids inthe oven, near surface units or in the
vicinity of this or any other appliance. Thefumes can
create a fire hazard or explosion. Do not usecooktop or
oven as a storage area for food or cooking utensils.
The following instruct(ons are based on safety consid-
erations and must be strictly followed to eliminate the DO NOT USE WATER F/ _ l(_
potential risks of fire, electric shock, or personal injury.ON GREASE FIRES -
Smother fireor flame or
PROPER INSTALLATION - Be sureyour appliance is use dry chemical or
properly installed and grounded bya qualified techni- foam-typeextinguisher,if _' _r_
clan. available or sprinkle
heavily with baking soda.
USEONLY DRY POTHOLDERS - Moist or damp
potho(ders on hot surfaces may result in burns from
NEVER USE YOUR steam. Do not let potholder touch hot heating ele-
APPLIANCE FOR ments. Do not use a towelor other bulky cloths.
WARMING OR HEAT-
ING THE ROOM. SURFACE COOKING UNITS:
USE PROPER PAN SIZE - This applianceis equipped
withone or moresurfaceelements of different sizes.
Select utensils having flat bottoms large enough to
cover the surface element. The use of undersized
STORAGEABOVE RANGE - To eliminate the hazard utensils will expose a portion of the heating element to
of reaching over hot surface elements,cabinet storage direct contact and may result in ignition of clothing.
should not be provided directly above a unit. If pro- Proper relationship of utensil to element will also im-
vided, storage should be limited to infrequently used prove efficiency.
items that can be safely storedin an areasubjected to
heat.Temperatures may be unsafe for some items NEVER LEAVESURFACEI7"___-E__l=_'_"'m_t
such as volatile liquids, cleaners, or aerosol sprays. IfUNITS UNATTENDED AT I _ 1 _!I_"4/
cabinet storage is provided, installation of a range
hood that projects at least S-inches beyond thebottom HIGH HEAT SETTINGS - [ _ _ j'_)
of the cabinet will reduce the hazards associated with Boilover causes smoking _"_'_" ,:
and greasy spillovers that ! _ r-_
such storage,may ignite, j -_
WEAR PROPER
APPAREL -TOPREVENT DAMAGE TO RANGE, never operate a
Loose-fitting or surface unit without a pan in place and never allow a
hanging garments pan to boil dry.
should never be
worn whileusing MAKE SURE DRIP BOWLS ARE IN PLACE - Ab
the appliance, sence of these bowls during cooking may subject wir
ing or components underneath to damage.
USER SERVICING- Donot repair or replaceany partPROTECTIVE LINERS - Do not use aluminum foil t
of the appliance unless specifically recommended in line surface unit drip bowls or oven bottoms,except a
the Use and Care Book. All other servicing should be suggested in the Use and Care Book. Improper insta
referred to a qualified technician. Always disconnect lation of theseliners may result ina risk of electr
unit or cut-off power tounit before any servicing, shock, or fire.
SAFETY INSTRUCTIONS
(WALL OVEN)
GLAZED COOKING UTENSILS - Only certaintypes VENTILATING HOODS:
of glass, glass/ceramic, ceramic, earthenware, or CLEAN VENTILATING HOODS FREQUENTLY -
other glazed utensils are suitable for range-top serv- Grease should not be allowed to accumulate on hood
ice without breaking due to the sudden change intem- or filter. When flaming foods under thehood, turn the
perature, fan off. The fan, if operating, may spread the flame.
UTENSIL HANDLES IMPORTANT SAFETY NOTICE AND WARNING
a ornia a eDrn ntera oxc orc
TURNEDINWARD ment Act of 1986 (Proposition 65) requires the Gover-
ANDNOT EXTENDnor of California to publish a list of substances known
OVER ADJACENT to the State of California to cause cancer or reproduc-
SURFACE UNITS - To tive harm,and requires businesses to warn customers
reducethe risk of of potential exposures to such substances.
burns, ignition of flam-
mable materials, and Users of this appliance are herebywarned that when
spillage due to unin- the appliance is engaged in the self-clean cycle there
tentional contact with the utensil,the handle of a utensil may be some low-level exposure to some of the listed
should be positioned so that it is turned inward, and substances, including carbon monoxide. Exposure to
does not extend over adjacent surface elements, these substances can be minimized by properly vent-
ing the appliance to the outdoors during the self-clean
DO NOT SOAK REMOVABLE HEATING ELE-cycle.
MENTS -Heating elementsshouldnever be im-
mersed in water. Immersing element in water would DEEP FAT FRYERS:
damage insulating material inside element. Useextreme caution when moving the grease kettle or
OVENS: disposing of hot grease.
USE CARE WHEN OPENING DOOR - Let hot air or DONOT TOUCH SURFACE ELEMENTS OR OVEN
steam escapebeforeremoving or replacing food. ELEMENTS, AREAS NEAR ELEMENTS OR INTE-
RIORSURFACES OF OVEN - Elements may be hot
DO NOT HEAT UNOPENED FOOD CONTAINERS - even though they are dark in color. Areas near surface
Build-up of pressure may cause container to burst and elements and interior surfaces of oven may become
result in injury, hot enough to cause burns. During and after use, do
PREPARED FOODWARNING: Follow food manufac- not touch or let clothing or other flammable materials
turer's instructions. If a plastic frozen food container contact heating elements, areas near elements or inte-
and/or its film cover distorts, warps, or is otherwise rior surfaces of oven untilthey have had sufficienttime
damaged during cooking, immediately discard the to cool. Among these areas are the cooktop, surfaces
food and its container.The food could be contami- facing the cooktop,oven vent opening and surfaces
nated,near this opening, oven door,and oven window. Also,
do not allow aluminum foil, meat probes or any other
KEEP OVEN VENT DUCTS (located under rear ele- metalobject, other thana utensil on a surface element,
ment; rear corner of cooktop; between oven door and to contact heating elements.
control panel of wall oven or on backguard) UNOB-
STRUCTED. Blockage of vent prevents proper oven ANTI-TIP BRACKET:
air circulation and will affect oven performance. Avoid WARNING: To reduce the risk of tipping of the appli-
touching oven vent area while oven is on and for sev- ance from unusual usage or by excessive loading of
eral minutes after oven isturned off. Some parts of the the oven door, the appliance must besecured by a
vent and surrounding area become hot enough to properly installed anti-tip device. To check if device is
cause burns. {nstatled properly: Use a flashlight and look under-
neath range to see that one of the rear leveling legs is
PLACEMENT OFOVEN RACKS - Always place oven engaged in the bracket slot.When removing appliance
racks indesiredlocation while oven is cool. If rack must for cleaning, be sure anti-tip device is engaged when
be moved while hot, use care to avoid contact of range is replaced.The anti-tip devicesecures the rear
potholder with oven element, leveling leg to the floor, when properly engaged.
--2--
SAFETY INSTRUCTIONS
(WALL OVEN)
ADDITIONAL INFORMATION:
Afterapplianceisinstalled,becertainallpackingmate-AI-IENTION: NE LAISSER AUCUN ALIMENT, US-
rialsareremovedfromtheappliancebeforeoperating TENSILE DE CUISINE, ETC., DANS LE FOUR
the unit. If appliance is installed near a window,take DURANT LE CYCLE D'AUTONETI-OYAGE.
steps to prevent curtains from blowing over surface
elements creating afire hazard.On some models, a fan should be heard during the
self-clean cycle. If not, cancel clean cycle and call a
Careshould begiven to locationof appliance. Besure serviceman before self-cleaning again. (Refer to
floor covering underappliance,walls adjacent toappli- CONTENTS onfront coverfor locationofself-clean in-
ance,cabinetry adjacentto appliance,and othermate- structions and fan information.)
rials adjacent to appliance can withstand prolonged
heat.This isa heavyappliance and can settle intosoft
floor coverings such as cushioned vinyl. Use care SMOOTHTOPCOOKTOP:
when moving range on this type of floor covering. Do not cook on broken cooktop. If cooktop should
break, cleaningsolutionsandspillovers maypenetrate
the broken cooktop and create a risk of electric shock.
Contact a qualified technician immediately. Clean
_ _,c_/cooktopwith caution. Ifawetspongeorclothisusedto
OVENDOOR wipe spills on a hot cooking area, be careful to avoid
Do not place excessive steam burn.Some cleaners can produce noxious
weight on an open oven fumes if applied to a hot surface.
-'"" door or stand on an open
oven door as, in some
cases, it could cause the DO NOT LEAVE CHILDRENALONE- Children
range to tip over, break- should not be left alone or unattended in area where
age ofthe dooror serious appliance isinuse.They should neverbe allowedto sit
injury, or stand on any part of the appliance. CAUTION: Do
notstore itemsof interestto childrenin cabinetsabove
CIRCUIT BREAKER OR FUSE- Locate and mark an appliance or on the backguard of a range.
breakerorfuse. Never replacea blown fuseorreset a
breaker untilyou know what has caused the problem.
Always replace a blown fuse with one of the correct Children climbing on the appli- _F_p{'f_F.J
amperage, do not use a substitute, anceto reach itemscould beseri- _._j_ _= /
ously injured. Children must be _'=" _"
taught that the appliance and
CONTROLKNOBS - Turn off control at the comple- utensilsinor on itcan behot.Chil-
tion of a cooking operation, drenshould betaught that an ap-
pliance is not a toy. They should
not be allowed to play with con-
SELF-CLEANING OVEN: troisor other parts of the unit.
Donotcleandoorgasket.Thedoorgasketisessential
foragoodseal.Careshouldbetakennottorub,dam-
age,ormovethegasket.Do notuseovencleanersor
ovenlinerprotectivecoatingofany kindinoraround
anypartoftheself-cleanoven.Cleanonlypartslisted
inthisbooklet.Beforeself-cleaningtheoven,remove
broilerpan,ovenracks,and otherutensils.
CAUTION: DO NOT LEAVE FOOD OR COOKING
UTENSILS, ETC., IN OVEN DURING THE SELF-
CLEANING MODEOF OPERATION. -SAVE THESE INSTRUCTIONS-
-3-
SAFETY INSTRUCTIONS
(MICROWAVE OVEN)
When usingthe MICROWAVEOVEN basic safety precau-8. Donotoperatethisapplianceifit hasadamagedcordor
tions should befollowed, including thefollowing: plug, if it is notworking properly, or if it has been dam-
aged or dropped.
WARNING- To reduce the risk of burns, electrical 9. This appliance should be serviced only by qualified
shock,fire,injurytopersons orexposureto excessivemicro-servicepersonnel.Contactthe nearestauthorizedserv-
wave energy: ice facility for examination, repair or replacement. Do
not attempt to service or repairthis appliance.
1. READ ALL THE INSTRUCTIONS BEFORE USING
THE APPLIANCE. 10.Do not cover or block any openings onthe microwave
oven.
2.Readandfollowthespecific"precautionstoavoid possi- 11. Do not store this appliance outdoors. Do not use this
bleexposureto excessivemicrowaveenergy"found on product nearwater - forexample, neara kitchensink, in
insidefront cover, a wet basement,or near aswimming pool, andthe like.
3. This appliance must be grounded and properly polar- 12. When cleaningsurfaces of doorand oventhat cometo-
ized.Connectonlytoa properlygroundedand polarized gether on closing the door, use only mild, nonabrasive
outlet. See installation instructions for grounding soaps ordetergents appliedwith asponge orsoft cloth.
instructions. 13.To reduce the risk of fire in the oven cavity:
4.Installor locate this appliance only in accordance with a. Donotovertook food,especiallystarchyitemssuch
the installation instructions described in this manual, as potatoesandfatty itemssuchas bacon.Carefully
attend appliance ifpaper,plastic,or othercombusti-
5.Someproductssuchaswhole eggsandsealed contain- ble materials are placedinsidethe oventofacilitate
ers,such as closed glassjars, may explodeand should cooking.
not be heated in this oven. b. Removewire twist-ties from paper or plastic bags
before placing bag in oven.
6. Usethisappliance onlyfor its intendeduseasdescribed
inthe manual.Do notuse corrosivechemicals orvapors c. Ifmaterialsinsidethe ovenshould ignite, keepoven
in this appliance. This type of oven is specifically de- door closed, turn oven off,and disconnect the
signed to heat, cook, dry, or defrost food. It is not de- power cord,or shut off power at the fuse or circuit
signedfor industrial, laboratory,or commercialuse. Itis breaker panel.
intended for home use only. Do notuse for drying d. Donotusethe cavityfor storage purposes. Do not
clothes, linens, newspaper, or similar non-food type leave paper products, cooking utensils,or food in
items, the cavity when not in use.
7. Makesure that all persons using this appliance, espe- e. Do not put metal insidethe oven, exceptas specifi-
cially children, are closely supervised and properly in- cally described in the manual or cookbook if sup-
structed on how to usethis appliance, pliedwith this oven.
-4-
SAFETY INSTRUCTIONS
(MICROWAVE OVEN)
14. Use only cooking utensils and accessories, made for 19. Brisklystir liquidsbefore heatingand reheatingtoincor-
use in the microwave and specifically described in this porate air.This prevents abrupt boilovers that some-
manual orcookbook, if included with oven. Use alumi- times occur after air-depleted liquids are heated,espe-
num foil only as directed in this booklet.See page 19. cially intall, narrow containers.
15. Do notuseoutdoors. 20. Microwave oven manufacturers do not recommend
16. Do not pop popcorn inanything other than a microwave deepfatfrying or frying ina microwave oven. Hotoil can
oven popperunless itisaspecially treatedbag labeled: damage oven parts and utensils and even resurtin skin
"Microwavepopcornintendedfor use inthe microwave", burns.
17. Never use brownpaper bags,glass or plasticbowls, or 21. Plasticwrap: Useonlythose types designed for micro-
other unsuitable containers to pop popcorn.To avoid waveoven useand avoidforming anair-tight seal. Fold
scorching and burning, remove popcorn after popping back a small corner or cut a small slit to allow steamto
hasslowed to two orthree seconds between pops.Pro-
longedpoppingcancause smokingfrom overheatedoil, escape.
breakage of dishes,damage to oven and eventually a
fire. 22. Stay near the microwaveoven while it is in useand
check cooking progress frequently. Leaving the micro-
18. Do not removethe outer caseor theplastic stirrercover wave oven unattended may result in overcooked food
insidethe oven cavity, and possiblya fire in your oven.
SAVE THESE INSTRUCTIONS
-5-
ELECTRONIC CONTROLLER
LOWER OVEN
I -. I I ]©
sTOP/O,EA. J I __1I__ SET
I
(NOTE: Allindicator words are displayed to show their location. When oven ortimer isnot in use,
indicator words are not displayed. Indicators are only displayedwhen oven is set for a cook, de-
layed cook, dean or timer operation,)
CLOCK CLEAN BROIL
1. PressCLOCK. 1.Closedoor. 1. PressISROtL.
2. TurnSETknobuntildisplayshows 2. Movedoorlocklevertolockedpo- 2. TurnSET knobclockwisetoselect
correct time of day. sition. HIbroilor counterc_ockwiseto se-
3. PressSTOP/CLEAR. 3. Press CLEAN pad. ("door" will lect LO broil.
flash in display and beeps will
When power isfirst suppliedto oven sound ifdoor is not locked.) See page12for additional informa-
or if there has been a power failure, 4. Ovenwillautomatically clean for3 tion.
thedisplaywillflash.Followabove in- hours. Select 2 or 4 hours by turn-
structionsto set clock, ingthe SET knob.
See page7for additionalinformation.
TIMER COOK TIME/STOP TIME BAKE TEMP
1. Press TIMER. To begin cooking immediately: 1. Press BAKETEMP.
2.TurnSET knobtodesiredtime.1. Press BAKE TEMP. Enter oven2. Turn SET knobuntildesiredoven
temperaturewithSET knob. temperatureappears in thedis-
TIMER starts automatically.3 beeps 2.Press COOK TIME. Enterdesired play.
signalthe endof the timing operation cooking time by turning the SET
andthetime-of-day reappearsinthe knob.Seepages 10to 11 for additionalin-
display, formation on baking and roasting.
Todelay the start ofcooking:
Tocancel:PressTIMERandholdfor 1. Press BAKE TEMP. Enter oven
3 seconds. Timeof day willreappear temperaturewith SET knob.
after a slight delay. 2.PressCOOK TIME. Entercooking
time with SET knob.
3. PressSTOPTIME. Entertime you
wishfoodto stop cookingwith SET
knob.
The oven will automatically turn on
and off at the preset times.
Press STOP/CLEARto cancel end-
of-cooking beeps. See page8 for ad-
ditionalinformation.
-6-
SELF-CLEAN OVEN
BEFORE DURING pear with use.If the oven is heavily
soiled,or if the broiler pan is left in the
SELF-CLEANINGSELF-CLEANINGoven, smoke and odor may occur.
Whenthe doorislockedand theCLEAN
pad is pressed,the oven automatically As the oven heats and cools, you may
begins to heat to cleaning tempera- hear sounds of metal parts expanding
tures. and contracting. This is normal and will
notdamage your appliance.
Turn off oven light before clean cycle.As the oven reaches cleaningtempera-
The life of the bulb may be shortened if tures,the LOCK indicatorwillturn onto
lefton duringthe clean cycle, show that an internal lock mechanism
has engaged. At this point, the oven AFTER
Clean oven frame, door frame and door can not be unlocked and opened. SELF-CLEANING
around the ovenvent with a non-abra-
sive cleaning agent such as Bon Ami. Topreventdamageto the door and lock Some soil may leave a light gray, pow-
These areas are not exposed to clean- lever, do not force the lock lever to the dery ash which can be removed with a
ing temperatures and should be left when the LOCK indicator is dis- damp cloth. If soil remains, it indicates
cleaned to prevent soil from baking on played, that the clean cycle was not long
duringthe clean cycle, enough.Thesoilwill beremovedduring
Wipe up excess grease or spillovers A fan sound can be heard during the the next clean cycle.
from theoven bottomtopreventexces- cleancycleand untiltheoven coolsafter
sive smoking duringthe clean cycle, the clean cycle.If the oven racks do not slide smoothly
after a clean cycle, wipe racksand em-
Do not use oven cleaners or oven liner About one hour afterthe completion of bossed rack supports with a small
protective coatings of any kind on the the cleancycle, the internal lockwill dis- amount of vegetable oil to restore ease
self cleanovenfinish or aroundanypart engage andthe LOCKindicatorwill turn of movement.
of the oven. off.At this point,the lock lever can be
moved to the left (unlocked position) Fine, hair-like lines may appear in the
Toprevent damage, do not cleanor rub and the door opened, oven interioror oven door.Thisis a nor-
the gasket around the oven door. The malconditionresultingfrom heatingand
gasketisdesignedtoseal inheatduring The first few times theoven is cleaned, cooling of the porcelain finish. These
the clean cycle, somesmoke andodormay bedetected, lines do not affect the performance of
This is normaland will reduce or disap- the oven.
--7--
USING YOUR OVEN
OVEN RACK POSITIONS:
CHARACTERISTICS RACK 1 (topofoven)usedfor broiling
thin non-fatty foods such as fish,
RACK 2 used for two-rack baking or
broilingthicker cuts of meat.
RACK3 usedfor mostone-rack baking
andfor roastingsome meats.NEVER placepans directlyon the oven
_e bottom.
RACK4usedforoneor two rackbaking
and roasting largemeats, cocking Do not cover entirerack withaluminum
....... larger foodsand for baking angel food foil or placefoil directly undercookware.
cakeor pie shells.Tocatch spillovers,cut a pieceof foil a
3_'NM{_RACK5 usedfor roastingturkeyorbak- littlelarger than the pan and place iton
_1 E}_ IC_ ing angel food cakeor pie shells, therackbelowtherackcontaining the
CO( NG!_' PL_'I pan.
PREHEATING
_lt_I_Wit} Preheatingisnecessaryfor baking.AI-
_ low oventoheat for 10to 15minutes
.................. before addingfood.
It is not necessary to preheat oven for
OVEN RACKS roasting,Itis notnecessary to preheat
Thetwo ovenracksaredesignedwith a _ for broiling unlessdarker browning is
"lock-stop" positionto keep racks from _ desired orif cooking thin (3/4-inch)
accidentally coming completely out of .....- steaks,Allowbroil elementto preheat 3
the oven. _ to 5 minutes,
/
To remove: Besurerackis cool. PullSelectingtemperature higher thande-
rack outto the "lock-stop" position.Tilt HINTSsired will NOT preheat the oven any
up and continue pulling until rack re- faster. Preheating at ahigher tempera-
leases. Ifcookingontworacks,stagger pansso ture may have a negativeeffect on bak-
one is not directly over the other. Useing results.
rackpositions2 and 4 or 2 and 5,when
To replace:Place rack on rack sup- cookingontworacks.
ports, tilt up and push toward rear ofTopreheat:Set ovenforbakingandal-
oven. Pullrack outto"lock-stop"posi- lowthe ovento heatuntildisplayshows
tiontobesurerackiscorrectlyreplaced. ] the presettemperature.Depending on
yourmodel,either 75or 100willappear
I
in thedisplay until the oven reaches
100°F.Ifthe oventemperatureis above
100°, the display will show the actual
oven temperature,Thedisplay willthen
show the oven temperaturein5° incre-
mentsuntilthe oven reaches thepreset
temperature.
Once thepreset temperatureis
reached,and the oventemperature has
stabilized,a single beepwill sound.
Use racks 2 and 4 when baking layer Iftheoventemperatureischangedaffer
cakes.Use racks 2 and 5 when baking preheating, a beep will signal that the
cookies or biscuitson cookie sheets, oven hasreachedthenew temperature
setting.
-10-
USING YOUR OVEN
TO SET OVEN:
1. Press BAKE TEMP pad. BAKE indi- Preheatoven fora_l baking opera- 5.Check food at minimumtime. Coc
cater turns on. tions,longer if necessary.
2. Turn SET knob until desiredternpera- 6. Press STOP/CLEAR pad to canc
lure is displayed.4.Place food in oven when oven has the operation.
3. BAKE ON indicator and oven irnrne- preheated to set temperature.
diately turn on. COMMON BAKING PROBLEMS ANDWHY THEY HAPPEN
Cakesare uneven. Panstouching each other or Cakes don't brown on top, incorrect rack position,
oven wails. Temperature set toolow.
Batter uneven in pans,Overmixing.
Temperature set too low or Too muchliquid.
baking timetoo short. Pansizetoo large ortoo little
Oven notlevel, batter in pan.
Undermixing.Oven door opened tee often.
Toe much liquid. Excessive shrinkage. Toolittle leavening,
Cake high in middle. Temperatureset toohigh. Overmixing.
Bakingtimetoo long. Pan toolarge.
Overmixing. Temperaturesettoo high,
Toomuch flour. Baking time too long.
Panstouching each otherorPans too close toeachother
oven walls, or ovenwails.
Incorrect rack position.
Cake falls. Too much shorteningor sugar. Uneventexture. Toomuch liquid.
Toomuch or too _ittleliquid. Undermixing.
Temperatureset too low. Temperatureset too low,
Old or too littlebaking powder. Bakingtimetoo short.
Pan too smarl.
Oven door opened frequently. Cakeshave tunnels. Net enough shortening,
Added incorrecttype of oiltoToomuch baking powder,
cakemix,Overmixing or at toohigh a
Added additionalingredients speed,
tocakemixor recipe. Temperatureset too high,
Cakes, cookies, biscuits Incorrect rack position,
don'tbrown evenly. Oven door notclosed properly. Cakes crack on top. Batter overmixed,
Door gasket not sealing Temperatureset too high.
properly. Toomuchreavening.
incorrect useof aluminumfoil. Incorrect rack position.
Oven not prehe_ed.
Pans darkened:J,dented or
warped. Cakenotdone in middle.Temperatureset too high.
Pan too small
Bakingtimetoo short.
Cakes, cookies, biscuits Oven not preheated.
toobrown on bottom.Pans touchingeach other or
oven wails.
Incorrect rack position. Pie crust edges too brown. Temperatureset too high,
Incorrect use of aluminum foil. Panstouching each other or
Placed2 cookiesheets onone oven walls.
rack, Edgesof crusttoo thin.
Used glass, darkened, stained,
warped or durlfinish metal
pans. (Usea shiny cookie Pies don't brown on bet- Used shiny metal pans.
sheet.) tom.Temperatureset too low.
Pies have soaked crust. Temperaturetoo low at start of
baking,
Fillingtoojuicy.
Used shin metal ans,
-11-
USING YOUR OVEN
HOW TO BROIL COOKING TIPS TOBROIL:
Broiling is a method of cooking tender Prepare meat by removing excess fat 1. Press BROIL pad."Broil" lights inthe
meats by direct heat under the broil ele- and slashing remaining fat, being care- display.
ment. The cooking timeis determined ful not to cut into meat. This will help
by the distance between themeat and keep meat from curling. 2. Turn SET knob clockwise to select HI
the element,the desired degree of for normal broiling.
aloneness and the thickness of the Placebroiler pan on any of the recom-
meat. mended rack positions. Generally, for Or, turn SET knob counter clockwise
brown exterior and rare interior,the to select LO for special low tempera-
Broiling requires the use of the broiler meat should be closeto theelement, lure broiling.
pan and insert. The correct positionof Place further downifyou want meatwell 3. Press STOP/CLEAR pad to cancel a
the insert in the pan is very important, done.
The broiler insert should beplaced in broil operation.
the pan so grease will drain freely. In- Broiling should be done with oven door Use HI BROIL for most broil operations.
proper usemay causegrease fires, opened to the broil stop position. When broiling longer cooking foods
The broiler insert CANNOT be covered such as pork chops, poultry or thick
with aluminum foil as this prevents fat Follow suggested times on broiling steaks, select LO BROIL. Low tempera-
from draining into pan below. However,chart. Meat should beturned onceture broiling allows food to cook tothe
for easier cleaning, thebroiler pan can about half waythrough cooking, well done stage without excessive
be lined with foil. browning. Cooking time may increase if
Check donenessby cutting a slit in meat LO BROIL is selected.
Donot use disposable broiler pans. near center for desired color.
They do not provide a separatetray.
BROILING CHART
I #2 I Well Done IHi
CHICKEN
Whole,split #3Well Done Lo 45 tO60 minutes
Pieces #3 Well Done Lo 30 to45 minutes
GROUND BEEF PATTIES
3/4 to 1-inch thick #2 Rare Hi 10to 14 minutes
-12-
CARE AND CLEANING
Broiler pan & in- Soap & water.Plastic Remove from oven after use. Cool then pour off grease. Place soapy
sert scouring pad. Soap clothover insertand pan; let soak to loosen soil. Wash inwarm soapy
filled scouring pad. water. Use soap filled scouring pad to remove stubborn soil. Clean in
dishwasher if desired.
_k_,=d E_i
Glass: Soap &water.PasteWashwithsoapandwater. Removestubbornsoilwithpasteof baking
Oven window ofbakingsoda& sodaandwater.De net useabrasivematerialssuchasscouringpads,
water.Windowclean- steelwoolor powderedcleaningagents.Theywilldamageglass.Rinse
ingfluid, withclearwateranddry.Topreventstainingofovenwindow,neveruse
excessiveamountsofwaterwhichmayseep underor behindglass.
I .............. ...................... .......................... ..........
i i i i ?
Oven Elements Elementsare self-cleaning.Soilwillburnoffaselementsare used.Do
notsprayovencleaneronelements,electricalhookup or connection.
Plasticfinishes: Soap &water.Paste Do not useovencleaner,powderorliquidcleansers,abrasiveorcaustic
Door handle,trim, ofbakingsoda and cleaningagentsonplasticfinishes.Thesecleaningagentswillscratchor
overlay water. Non-abrasivemarr finish. Topreventstainingor discoloration,wipeup fat,greaseor
plasticpador sponge, acid(tomato,lemon,vinegar,milk,fruitjuice,marinade)immediatelywith
adrypapertowelorcloth.When surfaceis cool,clean with soap and
water;rinse,and dry.
-13-
TROUBLESHOOTING CHART
(WALL OVEN)
BEFORE CALLING A SERVICER, CHECK THE FOLLOWING:
IPART OR ALL OF YOUR Is the oven plug disconnected from the electricaloutlet? •Are house fuses blown or
OVEN DOES NOT OPERATEcircuit breakers tripped? •Is the oven plug loose or improperly plugged in? Has power
supply to your home been interrupted? • Was oven properly set?
FOOD NOT BAKING SATIS- Are racks properly in place and in correct position for what you are baking? •Is oven
FACTORILY level? ° Are you using the proper pan? •Is itbright, not soiled or dark colored? ° Have
you used foilincorrectly? •Areyouusing standard measuring utensils? °Did youpre-
heat if recommended? • Oven temperature is incorrectly set - too low or too high.
I OVEN DOESNOTOPERATE Isthe ovendisconnectedfrom the electrical power? •Wasovenproperly set?
OVEN LIGHTDOES NOT Is bulb loose or burned out?
WORK
FPLUS A NUMBER APPEARSThis is called a FAULT CODE. If a fault code appears in the display, press the STOP/
IINTHE DISPLAY AND A CON- CLEAR pad. If the fault code reappears,disconnect power to the oven and call the ser-
TINUOUS BEEPSOUNDS. vicer.
: (EXAMPLE: F 2)
EXPLANATION OF FAULT CODES DURINGNORMALOVENCOOKING
Your appliance isequipped with an electronic control featur- If a fault code appears in the displayand continuous beeps
ing built-in, self-diagnostic software. This software continu- sound, press the STOP/CLEAR pad. Then, reprogram the
ously monitors the control to insure safe and proper opera- cooking operation.
tion. If the softwareshould defect a questionablesituation, a
FAULT CODE (F plus a number) will appear in the display If the fault code reappears in the display, call a servicer. Do
and continuous beeps will sound, not use the oven until the control has been serviced. The sur-
face unit can be used.
__ I.__ T DURING A SELF-CLEAN CYCLE
I._ If the oven is heavily soiled, excessivesmoke and flaring
may result in a fault code. tf this occurs, press the STOP/
CLEAR pad and allow the oven to cool for an hour. Then,
reprogram the oven for the clean cycle.
Afault code indicates that there may be functional error. As a
safety precaution, the control will automatically cancel the If the fault code reappears in the display, call a servicer. Do
program. Follow the procedures described to checkthe ap- not usetheovenuntil the controlhas beenserviced. Thesur-
pliance, face unit can be used.
-14-
Use and Care
Microwave Oven
with cook and defrost by weight
CONTENTS
GENERAL INFORMATION
_effn;ren_fe;7;ariinieiatiii::::::::::::::::::::Instaltati°n ...................... 171717 COcDoEnteRnOGcReAMSf_ozen'code.-••••.•.......Reheatcode .............. 24_2523-30
CONTROL PANEL FOR MICROWAVEOVENOvenlight and fan ................... ..... 1817 Ce°_rkobYby_ge_gh;iiii!iii!iii!iiiiiiiiiiii!.!!--ii
Prompt indicators ........................... 18 INFORMATION
OPERATIoNWhatbeeps mean'''"''''"''''"''''"'"............................. 1818 PaperGeneralinformation"''''''"'''''"''''"............................. "&plastic3131
Instruction chart ........................... 19-20 _r°Wor_i_g':::::::::::::::::::::::::::::::::::: 3131
ROWTOCOOKiitom_Stn°P:i:i:; / _;;; i;;;;;;;;; :i: i;i_;;; ::::::::::::::::::::::::::::::::::::::::::::::::::::::MAINTENANCE32323231313131
fflSERV_ER_p_ac_ng_ve_ _ig"bu`` ___________________. __(wa__v_na_ micr_wave_____________.________ven)........ 323332
ROWTOSPEEDspeed defrost DEFROST .................... 22 WARRANTY (wallOven and microwave oven) ..... 34
Speeddefrostw_ih_oldtime................... 22
Speed defrost then cook .................. 22
...................... 22
I
-16-
GENERAL INFORMATION
INSTALLATION INTERFERENCE DURING SELF-CLEAN
This oven was carefullypacked and WARNING OPERATION
shipped in good condition.Ifyou find
shippingdamages, notifythe dealer im- Microwave ovens generate radiofre- When the lower conventional oven is in
mediately. Remove all packing materi- quency energy during operation and, if a self-clean operation, the microwave
als bothoutside and insidethe oven be- not installed properly, may cause inter- oven cavity and metal meal rack (if
fore usingthe oven.This microwave ov- ference to radio and television recep- stored in the oven) will be hot to the
enisdesignedfor householduseonly.lt tion. You can determine if this unit is touch. This isa normal operating condi-
isnot intendedfor commercial or indus- causing interferencebyturning it onand tion during and clean cycle.
trial use. offwhile the interference is occurring. If
interference occurs it may be corrected The microwaveoven can beusedwhen
These things are normaland may oc- by one or more of the following mea- the lowerconventionaloven isinaclean
cur in your oven: sures: cycle, just expect the microwave oven
interior to behot.
: 1. Steam or vapor escaping around a. Reorient the receiving antenna.
the door.This develops as food
cooks and gives offsteam, b. Relocatethe ovenwith respecttothe Microwave cookingtimes maybediffer-
2.Moisture droplets on the oven receiver, ent when the microwave oven is used
walls, oven door or the oven bet- while the lower oven is in a self-clean
tom after cooking some foods, c. Plug the oven into a different outlet operation. Always check food at the
so that it andthe receiver are on dif- minimum suggested cooking time. Add
3. Dimming ofoven lightand change additional time if necessary.
in blower sound. This may occur ferent circuits.
while the oven is operating at a
power level other than HIGH if If the interference persists, you may
ovenisequipped with theSELECT want to consult an experienced radio/
control, television technician for additional sug-
gestions.
4. Thetop or bottom of the oven and
trim may feel hotto the touch.This
results from the venting of hot
moist airduring cooking.
5. Sometelevision and radiointerfer-
ence might be noticedwhile using
your microwave oven.This is simi-
lar to the interference caused by
other small appliances and does
not indicate any type of problem.
-17-
OPERATION
COOK _ J _ I IF---, Enterthe desiredtime. See page 21for comp(ete
, instructions,
'i Youmust enter a cooking time beforeselectinga
POWER ==_" IL_ /power level.
JTheoven willautomatically cook at fullpower ("HI")
unlessyou setect a lowerpower.
Enter powerlevel within 3 seconds of pressing the
POWER pad.
SPEEDDEFROST _'_,7-, t,At- Enter defrosttime.See page22 for complete
I II-- instructions.
TIMER _ _ /t,,4L-_ r Enter desiredtiming. See page 20for complete
I tt_Iinstructions,
CONVENIENCE_z,i- I-tT/i- ] Seepage 24 for complete instructions.
AND FROZEN i_ t_t±tF- I
COOK BY WEIGHT _,_J-t-t T/l- ]
±tt_- See page 28 for completeinstructions.
E
IDEFROST BYWEIGHT _ .)'-f t-t1-/ I Seepage30 for completeinstructions.
I
IPOPCORN -I_ .'E.I/-/¢o= -3 tCI_l Time depends onyourmodel.
_-tLC
t
B_TERI-- t_l Tit-- I
REHEAT I_ ___ __u:.- See page 26for complete instructions.
I
/,,,t_-'PressCLOCK padtwice and entercorrect time
CLOCK, ifequipped _ T_ _ IF- i of day.See page 20for complete instructions,
RESET ..................................................... Cancels any program except clock.
TURNTABLE ................................................ Turns turntable on and off.
START/STOP................................................ Turns oven on or off.
-19-
OPERATION
CLOCK, ifequipped START/STOP
00:00willflash in the displaywhen the oven isfirst plugged Tostartor stopanyoperationexcept TIMERfunction, press
intoa walloutlet or if therehas beena powerfailure. Colons START/STOP. To interrupt any operation except TIMER,
must beflashing in the displayto set the clock,press START/STOP or open oven door, To resume, close
door and press START/STOR If food is removed from the
To set clock: oven with time remaining onthe display,press RESET to
1.Press CLOCK twice, clear the timing.
2. Enter time-of-day by pressing
the number. Tostart TIMER, press START/STOP.Tostop TIMER,press
(Ex.830or8:30.) RESET.TIMERfunction can not be interrupted.
3. Press START/STOP.
This locksin the time-ofday. TIMER
To recall time of day during acooking operation, press Use as a handy kitchentimer totime conventionalcooking
CLOCK.Timeof daywill appearinthe disptayfor 3 seconds operations or to time microwavestanding times.
before returningto the current timing.Toset timer:
1. PressTIMER.
RESET2. Entertiming.
If a timing is left on the display or if an incorrect entry was (Ex.530or5:30-5min.30seconds).
made, pressRESETtocleartheentry. Thetime-of-daywill 3. Press START/STOP to begin
reappear. The oven must be offto clear an entry, timing,
TURNTABLE A long beepsignalsthe end ofatimingoperation.Press RE-
SETto stopand cancelTIMERoperation.Timerfunctioncan
Theturntablewillautomatically rotatewhenever theoven is not be interrupted.
turnedonfor anyoperation.Ifyouwishto turn offtheturnta-
ble,press TURNTABLE. The turntable will automatically
turn onthe next time the oven is used. HINTS
Itispossibleto usetheTIMERatanytime.For example,you
cansetthe TIMERwhile the ovenisbeingusedforacooking
operation. Or,youcansetthe TIMERandthen setacooking
operationwhile thetiming operation is in use.
IfTIMERisusedalongwith acooking operation,the display
will show the cooking time ratherthanthe TIMERtiming.To
recall timing for TIMER, press TIMER pad and time will be
displayed for 3 seconds.
POPCORN
This isa presettiming for microwave popcorn. Carefulryfol-
Iowth package directions. Donot leavemicrowaveoven un-
attendedwhilepopping popcorn.P(acemicrowave popcorn
on a microwave-safe, heat-proof dish in the oven. Micro-
wave popcorn brands vary in their yield. Do not repop un-
popped kernals. Some brands popfaster than others.
Stopmicrowave ovenwhen rapidpopping slowsto 2to3se-
: conds between pops.
To set: I POPCORN]
1. Press POPCORN.
2. Press START/STOP. I START/STOP]
-20-
HOW TO COOK
COOK AT FULL POWER PROGRAM COOKING
Theovenwillautomaticallycookat fullpower (H0unlessyou It is possible to program the oven to cook at two different
select another power level,power levels. Forexample,you canset the oven to cook at
HIGH (Stage-I) to begin a cooking operation or to bring
water to a boil.Then, reduce the power level (Stage-2) to
Toset: continue the operation ata slower, more gentle speed.
1. Pressnumbers toentercooking
time.
(Ex. 2 30 or 2 minutes, 30 seconds)
2. Press START/STOP to begin To set:
STAGE-1
cooking. 1. Press COOK.
2. Entercookingtime for stage-1.
3. If desired,select a power level.
HINTS
Tocheckfoodduring cooking,openthe ovendoor.Whenthe
door is opened, the oven turns off and thedisplay stops
counting down.Check food, close doorand press START/
STOPtocontinue cooking. STAGE-2
4. Press COOKagain.
("mere"appears in the display.)
At the end of cooking,"END" appears in the display and 4
beeps sound. Openthe oven door or press RESET.Time- 5. Entercookingtime for stage-2.
6. If desired, select a power level.
of-day reappears inthe displaywhen the door isopenedor 7.Press START/STOP to begin
RESET is pressed, cooking. []
CHANGING THE POWERLEVEL
Powerlevelmustbeenteredwithin 3secondsafterpressing
POWER.Thedisplayreturnsto the cookingtime after3 sec-
onds. During stage-l, the "cook" and "mem" prompts light in the
displayto indicatethat this is a 2-stage cooking operation.
The"mem" prompt turns off when the oven changes from
Toset: stage-1 tostage-2.2 beepssignalthischange. 4beepssig-
1. Press numbersto entercooking halthe end of cooking.
time.
2. Press POWER.
3. Press a single number to enter
power level.[]
(Ex. 4 for 40%power.)
4. Press START/STOP tobegin
cooking.
HINTS
Press POWER to recall thepower level during cooking.
Powerlevelwill appearinthedisplayfor3 secondsbefore
returningto thecurrenttiming.
Powerlevelcanbechangedduringcooking,whiletheoven
is operating.Press POWER thenenterthepower level.
PressPOWERtwicetocookat fullpower(HI).
-21-
HOW TO SPEED DEFROST
SPEED DEFROST SPEED DEFROST THEN COOK
This setting isdesigned to defrost foods quickly andconven- Itis possible to program a speed defrost operation followed
iently with a minimum of handling. To defrost meat, poultry or immediately by a cooking operation by using the 2-stage
seafood, refer to CODE PROGRAM - Defrost by Weight on cooking feature. (Note: You can cook using both stage-1
page30. and stage-2 or cooking using only stage-1).
To set speed defrost: To set speed defrost:
1. Press SPEED DEFROST. 1. Press SPEED DEFROST.
2. Enter defrost time. 2. Enter defrost time.
3. Press START/STOP tobegin
defrosting.
STAGE-1
SPEEDDEFROST WITH HOLD TIME3. Press COOK for stage-1.
It is possible to program a defrost operation with standing 4. Enter cook time.
time at the end of defrosting. 5. Enter power level if desired.
To set:
STAGE-l: SPEED DEFROST STAGE-2
1. Press SPEED DEFROST. 6. Press COOK for stage-2.
7. Enter cook time.
2. Enter defrost time. 8. Select power level if desired.
9. Press START/STOP.
STAGE-2: HOLD for standing time
3. Press COOK.
4.Enter standing time.
5. Press POWER.
6. Enter "0" power.
7. Press START/STOP. The oven will automatically defrost then cook attwo different
levels of power. 2 beeps will signal when the oven changes
from onestage to another. 4 beeps signal the end of cooking.
The oven will defrost for the time you enter and thenwill
automatically hold the food for the standing time you en-
tered, 4 beeps will signal the end of defrosting. Fan and light
will remain on for both the defrost and hold operations.
-22-
CODE PROGRAMS
CODE PROGRAMS
ThefourCODE programs helptotake the guessworkoutof Yourovenwillfeature uptofour CODE programs.They are:
selectingtimings and power levels for a variety of foods.
Several CODES have been preset by the manufacturer to
defrost, cook or heat foods that are most commonly pre-
paredin a microwaveoven.Eachcode haspreprogrammed
cooking times and power levels for a specific food. All you
haveto doisselectthecode andentertheweight or amount
of thefood.
When using CODE programs, itis very important that you
enterthecorrectinformation. Cookingtime and power level
are determined bythe weight oramount you enterfor each
code.
-23-

Other Whirlpool Microwave Oven manuals

Whirlpool MH6141XK User manual

Whirlpool

Whirlpool MH6141XK User manual

Whirlpool Cook30 User manual

Whirlpool

Whirlpool Cook30 User manual

Whirlpool GH4155XPQ User manual

Whirlpool

Whirlpool GH4155XPQ User manual

Whirlpool WOC75EC0HV00 User manual

Whirlpool

Whirlpool WOC75EC0HV00 User manual

Whirlpool MH61lqXB User manual

Whirlpool

Whirlpool MH61lqXB User manual

Whirlpool AMW 497 Operating and maintenance manual

Whirlpool

Whirlpool AMW 497 Operating and maintenance manual

Whirlpool MT 242 WH User manual

Whirlpool

Whirlpool MT 242 WH User manual

Whirlpool MT1071SG User manual

Whirlpool

Whirlpool MT1071SG User manual

Whirlpool FT 381 User manual

Whirlpool

Whirlpool FT 381 User manual

Whirlpool MT4155SPB1 User manual

Whirlpool

Whirlpool MT4155SPB1 User manual

Whirlpool MH3184XPB5 User manual

Whirlpool

Whirlpool MH3184XPB5 User manual

Whirlpool W10918338A User manual

Whirlpool

Whirlpool W10918338A User manual

Whirlpool MWF 863 User manual

Whirlpool

Whirlpool MWF 863 User manual

Whirlpool JQ 280/IX/AU User manual

Whirlpool

Whirlpool JQ 280/IX/AU User manual

Whirlpool RM955PXP User manual

Whirlpool

Whirlpool RM955PXP User manual

Whirlpool MB7120XY User manual

Whirlpool

Whirlpool MB7120XY User manual

Whirlpool VT 265 User manual

Whirlpool

Whirlpool VT 265 User manual

Whirlpool MAX 34 User manual

Whirlpool

Whirlpool MAX 34 User manual

Whirlpool MT8066SE User manual

Whirlpool

Whirlpool MT8066SE User manual

Whirlpool WOC54EC7HW User manual

Whirlpool

Whirlpool WOC54EC7HW User manual

Whirlpool GSC309PVS - 30in Built-in Microwave Combination Double Wall... User manual

Whirlpool

Whirlpool GSC309PVS - 30in Built-in Microwave Combination Double Wall... User manual

Whirlpool AMW 842 Operating and maintenance manual

Whirlpool

Whirlpool AMW 842 Operating and maintenance manual

Whirlpool VT 265 User manual

Whirlpool

Whirlpool VT 265 User manual

Whirlpool MT2070XAB User manual

Whirlpool

Whirlpool MT2070XAB User manual

Popular Microwave Oven manuals by other brands

Haier QVM7167 installation instructions

Haier

Haier QVM7167 installation instructions

Sears 721.88512900 manual 

Sears

Sears 721.88512900 manual 

Toshiba MM-MM20P instruction manual

Toshiba

Toshiba MM-MM20P instruction manual

DAEWOO ELECTRONICS KOC-9Q0T7S Service manual

DAEWOO ELECTRONICS

DAEWOO ELECTRONICS KOC-9Q0T7S Service manual

TriStar MW-2890 user manual

TriStar

TriStar MW-2890 user manual

Perfect Aire 1PMW07 user manual

Perfect Aire

Perfect Aire 1PMW07 user manual

Magic Chef MCD770CW user manual

Magic Chef

Magic Chef MCD770CW user manual

Perfect Aire 1PMWSP14 user manual

Perfect Aire

Perfect Aire 1PMWSP14 user manual

Welbilt 32Z3933 Installation and user manual

Welbilt

Welbilt 32Z3933 Installation and user manual

Bluesky BMG900ESL23 user manual

Bluesky

Bluesky BMG900ESL23 user manual

H.Koenig VIO34 instruction manual

H.Koenig

H.Koenig VIO34 instruction manual

Magic Chef MCM1290A user manual

Magic Chef

Magic Chef MCM1290A user manual

Magic Chef MCD991ARS user manual

Magic Chef

Magic Chef MCD991ARS user manual

Teka MM 20 AG instruction manual

Teka

Teka MM 20 AG instruction manual

Magic Chef MCO1610WF user manual

Magic Chef

Magic Chef MCO1610WF user manual

Junker JG4119260 User manual and installation instructions

Junker

Junker JG4119260 User manual and installation instructions

Magic Chef HMM1611ST user manual

Magic Chef

Magic Chef HMM1611ST user manual

BLUE STONE MOB-7755 user manual

BLUE STONE

BLUE STONE MOB-7755 user manual

manuals.online logo
manuals.online logoBrands
  • About & Mission
  • Contact us
  • Privacy Policy
  • Terms and Conditions

Copyright 2025 Manuals.Online. All Rights Reserved.