manuals.online logo
Brands
  1. Home
  2. •
  3. Brands
  4. •
  5. Whirlpool
  6. •
  7. Ventilation Hood
  8. •
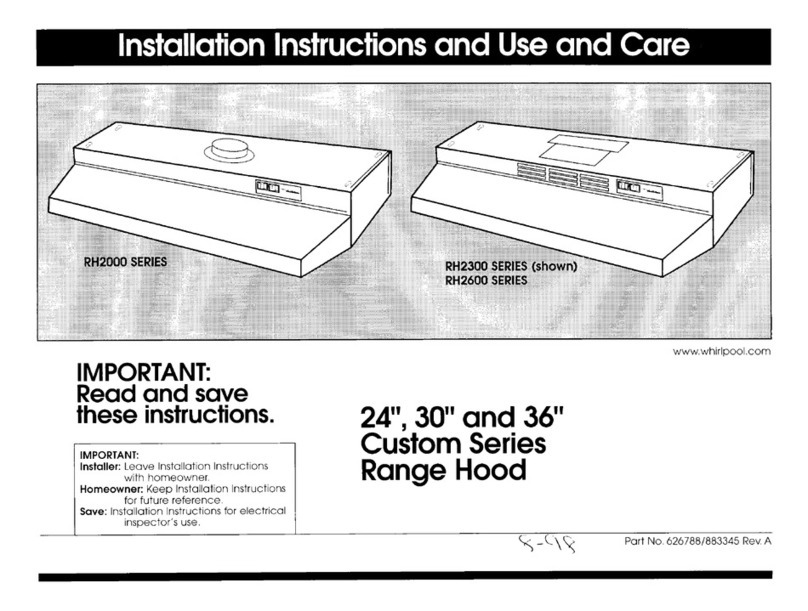
  9. Whirlpool RHH 4300 SERIES User manual

Whirlpool RHH 4300 SERIES User manual

INSTALLATION
and
OPERATING INSTRUCTIONS
f
or
whirlpool
CONVERTIBLE RANGE HOOD
RHH 4300 SERIES
INSTALLATION INSTRUCTIONS
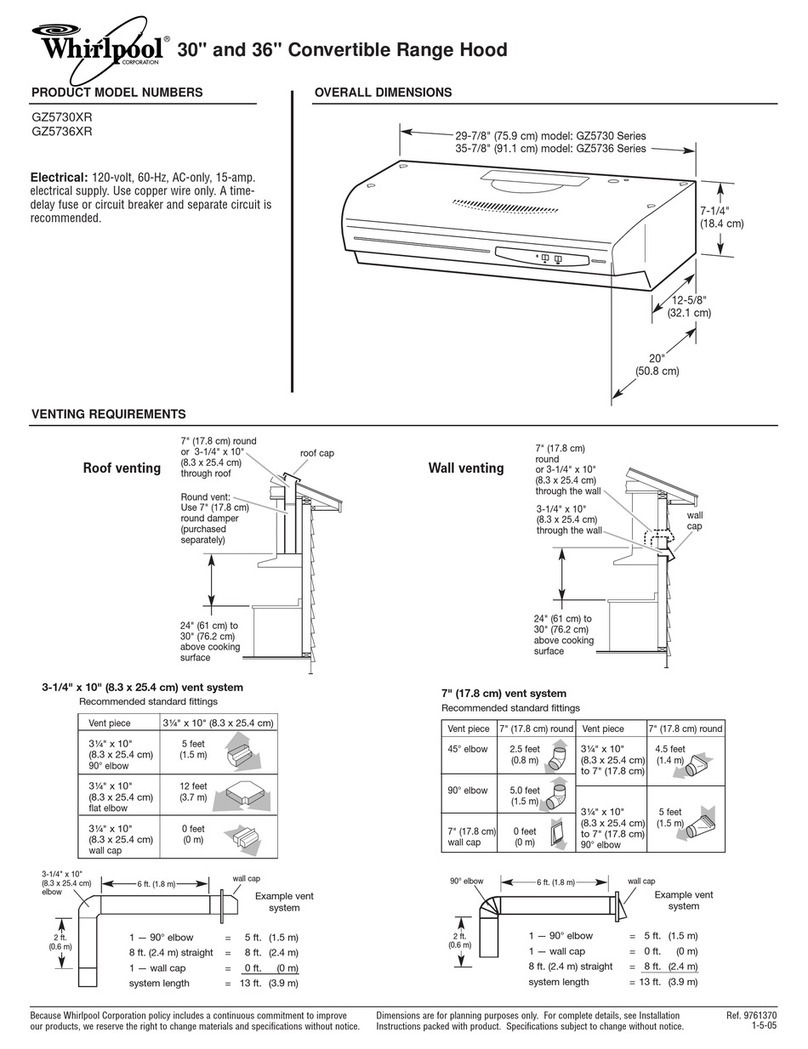
Your range hood has been designed to filter out smoke,
odors and grease which rise from the cooking surface.
Before you begin the installation be sure that all parts and
accessories are removed from carton. For best results and
ease in the installation of this range hood, read the
TO INSTALL RANGE HOOD
YOUR HOOD CAN BE INSTALLED VENTLESS WHERE AIR IS
CIRCULATED BACK INTO THE ROOM THROUGH THE
FILTER OR VENTED WHERE AIR IS TAKEN OUT OF YOUR
KITCHEN. For most efficient operation, top of hood should be
approximately 66 inches (137.6 cm) from the floor.
1.
2.
3.
4.
5.
6.
For vented applications, see Figures 4, 5, and 6. Typical
vented installations are shown for the 7” Round Vertical,
3% x 10 Vertical, and the 3% x 10 Horizontal Discharge
respectively. Choose the best method for your installation.
Mark locations on cabinet or wall for ventilating duct and
electrical wiring from dimensions given in Figure 1.
Cut holes at marked locations to accomodate ventilating
duct and electrrcal wiring. Allow %” (1.91 cm) extra on
ventilating opening toward the front of cabinet directly
above the hood. Be sure to minimize openings through
outside walls or the ceiling. These will have to be sealed
later. Figure 2 shows cabinet cutouts for the 3% x 10
Vertical Venting.
Run wire through wall or cabinets according to the
National Electrrcal Code and applicable local codes.
DO
NOT
turn power on until installation is complete.
Remove screws holdrng junction box cover. See Figure 6.
Lift the hood into posrtion and mark the hole locations on
the cabinet for each of the four keyhole mounting slots.
KEYHOLE SLOT
IN CANOPY
FIG. 3
instructions sheet to become familar with the step by step
installation.
TOOLS REQUIRED FOR INSTALLATION OF HOOD:
A
standard slot head screw driver, punch or ice pick, drill
with X-inch bit, keyhole saw and a ruler or tape measure.
KNOCKOUT FOR 7” (15.8 CM)
ROUND VENTING 7 x
REAR OF HOOD
&,R,NG KNOCKOUTS
FIG. 1
A
CABINET CUTOUTS
LSTARTER HOLES
FIG. 2
SCREW\
(IN INSTALLATION
PARTS BAG)
7.
8.
9.
10.
11.
12.
13
14.
LOCATE AS FAR
FROM HOOD AS
POSSIBLE
FIG. 4
YRAIN CAP
‘ER
IF RAIN CAP HAS
A DAMPER, REMOVE
DAMPER BLADE
FROM HOOD.
VERTICAL VENTING
7” ROUND
FIG. 5
Remove the hood and start all four screws in the center of
the narrow neck of the keynole slot marked on the cabinet
bottom. See Figure 3.
Remove proper venting knockout. If 7” (17.8 cm) round
vertical venting, entire top knockout including rectangular
portion must be removed The best performance from your
hood, with most air taken from the kitchen and when the
hood is most quiet, comes when you top vent with 7” round
duct pipe as shown in Figure 4.
FOR RECTANGULAR VENTING: There are predrilled
holes on hood so you can attach damper to hood with
small sheet metal screws included.
Install proper ductwork. For round vented installations, a
round damper should be placed in the ductwork to prevent
air infiltration.
Lift the hood into position simultaneously feeding the
electrical wire through the knockout.
Tighten four mounting screws to secure hood to cabinet.
Be sure the screw heads are in the narrow neck of the
keyhole slot.
Complete electrical wiring in the junction box according
to the National Electrical Code and applicable local codes,
Replace junction box cover
Seal holes around ventilating pipe and wiring passing
through ceiling or outside wall with caulking or insulation
to prevent heat loss.
FOR VENTLESS
INSTALLATION
1. To convert your range hood to ventless, remove the
discharge grill shown in Figure 7 by pulling with fingers.
Remove the metal back seal from behind the louver.
2. Replace discharge grill and secure with plastic rivets by
pushing with thumb.
3. Follow instructions under “Vented Installations” for wiring
and mounting. .Omit ductwork preparations.
4. Install charcoal filter from ventless kit
behind aluminum
filter.
(See Figure 8).
VERTICAL VENTING
~~‘x IO” RECTANGULAR
IF RAIN CAP HASIF RAIN CAP HAS
A DAMPER, REMOVEA DAMPER, REMOVE
DAMPER
BLADEDAMPER BLADE
FROM HOOD.FROM HOOD.
FIG. 6
HORIZONTAL VENTINGHORIZONTAL VENTING
rDlSCHARGE GRILLrDlSCHARGE GRILL
FIG. 7
LIGHT LENS \
JUNCTION BOX
COVER
-CHARCOAL
ALUMINUM
IMPORTANT SAFEGUARDS FOR
ELECTRICAL APPLIANCES
When using electrical appliances, basic safety precautions
should always be followed including the following:
1. Read and follow all instructions
2. Close supervision is necessary when any appliance is used
by or near children.
3. To avoid providing fuel for a grease pan fire clean lint and
grease from all hood surfaces- interior and exterior. Besure
to remove and clean air filter every three months.
4. Do not saturate electrical connections, switches, and motor
in water during cleaning. remember, WATER AND
ELECTRICITY DO NOT MIX!
5. If any electrical malfunction becomes evident during use,
disconnect power to hood at your home fuse or breaker
box.
FILTER
FILTER
FIG. 8
OPERATION AND CARE OF UNIT
CARE OF FILTERS:
ALUMINUM FILTER: For greater efficiency, the permanent
type aluminum filter should be removed and cleaned
periodically.
To clean, the filter should be soaked in hot water and detergent,
and thoroughly rinsed. The aluminum filter can be cleaned in a
dishwasher.
CHARCOAL FILTER: This filter should be inspected
periodically and when it becomes saturated, should be
replaced. There are no effective means of reactivating charcoal
filters.
LIGHTS:
Do not use bulb larger than 75 watts in light socket.
CARE OF FAN MOTOR:
Fan motor has life time sealed bearings that never need oiling
under normal usage. A few drops on each bearing after three
years of heavy usage will prolong the motor life, Clean motor
with a damp cloth and grease cutting detergent when a heavy
coating of grease has accumulated.
CARE OF EXTERIOR SURFACES:
Your range hood is a beautifully finished addition to your
kitchen and requires only the care you give your range to
preserve its lasting beauty. Clean with a mild detergent to
preserve finish. DO NOT use abrasive cleaners.
TOWARD CEN
TO REMOVE
PRESS IN TOWARDCENTER
AND OUT TO REMOVE LIGHT
LENS. CLEAN WITH WATER
AND MILD DETERGENT.
FIG. 9
TER
Whirlpool franchised TECH-CARE I service
If your WHIRLPOOL
appliance ever needs servlceanywhere
In the United States, help IS just a phone call away. .to your
nearest TECH-CARE service representative.
WhIrlpool malntalns a natIonwIde network of franchised
TECH-CARE
service companies to fulfill your warranty and
provide after-warranty service and maintenance to keep your
WHIRLPOOL
appliance in peak condition.
You’ll find your nearest TECH-CARE servicecompany listed
In your local telephone book Yellow Pages under
Washers/Dryers-RepaIrIng or Servicing. Should you not find a
listing. dial free, the Whirlpool COOL-LINE” service assistance
telephone number (800)253-1301 When calling from
Mtchigan Dial (800) 632-2243
Alaska & Hawaii Dial (800) 253-l 121
If you move.
Call the TECH-CARE service representative in your local
area He’ll see to the installation of WHIRLPOOL appliances in
your new home. promptly. expertly and fairly priced to you
Helpful hints.
You can help your TECH-CARE service representative give
you faster service If you Include the model and serial number of
your
appliance
when requestrng service. Also, retain your sales
slip and warranty to verify your warranty status.
Remember. ,
Your TECH-CARE service representative
IS
specially tralned
In the expert repaIrIng and servlclng of your WHIRLPOOL
appliances. He can help you malntaln the quality orIgInally built
Into your WHIRLPOOL appliance So why not takethetlme, now,
to look up his telephone number and lot iI down In the space
orovldeti below
My TECH-CARE service representative’s telephone number is:
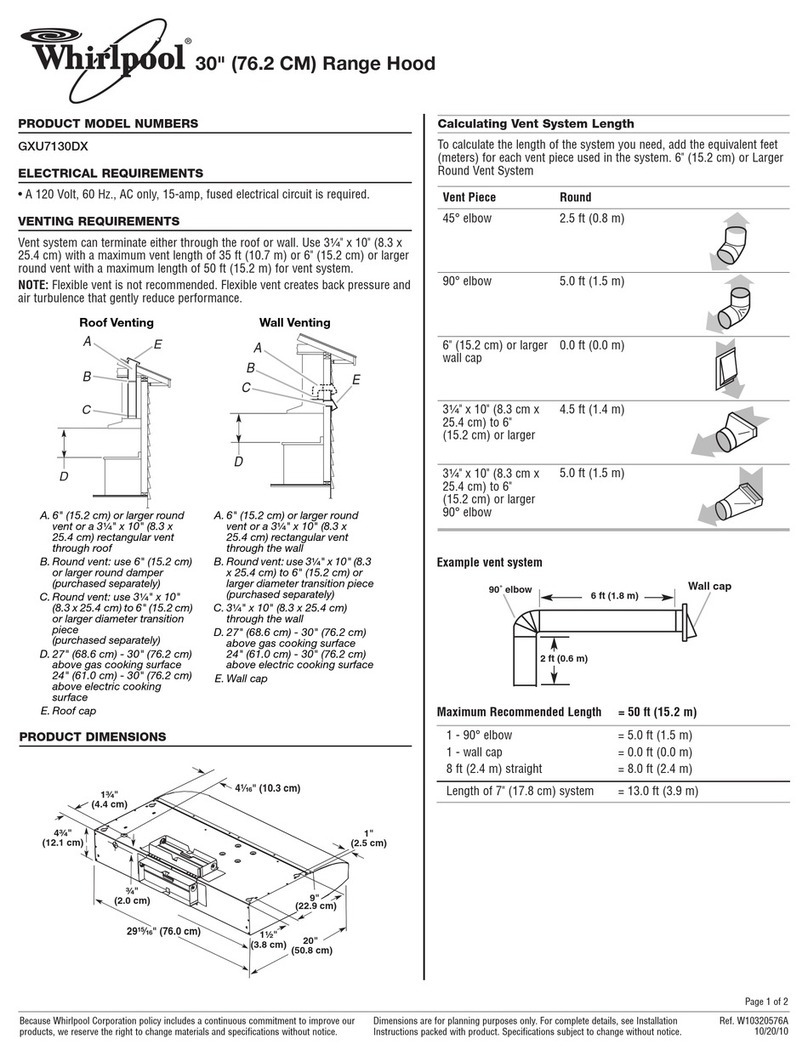
Range hood model number:
Range hood serial number.
Purchase and/or lnstallatlon date,
TLirlpool
CORPORATION
Benton Harbor, Mlchlgan Automatic Washers.
Clothes Dryers, Freezers, Refrigerator-Freezers.
Ice Makers. DIshwashers, Built-ln Ovens and
Surface Umts. Ranges. Microwave Ovens. Food
Waste Disposers, Compactors, Room Atr
Condltloners. Dehumldlfters, CentralHeatlngand
Air Conditioning Systems
A625-772
P/N830723 7-20-79

Other Whirlpool Ventilation Hood manuals

Whirlpool UXT4136AD Product information sheet

Whirlpool

Whirlpool UXT4136AD Product information sheet

Whirlpool RH8930XLS User manual

Whirlpool

Whirlpool RH8930XLS User manual

Whirlpool 4324076 User manual

Whirlpool

Whirlpool 4324076 User manual

Whirlpool AKR 551 JA Operating instructions

Whirlpool

Whirlpool AKR 551 JA Operating instructions

Whirlpool AKR 520 Assembly instructions

Whirlpool

Whirlpool AKR 520 Assembly instructions

Whirlpool AKR 806 IX AKR 806 IX Manual

Whirlpool

Whirlpool AKR 806 IX AKR 806 IX Manual

Whirlpool Build-in 30 inch Product information sheet

Whirlpool

Whirlpool Build-in 30 inch Product information sheet

Whirlpool UXT4230ADW0 Product information sheet

Whirlpool

Whirlpool UXT4230ADW0 Product information sheet

Whirlpool UXI0600DYS Parts list manual

Whirlpool

Whirlpool UXI0600DYS Parts list manual

Whirlpool AKR 890 IX User manual

Whirlpool

Whirlpool AKR 890 IX User manual

Whirlpool UXT5230BDS User manual

Whirlpool

Whirlpool UXT5230BDS User manual

Whirlpool UXT4236ADS Product information sheet

Whirlpool

Whirlpool UXT4236ADS Product information sheet

Whirlpool RH2300XL-2 SERIES User manual

Whirlpool

Whirlpool RH2300XL-2 SERIES User manual

Whirlpool RS675PXGB0 User manual

Whirlpool

Whirlpool RS675PXGB0 User manual

Whirlpool AKR601UMIX User manual

Whirlpool

Whirlpool AKR601UMIX User manual

Whirlpool HC338 Installation guide

Whirlpool

Whirlpool HC338 Installation guide

Whirlpool UXT3030AYW0 Product information sheet

Whirlpool

Whirlpool UXT3030AYW0 Product information sheet

Whirlpool AKR 526 IX User manual

Whirlpool

Whirlpool AKR 526 IX User manual

Whirlpool GXW7230DAS Product information sheet

Whirlpool

Whirlpool GXW7230DAS Product information sheet

Whirlpool AKR640IX User manual

Whirlpool

Whirlpool AKR640IX User manual

Whirlpool AKR 809 MR AKR 809 MR User manual

Whirlpool

Whirlpool AKR 809 MR AKR 809 MR User manual

Whirlpool Amana UXW7324BSS User manual

Whirlpool

Whirlpool Amana UXW7324BSS User manual

Whirlpool UXD8630DY Parts list manual

Whirlpool

Whirlpool UXD8630DY Parts list manual

Whirlpool AKR 758 UK IXL Operating instructions

Whirlpool

Whirlpool AKR 758 UK IXL Operating instructions

Popular Ventilation Hood manuals by other brands

THERMEx palermo vertical 810 instructions

THERMEx

THERMEx palermo vertical 810 instructions

Wolf PW662718 Planning information

Wolf

Wolf PW662718 Planning information

Aria QR062 owner's manual

Aria

Aria QR062 owner's manual

Zephyr Tempest II AK7536ASX Use, care and installation guide

Zephyr

Zephyr Tempest II AK7536ASX Use, care and installation guide

Electrolux EI30HI55K Factory parts catalog

Electrolux

Electrolux EI30HI55K Factory parts catalog

ELICA LIB0099060A Use, care and installation guide

ELICA

ELICA LIB0099060A Use, care and installation guide

NEFF D 96E2 N0 Operating and installation instructions

NEFF

NEFF D 96E2 N0 Operating and installation instructions

Grundig GEDD 5481 XB User instructions

Grundig

Grundig GEDD 5481 XB User instructions

ZANKER KHB 62650 XA user manual

ZANKER

ZANKER KHB 62650 XA user manual

Lamona LAM2377 User instructions

Lamona

Lamona LAM2377 User instructions

Smeg HOBD682R1 manual

Smeg

Smeg HOBD682R1 manual

NEFF D5625 installation instructions

NEFF

NEFF D5625 installation instructions

NEFF DUL63CC40 instruction manual

NEFF

NEFF DUL63CC40 instruction manual

STOVES S1100 User & installation instructions

STOVES

STOVES S1100 User & installation instructions

Broan QL100 Series installation instructions

Broan

Broan QL100 Series installation instructions

Beco CFB 6437 WHA user manual

Beco

Beco CFB 6437 WHA user manual

KitchenAid KHTU105L Dimension Guide

KitchenAid

KitchenAid KHTU105L Dimension Guide

Bosch DWJ81AN60 User manual and installation instructions

Bosch

Bosch DWJ81AN60 User manual and installation instructions

manuals.online logo
manuals.online logoBrands
  • About & Mission
  • Contact us
  • Privacy Policy
  • Terms and Conditions

Copyright 2025 Manuals.Online. All Rights Reserved.