manuals.online logo
Brands
  1. Home
  2. •
  3. Brands
  4. •
  5. Whirlpool
  6. •
  7. Washer
  8. •
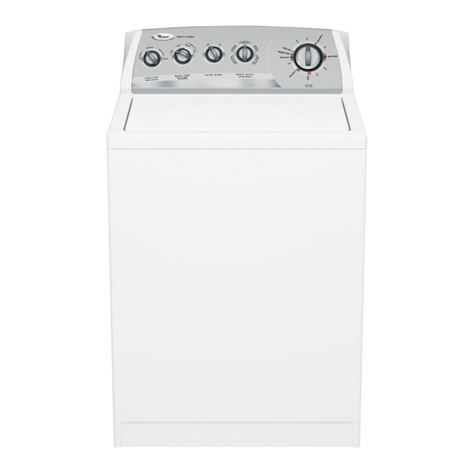
  9. Whirlpool CWC22 User manual

Whirlpool CWC22 User manual

USER’S MANUAL
USER’S MANUAL
AUTOMATIC WASHER
Programming your washer is quite simple, just follow the steps bellow:
LOADING THE CLOTHES
UNDERSTANDING THE WASH
PROGRAMS
CLEANING THE WASHER
EXAMPLES OF CLOTHES LOADS FOR WATER
LEVEL SELECTION
FILLING THE DISPENSERS
4
4
1
1Place the clothes in the
basket in an uniform way,
surrounding the agitator.
BLEACH
Carefully fill the proper dispenser
with bleach, according to the amount
recommended by the manufacturer.
Attention must be paid to avoid spilling the
product directly on the clothes placed in the
basket. Use bleach for white clothes. For
the color ones, use special no chlorine bleach.
Optional use.
2
2Put the
in the drawer
and and
, if desired, in
the proper dispensers
(as indicated in the figure).
POWDER
DETERGENT
BLEACH
SOFTENER
Press the
key to select the
wash in accordance
to type of clothing
and/ or soil level.
PROGRAM
SELECTION
3
3Press the button
once to fill the Washer with water
and start the washing process.
To interrupt washing,press the
same key once more.
START/OFF
5
5
Your Washer has 2 levels
of water: High and Medium.
the light is off
the light is on
To wash small amounts of
clothing, press the
key and the
corresponding light will be lit.
HIGH LEVEL:
MEDIUM LEVEL:
MEDIUM
WATER LEVEL
LOADING THE CLOTHES
UNDERSTANDING THE WASH
PROGRAMS
CLEANING THE WASHER
FILLING THE DISPENSERS
POWDER DETERGENT
For : fill the
whole drawer with detergent powder.
HIGH WATER LEVEL For or
DELICATE WASH: use only half
amount of soap.
MEDIUM WATER LEVEL
HIGH WATER
LEVEL
MEDIUM WATER
LEVEL
PROGRAMS SOIL LEVEL WASHING STEPS APROXIMATE TIME
Super washing (with soak) High 1hour and 35 min.
Medium level of water
Bed sheets
* (towel, face towel and mat)
Up to 1 double set
(2 double sheets,
2 pillowcases)+1 single set
HINTS
During the wash, you can advance the programs:
SOAK , WASH , DOUBLE RINSE , SPIN ;
by pressing the PROGRAM SELECTION button,
the light will indicate the new step.
Every time the lid is open, the wash will stop and the
light on the panel will blink until the lid is closed
again.
For your safety and the perfect functioning of the
Washer, when the lid is open, never insert any
object in the safety lock opening.
At the end of the wash, the Washer will turn off
automatically.
Please also refer to the label located inside your
Washer lid, for a quick reference guide for your
waher.
Every 2 months, put ½ liter of bleach directly in
the basket. Close the lid and press the
START / OFF key once.
1. Pull the softener dispenser, by holding it
from the bottom, detaching it from the
agitator.
2. Separate the parts of the dispenser set.
3. Wash the drawer with running water and a sponge
and then dry it.
4. Clean the drawer compartment with a damp cloth.
5. Place the drawer in the compartment by tilting it
upwards, in order to locate it correctly in the
compartment.
To clean the window in the lid, use a neutral soap,
applied with a soft cloth or flannel.
Up to 3 single sets
Up to 2 baths sets*
Up to 4 tablecloths
Jeans + 3 shorts
up to 5 jeans, or 4
Up to 10 shirts or
14 undershirts
Up to 3 adult pieces Up to 5 adult pieces
Up to 14 shirts or
18 undershirts
Jeans + 3 shorts
Up to 6 tablecloths
Up to 3 bath sets*
Bathroom
clothes
Table - linen
Jeans
Shirts
Sports
breeches &
jacket
High level of water
48 min.
36 min.
36 min.
5 min.
Normal
Light
Regular washing
Fast washing
Double rinse
Spin
2 rinse +spin
wash +1 rinse +spin
wash +2 rinse +spin
soak +wash +2 rinse +spin
EXAMPLES OF CLOTHES LOADS FOR WATER
LEVEL SELECTION
INTERNAL CLEANING OF
THE WASHER
CLEANING THE DISPENSERS
AND FILTER (Clean the containers weekly or
when necessary).
CLEANING THE DISPENSERS AND FILTER:
CLEANING THE SOFTENER DISPENSER AND FILTER:
EXTERNAL WASHER CLEANING
Let the Washer do the Complete Washing, with
the HighWater Level. This way you garantee that
the whole amount of bleach is removed from the
Washer.
CAUTION
Do not use alcohol, glass cleaner, removers, or
abrasives on Washer.
Do not use water jets when cleaning your Washer,
to avoid damage of the electrical components.
CAUTION
3. Wash every part separately and the
center of the agitator with water
and a sponge.
4. Released the filter pushing the locker
and wash with current water.
5. Assemble the parts of the
dispenser / filter set.
6. Put the dispenser / filter set in the
center of the agitator again, until
it snaps into place.
SOFTENER FILL
Supply the dispenser in agitator center with softener, using the amount recommended
by the manufacturer. Some softeners are very thick and could let residues in the
dispenser. In this case, dilute the softener with water before adding to the dispenser.
Use softener is optional.
1. Pull the soap drawer until
it stops and locks.
2. Lift the drawer in order to
unlock and remove it from
its compartment.
CWC22
CompletaCompleta
WashWash
WashWash
Double
Rinse
Double
Rinse
Double
Rinse
Double
Rinse
SoakSoak
SoakSoak
SuperSuper
SpinSpin
SpinSpin
PROGRAM
SELECTION
PROGRAM
SELECTION
PROGRAM
SELECTION
N
A
C
V
E
D
P
A
R
/
O
T
G
C
R
E
A
L
M
E
S
O
F
N
F
/
O
NormalNormal
RegularRegular
FastFast
M
L
E
E
D
V
I
E
U
L
M
R
W
E
A
T
HINT: Your Washer can
be
programmed by any
button.
Begin the program by
pressing PROGRAM
SELECTION or MEDIUM
WATER LEVEL button,
then
press the
START/PAUSE
button in order to fill
the
Washer and begin the
wash.
INSTALLATION MANUAL
INSTALLATION MANUAL
AUTOMATIC WASHER
We congratulate you for your choise. In order to certify the good performance of your Washer, and improve
its life please, follow these instructions.
CHECKING THE INSTALLATION REQUIREMENTS
INSTALLING THE WASHER
TURNING THE WASHER ON
CHECKING THE INSTALLATION REQUIREMENTS
INSTALLING THE WASHER
TURNING THE WASHER ON
Check the
supply
voltage
indicated
on the
label
attached to the
Washer’s power cord,
and see if the power
outlet that will be used
for the connection has
the same voltage(120V)
You must install your Washer:
In a location that is not exposed to
direct sunshine or rain.
Warranty and Autorized Service List.
On a flat, level surface, with
adequate support for all feet. This
will help to avoid vibration, noise
and leakage (see how to level your
Washer on iten 3).
2. Remove the bottom
packagingpiece by lifting
it by the side handles.
Never use the Washer
with the bottom packaging
piece under the machine,
as you may damage it.
47
inches
34
inches
Set the curve of the water outlet
rubber hose in the tank, or in a
exclusive draining tube .
Set the Washer in
its location,
installing it 10cm
away from the
wall, furniture, or
other objects.
In order to check if
your Washer is
adequately
laveled, fill it with
water up to the
MIDDLE LEVEL and
see if the water
surface is perfectly
aligned with the
basket holes.
Please note inside the threaded part the sealing washer
with filter-screen, which must be with the prominent side
of the filter-screen turned outwards.
Connect the hose on the tap, sufficiently tight to avoid
water leakage. Open the tap and ckeck if there is leakage in
either end and . In case that occurs, tighten again the
connections and .
Do not use plug adapters, extensio cords or improvised connections between the
Washer and the wall outlet. If there is more than one home appliance connected in
the same outlet, there is the risk of a surge and damage may occur to the products.
Ckeck if all the recommendations in the sections 1, 2 and 3 were followed.
Check if the tap and the shutoff valve are open.
Connect the Washer’s power cord to the power outlet.
4. Remove the film that
protects the control
panel.
Thermal cut-outs or
fuses are required for
the Washer protection.
ELETRIC REQUIREMENTS
INSTALL THE WATER OUTLET RUBBER HOSE
USE THE ADJUSTABLE FEET
TO LEVEL YOUR WASHER
INSTALL THE WATER INLET HOSE
LOCATION FOR INSTALLATION
CHECK THE ACESSORIES
The water pressure
needed filling the Washer
should correspond to a
level of 6ft to 260ft above
the tap (approximately
0,3 PSI to 11 PSI)
WATER REQUIREMENTS
ATENTION
IMPORTANT:
IMPORTANT:
IMPORTANT:
IMPORTANT:
If there are no
thermal cut-outs in
the power
distribution panel,
and a exclusive
tripolar power outlet
is not available, seek the aid of an
electrician to install them
(preferably in some place near the
Washer).
Never change the power cord or use it
differently from recommended. If
installation or repair is necessary, call
in an authorized service technician.
The curved end of the water outlet hose must be located between
34 inches and 47 inches. If below34 inches your Washer will not
reach the water level considered adequate for operation. If located
above 47 inches, the Washer will not be able to drain the water.
The filter-screen in that position prevents dirt present
in the water from blocking the filter. Occassionally, it may be
necessary to disconnect the hose from the tap and clean the
filter-screen with a brush and water.
Don’t conect the Washer hot water inlet to a water source
with temperature above 140F.
Your Washer was designer with
adjustable feet, which are useful
for the leveling and stability of
the product.
The wide diameter of the electric
network must conform to the following
table:
Distance
from panel
Gauge
99 to 164ft
6#AWG
120V
12#AWG
30ft to 39ft
10#AWG
40ft to 65ft
8#AWG
66 to 98ft
WATER CONSUPTION
GENERAL
Centrifugation (rpm)
750
WITHOUT PACKAGE WITH SHRINK PACKAGE
High Level Medium Level
Program
215 liters 149 liters
Super Wash
215 liters 149 liters
Regular Wash
175 liters 129 liters
Fast Wash
SIZE AND WEIGHT
22’’ 24’’
26’’
41’’
25’’
39’’
Width
Depth
Height with the lid closed
75 lbs
79 lbs
Weight
TECNICAL DATA
TECNICAL DATA
It is necessary to have
an exclusive tap for the
Washer water inlet .
The tap should be ¾ BSP
thread.
PREPARING THE WASHER FOR INSTALLATION
1. Remove the Washer from the
external packaging. Then
remove the internal
packaging piece and the
accessories bag which are
inside the Washer.
UNPACKING THE WASHER
3. Remove the plastic
protection from the
cabinet. Over time the
film will become more
difficult to remove, so
it is better to remove it
as you are installing
the washer.
Phases
Ground
Wire
120V
10A
A
A
A
B
C
C
D
D
A
B
C
D
tap
water outlet rubber hose
rubber hose for
water inlet
power
cord
Level the Washer
by turning its
rotary feet up or
down,until the surface
of casters is higher
than feet bottom
surface in order to
avoid vibrations.
CWD22
ELECTRIC FEATURES
Voltage Voltage
Range
Frequency Eletric
current
Maximum
power
Max. power
consumpition
127V
220V
106 to 132V
198 to 242V
60 Hz
60 Hz
7,3 A
3,9 A
700 W
690 W
219 W/h
213 W/h

Other Whirlpool Washer manuals

Whirlpool AWO 7120 User manual

Whirlpool

Whirlpool AWO 7120 User manual

Whirlpool FWEB8002 Series Installation guide

Whirlpool

Whirlpool FWEB8002 Series Installation guide

Whirlpool WTW4950HW User manual

Whirlpool

Whirlpool WTW4950HW User manual

Whirlpool AWO 9763 User manual

Whirlpool

Whirlpool AWO 9763 User manual

Whirlpool LSC8244EQ0 User manual

Whirlpool

Whirlpool LSC8244EQ0 User manual

Whirlpool 8182759 Assembly instructions

Whirlpool

Whirlpool 8182759 Assembly instructions

Whirlpool AWO/D 6928 - PROGRAM User manual

Whirlpool

Whirlpool AWO/D 6928 - PROGRAM User manual

Whirlpool LA609OXS User manual

Whirlpool

Whirlpool LA609OXS User manual

Whirlpool WWA-680 User manual

Whirlpool

Whirlpool WWA-680 User manual

Whirlpool WASHER User manual

Whirlpool

Whirlpool WASHER User manual

Whirlpool 3LWTW4815FW User manual

Whirlpool

Whirlpool 3LWTW4815FW User manual

Whirlpool LA6150XS User manual

Whirlpool

Whirlpool LA6150XS User manual

Whirlpool Cabrio 6AWTW5550XW User manual

Whirlpool

Whirlpool Cabrio 6AWTW5550XW User manual

Whirlpool 6LA6300xY User manual

Whirlpool

Whirlpool 6LA6300xY User manual

Whirlpool WTW4800XQ Assembly instructions

Whirlpool

Whirlpool WTW4800XQ Assembly instructions

Whirlpool AWT 8123 D - SERVICE User manual

Whirlpool

Whirlpool AWT 8123 D - SERVICE User manual

Whirlpool Cabrio WTW8700EC User manual

Whirlpool

Whirlpool Cabrio WTW8700EC User manual

Whirlpool AWO/D 3080 User manual

Whirlpool

Whirlpool AWO/D 3080 User manual

Whirlpool AWO/D 42115 User manual

Whirlpool

Whirlpool AWO/D 42115 User manual

Whirlpool WWDC 8220/1 User manual

Whirlpool

Whirlpool WWDC 8220/1 User manual

Whirlpool Gold GSX9885JQ0 User manual

Whirlpool

Whirlpool Gold GSX9885JQ0 User manual

Whirlpool AWM 6120 User manual

Whirlpool

Whirlpool AWM 6120 User manual

Whirlpool WRSB 7259 D EU User manual

Whirlpool

Whirlpool WRSB 7259 D EU User manual

Whirlpool CABRIO W10373816B User manual

Whirlpool

Whirlpool CABRIO W10373816B User manual

Popular Washer manuals by other brands

Ariston ALD 100 Instructions for installation and use

Ariston

Ariston ALD 100 Instructions for installation and use

LG F4J8VHP2SD owner's manual

LG

LG F4J8VHP2SD owner's manual

LG T2175VSPW owner's manual

LG

LG T2175VSPW owner's manual

Asko 20605 - quick start guide

Asko

Asko 20605 - quick start guide

Samsung SW50USP user manual

Samsung

Samsung SW50USP user manual

Alliance Laundry Systems LTS97A*N1500 operating instructions

Alliance Laundry Systems

Alliance Laundry Systems LTS97A*N1500 operating instructions

Kenmore Washer operating instructions

Kenmore

Kenmore Washer operating instructions

SERVIS WL612W user manual

SERVIS

SERVIS WL612W user manual

GE WBSR1060T owner's manual

GE

GE WBSR1060T owner's manual

Samsung WF431ABP user manual

Samsung

Samsung WF431ABP user manual

Nordmende WM1277WH user manual

Nordmende

Nordmende WM1277WH user manual

Smeg S 800 TL instruction manual

Smeg

Smeg S 800 TL instruction manual

Artusi AWM1712W Operation manual

Artusi

Artusi AWM1712W Operation manual

Sharp ES-HFB914AWA-IT user manual

Sharp

Sharp ES-HFB914AWA-IT user manual

Samsung WD18H7 SERIES user manual

Samsung

Samsung WD18H7 SERIES user manual

Ariston AQXL 109 Instruction booklet

Ariston

Ariston AQXL 109 Instruction booklet

Zanussi FL1022M Instructions for the use and care

Zanussi

Zanussi FL1022M Instructions for the use and care

AEG L6FBK947 user manual

AEG

AEG L6FBK947 user manual

manuals.online logo
manuals.online logoBrands
  • About & Mission
  • Contact us
  • Privacy Policy
  • Terms and Conditions

Copyright 2025 Manuals.Online. All Rights Reserved.