Multi Purpose Adjustable Charge Converter
USER’S MANUAL
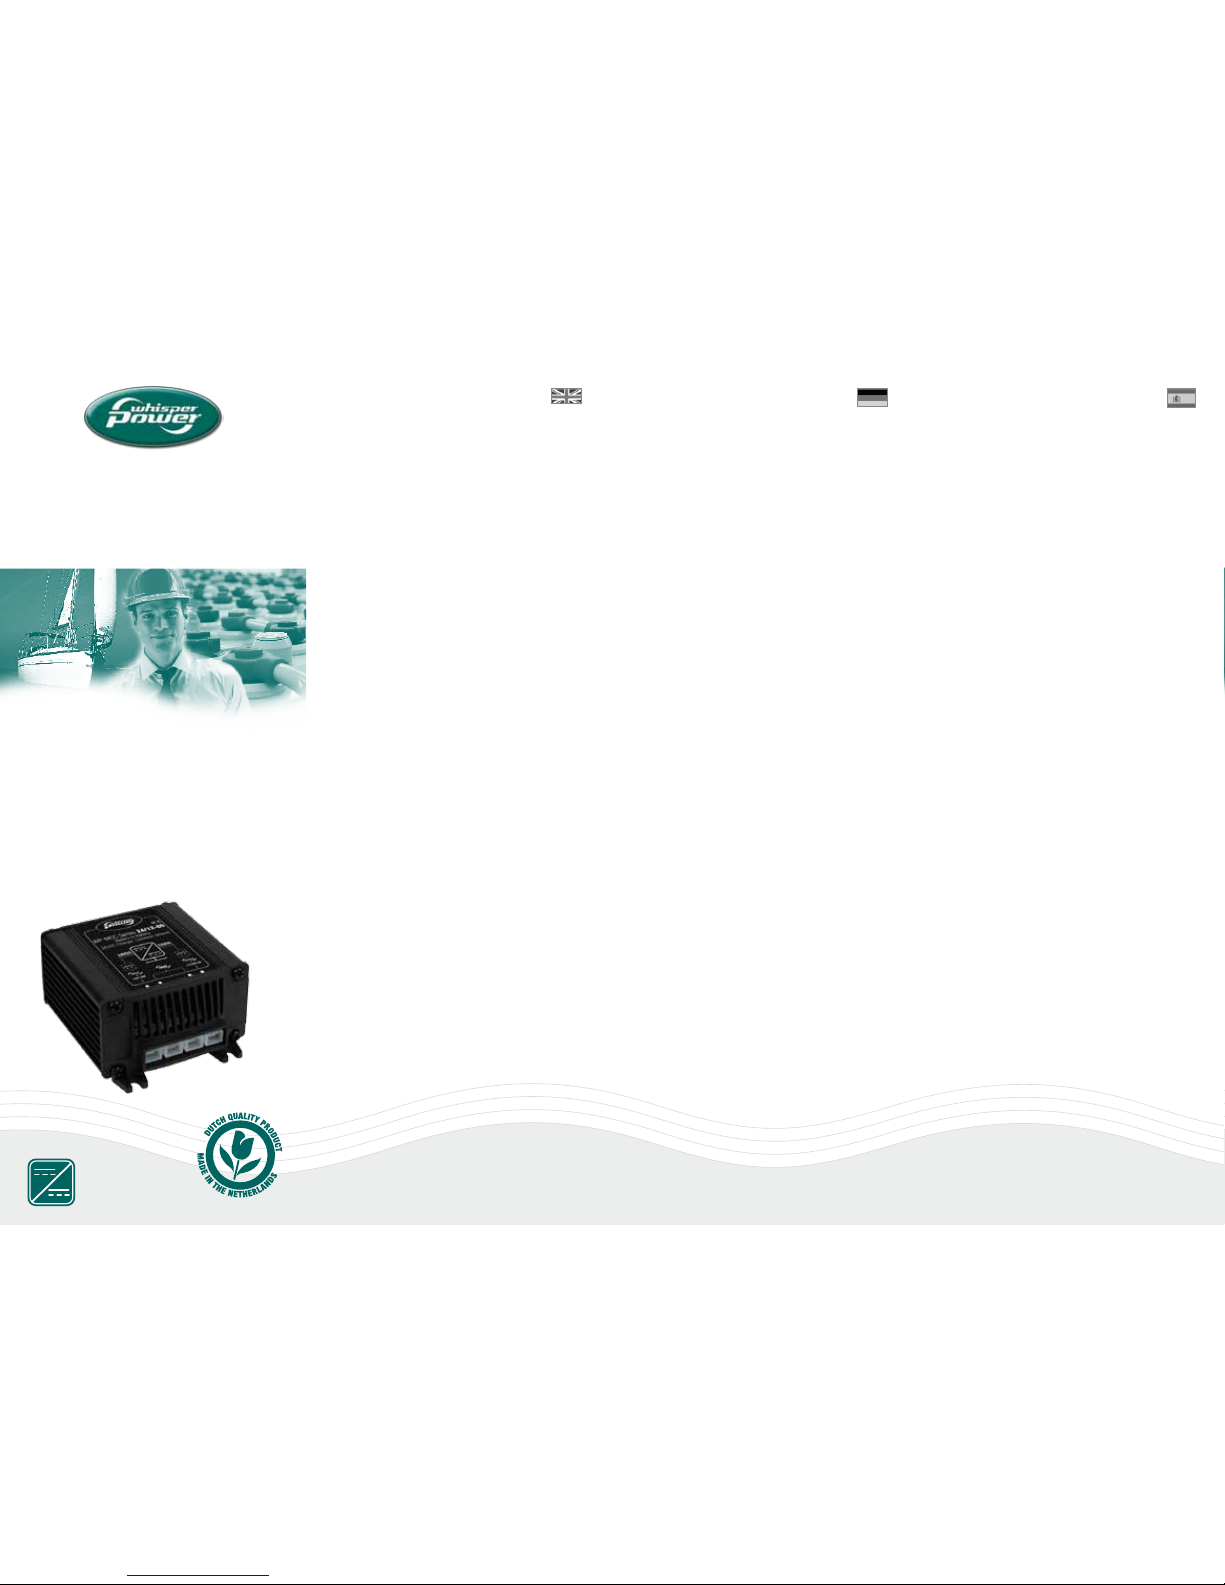
WP-MCC 24/12-05
ASSEMBLY
1. Select a cool, dry and ventilated position to install the
device which is not exposed to direct sunlight and where
the device can be assembled vertically or horizontally.
2. Isolate the power to the wiring before commencing
installation.
3.
Using the product as a template, mark the fixing positions.
4. Drill three holes ø4,5mm for the screws. Before you start,
ensure that any cables or other lines cannot be damaged
when drilling.
5. Attach the product.
6. Reconnect the power to the wiring.
THE CONNECTIONS
Isolate the circuit before you connect or disconnect the
device. Connect the unit as detailed in the drawing. (1) lnput
Positive, (2) Input Negative, (3) Output Negative, (4) Output
Positive
SAFETY
•Thedevicemustnotbeexposedtoseveremechanical
shocks.
•Thedevicemustnotbeexposedtoextremetemperature,
direct sunlight or vigorous vibration.
•Thedevicemayonlybeusedwithinadryenvironment,
such as a vehicle,
•Duringoperationtheunitcanbehottotouch.Therefore
it must be sited so that during operation it is not readily
accessible.
•Donotinstallthisdeviceonhotvehiclepartsandensure
there is sufficient space around the device for air circula-
tion and cooling.
•Theinputandoutputwiringmustbefusedappropriately.
•Observethemagnitudeandpolarityattheinput/output
voltage when installing. Incorrect polarity at the output
could damage the circuit.
•Isolatethecircuitbeforeyouconnectorremovethedevice.
•Ensurethattheoutputofthedeviceisnotshort-circuited.
•Neveropenthedevicecasingandneverrepairit,The
device must be replaced if it is damaged.
MONTAGE
1. Wählen Sie einen kühlen und gut belüfteten
Ort zur Installation, welcher nicht in direkter
Sonneneinstrahlung liegt und wo das Gerät horizontal
oder vertikal montiert werden kann.
2. Unterbrechen Sie die Stromversorgung zur Verkabelung
bevor Sie mit der Installation beginnen.
3. Benutzen Sie das Produkt als Schablone und
markieren Sie die Befestigungspositionen.
4. Bohren Sie die drei ø4.5mm Löcher für die Schrauben.
Stellen Sie sicher, dass keine bereits vorhandenen
Kabel beschädigt werden können.
5. Befestigen Sie das Produkt.
6. Schließen Sie die Stromversorgung wieder an.
ANSCHLüSSE
Unterbrechen Sie die Stromversorgung bevor Sie das
Gerät anschließen oder entfernen. Schließen Sie das
GerätwieinZeichnungan.(1)EingangPositiv,(2)Eingang
Negativ, (3) Ausgang Negativ, (4) Ausgang Positiv
SICHERHEIT
• DasGerätdarfnichtextremenmechanischenSchocks,
extremenTemperaturen,direkterSonneneinstrahlung
oder starken Vibrationen ausgesetzt werden und soll
nur in einer trockenen Umgebung installiert werden,
zum Beispiel in ein Fahrzeug.
• WährenddesBetriebskanndasGerätheißwerden,
daher sollte das Gerät so installiert werden, dass es
nicht einfach zugänglich ist.
• DasGerätnichtaufheißenFahrzeugteileninstallieren
und genügend Platz für Luftzirkulation und Kühlung
gewährleisten.
• DenKabelbaumdurchSicherungenschützen.
• DieStärkeundPolaritätdesAusgangssolltebeider
Installation beachtet werden. Fehlerhafte Polarität am
Ausgang könnte den Schaltkreis beschädigen.
• DenSchaltkreisisolierenbevordasGerät
ein- oder abmontiert wird.
• DerAusgangdesGerätesdarfnicht
kurzgeschlossen werden.
• SolltedasGerätdefektsein,mussesausgetauscht
werden. Das Öffnen des Gehäuses oder die Reparatur
des defekten Gerätes ist untersagt.
ENSAMBLAJE
1.Elijaunlugardemontajequenosoportealtas
temperaturasyestéventiladoquenoquedeexpuesto
directamentealaradiaciónsolaryenelqueelaparato
se pueda montar en posición vertical o en horizontal.
2. Cortar la corriente antes de comenzar la instalación
3. Utilizando el producto como plantilla, marcar las posi-
ciones de fijación.
4. Realice tres agujeros para los tornillos de ø4,5 mm,
Asegúresedequealperforarnosepuedadañarningún
cable ni ninguna otra línea.
5. Fije el producto de montaje con los tornillos.
6. Volver a conectar a la toma de corriente.
CONEXIONES:
Cortar la corriente antes de conectar o desconectar el
aparato. Conectar la unidad como se detalla a continuación.
(1)EntradaPositivo,(2)EntradaNegativo,(3)SalidaNega-
tivo, (4) Salida Positivo
SEGURIDAD
• Elaparatonodebequedarexpuestoafuertes
sacudidas mecánicas.
• Elaparatonodebequedarexpuestootemperaturas
extremas ni a una radiación directa del sol ni a intensas
vibraciones.
• Elaparatosólosepuedeponerenfuncionamientoenun
entorno seco, es decir, en el interior del vehículo.
• Duranteelfuncionamientolaunidadpuedeestarcali-
ente, por ello ha de situarse en un lugar de difícil acceso
durante su uso.
• Noloinstaleenpartescalientesdelvehículoypreste
atenciónaquehayasucienteespaciolibrealrededordel
aparato para permitir la circulación de aire y, con ello, la
refrigeración.
• Protegerlasconexionesconfusibles.
• Duranteelmontajepresteatenciónalvalorylapolaridad
de la tensión de solida. Una polaridad incorrecta o
sobretensión pueden perjudicar el circuito de corriente.
• Cortarlacorrienteantesdeconectarelaparatoode
desmontarlo.
• Asegúresedequelasalidadelaparatono
esté cortocircuitada.
• Noestápermitidoabrirnirepararelaparato.
Encasodeavería,deberácambiarse.
Batterycharger function DC/DCConverter
12V / 5A slavecharger