Wi Digital Systems AudioStream EL User manual

STEREO
DIGITAL WIRELES
TM
TM
Wi AudioStream EL
Pocket Portable Digital Wireless System
USER GUIDE
TM

Thank You For Choosing the Wi AudioStream EL Pocket Portable Stereo Digital Wireless System.
Congratulations on your purchase of the Wi AudioStream EL Pocket Portable Wireless MIC and Monitoring System.
Please thoroughly read this User’s Manual for all the feature operation information necessary to install and operate
your new Wi AudioStream EL system.
For additional support, please visit www.jangusmusic.com
Wi AudioStream EL
CONGRATULATIONS

PACKING LIST
What is included in the package?
Verify that you have received all of the items listed below.
Wi AudioStream EL
3
MIC Windscreen
Wi Sure-Fit™ EL Earset
Wi Simple-Twist™
Detachable Earset Cable
Wi Simple-Twist™
Detachable Lavalier Cable
Rubber Instrument MIC Clip
Earset/Lavalier Cable Clip
Wi Transmitter Wi Receiver
Universal
AC Charger
1/8” to 1/8” TRS Stereo
Cable & 1/4” Adapter
1/4” Stereo Male to 1/8”
Stereo Male Y-split Cable
USB Y-Split
Power Cable
Hard Shell
Carrying Case
1/8” TRS Adapter

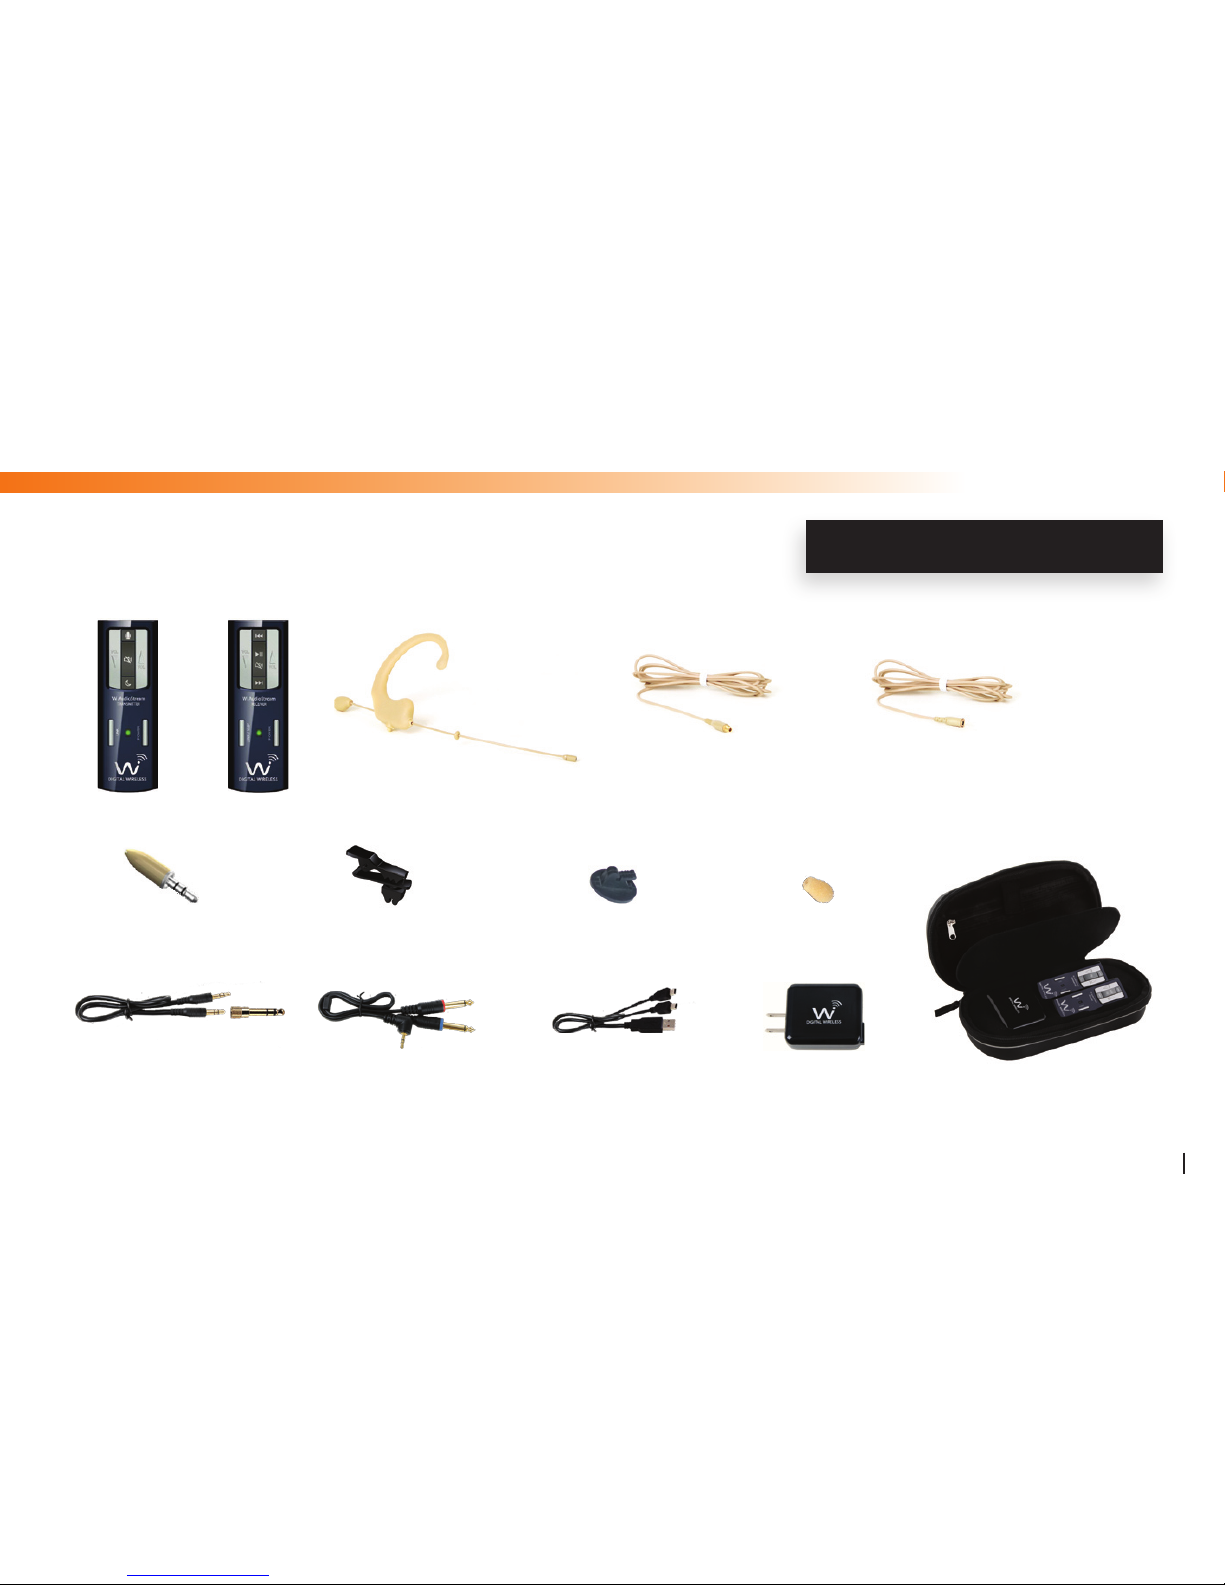
Transmitter Controls and Connections
jAudio IN Jack: Provides mono and stereo connection for your
microphone or other sound source.
kPower ON/OFF: Press and hold the Power button for 2 seconds
to turn the transmitter ON or OFF.
lPower/Status LED: Displays the status of six functions: ON/OFF, Battery
Charging, Low Battery, Pairing, Mute, Operating and
Sleep Modes.
F
Refer to the “Tx Button Functions” on page (32) for more details
mVolume UP: Press once to increase the volume level one step
at a time. Hold to increase continuously.
nVolume DOWN: Press once to decrease the volume level one step
at a time. Hold to decrease continuously.
Wi AudioStream EL
4
j
o
n
p
l
m
k
TRANSMITTER FEATURES

Wi AudioStream EL
5
oMute: Press and hold for 1.5 seconds to mute or unmute the audio.
pLink/Pair: The Link button performs two functions: Pairing and Linking.
Pairing allows the Transmitter to connect to up to eight (8) different receivers
sequentially to create a wireless audio matrix. Press and hold for 3 seconds until
thegreenLEDdisplayfastashes,indicatingthatitisreadytopairwitha
Receiver. Once the Transmitter pairs with the Receiver, the LED on both devices
will turn solid green.
Linking allows the Transmitter to re-route the audio signal sequentially to up to
eight (8) different receivers previously paired with the Transmitter. Press once to
re-route the wireless connection to the next receiver.
TRANSMITTER FEATURES

Wi AudioStream EL
6
qSleep: Press and hold for 2 seconds to put the Transmitter and Receiver into
power save mode (all settings will be preserved). Press once to wake-up
the Transmitter and Receiver. (Sleep function will prolong the Transmitter
battery life by 50% and the Receiver battery life by 35%).
rMode: Press and hold for 2 seconds to select the desired operation indicated
bythefollowingblueLEDashingsequence.Continuetoholdtocycle
between the three operating modes.
Stereo Mic-in Mode Solid Green LED and Slow Blue LED Flashes
Mono Mic-in Mode Solid Green LED and Fast Blue LED Flashes
(Factory Setting)
Stereo Line-in Mode Solid Green LED and Two Blue LED Flashes
TRANSMITTER FEATURES

Wi AudioStream EL
7
sCharging Port: This is a mini USB connection to power
up and charge the internal batteries.
The Transmitter can be charged using the
supplied universal AC charger, via an
instrument or computer USB port, or the
optional AA battery power booster adapter.
Belt Clip: The Transmitter can be attached to belts,
shirts and pants’ pockets. The compact and
lightweight design is easy to wear without
impeding body movement.
TRANSMITTER FEATURES
11
s
11
r
q

Wi AudioStream EL
8
Receiver Controls and Connections
uAudio OUT Jack: Stereo connection for professional Sound Systems,
Monitors, Mixers, In-Ear Monitors, Headphones and more...
vPower ON/OFF: Press and hold for 2 seconds to turn the receiver
ON or OFF
wPower/Status LED: Displays the status of six functions: ON/OFF, Battery
Charging, Low Battery, Pairing, Mute and Sleep mode.
xVolume UP: Press once to increase the volume level one step
at a time. Hold to increase continuously.
yVolume DOWN: Press once to decrease the volume level one step
at a time. Hold to decrease continuously.
u
|
y
{
z
w
x
v
RECEIVER FEATURES

Wi AudioStream EL
9
zLink/VoIP: This multifunction button performs the Pairing and VoIP MIC activation.
Pairing allows the Receiver to be discovered by the Transmitter. Press and hold
the Link buttonfor3secondsuntilthegreenLEDdisplayfastashes,indicating
that it is ready to pair with a Transmitter. Once the Transmitter pairs with the
Receiver, the LED on both devices will turn solid green.
VoIP Microphone operations - See item #10
{Next Track: The Next Track function button is used with the optional Wi USB Transmitter to
remotely control jumping to the next track for media players or sequencing
software.
Press the Next Track button once to jump to the next audio track.
|Previous Track: The Previous Track function button is used with the optional Wi USB Transmitter
to remotely control jumping to the previous track for media players or sequencing
software.
Press the Previous Track button once to go back to the previous audio
track.
RECEIVER FEATURES

Wi AudioStream EL
10
}Mute/Pause/Play: Press and hold the Mute/Pause/Play button for 1.5 seconds to mute/un-mute audio.
Press once to pause or play an audio track (when Receiver is used with the optional
Wi USB Transmitter, this function will remotely control the media player or
sequencing software to mute, pause or play the audio track).
~VoIP Microphone: Press the LINK / VoIP button (see page 9) once to activate the VoIP Microphone.
The Blue LED on the Receiver will turn ON when the VoIP MIC is activated. (This
microphone is used with the optional Wi USB Transmitter for Voice over
Internet Protocol (VoIP) communications).
F
Refer to the “Rx Button Functions” on page (34) for more details
RECEIVER FEATURES

Wi AudioStream EL
11
}
11
12
~sCharging Port: This is a mini USB connection to power
up and charge the internal batteries.
The Receiver can be charged using the
supplied universal AC charger, via an
instrument or computer USB port, or the
optional AA battery power booster adapter.
Belt Clip: The Receiver can be attached to belts,
shirts and pants’ pockets. The compact and
lightweight design is easy to wear without
impeding body movement.
RECEIVER FEATURES
11
12

Wi AudioStream EL
12
jRemovable MIC: Simple-Twist removable microphone capsule for ear-worn, lavalier and instrument
miking applications
kEarset MIC Port: Simple-Twist removable microphone capsule port
lSilicon Spacer: Silicon cheek spacer
mBoom: Sure-Fit bendable boom design
nBoom Lock: Adjustingtheboomlength,leftandrightearplacementboomcongurationand
keeping boom securely in place
oCable Port: Simple-Twist detachable cable port
pEL Ear Mount: Sure-Fit advanced ergonomic silicon ear mount model EL
qLavalier MIC Port: Simple-Twist detachable Lavalier cable with removable microphone capsule port
EARSET FEATURES

Wi AudioStream EL
13
EARSET FEATURES
o
k
l
m
n
j
p
q

Wi AudioStream EL
14
Handling The Wi Sure-Fit EL Series
The Wi Sure-Fit EL Series is a high-precision instrument and
isdesignedfordurabilityandexibility.Thefollowingare
some of the basic precautions to prevent damage to
the Wi Sure-Fit EL.
Do not bend the boom over sharp edges such as
theendofyourngernailortwisttheboom
around a tight radius less than 1/2” diameter.
Usethethumbandindexngertodosmall
bends at multiple points of the boom to get the
desired curvature.
EARSET HANDLING
O
P
O
P

EARSET HANDLING
P
Wi AudioStream EL
15
Do not bend and wrap the cables in any way that
creates severe coiling or strain on the cables.
Always detach the earset cable and the removable
adapter when storing the Wi Sure-Fit microphone
O
O
P

Wi AudioStream EL
16
Ready, Charge, Go!
Before using your new Wi AudioStream EL digital wireless system,
you need to fully charge the batteries for approximately 2 hours.
Charging
1. Plug the AC Charger into a power socket.
2. Connect the USB power cable to the USB port on the AC charger.
3. Connect one of the two mini USB connectors to the transmitter
USB port.
4. Connect the second mini USB connector to the receiver USB port.
5. The Power/Status LED will turn to solid Red ON.
6. When charging is complete the Red LED will turn OFF.
7. The battery will last 4 to 6 hours of continuous operation.
POWER
LINK
AC Charger
USB Port
Mini USB
Connector
USB Port
USB Connector
GETTING STARTED

GETTING STARTED
Wi AudioStream EL
17
More Charging Options
TheWiAudioStreamELpowersource’sexibledesignboastsan
internal rechargeable battery for 4~6 hours of battery operation. The
optional ON-THE-GO AA battery power adapter provides for 10~13
hours of extended battery operations and the AC power adapter
provides continuous operation, so there’s no need to power down the
Wi AudioStream EL for recharging or swapping the AA batteries on
the optional ON-THE-GO battery power booster. The Transmitter and
Receiver can also be powered by USB bus power when connected to
any USB host equipped device for continuous power operation.
Charger
USB
Bus Power
AA Battery
Power Booster

Wi AudioStream EL
18
EARSET SETUP
The Wi Sure-Fit Earset & Lavalier
Delivering unmatched value, comfort, sound
qualityandsecuret,theWiSure-Fit™ELSeries
earset and lavalier microphone delivers three (3)
applications in one versatile microphone including
ear-worn, lavalier and video camera/instruments
miking applications. Jangus Music’s ultra-small
removable MIC capsule mounted on an ultra-thin,
rugged, bendable, adjustable length and incred-
ibly lightweight boom captures vocals clearly with
excellent rejection of wind and ambient noise. The
WiSure-Fit™ELSeriesisanexcellentchoicefor
pastors,artists,tnessinstructors,speakingand
singing performers, video camera miking and hard
to MIC instruments.

EARSET SETUP
Connecting The Earset Cable
TheWiSure-Fit™ELSeriesultra-low-proledetachablecable
delivers minimum visibility with maximum durability. Optional adapters
givetheWiSure-Fit™ELseriesearsetgreatexibilityforusewith
differentpocketwirelesssystemsincludingAKG™,Shure™,Sony™,
Audio-Technica™ andSennheiser™.
1. Locate the detachable earset cable and the included
detachableadapterfortheWiAudioStream™ELpocket
portable digital wireless system.
2. Fasten the adapter end of the earset cable to the screw
connector located on the pocket wireless system adapter.
3. Fasten the earset end of the earset cable to the screw
connector located on the silicon ear mount.
Wi AudioStream EL
19

P
Q
Wi AudioStream EL
20
EARSET CUSTOM FITTING
Left or Right Ear Placement
The Wi Sure-Fit EL Series can easily be converted from right
to left ear wearingpreferenceswithaSimple-Twist™.Thisun-
matchedtimesavingfeaturedeliversexceptionalexibility
for venues needing to accommodate multiple users and their
wearing preferences.
1. Press the boom locking switch located on the bottom
of the Silicon ear mount.
2. Rotate the boom 180 degrees to the preferred
ear wearing preference.
3. Release the locking switch when rotation is complete.
No need to rework the bend or reshape the boom again when
switching from left to right ear placement. The boom maintains
its original angle to capture vocals from the near-the-mouth
position, from the opposite side.
5
This manual suits for next models
1
Table of contents
Other Wi Digital Systems Microphone manuals