Place cam into panel with
arrow pointing to the edge
Note / Op / Noter
Waarschuwing: Bepaalde montage-elementen kunnen gevaar opleveren als ze in handen van kleine
kinderen. Houd deze voorwerpen buiten het bereik van kinderen. Zorg dat kinderen zich niet zonder
begeleiding in de ruimte kunnen bevinden waar het montagewerk plaatsvindt.
Alvorens aan de slag te gann, adviseren wij u deze instructies nauwkeurig door te lezen. De kasten zijn vrij
groot. Daarom kan hetraadzaam zijn, ze te monter in de ruimte waar ze uiteindelijk komen te staan.
N.B.: Omdat muren in verschillende huizen van verschillend material kunnen zijn, zijn er green schroeven
voor wandmontage bijgeleverd. In geval van twijfel raden wij u aan een deskundige te raadplegen. Zet de
kast op en schone, solide ondergrond in elkaar. Schroeven om kasten samen te voegen zijn niet voorzien
Let Op: Er is alle mogelijke moneite gedann om ervoor te zorgen dat dit product u in perfecte staat bereikt.
Elk product waaraan duidelijk schade te zien is, mag niet geinstalleerd worden en dient te worden
geretourneerd aan het bedrijf waar u het gekocht heeft en waar het product vergoed zal worden.
In het belang van voortdurende verbetering, behouden wij ons het recht voor om specificaties te
veranderen of aan te passen zonder voorafgaande mededeling. Fouten en weglatingen uitgezonderd.
Hoewel alle kasten zijn ontworpen om jarenlang dienst te doen, helpt het om het oorspronkelijke aanzicht
te behouden als de volgende richtlijnen in acht worden genomen:
Gezaagde kanten: Alle gezaagde kanten waar men blank spaanplaat ziet moeten afgewerkt worden met
een vochtwerende substantie b.v. lakverf, vernis of siliconenkit (ook kastpanelen waarbij dit het geval is)!
Onderhoud: Wanneer u iets gemorst heeft, ook water, moet u het oppervlak onmiddellijk schoonvegen.
Wrijf het schoon met een vochtige doek en een mild schoonmaakmiddel. Wrijf erover met een vochtige
doek om overtollig vocht te verwijderen en droog het na met een zachte, droge doek. Gebruik geen
oplosmiddelen, schuurmiddelen of gepigmenteerde glasreinigingsmiddelen.
Laden, glijgroeven, deuren en scharnieren: De glijgroeven en scharnieren zijn in de fabriek voorgesmeerd.
Maak ze niet schoon met oplosmiddelen, omdat dit de soepele werking van de bewegende delen negatief
beïnvloedt. Trek nooit aan of leun nooit op half of geheel openstaande laden en/of deuren.
Attention: Certains éléments d’équipement peuvent éventuellement être dangereux pour les petits
enfants. Veuillez ne pas mettre ces éléments à leur portée et ne jamais laisser d’enfants sans
surveillance dans la zone d’assemblage.
Veuillez lire ce mode d’assemblage attentivement avant de continuer. Certaines de ces armoires
sont assez grandes et peuvent exiger d’être assemblées dans la pièce où elles seront installées.
Remarque: En raison des différentes conditions des murs, aucune vis n’est fournie pour la fixation
des éléments au mur. En cas de doute, consultez un expert. Assemblez les armoires sur un plan de
travail solide et propre. Vis pour joindre les caissons ensemble ne sont pas fournies
Veuillez noter: Tout a été fait pour assurer que ce produit quitte l’usine en parfait état. Tout article
visiblement défectueux ne doit pas être installé et doit être retourné au point de vente où il vous
sera remboursé.
Dans le cadre de notre politique d’amélioration continue, nous nous réservons le droit de modifier
ou d’ajuster les spécifications sans préavis. Sauf erreur et omission.
Ces éléments ont été conçus dans le but de vous donner des années de plaisir et de satisfaction.
Vous contribuerez au maintien de la beauté initiale de votre cuisine en suivant nos conseils :
Coupes : Toutes les coupes doivent être traitées avec du silicone, laquées ou vernies pour les
protéger de l’humidité (ceci concerne aussi les armoires qui ont été sciées).
Nettoyage : Tout liquide renversé sur la surface, même de l’eau, doit être immédiatement essuyé.
Enlevez toute tâche à l’aide d’un linge doux et humide et d’un détergent domestique. Essuyez toute
trace d’humidité à l’aide d’un linge humide et séchez avec un linge doux et sec. N’utilisez ni
solvants, ni produits abrasifs, ni produits pigmentés pour nettoyage de vitres.
Tiroirs, glissières, portes et charnières : Les glissières à roulettes et les charnières sont lubrifiées en
usine. Ne les nettoyez pas avec un solvant car le fonctionnement des parties mobiles en souffrirait.
Ne tirez et ne vous appuyez jamais sur des portes ou des tiroirs partiellement ou totalement
ouverts.
Caution: Some pieces of hardware could be hazardous to small children. Keep all
these items out of reach and do not leave children unattended in the assembly
area.
Please read these instructions carefully before proceeding. Some of the units are
quite large and may have to be assembled in the room where they are to be
installed.
Note: Due to variation in wall conditions, no screws are supplied for fixing the units
to the wall. If in doubt consult an expert. Assemble the unit on a clean solid work
surface. Screws for joining cabinets together are not supplied
Please Note: Every effort has been made to ensure that this product leaves the
factory in perfect condition. Any item which has a visible defect must not be
installed and returned to the place of purchase.
In the interest of continuing improvements, we reserve the right to amend or adjust
the specifications without prior notice. Errors and omission accepted.
These units have been designed to give years of pleasure and satisfaction.
You will help to maintain the original beauty of your kitchen by following
these guide lines.
Sealing: All cut edges where raw chipboard is exposed on both the worktop and
the carcase must be sealed with a moisture resistant sealer such as gloss paint,
varnish or silicone sealant.
Cleaning: Any spillage, even water,should be removed from the surface
immediately. Remove any marks with a soft damp cloth and mild household
detergent. Wipe over with a damp cloth to remove any excess moisture and dry
with a soft, clean cloth. Do not use solvents, abrasive cleaners or pigmented glass
cleaners.
Drawers, Runners, Doors and Hinge: The roller runners and hinges are factory
lubricated. Do not clean with solvents as the operation of the moving parts will be
affected. Never pull or lean on partially or fully open doors and drawers.
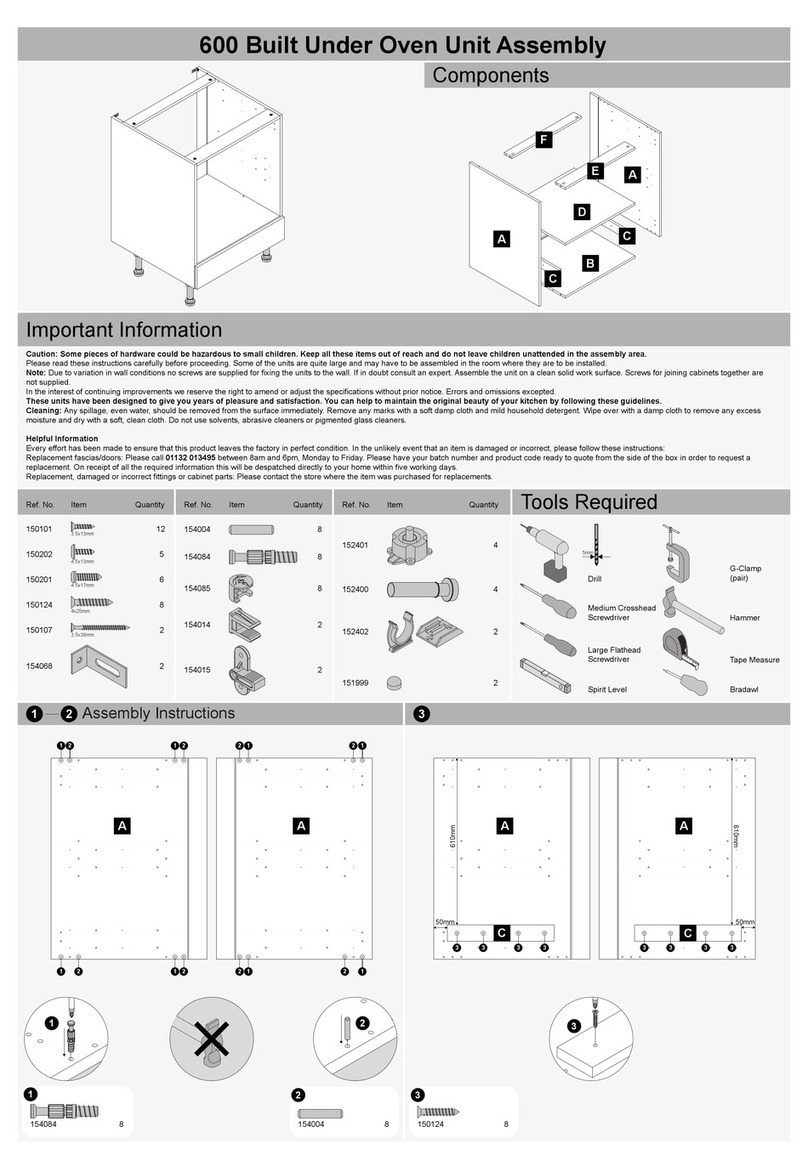
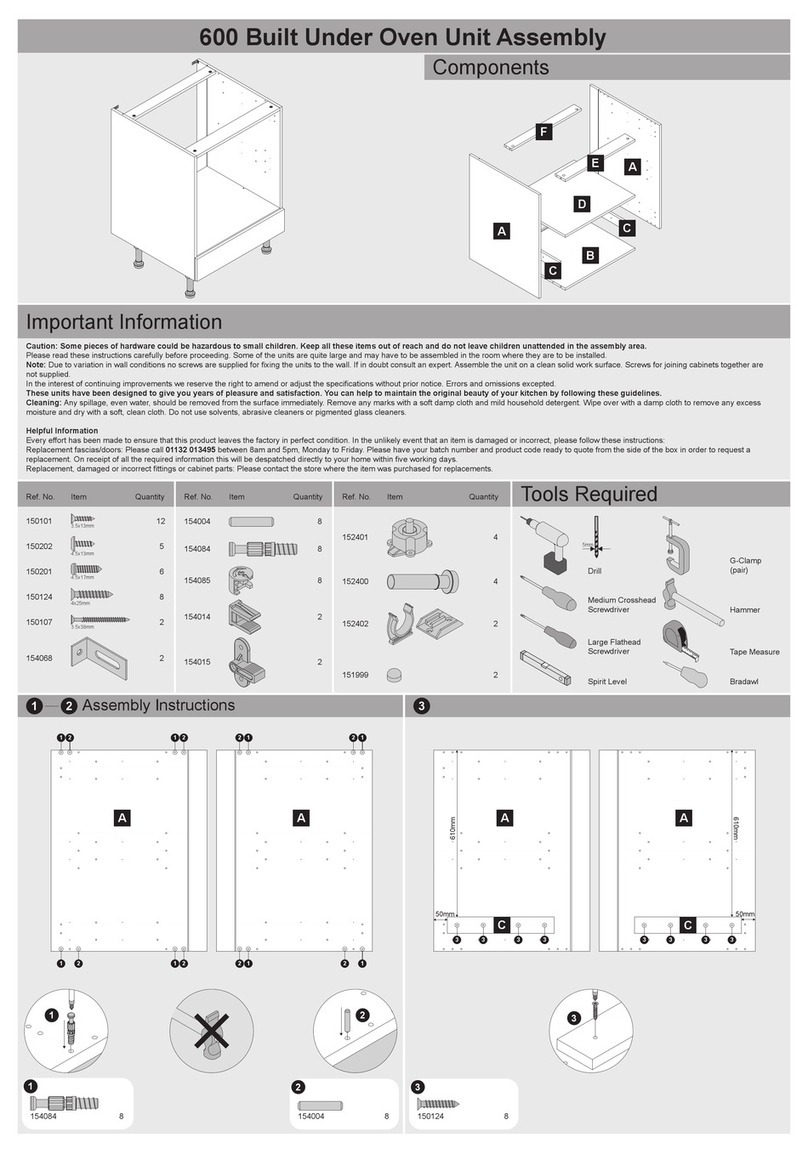
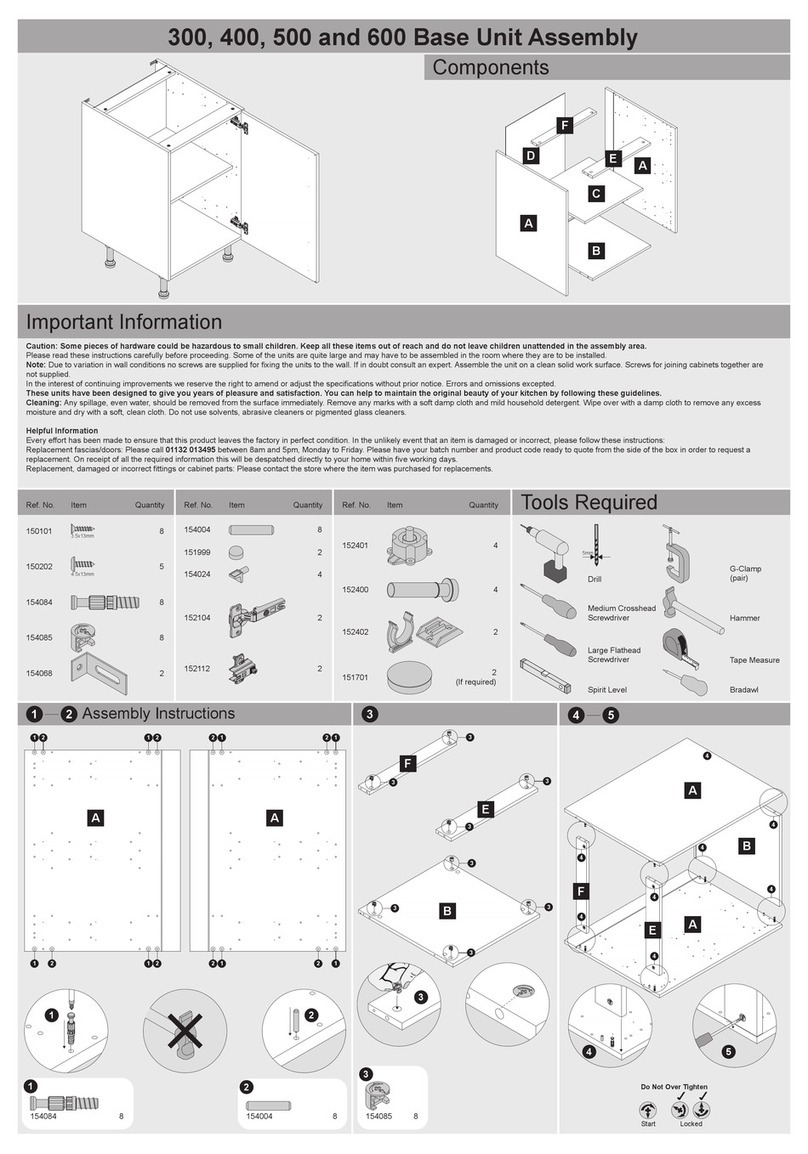
Components
A
B
C
D
H
K
H
ALeft End Panel
BRight End Panel
CBottom Panel
Door Handle x1
Various types
Ref: 170956 (03)
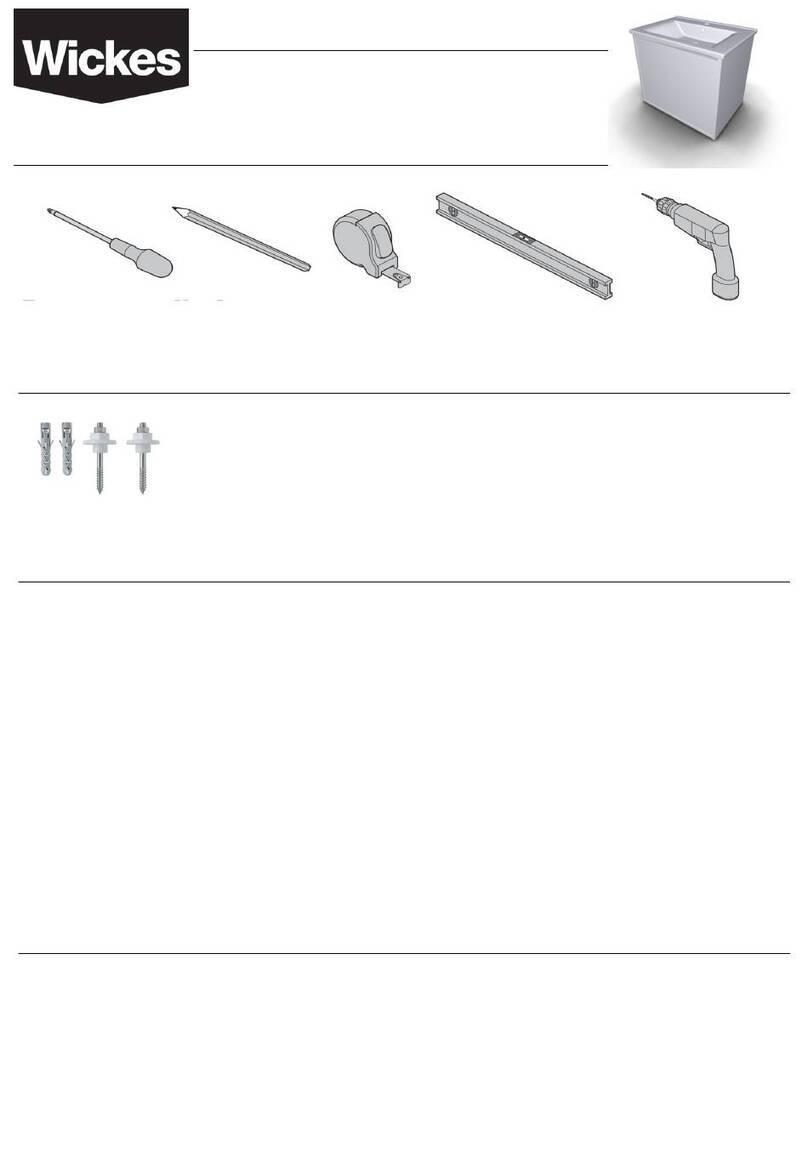
Tools Required
5mm
Code Item Qty
154065
154066
154004
150901
150202
6
6
6
12
8
151801 8
151999
2
150199
152162
154068
152400
152401
152402
4.5 x 13mm
154024
152161
2
4.5 x 45mm Carcase Screw
4
154041
150101
36
7
7
3
54
1
1
4
4
1
154066
x 2
2
154065
x 6
2
1
2
2
H
2
2
2
2
34-5 6-7
Code Item Qty Code Item Qty Code Item Qty
2
1
3.5 x 13mm
3
3
3
3
3
3
3
3
3
3
4
4
5
5
5
7
7
7
7
7
7
6
6
6
6
50mm x 6.3mm
150901
x 8
3
154066
x 4
6
154004
x 6
7
4
x 2
150202
x 3
4.5 x 13mm
5
67
Benodigde gereedschap Outils nécessaires
DFront Rail
Back Rail
Hardboard Back
Shelf Panel
L..Zijpaneel
Panneau Lateral Droit
R..Zijpaneel
Panneau Lateral Gauche
H
Return Top & Bottom
Afsluiting Boven en Onderpaneel
Retour Panneau de Haut et Bas
Return Back Panel
Afsluiting Achterpaneel
Retour Panneau Arrière
Return End Panel
Afsluiting Zijpaneel
Retour Panneau Latéral
Door
Deur
Porte
Corner Post
Montant De Coin
Deur Hangreep x 1
Verschillende types
Poignée de Porte x 1
Différents types
Hoekonderkast Armoire Basse d’Angle
925mm x 925mm Corner Base Cabinet
//
