HOW TO CONNECT WIDEX TV-DEX TO
A TV WITH DIGITAL AUDIO OUTPUT
Some TVs only have a Digital Audio Output and cannot connect directly to a Widex TV-
DEX. In this case a Digital to Analog Converter has to be connected between the TV and
the Widex TV-DEX.
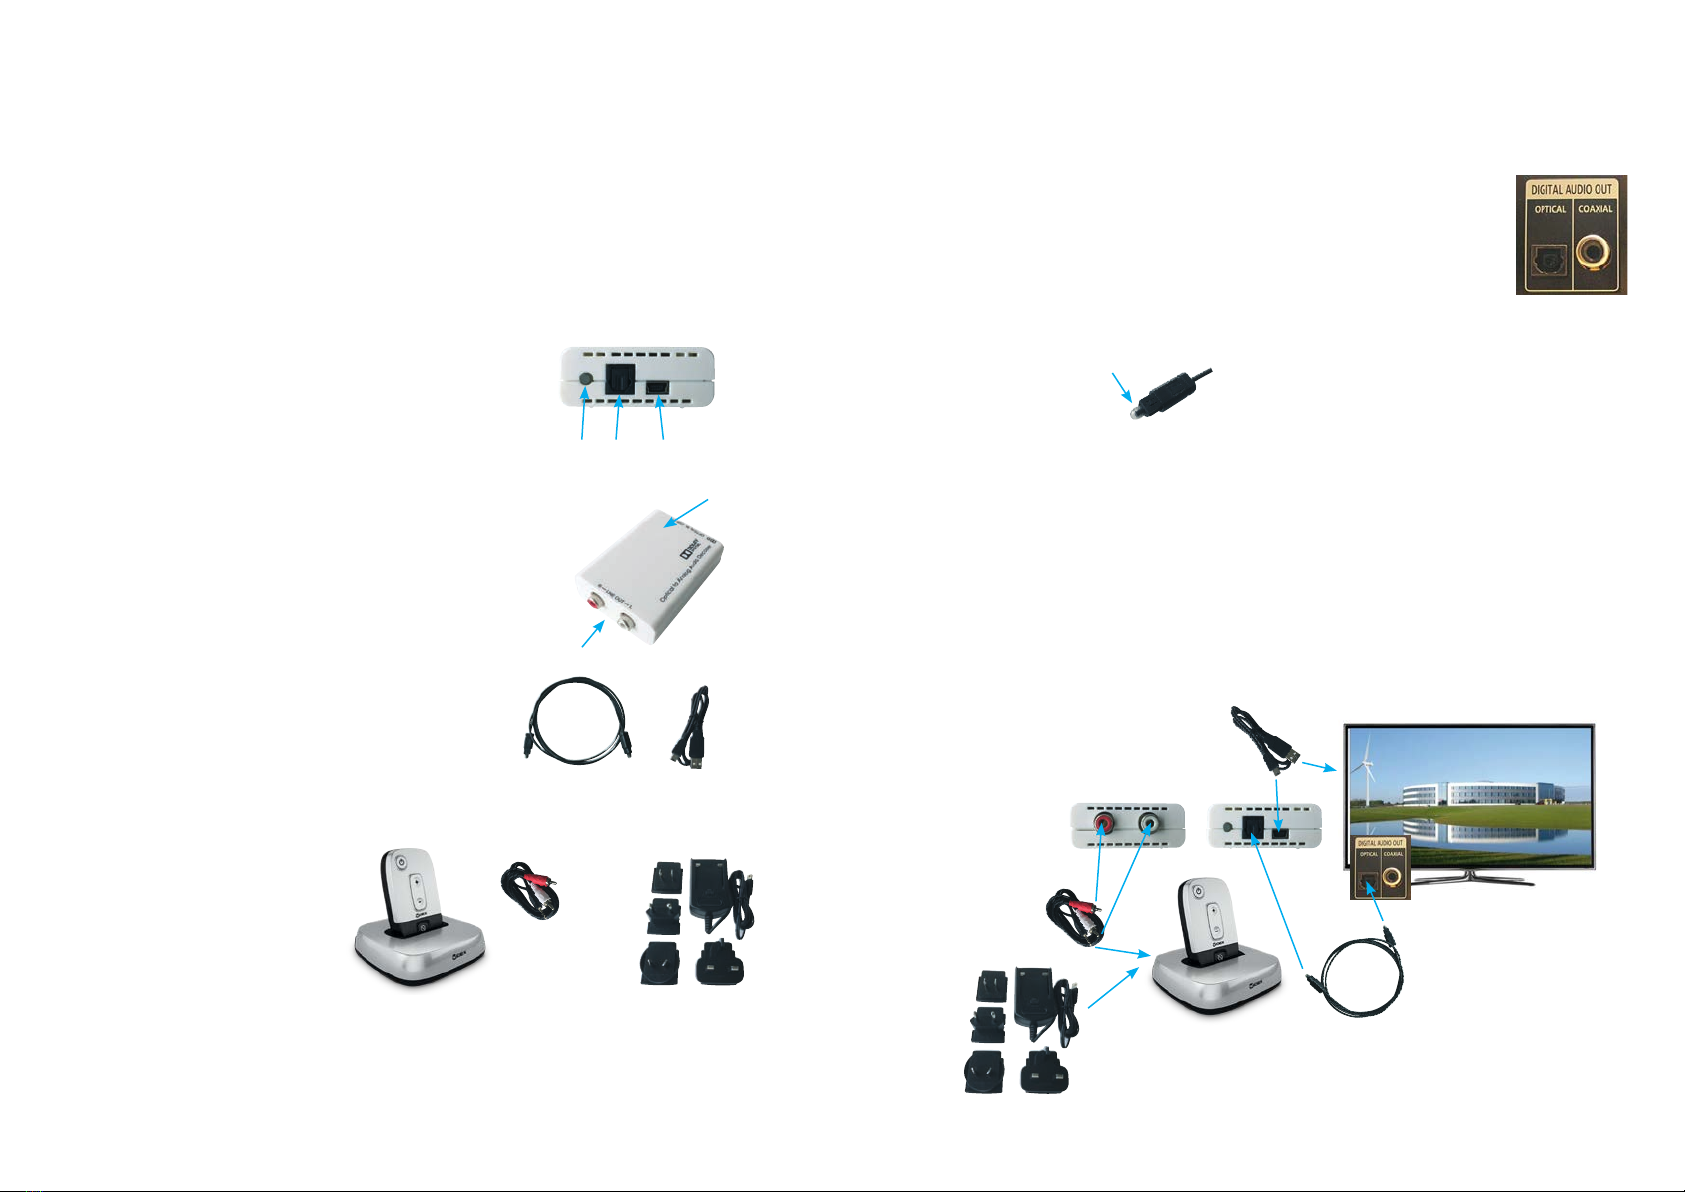
Package description
1. Dolby/PCM LED Indicator. When the source audio is
encoded with Dolby Digital, the LED will illuminate.
2. OPTICAL IN: Connect the Optical input to an Optical
digital audio source, such as a HDTV, HiFi stereo or
Set-top Box.
3. USB 5V: Power input. Connect to any powered USB
port with a Mini-USB cable or connect to a USB AC
adaptor (not included).
4. R/L LINE OUT (RCA/Phono connector): Right/Left
analog audio output. Connect to the input of Widex
TV-DEX.
5. Power LED: The LED will illuminate when connected
to power.
6. Optical (TOSLINK) cable.
7. Mini-USB to USB cable (power cable).
Connecting the Digital to Analog Audio Converter to the TV
1. Locate the OPTICAL (TOSLINK) DIGITAL AUDIO OUT on the rear
of the TV.
2. Connect the Optical Cable (6.) to the TV and to the Digital to
Analog converter (2.).
Note: The Optical Cable is delivered with a small protective cap
that has to be removed.
Example of Digital
Audio Output
socket on TV. The
Optical output is
normally protected
by a hinged cover
plate.
3. Connect the output of the Digital to Analog Converter (4.) to the Widex TV-DEX
(8.) using the cable (9.) included in the TV-DEX box.
4. Connect the Mini-USB power supply (10.) to the TV-DEX and a wall socket.
5. Connect the Mini-USB to USB cable (7.) to the USB 5V power terminal (3.) on
the Digital to Analog Converter and to a USB terminal on the TV.
Note: Alternatively, a standard USB power supply can be used for power to the
Digital to Analog Converter (not included).
1. 2. 3.
5.
4.
6. 7.
Connection diagram
(numbers refer to the five
steps above)
3.
2.
1.
5.
TV-DEX package contents
8. TV-Controller and TV-Base.
9. 3.5 mm jack to phono cable.
10. Mini-USB power supply.
8. 9.
10.
4.


