Wifibot 4G User manual

Quick Start Guide
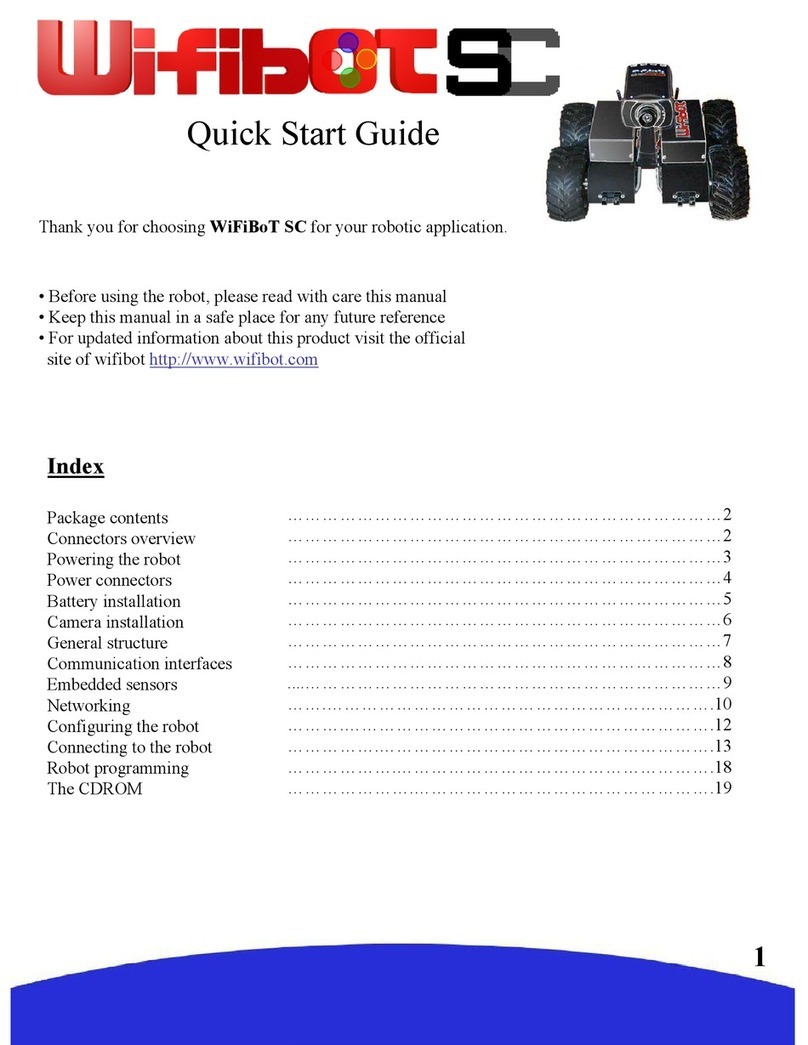
Thank you for choosing WiFiBoT 4G for your robotic application.
• Before using the robot, please read with care this manual
• Keep this manual in a safe place for any future reference
• For updated information about this product visit the official
site of wifibot http://www.wifibot.com
Index
Package contents
Connectors overview
Powering the robot
Power connectors
Battery installation
Camera installation
General structure
Communication interfaces
Embedded sensors
Networking
Configuring the robot
Connecting to the robot
Robot programming
The CDROM
1
…………………………………………………………………2
…………………………………………………………………2
…………………………………………………………………3
…………………………………………………………………4
…………………………………………………………………5
…………………………………………………………………6
…………………………………………………………………7
…………………………………………………………………8
....………………………………………………………………9
…….………………………………………………………….10
……….……………………………………………………….12
…………….………………………………………………….16
……………….……………………………………………….21
………………….…………………………………………….22

Package contents
Make sure to be in possession of all the articles mentioned below. If
any of them should be missing, contact your reseller as soon as
possible.
Robot
IP camera
Two battery packs
Battery charger
Wifibot CD-ROM
Camera CD-ROM and documentation
4x charging cables
1x RJ45 cable for the IP camera
Connectors overview
The figure below shows the location of
the different connectors of the robot:
This diagram shows the signal pinout
of the DSUB-9 connectors.The
RS232 signals are found on the
connector located on the left while
the I²C signals can be found on the
connector located on the right of the
robot. (see the other diagram below)
2
Battery
connector +
Battery
connector -
Battery
connector +
Battery
connector -
Ethernet
switch
External power and
charging connector
Power
ON/OFF
RS232
Serial
Number
I²C

Powering the robot
Powering the robot with batteries:
The robot gets its power normally from two battery
packs with four Ni-MH cells each, with a capacity of
9500 mAH and a total nominal voltage of 9,6V.
Located on the upper part of the platform, their
location and clamping have been especially
designed to facilitate their removal and replacement
in an easy and simple way. It is enough to insert the
packs in their connectors, their shape preventing any
error, the only thing left is to close the clamps and
the robot is ready to go. The robot comes with only
two packs, additional packs are available separately.
Powering the robot from an external source:
When developing custom applications it is often
more practical to use an external power source rather
than to have to constantly charge the batteries. Take
out the batteries, then plug the included cable into
the connector located next to the power switch of the
robot and connect the robot to a lab DC power
source at a voltage between 9 and 12 V. Make sure
the power source can deliver several amps,
especially if you plan to test the motors.
3

Power connectors
The 5V/9.6V power output:
The robot is equipped with two 5V 2A DC/DC
converters. One of the converters is reserved
exclusively to power the different internal
components of the robot. The second converter is
available to the user through the general power
connector dedicated to external modules such an IP
camera. A direct connection to the batteries is
made available on this connector as well. The 5V
output can’t give more than 2A and a maximum of
10A is recommended for the 9.6V output. An
incorrect use of this connector beyond those values
(short circuit or other) can provoke a malfunction
of the robot or of the DC/DC converter and even
damage those.
Note: The WiFiBoT company will not in any case be considered responsible for any damage
provoked by any incorrect use of this connector. Any reparation necessary for any damage caused
by the incorrect use of this connector will not be covered by the warranty.
The external power and charging connector:
This connector presents directly the + and – of the robot
and has a double use. On one side it allows to directly
power the robot with an external source without having
to use the batteries. The second use is to charge the
batteries on the robot itself when no additional packs are
available.
Note : When charging the robot make sure the power
switch is OFF so the charger does not find the robot in
march.
4

Battery installation
Insertion:
Locate the connectors and their direction on both the
robot and the two battery packs. Insert the batteries
till the end and secure them by closing the lateral
clamps.
Extraction:
Open the clamps and pull the battery packs up.
Charge:
A battery charger is included with the robot and can
be used for charging the batteries in two different
ways:
Externally: This charging mode allows a continuous
use of the robot by doing a rotation of several battery
packs. Insert first each plug in the corresponding
color on the charger side and then connect the three
cables included for this purpose to the batteries as
shown on the photo. (red color with the battery +, see
page 3)
On the robot: This mode is recommended when the
user has only one set of battery packs. First make sure
the robot is OFF, then connect the plugs of the
charging cable on the side of the charger and then on
the charging connector located next to the power
switch of the robot.
5

Camera installation
The robot is sold with an IP camera which model can vary depending of the robot version, it
is a complement and is not part of the robot itself. It is an independent peripheral which can
be replaced by any other camera model or network peripheral. For more information about
your particular camera please refer to its manual included in the CD-ROM. Nevertheless its
installation is similar in all models.
Place the camera on the central support:
Screw the camera on its support and if it
applies, adjust manually the desired position
angle.
Connect the Ethernet cable to the camera :
Connect the included Ethernet cable to the
RJ45 port located at the back of the camera
and to one of the ports of the embedded
switch.
Connect the power cable of the camera:
Connect the proper power output (5V/9.6V) of
the robot to the camera power input located at
the back of the camera.
6

The operating software running on the Cube is a
specially adapted Linux distribution “Nylon”. It
provides several features including:
• Linux Kernel 2.4.27
• Mesh Routing (OLSR)
• Web Server
• DNS Server
• DHCP Server/DHCP Client
• Firewall (Shorewall)
•Perl
• Software updates via the Internet
It is totally programmable and all components are
available in source text format. Some
programming examples are included in the CD
and the web page for the distribution can be found
at: http://www.meshcube.org
General structure of the robot
System architecture:
The system architecture is very simple, it is build
around a double bus Ethernet-I²C and a CPU that
acts as a bridge between the two. This same CPU
works as an access point and makes the Ethernet bus
accessible from the outside through Wi-Fi. In
general the embedded LAN is used for peripherals
of a certain importance such the IP camera while the
I²C bus is useful for connecting more simple
modules based on micro-controllers. To finish, the
robot features one RS232 port which can be bridged
to upper levels as well. This makes possible to add
to the robot commercial modules as well as “home
made” ones based on simple micro-controllers.
The embedded CPU:
The embedded CPU is a 4G Access Cube from 4G-
systems, some of its interesting features are:
• 400MHz MIPS processor AMD Alchemy Au1500
• 64 MB RAM
• 32 MB Flash
• 100Mbps Ethernet
• Power Over Ethernet Standard IEEE 802.3af
• USB host/USB device (no external plug on robot)
• Scope for installing up to 8 MiniPCI devices via 4
dual adapters.The robot has space for one MiniPCI.
• WLAN card with RP-SMA connection
• Dimensions 7 x 5 x 7 cm
• Power rating 4 W
• No moving parts
7

Internal Communication Interfaces
The Ethernet switch:
A 10/100 Ethernet 5 port switch interconnects the
different high level peripherals of the robot
forming an embedded LAN. From those 5 ports,
one is not available and another is necessarily
taken by the Access Cube. From the 3 left, one
port is generally taken by the IP camera but can
be made available depending of the application.
This leaves normally two available ports where
we can add other peripherals if needed. For those
to be reachable from outside the robot, this one
will have to be reconfigured (see pag 15).
The I²C bus:
The I²C bus interconnects the micro-controllers in
charge of the low level modules to the central
processor that acts as a bridge with the upper
levels of the robot architecture. The central
processor works always as the master and all
communications necessarily pass by it. Up to 127
devices can be connected. The I²C is accessible on
pin 5 (GND), 6(SCL) and 9(SDA) of the DSUB-9
connector located on the RIGHT of the robot. The
program ../root/i2cdetect that can be found in the
CPU allows to detect the devices connected to the
bus. The address of the chip in charge of the left
wheels (0xA2) can be seen as 0x51, the one of the
right wheels (0xA4) as 0x52 and the ADC can be
seen as 0x9C.
The RS232 ports:
One RS232 port (RX,TX and GND) is available on the DSUB-9 connector of the left. This port
presents a TTL signal, for peripherals using standard PC signals, an interface such as the
MAX232 is needed.
8
This diagram shows the signal pinout
of the DSUB-9 connectors.The
RS232 signals are found on the
connector located on the left while
the I²C signals can be found on the
connector located on the right of the
robot.

Embedded sensors
Speed control:
The four motors can be controlled in open or close
loop depending of the needs of the user. Every
wheel has an external laser cut code wheel of 300
sectors which signal is recuperated by an optical
sensor. The signal is then filtered and sent to four
independent PID speed controllers. When remotely
controlling the robot, the close loop is done by the
operator and therefore is not very useful at the wheel
level but it is generally needed in autonomous
applications. In both open and close loop control, the
speed of each wheel can be retrieved as the number
of sector per 1/25 of second but we note here that
the “tank like” design of the robot does not allow
consistent odometry calculations from the wheel
speed.
IR ranging sensors:
The robot is equipped with two IR sensors with a
maximal range around 1,30m. They work by
triangulation and give an analog output inversely
proportional to the distance to the obstacle. The
output voltage is then digitalized over 8bits by a
micro-controller and sent to the central processor.
Those sensors can have different uses like for
example to trigger emergency stops or during
docking procedures. The output of the sensors is not
linear and follows a certain curb. For more
information refer to the sensor datasheet.
Battery level:
The robot autonomy is around 2h but can vary depending of how it is used. For this and in order to
monitor the battery level, an 8 bit A/D converter has been connected to the I²C bus providing us this
information.
9

Networking
Network architecture:
In the WiFiBoT 4G, the embedded CPU works as a
gateway between our internal wired LAN and the
external wifi WLAN. The CPU has at least one
ethernet card and one wireless card connected to two
separate networks (LAN/WLAN).The LAN and the
WLAN should have a different address class and
therefore data needs to be routed between
them. This is done through Dynamic NAT
(Network Address Translation). This means, all
local components will have their own IP address
within the LAN, but from the WLAN they will all
be seen as a single IP. In order to be able to access
the separate devices we will need to assign to each
of them a separate port (Fig1 is a concrete example).
This will require to configure the CPU with the
proper routing table (see pag 15). Fig 1
Fig 2
10

The WLAN modes:
The external Wi-Fi WLAN can be configured in 4
different working modes:
-Infrastructure Master (Access Point)
-Infrastructure Managed (Adapter/Bridge)
-Ad-hoc without routing algorithm
-Ad-hoc with the OLSR routing algorithm
(Mesh Networking)
In infrastructure mode we have a master/slave
structure where all the data is centralized in one
device called access point (server/master) to which
different adapters (clients/slaves/managed) connect.
A client cannot talk directly to another but has to
pass by the access point which will forward the data
to the destination. Several access points can be
connected together with cables extending in this way
the zone covered by the wireless network. This is the
most common setup for a Wi-Fi network (see Fig1).
In ad-hoc mode we do not have any central
management, each client can talk directly to the
other. This mode works fine for networks with few
elements. Without any routing algorithm, each
element needs to have a direct radio link with the
others in order to communicate, no data will be
forwarded (see Fig2). If a routing algorithm such as
OLSR is added, you obtain a self-organizing mesh
network in which message forwarding is possible
wirelessly between different nodes, connecting in
this way devices which are not within direct radio
range (see Fig3). This allows to extend the zone
covered without the need of any cable.The network
is completely dynamic, routing tables are rewritten
automatically and dynamically as the network
changes. If a new OLSR enabled device appears, it
will be automatically detected and merged to the
routing tables of each node. This is especially useful
for mobile networks that can change over time like
for example in a multi-robot application.
11
Fig 1
Fig 2
Fig 3

Configuring the robot:
Now that we have seen the different networking issues we will see how to configure the different
parameters involved on the robot. There are 3 important configuration files we need to manage in
the robot:
../etc/network/interfaces
../etc/nylon/interfaces.conf
../etc/rc2.d/S31wifibot
These files can either be edited outside the robot and then transferred or directly edited on the robot.
For clarity we will see here how to configure a WiFiBoT equipped with one wireless card only. For
WiFiBoTs with two cards, the files are simply extended with the parameters of the second wireless
card.
The “interfaces” configuration file:
This file allows to specify the IP settings of the different network interfaces present on the robot and
the wireless settings when it applies. All the WiFiBoTs 4G have the eth0 interface for the LAN and
the wlan0 interface for the WLAN connection, an additional wlan1 interface can be added if
requested. As we have seen there are four possible wireless modes, here we will show an example
of configuration of this file for each one of those modes.
12
Infrastructure Master:
• LAN IP settings
• WLAN IP settings
• wireless mode
specified to master,
that is, it will create a
wireless network.
• SSID, that is the
name of the wireless
network the robot will
create.
• channel to be used,
important to avoid
interferences if several
wireless networks are
present.

Ad-hoc:
• LAN IP settings
• WLAN IP settings
• The gateway IP if
there is one.
• wireless mode
specified to ad-hoc,
that is,all devices will
talk directly to each
other.
• SSID, that is the
name of the wireless
network the robot will
connect.
• channel to be used,
Infrastructure Managed:
• LAN IP settings
• WLAN IP settings
• If the wireless
network is further to be
connected to another
network (i.e Internet)
we need to specify the
gateway.
• wireless mode
specified to managed,
that is, it will connect to
an existing wireless
network.
• SSID, that is the name
of the wireless network
the robot will connect.
• channel to be used,
13

Ad-hoc + OLSR:
• LAN IP settings
• WLAN IP settings
•Inmesh mode we
need to specify the
broadcast address.
• The gateway IP if
there is one.
• wireless mode
specified to ad-hoc
(mesh is built over ad-
hoc).
• SSID, that is the
name of the mesh
network the robot will
connect.
• channel to be used,
• RTS parameter
needed in mesh mode.
14
The “interfaces.conf” configuration file:
This file is very simple, all it does is to indicate what interfaces we
have and if the wireless ones will work as standard Wi-Fi or doing
Mesh networking.
Normal Wi-Fi:
• We specify here the
network interfaces.
• We then specify that
the wireless interface
will work as a normal
Wi-Fi device.
Mesh Networking:
• We specify here the
network interfaces.
• We then specify that
the wireless interface
will make use of OLSR
and work within a mesh
network.

15
The “S31wifibot” configuration file:
This is the last step of configuration, we will first specify the routing tables of the NAT
address translation, this is needed to make the embedded devices visible from outside the
robot.Then we set the commands to set up the low level I²C interface and launch the control
server at boot time.
Information about IPTABLES/NAT can be found at http://www.netfilter.org/
We use « iptables »
for seeting the NAT
The interface we
are « NATting »
The WLAN interface
IP and ports we will
connect to from outside.
The LAN device
IP and ports we
want to reach
(i.e the camera)
Start the control
server to wait for
connections
Creates the interface
in order to get
access the I²C bus
Installs the
I²C driver
IMPORTANT NOTE!!!!: When editing the configuration files under windows, use the
“WinVi32.exe” text editor ONLY, it is included in the CDROM at ..\software\WinVi32\
It is important to use it to respect the Linux format, specially when editing configuration files.
Another option is to edit the files directly on the CPU under Linux with the installed “vi” editor,
check http://www.linuxfibel.de/vi.htm for more information.

Connecting to the robot:
Configuring your ethernet/wireless adapter:
By default, the robot has been pre-configured with
certain IP addresses. Before connecting to the robot
you may need to adjust the IP settings of the
network adapter of your computer. Make sure all the
devices in a same network having to communicate
with the robot have the same class of address.
To adjust the TCP/IP settings of the network
adapter:
1- Right-click on My Network Places in the Start
menu, then select Properties from the pop-up menu.
The Network and Dial-up Connections window
appears.(Fig1)
2 - Disable all the network adapters except the one
you want to use for connecting to the robot (Ethernet
or Wi-Fi). Right-click the network adapter, then
select Properties from the pop-up menu. (in Fig1)
3 - Double-click the Internet Protocol (TCP/IP)
item to display the Internet Protocol (TCP/IP)
Properties window. (in Fig2)
4 - Check the Use the following IP address option,
then enter the IP address for the network adapter.
Set IP address depending on the case : (in Fig3)
If you are connecting to the robot with a cable
directly on its embedded switch, that is to the LAN,
then enter 192.168.0.x (x can be any number
between 1 and 254 except 250 and those used by the
CPU and the camera of the robot). For example, a
Wifibot Serial Number: S/N Y-AXX will have as IP
for the CPU 192.168.0.1XX and 192.168.0.XX for
the camera, those number are therefore not
available. Set the Subnet Mask to 255.255.255.0
and leave Default gateway and DNS empty.
If you are connecting to the robot wirelessly,
that is to the WLAN, then enter 192.168.1.x (x
can be any number between 1 and 254 except
those used by robots or other devices). For
example, a Wifibot Serial Number: S/N Y-
AXX will have as IP 192.168.1.1XX. Set the
Subnet Mask to 255.255.255.0
5 - Click OK when finished.
Fig 1
Fig 2
Fig 3
16

Connecting your wireless adapter to the robot:
Once you have adjusted the TCP/IP settings, if you
are using a cable and providing the robot is switched
ON then you are already connected but if you are
connecting wirelessly you have to make sure your
wireless adapter is connected to the robot and not to
something else. This can be done through windows
or using the software provided with your adapter.
To connect your wireless adapter to the robot using
windows, follow these steps:
1. Switch ON the robot and wait a few seconds.
2. In the Network and Dial-up Connections
window,right-click on the wireless network
adapter,then select Properties in the pop-up
menu. The Wireless Network Connection
Properties window appears.(Fig1)
3. Click the Wireless Networks tab. A list of
wireless access points appears in the
Available networks box. (in Fig1)
4. If the wifibot network is not listed in the
Available networks, then click Refresh till
it is. (in Fig1)
5. Check the Use Windows to configure my
wireless network settings option.(in Fig1)
6. Click OK when finished.
7. Right-click on the wireless network adapter
again, then select View Available Wireless
Networks from the pop-up menu (in Fig2).
The Connect to Wireless Network dialog
box opens with a list of available networks in
the Available networks box. (in Fig3)
8. Select the wifibot network from the list, then
check Allow me to connect to the selected
wireless network, even though it is not
secure option. (in Fig3)
9. Click Connect (in Fig3), a pop-up window
at the bottom of the screen should appear
indicating you are connected. (in Fig4)
Fig 1
Fig 2
Fig 3
Fig 4
17

Whether you are connected to the robot directly
though a cable or wirelessly you can now decide to:
- Control the robot through our control software.
- Access to the robot’s operating system to configure
the robot.
- Transfer files between your computer and the
robot’s flash memory.
The control software:
The control software can be found in the CDROM in
..\Software\control software\
1. Install if necessary the Video Decoder
present in the same folder.
2. Launch the WifibotGUI program.
3. Click on Robot then Settings. The Robot
Settings window appears.
4. Set the Control Server IP and the Control
Server Port which by default is 15000.
5. Set the Camera IP and the Camera Port
which for the image is by default 80.
6. Select the proper Camera Type.
7. Click on Video, then select VideoOn. The
image from the camera will appear.
8. Click on Robot then Connect.
9. Click on Input then select Joystick or
Virtual_joy. The robot can now be operated.
The menu options:
Settings: IP settings of
the Control Server and
the Camera.
Connect: Starts the
communication with
the Control Server.
Disconnect: Stops the
communication with
the Control Server.
Input Selections
(control panel for
calibrating the
joystick)
Video selections:
Allows to configure
and control some
options of the
camera.
18
Reboot: Reboots
the robot’s CPU.
Speed View: Plots in
real time the speed
signal from the code
wheels.
Motor Control ON:
Activates the speed
control, Input_Left
and Input_Right set on
the dialog will be
applied.
Motor Control OFF:
Deactivates the speed
control.
Pan-Tilt camera control:
The red button takes the
camera to the default position.
You can click on the image
too for moving the camera.
Current input: shows the
current input or allows to set
it manually with keyboard.
Sensor feedback: shows the
data retrieved from the range
sensors, the battery level and
the speed of the robot.

Accessing the embedded operating system:
To remotely log into the robot’s operating system
we will make use of a protocol called SSH (Secure
Shell) which facilitates encrypted communication
across networks. This requires a SSH client
program. Whichever the SSH client you use, the
procedure is similar:
1. Open the SSH client.
2. Enter the CPU IP address (the default port
is 22) and then start the connection.
3. The first time a connection is established,
the program will ask for confirmation.
4. Enter login: root.
5. Enter password: wifibot
For your convenience the CDROM includes a free
SSH client you can find in ..\software\putty\
Connect to the robot in the following steps:
1 - Enter the IP
address here.
2 - Check the SSH
option.
3 - Click Open to
start the connection.
4 - Confirm the connection.
5 - Enter login: root
6 - Enter password: wifibot
19

Transferring files to the robot:
For transferring files we will use the SFTP protocol,this requires an SCP client program. For your
convenience you will find in the CDROM a free SCP client in ..\software\WinSCP\
Connect to the robot in the following steps:
1 - Enter the IP address here.
2 - Enter User name : root
3 - Enter password: wifibot
4 - Click Login to
initiate the connection.
5 - Confirm the
connection.
6 - Confirm again.
You are now connected and you
can start transferring the files.
20
Table of contents
Other Wifibot Robotics manuals
