Wiko VOIX User manual

A downloadable, printable guide to your WIKO VOIX and its features.
User Guide
Powered by AndroidTM 12

2
Contents
Geing staed ............................................................ 4
About the user guide............................................................4
Geing to know your phone .....................................................5
Setup ..........................................................................8
Home screen .................................................................. 11
Making connections........................................................14
Phone ........................................................................14
Contacts ......................................................................16
Messages .....................................................................17
Gmail .........................................................................18
Internet and social networking ..................................................19
Connectivity...................................................................21
Apps and enteainment................................................... 23
Camera and video .............................................................23
Photos ........................................................................25
Productivity ...................................................................26
Seings ..................................................................30
Network & internet............................................................ 30
Connected devices ............................................................33
Apps ..........................................................................36
Notications...................................................................37
Baery ........................................................................39

3
Storage ......................................................................40
Sound.........................................................................41
Display ........................................................................42
Accessibility ...................................................................43
Security ..................................................................... 46
Privacy ....................................................................... 50
Location.......................................................................51
Safety & emergency ...........................................................52
Passwords & accounts..........................................................53
Digital Wellbeing & parental controls............................................ 54
System........................................................................55
About phone ..................................................................61
Safety and use............................................................ 62
Regulatory agency identications .......................................... 73
FCC Regulations ...............................................................73
RF Exposure Information (SAR) .................................................74
Hearing Aid Compatibility (HAC) ...............................................75
Warranty .................................................................76

4
Geing staed
The topics in this section will introduce you to your phone, help you get set up with
service, provide an overview of the phone screen, and get you staed with basic phone
operations.
About the user guide
Thank you for purchasing your new WIKO VOIX Smaphone. The following topics explain
how best to use this guide to get the most out of your phone.
Before using your phone
Read the Quick Sta Guide that came with your device thoroughly for proper usage.
Descriptions in the user guide
Note that most descriptions in this guide are based on your phone’s setup at the time of
purchase. Some operation descriptions may be simplied.
Screenshots and key labels
Screenshots and other illustrations in this user guide may appear dierently on your
phone. Key labels are simplied for description purposes and dier from your phone’s
display.
Other notations
In the user guide, the phone may be referred to either as “phone,” “device,” or “handset.”
A microSDTM or microSDHCTM card is referred to as an “SD card” or a “memory card.”

5
Geing to know your phone
These topics illustrate your phone’s primary pas and key functions.
Headset jack
Receiver
Front
camera
Touch
screen
Microphone
USB Type-C charging &
accessory po
Rear dual
cameras
Flash
Speaker
Volume
keys
Power/Lock
key
Fingerprint
sensor
SIM tray
Eject SIM
tray
LED indicator
Home
buon Recents
buon
Back buon
Microphone
Note: Your phone’s screens and app layouts are subject to change. This user guide uses
sample images only.
6
Pa Description
Headset jack Plug in a headset (sold separately) to listen to music or for
convenient, hands-free conversations.
SIM tray Inse your Nano SIM card and microSD (sold separately) for
service and additional storage.
Receiver Hear the caller and automated prompts.
LED indicator Be informed of status changes and notications on the
phone with an LED indicator light on the front display.
Front camera Take pictures and record videos while facing the screen.
Touch screen • View information needed to operate your phone.
• Access your phone’s features and applications.
Microphone Transmit your voice electronically for a call, voice recording,
etc.
USB Type-C
charging &
accessory po
Connect the USB cable (included) for charging, or connect
other accessories.
Speaker Listen to calls, automated prompts, and music.
Volume keys Adjust the volume for ringtones, media, notications, and
system sounds.
7
Pa Description
Power key
• Press to turn the screen on or o.
• Press and hold to turn the phone on or o.
• Press along with the Volume down key to take a
screenshot.
Rear dual cameras
• Take pictures and record videos with a 13+2 MP lens.
• Use features such as the Porait mode, Time lapse, Beauty
mode, and more.
Flash Brighten photos taken indoors or at night.
Fingerprint sensor Unlock your phone with a touch of your nger.
Back buon Return to the previous screen.
Home buon Display the main Home screen.
To talk to Google, just press and hold the home buon.
Recent Apps buon • Tap to display a list of recently used apps.
• Double-tap to swap between your last two used apps.
CAUTION! Inseing an accessory into the incorrect po may damage the phone.
8
Setup
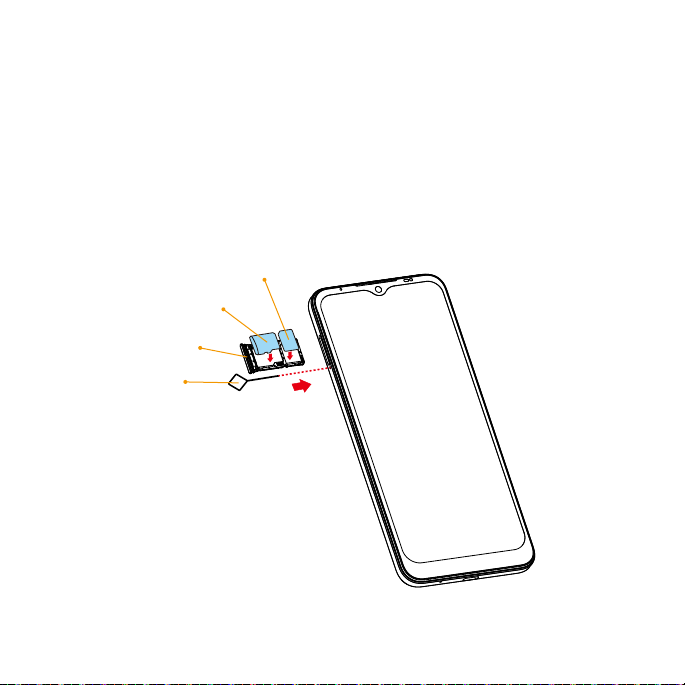
Install a Nano SIM/microSD card
1. Inse the included SIM tray pin into the tray slot and remove the SIM tray.
2. Place the Nano SIM card and microSD card (not included) with metal contacts facing
down into the tray.
3. Gently slide the SIM tray back into the slot.
microSD
Nano SIM
Pin
SIM tray

9
Charge the baery
1. Connect one end of the data cable to the USB po located on the boom of your
phone.
2. Connect the other end to the power adapter.
3. Connect the power adapter to an electrical outlet to fully charge your phone.
Note: Use the power adapter that comes with your phone; using other adapters may
damage your phone.
Turn your phone on and o
The instructions below explain how to turn your phone on and o.
Turn your phone on
Press and hold the Power key until the device turns on.
10
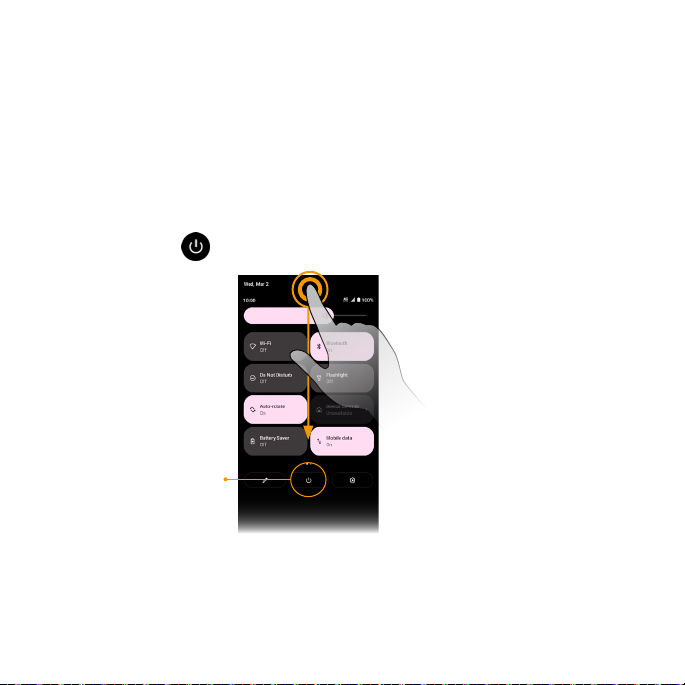
Turn your phone o
There are two ways you can use to turn your phone o.
• Using Power key
1. Press and hold the Power key.
2. Tap Power o.
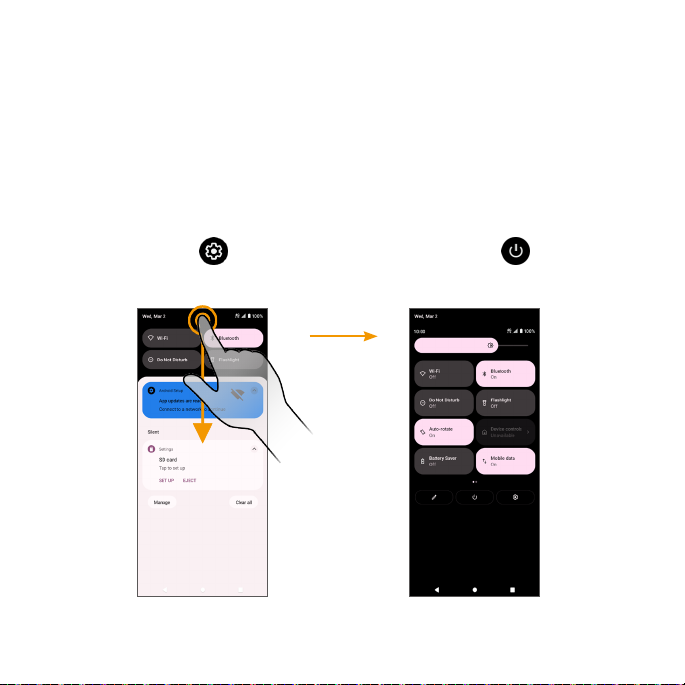
• Via Quick Seings Panel
1. Swipe down on the Status bar twice to enter Quick Seings panel.
2. Tap Power icon > Power o.
Power icon
Complete the setup screens
Once your phone is powered on, you will need to run Setup. The Setup Wizard will appear
to guide you through the basic seings on your device. Follow the instructions to nish
your phone setup.

11
Home screen
The Home screen is the staing point for your phone’s applications, functions, and
menus. You can customize your Home screen by adding application icons, shocuts,
folders, and more.
Your Home screen extends beyond the initial screen. To add a new Home screen, drag an
app icon to the right edge of the main screen and release the icon.
Status area
App icons
Notication area
Home buon
Back buon Recent Apps buon
Status bar
App list
All installed apps can be accessed and launched from the Apps list. From the Home
screen, swipe up to access the Apps list.

12
Status bar
The Status bar at the top of the Home screen provides phone and service status
information on the right side and notication ales on the le.
Status icons (Right side)
3G data service Network (full signal)
4G LTE data service Wi-Fi®enabled
Baery (full charge) Hotspot on
Baery (charging) GPS in use
Mute on Airplane mode enabled
Alarm on
Notication icons (Le side)
Download Missed call
New voicemail New Email
Warning New text or MMS message
Update successful Wi-Fi network available
Note: Not all status and notications icons are listed on the table above.
13
Notication panel
1. Swipe down on the Status bar to open the Notication panel.
2. Swipe le or right on a notication to delete it, or tap Clear all to clear all event-based
notications (other ongoing notications will remain).
Quick Seings panel
1. Swipe down on the Status bar again from the Notication panel.
2. Tap a seing to turn it on or o.
3. You can tap Seings to access full seings or tap Power o to turn your
phone o.
Quick Seings panel
Notication panel
14
Making connections
The topics in this section will explain how to help you make connections, from phone
calls and maintaining contacts, to text messages, email, Internet, and international
services.
Phone
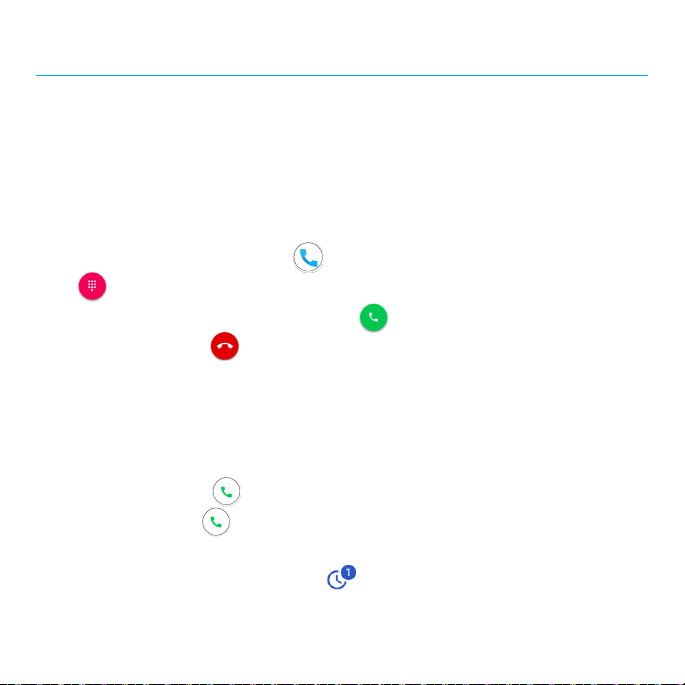
Make a call
1. From the Home screen, tap Phone .
2. Tap to open the dialpad.
3. Enter a phone number in the keypad and tap to make a call.
During a call, you can tap at the boom of the screen to hang up.
You can place phone calls directly from your contacts list, recent calls, and favorite list.
Receive a call
The Incoming Call screen is displayed when a call is received, along with the caller’s
numbers and other information you’ve entered for that contact.
• To answer a call, swipe up.
• To reject a call, swipe down.
• Press any side key to mute the ringer.
• Any missed calls are logged in Recents .
To answer a call when your screen is unlocked, tap ANSWER.
15
Reject a call and send a text message
You can reject an incoming call and automatically send a quick response text message to
the caller.
1. When a call arrives, tap on the boom le corner of the screen.
2. Tap one of the messages or write your own to send to the caller.
You can edit the preset quick responses by tapping > Seings > Quick responses
and edit the quick responses.
Call seings
1. From the Home screen, tap Phone .
2. Tap > Seings to adjust your call seings.
Call log
1. From the Home screen, tap Phone .
2. Tap Recents on the boom bar to display the Call Log.
3. You can tap a contact in the Call Log to display more options.
•Audio call: Make a voice call to the contact/number.
•Video call: Make a video call to the contact/number.
•Create new contacts: Create a new contact from an unknown number.
•Add to a contact: Add an unknown number to an existing contact.
•Send a message: Send a text message to the contact/number.
•Block number: Block the contact/number.
•Call details: View detailed call information.

16
Contacts
From the Home screen, swipe up to access Apps and tap Contacts .
Add a contact
1. From the Contacts screen, tap to add a contact.
2. Use the keyboard to enter information. When you are nished, tap SAVE.
Edit a contact
1. From the Contacts screen, tap a contact to view its details.
2. Tap Edit on the top right corner of the screen.
Delete a contact
1. From the Contacts screen, tap a contact to view its details.
2. Tap > Delete.
Share a contact
You can quickly share contacts using Bluetooth, Gmail, or text messages.
1. From the Contacts screen, tap a contact to view its details.
2. Tap > Share.
3. Select how you’d like to share the contact information card (vCard).
Contacts seings
1. From the Contacts screen, tap a contact to view its details.
2. Tap > Seings to adjust your contacts seings.

17
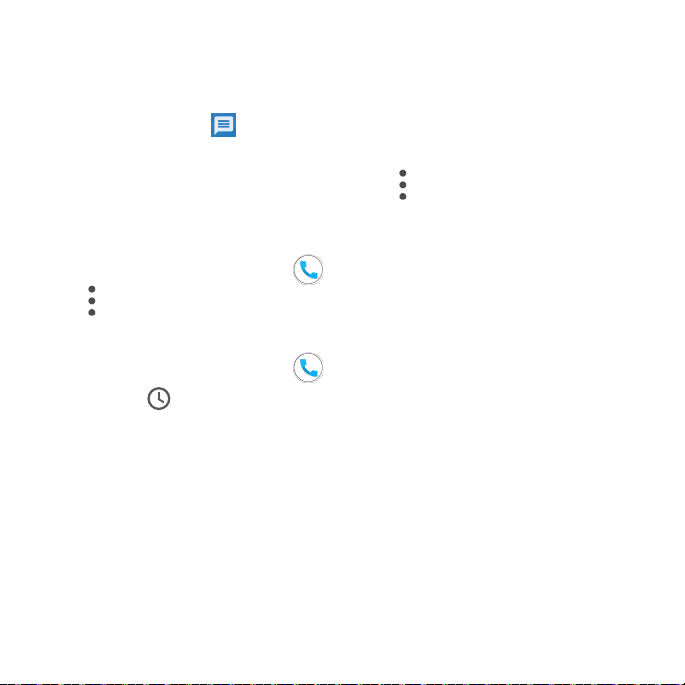
Messages
Send instant messages, media, and more with text and multimedia messages.
From the Home screen, tap Messages .
Send a text message (SMS)
1. From the Messages screen, tap .
2. Enter a contact name or mobile number in the To eld and tap the text box and
compose your message.
3. When done, tap Send to send the text message.
Note: Your text message automatically becomes a multimedia message if you enter an
email address as the recipient, aach an item, or compose a very long message.
Send a multimedia message (MMS)
1. From the Messages screen, tap .
2. Fill in one or more recipients and tap the text box to compose your message.
3. Tap to the le side of the text box to add emojis, location, contacts, or les. Tap
to aach photos or videos. Tap to send sound recordings.
4. Aer adding aachments, you can tap to view it, and tap to delete the aachment.
5. Tap Send to send the MMS message.
Messages seings
Tap on the top right conor of the Messages screen and tap Seings to adjust your
messages seings.
18
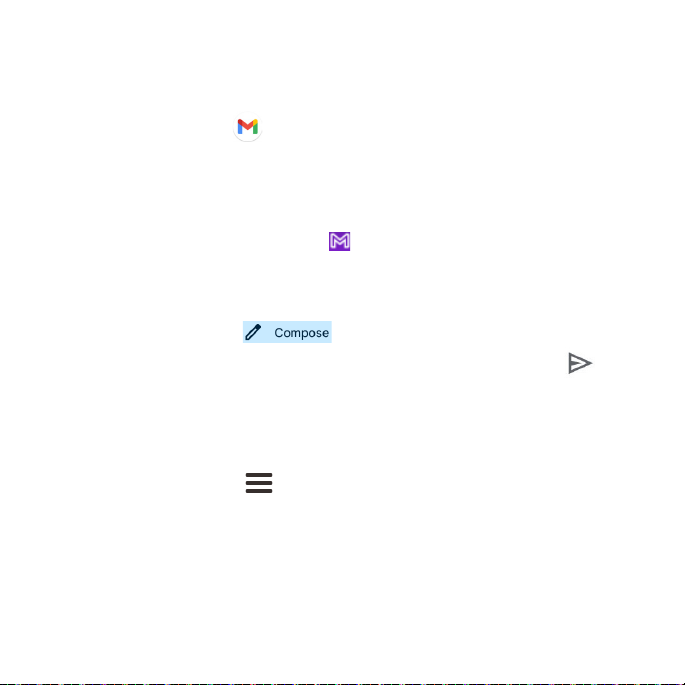
Gmail
Use Gmail to send, receive, and manage your email messages. Before using Gmail, you
must sign into your Google Account on your phone. From the Home screen, swipe up to
access Apps and tap Gmail .
Note: You can use the Gmail app to manage email for other accounts, such as Hotmail,
Outlook, Exchange, and more.
Receive an email
When a new email is received, you will see in the Status bar. Drag the Status bar down
to display the Notication panel and tap the new message to view it.
Compose an email
1. From the Gmail screen, tap to compose a new email message.
2. Enter the message recipient(s), subject, and message, and then tap Send .
Email seings
You can access seings for the Gmail app and for your individual email accounts from
the Gmail seings menu.
1. From the Gmail screen, tap > Seings.
2. Tap General seings to access seings for all accounts, or tap an account name to
congure seings for a specic email account.

19
Internet and social networking
The following topics describe how to connect to and use the Internet on your phone and
how to access popular social networking sites.
Chrome browser
From the Home screen, tap Chrome to browse the Internet, search for information,
and bookmark your favorite web pages for convenient access.
Browsing web pages
1. Tap the address eld.
2. Enter a web address or a keyword to browse for web pages.
Adding a bookmark
1. Open the web page you want to bookmark.
2. Tap > .
Opening a bookmark
1. From the Chrome browser screen, tap > Bookmarks.
2. Select the bookmark of the website you want to view.
Customizing browser seings
1. From the Chrome browser screen, tap > Seings.
2. In the Seings list, you can select options to customize the browser.
Tip: For more information, visit: google.com/intl/en/chrome/browser/mobile/.
20
Facebook
Post updates, see what your friends are up to, upload pictures and check-ins, and more
with on-the-go Facebook access.
1. From the Home screen, swipe up to access Apps and tap Facebook .
2. Enter your mobile number or email and password and tap Log In, or tap Create New
Facebook Account to join Facebook.
3. Once completed, your Facebook account will be added to your phone.
Once you’ve either created an account or signed in, you can post and view updates,
upload pictures, tag locations, and more, all from your phone.
From the Facebook screen, tap What’s on your mind? to type an update. You can also
share photos and videos, sta a live video, scroll through your Facebook feed, and more.
YouTube
View videos uploaded to YouTube and upload your own videos.
1. From the Home screen, swipe up to access Apps and tap YouTube .
2. Browse YouTube channels and tap a video to view.
3. The video will play on your phone screen. Tap the screen to pause or resume play while
watching.
You can post videos to your YouTube account from your phone.
1. Tap Record/Post Video .
2. Select a video to upload, record a new video to upload, or stream a live video. Enter a
title, description, and tags, and select a privacy seing.
Table of contents
Other Wiko Telephone manuals


