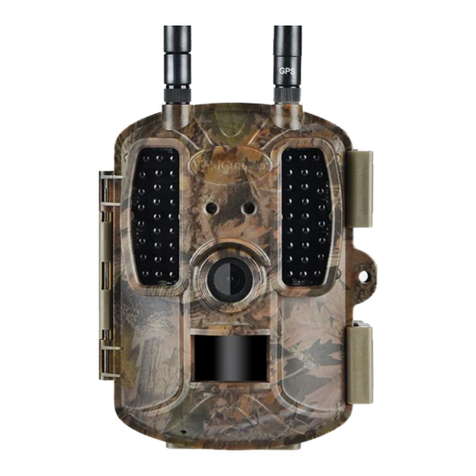
WildGuarder Watcher1 Series User manual

Page 1/ 33
4G LTE FULL HD CELLULAR
WIRELESS TRAIL CAMERAMERA
USER’S MANUAL
Model:Watch1/Watcher1w/Watcher1-4G/Watcher1w-4G

Page 2/ 33
IMPORTANT NOTE
IMPORTANT NOTE
Congratulations on your purchase of one of high quality digital trail camera on the market! WildGuarder is very proud of this little unit
and we are sure you will be pleased with it as well. We truly value your business and will continue to provide you top quality customer
service should you ever need help with any of our products.
Please refer to the notes below and the instructions in this manual to ensure that you are completely satisfied with this product. If your
WildGuarder HD Trail Camera Watcher1 does not seem to be functioning properly or if you are having photo/video quality issues,
please check the Troubleshooting/FAQ section on pages. Problems are often due to something simple that was overlooked, or require
only changing one setting to solve.
If your problem continues after trying the solutions in the Troubleshooting/FAQ section, please contact your local Agent/Dealer or email
us through support@wildguarder.com directly.
You will also find this manual and other technical articles at Wildguarder official site: www.wildguarder.com
WildGuarder recommends using a external solar panel power or full set of Twelve Lithium AA batteries
in these Watcher1 models to obtain maximum battery life
Do not mix old and new batteries Do not mix battery types-use ALL lithium or ALL alkaline
WildGuarder recommends using SanDisk® class 6 or faster SDHC Cards (up to 32GB capacity)
in your Watcher1 Series

Page 3/ 33
Table Of Contents
Table Of Contents
1. General Information ........................................................ .4
1.1 Fully Functionality Introduction ....................................... 5
1.2 Application........................................................................ 5
1.3 Main Features................................................................... 6
1.4 Power Supply .................................................................... 7
1.5 SD Card Selection.............................................................. 7
1.6 Attention ........................................................................... 7
2. Whole View and Details of Camera .................................... 8
2.1 Figure 1: Front View of Camera;....................................... 8
2.2 Figure 2: Internal, Side View of Camera;.......................... 8
3. Quick Start ........................................................................ 8
3.1 Insert Sim Card ............................................................... 8
3.2 Insert SD card and format it ............................................. 8
3.3 Load Batteries ................................................................... 9
3.4 Enter Setup Mode............................................................. 9
3.5 Enter Live Mode................................................................ 9
4. Advanced Setting............................................................. 10
4.1 Set up Parameters on Camera........................................ 10
4.2 Setup Camea On PC........................................................ 19
4.3 Setup MMS/SMTP/FTP On PC ........................................ 22
4.4 4G Setup ......................................................................... 22
4.5 SMS Remote Control APP ............................................... 27
4.6 Working Condition of 4G LTE Module ............................ 29
4.7 Cleaning .......................................................................... 29
5. Trouble Shooting ............................................................. 30
5.1 Photos Do Not Capture Subject of Interest.................... 30
5.2 Camera Stops Taking Images or Won’t Take Images...... 30
5.2 Night Vision Flash Range Doesn’t Meet Expectation..... 30
6. Specification.................................................................... 31
7. Warranty ......................................................................... 32

Page 4/ 33
General Information
1.General Information
The Watcher1 Series is WildGuarder® Latest generation of 4G LTE network in the market. This manual applies to basic model Wathcer1
and 4G LTE cellular model Watcher1-4G, the WildGuarder® top version 4G LTE cellular mobile communication scouting camera, with
unique 4G FDD-LTE wireless module and high speed of communication function. The module of Watcher1-4G scouting camera is able to
transmitting original size picture of Maximum 20MP & 30MB big file 1080P HD video files to your email at high communication speed
with 4G LTE network, however, the other brands 3G scouting camera is sending Thumbnail size only. In addition, the latest version
Watcher1-4G supports FTP function, the camera is able to uploads the video & picture to the FTP space, then you can preview &
download the video & picture via FTP PC software/APP. Furthermore, Watcher1 series camera , with its highly sensitive Passive Infra
Red (PIR) sensor, triggers to take pictures/videos and sends the images to your cell phone or E-mail account.
WildGuarder® Watcher1 series are highly qualified products that can be operated easily, with its unique patent design & excellent
performance.It was R&D by our diligent and smart engineers based on feedbacks and requirements from customers globally, as
WildGuarder® is always open-minded with willing to adopt creative ideas from you. You will enjoy the excellences reflected on this
series product.
Please read the USER’S MANUAL in details before starting for better operation of WildGuarder® Watcher1 series scouting trail camera.
There are four version of Watcher1 Series:
Watcher1 is basic model(non cellular) with regular angle
Watcher1w is basic model(non cellular) with wide angle
Watcher1-4G is 4G LTE Network wireless cellular model with regular angle.
Watcher1w-4G is 4G LTE Network wireless cellular model with wide angle.
There are three versions of WildGuarder® Watcher1-4G:
Version for Europe Market
Version for Australia Market
Version for North America Market
Supported 4G/3G/2G network frequency bands list in below:
Version for Europe & Australia
4G FDD-LTE frequency: B1 B3 B5 B7 B8 B20
3G WCDMA frequency: B1 B5 B8
2G GSM Network: 850/900/1800/1900
Version for North America
4G FDD-LTE frequency: B2 B4 B5 B12 B17
3G WCDMA frequency: B2 B4 B5
2G GSM Network: 850/1900
There are three color for your selection:
Camo Green - Design concept from Spring and Summer.
Camo Yellow - Design concept from autumn and winter
Red Brown - Design concept from the dark woods/forest

Page 5/ 33
Fully Functionality Introduction
1.1 Fully Functionality Introduction
Besides all the functions you may experience from any other similar products. The WildGuarder® digital scouting camera is aimed to
offer user the most friendly using experience with many extraordinary features, such as sending up to 30Mb big file FHD 1080P video &
maximum 20 Megapixel high quality image,90° or 112° Wide Angle FOV lens, 56pcs 940NM No-Glow IR LEDs, 04s-6s seconds trigger
time, SMS remote control, FTP function, user friendly operational menu, etc.
1.2 Application
This 20MP digital camera is an ideal product for housing security, warehouse surveillance, and monitoring wild animals with its
camouflage appearance and nice shape. It is convenient to install or fasten, could be used to take photographs manually and carry on
full HD 1080P videos in Test mode.
A. Instant surveillance camera for home, office, construction site, and warehouse, etc
B. Motion-triggered infra-red night vision surveillance;
C. Animal observation and hunting;

Page 6/ 33
Main Features
1.3 Main Features
1.Support 4G FDD-LTE network and downward compatible with 3G WCDMA /2G GSM/GPRS network
2. Regular lens model: 70 degree FOV lens; 70 degree PIR angle;
Wide lens model: 110 degree FOV lens; 112 degree PIR angle;
3.Supports sending up to 30Mb big file 1080P video files & 20MP/12MP/8MP/5MP original size image via 4G FDD-LTE network
4.FTP Function: Supports uploading 30Mb 1080P HD video & 20MP/12MP/8MP/5MP original size picture to FTP space,
allow users preview & download the video & picture via FTP software/APP.
5. GPS parameter(longitude & latitude) can be inputted via camera menu. (The longitude & latitude will be displayed
on the pictures & video)
6.WildGuarder APP & SMS Remote control function: The Camera setting can be changed via WildGuarder APP.
7.Programmable 1.3MP or 5 or 8 or 12 or maximum 20 Megapixel high-quality resolution.
8.Rapid 0.4-0.6 seconds trigger speed.
9. Real high-definition Full HD 1080P (1920x1080): 30FPS, 720P (1280x720),640x480 video with audio record.
10.There are 56pcs invisible 940NM No-Glow black LEDs in total.
11. The former provides up to 20 meters flash range whereas the latter up to 15 meters flash range.
12.In “Cam + Video” mode, camera takes both pictures and video at every trigger event.
13.Ultra low standby power consumption. Extremely long in-field life. Support external solar panel power, the working
time will be extend.
14.Support multiple functions: adjustable PIR sensitivity, Multi-shot (1~3 photos per trigger), programmable delay
between motions, Time Lapse, Timer, Audio Recording, TV out, stamp of (Logo, date/time, temperature, moon phase,)
on every single photo.
15.Perform in the most extreme temperatures from -22°F to 158°F.
16.In Time Lapse setting, the camera automatically and constantly takes pictures/videos at specified interval. This is
very useful when observing plants flowering, birds building nest, or when monitoring unattended properties such as
parking lots.
17.With Timer setting on, the camera can be programmed to only work in specified period every day. This feature able
to works with ‘Time-Lapse’at the same time.
18.Convenient to be mounted on trunk or tripod.
19.Built-in 2.0” TFT color display to review images and videos.
20.Brand Logo, Date, time, longitude and latitude temperature and moon phase would be stamped on the bottom of the pictures.
21.Lockable and password protected.
22.Users can configure the Camera on the computer, or directly on the built-in TFT screen.

Page 7/ 33
Power Supply
1.4 Power Supply
Batteries
The Watcher1 series trail camera runs on 4 or 8 or 12 pieces AA size batteries (12V power supply to ensure camera well performance of
all functions); It is able to work with alkaline, high-quality NiMH, and Lithium rechargeable batteries. But we suggest to run camera with
NiMH and Lithium batteries only as performance of alkaline batteries is much poorer than either NiMH or Lithium batteries.
NOTE: Don’t mix batteries types! Different batteries to be used in camera may cause permanent damage which also violates warranty
policy!
CAUTION: 1.Please note that even in the OFF mode, the camera still consumes a small amount of battery power. If you are not using
the camera for an extended period of time, we highly suggest users to remove the batteries from the camera to avoid possible acid leak
that may damage the camera and void the warranty.
2.Always have the camera in the OFF position when installing or removing batteries and memory card. Removing batteries or memory
card while the camera is ON may damage the camera
Solar Panel
To bring better using experience for our users, the Watcher1 series are designed to be able to work with most standard 12V/1~2 A
lithium battery build-in solar panel, that means the working time of camera can be greatly extended.
Power Adaptor—Security Surveillance Purpose
This camera can also be powered by an external 12V/ 1~2A DC adapter. Recommend to remove the AA size batteries when power
adapter is used. Electrical power is recommended for security purposes.
1.5 SD Card Selection
Using a memory card is required to operate the camera. When the camera is "ON" and no memory card is used, the screen displays
"Please insert memory card". The SD slot of the camera has a maximum 64GB memory capacity. Before inserting or removing the
memory card, the camera must be turned to "OFF". Failing to do may cause the loss or damage the pictures already recorded from the
memory card. When the SD card is full, the viewing screen indicates "Memory Full". The following data shows an approximate quantity
of photos which can be recorded by the camera depending on the memory card capacity.
Chart below will show you the approximate capacity of different size SD cards. Please check to see which size card can fit your needs
best.
1.6 Attention
1. Insert the SD memory card correctly, camera does not support SD card hot swap (insertion).
2. Please use high-quality AA batteries in order to prevent battery cells from corrosion of leaked acid.
3. Use right adaptor (12V/1A or 2A) of this camera to supply power, and do not invert the electrode when put in batteries.
4. In Test mode, camera will automatically enter PIR Auto mode if no keypad touching within 60 sec. Please manually turn ON it as if you
want to do some further configuration.
5. Don’t interrupt power supply during system upgrade, please deliver it back to factory if the device doesn’t work after upgrading.
6. Do not frequently insert or pull out SD card and battery or plug in and out the adaptor when the camera is on.
7. Do not have any floating objects, such as leaves, strings, or ribbons in the 3M motion detection zone of cameras, to avoid mistaking
photograph or videos.
8. Keep camera away to hot irrelevant objects, air conditioner exhaust vents, and light, etc. to avoid mistaking photos or videos.
9. Programmed Date/Time can be saved in camera for 12 hours once camera was powered 1 hour above.
10. Slide the power switch to OFF position to turn off the camera, Please note that even in the OFF mode, the camera still consumes a
small amount of battery power. Therefore, please remove the batteries if the camera is not in use for a long time

Page 8/ 33
Whole View and Details of Camera
2.Whole View and Details of Camera
3. Quick Started
3.1 Insert SIM Card
A SIM card is needed for Watcher1-4G (If it is non cellular model Watcher1, do not need SIM card) from a Mobile Phone Network
Operator. Make sure it supports 4G LTE network and provide Short Messaging Service (SMS), Multimedia Messaging Service (MMS) and
data traffic service.
Open the camera, you will see the SIM card slot at the side part, insert SIM card as the sign aside to finish SIM card insertion. Pay
attention to the right direction to insert SIM card when insertion.
3.2 Insert SD Card and Format It
Open the camera, you will see the SD card slot at the side part, insert the SD card as the sign aside the card slot.
The camera do not comes with internal memory, therefore, it will not work without a SD (Secure Digital) memory card or SDHC (High
Capacity) card. Before inserting the SD card, please make sure the write-protect switch on the off side of the SD card (NOT in the “Lock”
position). The supported memory capacity is up to 64GB, please always format the SD card on camera before starting.

Page 9/ 33
3.3 Load Batteries
Open the camera cover, you will see the battery slot.
Please load at least 4 AA batteries should be inserted as indicated inside the battery slot. Upside down batteries electrode may cause
device malfunction. Also, we strongly recommend changing the batteries when power icon(on camera screen) or photo stamp is empty.
Make sure the 12 new and full AA alkaline batteries are loaded.
3.4 Enter Setup Mode(Test Mode)
Switching Setup and off , making settings
After connecting a power supply, switch camera to the “SETUP/Test” position to make the settings described on the following pages
using the buttons (photo as follows). In off mode, the infrared led are off. When turn to ‘On’or ‘Setup/Test’ mode, the red light will
work for a while.
In the ‘Setup mode’, you can test the working area of PIR (Passive Infrared) sensor, specifically the sensing angle and distance.
To perform the test:
-First position the camera at proper height and aim at the region of interest (ROI).
-Walk slowly from one side of the ROI to the other side parallel to the camera. Try different distances and angles from the camera.
- If the Motion Indicator flashes blue, it means that the position you located is detected by one of the side Prep PIR sensors. If the
Motion Indicator flashes red, it indicates that position is captured by the main PIR sensor.
The best position to place the camera could be found through this test. Generally, it is recommended to place the camera at the height
of 3 to 6 feet (1 to 2 meters) to the ground.
3.5 Enter Live Mode
After finishing & checking all setting, switch camera to the ‘ON’position to enter the live mode. The motion indicator will flash red for
about 3 seconds and the camera starts working after flash. It will immediately take pictures or record videos when person or animal
enters the area of the PIR sensor.
Caution: To avoid potential false triggers due to temperature and motion disturbances, please do not aim the camera at a heat source

Page 10 / 33
(e.g.: the sun, heated stone or metal) or nearby tree branches and twigs. The ideal direction to aim at is the north and the open place
without heat source. Also, remove any twigs close to the front of the camera.
Operation Panel:
Press the key to choose the upper option.
Press the key to choose the next option.
Press the (SHOT key) to manually trigger the shutter. A photo or video (depending on the red mode key) will be taken and saved to
the SD card.
Press ‘OK’key to save the menu setting
Press ‘Mode’key to swift photo mode and video mode; review or replay the photo or video; swift the number, letter, symbol when
re-setting up mobile ID and Email.
The ‘Menu’on the keypad allows you to program the camera to work the way you want.
4.Advanced Setting:
4.1.Set up Parameters on Camera
To select whether photos or videos are to be recorded in motion detection mode or time lapse mode. In Photo + Video mode, the
camera first takes a photo and then starts filming video.
Language
There are 12 language for your selection - English / French / Spanish / Portuguese / Dutch/ Italian / T Chinese / S Chinese /
Japanese / Hungarian / Polish / Swedish. You can set the language via camera menu or WildGuarder PC software.

Page 11 / 33
Image size
There are 5 different photo resolution for your selection - 20MP, 12MP,8MP, 5MP,1.3MP.
Note: The larger the file size, the more detailed the image. However, the maximum number of high-resolution images that can be
stored in the memory card is much fewer than small size images .
For example: If you use a 16GB(=16384MB) SD card and set the image size as 20MP. You will get about 818 pieces images.
If you set the image size as 5MP,you will get about 3275 pieces images.
In addition, the transmitting speed of small file image will be much faster than the big file image.
Video resolution
There are three video solutions for your selection - 1920 × 1080, 1280 × 720, 640 × 480.
The higher resolution produces better quality videos, but creates larger files that will take up more SD card space and fills it up faster.
Note: The transmitting speed of VGA video will be much faster than the high-definition video.
Date & time
Set up date and time. They will be displayed on the photos and video that taken by camera.
Shooting No.
Select the number of photos that will taken in one succession, when the camera is activated in ‘Photo’ or ‘Camera + Video’mode.
If you select ’01 Photo’, camera will take 1 photo after one trigger.
If you select ’02 Photo’, camera will take 2 continuous photo after one trigger.

Page 12 / 33
If you select ’03 Photo’, camera will take 3 continuous photo after one trigger.
Video length
Use the up/down buttons to select the length of the video recording (between 5–30 seconds) that is to be made when video recording
is activated. The longer the recording time selected, the shorter the operating time.
Note:
1. For saving power, it is better to set the video length within 10 second if you use video transmitting function.
2. The transmitting speed of small file video will be much faster than the big file video.
3. If users would like to transmitting big file video or image, we recommend the solar panel power to extend the working time of
camera.
Interval
Allows users to customize how often the PIR sensor can be allowed to work. This prevents the card from filling up with
too many redundant images. Options are 3-60 seconds and 1-60 minutes.
The recommend interval setting is : 3-5 seconds
PIR Sensitivity
For interior areas and environments with little interference, such as branches blowing in the wind, select “High”. Select “Medium” for
exterior areas and environments with a normal amount of interference, and select “Low” for environments with a high level of
interference.

Page 13 / 33
Date stamp
Here you can choose whether to save your photos with a time stamp. You can choose whether the stamp consists of the
‘Date and Time’or ‘Date’ only. The date stamp will be showed on the image.
Timer
Select “On” if the camera should only be active during a certain time period. In the sub- menu, you can set the start and end time for
PIR mode and Time-lapse mode. There are two ‘Timer’ for your setting.
Press the ‘up/down’buttons to set the hour for the start of the active phase. Then switch to the next field using the right button. Press
the up /down buttons to set the minutes for the start of the active phase.
The settings made here apply every day. The camera will not record any images outside of the active phase.
Confirm your selection with the OK button. Afterwards, press the ‘MENU’button to close this sub-menu.
Password Setting
Select “On” if you would like to use a password to protect the camera from unwanted access. In the following screen menu, you can set
a 4-digit combination:
Press the up /down buttons to select the first digit between ‘0–9’.
Then switch to the next field using the right button. Press the up /down buttons to select the second digit between 0–9. Confirm your
selection with the ‘OK’button. Afterwards, press the ‘MENU’button to close this sub-menu. The set number combination must now be
entered each time the camera is switched to test mode.
If you forget the number combination, please ask the supplier for firmware to reset it to the factory default settings.

Page 14 / 33
Serial NO.
The serial number stamp will be showed on the picture or video, this function will help users to tell where the image came from.
1.Select “On” if users want to use a serial number to rank the camera. In the following screen menu, you can set a 4-digit combination.
2. Press the up /down buttons to select the first digit between 0–9.
3. Switch to the next field by using the right button. Press the up/down buttons to select the second/third/fourth digit between 0–9.
Time lapse
With this function the camera automatically takes pictures at adjustable intervals. This function is useful if you want to observe the
blooming of plants or the others, for example. When users confirm “On” with the OK button, you can then set the desired time interval
using the menu that now appears:
Press the up/ down buttons to set the hour of the desired time interval. Then switch to the next field, “Min”, using the right button.
Press the up/down buttons to set the minutes of the desired time interval. Then switch to the next field, “Sec”, using the right button.
Press the up/down buttons to set the seconds of the desired time interval. Confirm your selection with the OK button. Afterwards,
press the MENU button to close this sub-menu.
SD cycle

Page 15 / 33
Select the ‘On’ option, the oldest pictures or video will be deleted from SD card if there is not enough memory space for the new files.
Select the ‘Off’ option, the camera won’t take the pictures or video if there is not enough SD card memory storage.
MMS Status
If you would like to use MMS function, please select ‘VGA’ or ‘QVGA’ option.
If you would like to turn off MMS function ,please select ‘Off’
There will be two image size for your selection - VGA=640x480 or QVGA=320x240
MMS Setup
Set the recipient cellphone number to receive the picture via MMS function. User will be allow to set three recipient cellphone number.
GPRS Status
Please select ‘SMTP’if you would like to use SMTP(Email)function to transmitting the image
Please select ‘FTP’ if you would like to use FTP function to transmitting the image.
Note: Both SMTP & FTP function supports sending image & video. But if users would like to transmitting big file image & video,
FTP will be the best choice. Because some mail servers do not allow transmitting & receiving big files or they have limit. moreover, the
transmitting speed of FTP function will be faster than SMTP.

Page 16 / 33
GPRS setup
Users allow to set three different recipient email address.
FTP Setup
The File Transfer Protocol (FTP) is a standard network protocol that can be used for the transfer files between a camera and server via
4G network.
By setup FTP function, the 1080P video & 20MP original size image will be uploaded to your FTP space via 4G network once the camera
captures wildlife. Then the image & video able to be previewed & downloaded via FTP PC software or FTP APP.
The necessary FTP parameter are ‘Server’, ‘Port’, ‘Account’, ‘Account Password’
Note: Before using the FTP function, user need to register a FTP account. We recommend the
paid FTP space/account, because it will be more stable and faster when transfer flies and there will be no spam any more.
SMS Remote Control Interval:

Page 17 / 33
Inter the On sub-menu, input the interval time. The SMS module will be activated each interval time and receive SMS command.
The instruction can be made via APP. After camera is activated, it will be awaken for 6mins. The shortest SMS Control Interval is 10min.
For example: SMS control interval 5 hours. The camera will receive SMS text command at each 5 hours interval.
Note:
In order to reduce power consumption, we suggest to set the SMS control interval more than 24 hours. If you set it with short interval,
the SMS module will always be awaken, it is resulting in increase power consumption.
Record audio
Turn on this function, camera able to records sound while recording video.
GPS Data
This function allow users input the GPS parameter that your got from other GPS instrument.
The Latitude &Longitude stamp will be displayed on the picture & video.
Default Settings
If user select “Yes” the menu item and press the OK button, all previously made camera settings including any password will be deleted
and the factory settings will be restored.

Page 18 / 33
Format
Formatting the memory card will permanently delete all data on it including the locked images. Before you use a new memory card in
the camera or a card that has previously been used in another device, you should first format the memory card. Select “Yes” with the
OK button and confirm the following prompt with the OK button. The formatting process starts. While the card is being formatted, the
message “Please wait” appears.
Version
Check the Software Version number. That will help manufacturer to find our the reason when the camera with problem.
`

Page 19 / 33
Setup Camera On PC
4.2 Setup Camera On PC.
After formatting the SD card on camera, retrieve the SD card and insert into computer. The SD card reader may be needed if your computer
unable to read SD card directly, or you can directly connect the camera to computer by using USB cable to read SD card in the Test mode.
Obtain the CD from the packing box and insert into computer, the disc drive may be needed if the PC without the disc drive. Then run the
WildGuarder-4G setup.exe software from the CD.
If your computer unable to read the disc, please download the software from WildGuarder official website directly:
http://www.wildguarder.com/firmware-downloads.html
Below is the icon of the WildGuarder-4G setup.exe software:
Double click the WildGuarder-4G setup.exe icon to enter Setup homepage:
A. Mode
Select whether photos or videos are to be recorded. In “Photo + Video” mode, the camera first takes a photo and then starts filming video.
This mode is available for motion detection and Time-lapse mode.
B. Language
There are 12 language for your selection - English / French / Spanish / Portuguese / Dutch/ Italian / T Chinese / S Chinese /
Japanese / Hungarian / Polish / Swedish. You can set the language via camera menu or WildGuarder PC software.
C. Image size
Select a photo size: 1.3 MP, 5 MP (preset), 8 MP, 12 MP, 20MP.
The larger the file size, the more detailed the image. However, the maximum number of high-resolution images that can be stored before
the memory card is full.
D. Video size
Select the screen resolution: 1920 × 1080, 1280 × 720, 720 × 480, 640 × 480. The higher the resolution, the sooner the capacity limit of the
memory card will be reached.
E. Video length
Use the up/down buttons to select the length of the video recording, that is to be made when video recording is activated. The longer the
recording time selected, the shorter the operating time.
F. Interval
Input the minimum time period(between 3second and 60mins) that the camera should wait before reacting to subsequent

Page 20 / 33
Setup Camera On PC
activation of the sensor after the initial recording. During the selected interval, the camera will not record any images or videos. This
prevents the memory card from being filled up with too many recordings of the same event. You can select between 3 seconds to 60
minutes.
Select the number of photos that are to be taken in succession when the camera can photo. In addition to single shot mode 1 photo, you
can take“2 photos”or“3 photos”.
H. PIR Sensitivity
The sensitivity of the main motion sensor is set here. For interior areas and environments with little interference, such as branches blowing
in the wind, select “High”. Select “Medium” for exterior areas and environments with a normal amount of interference, and select “Low”
for environments with a high level of interference.
I. Date stamp
Here you can choose whether to save your photos with a time stamp. You can choose whether the stamp consists of the time and date or
just the date.
J. 4G Setup
Please refer below MMS/4G Setup
K. Record audio
Turn on the function, you can record sound while recording video.
L. SD Cycle
If select ‘On’ option, the camera will delete the oldest pictures & video from SD card if there is not enough storage.
If Select ‘Off’ option, the camera will stop taking photo & video if there is not enough storage of SD card.
M. Timer
Select “On” if the camera should only be active during a certain time period. In the screen menu that subsequently appears, user can set
the start and end time for the active phase:
Input the hour and minute for the start/end of the active phase. Confirm your selection with the “OK” button and to close this sub-menu.
The settings made here apply every day. The camera will not record any images outside of the active phase.
N. Password Setting
Select “On” if you want to use a password to protect the camera from unwanted access. In the following sub-menu, you can set a 4-digit
combination:
Confirm your selection with the “OK” button and close this sub-menu.
The set number combination will work when camera is on test mode.
If you forget the number combination, please ask the supplier for firmware to reset it to its factory default settings.
O. Serial No
This manual suits for next models
4
Table of contents
Other WildGuarder Scouting Camera manuals
