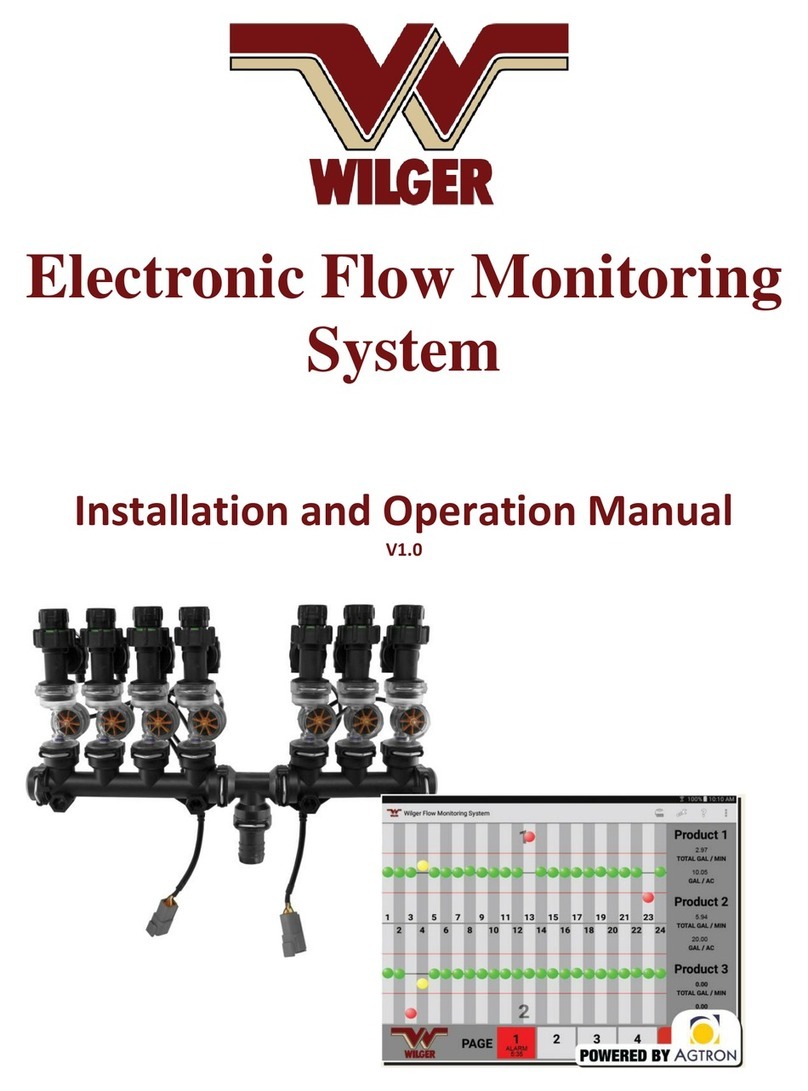
WILGER EFMS User manual

1
Electronic Flow
Monitoring System
Installation and Operation Manual
V1.2 (Revised Feb 22, 2021)
Featuring App version 2.6.3

2
1.Table of Contents .................................................................................3
2.Important Information...........................................................................4
3.Introduction ..........................................................................................5
EFM System Components .............................................................5
Tablet and EFM App.......................................................................9
Overview of the EFM System.......................................................12
4.Installing the EFM System..................................................................14
Planning Your Installation .............................................................14
Installing the Plumbing.................................................................15
Installing and Connecting the Electronics....................................16
Installing the Wilger Electronic Flow Monitoring App...................16
Launching the App .......................................................................17
Connecting the Tablet to the ECU................................................18
Configuring the ECU Main Settings .............................................20
Configuring the Flow Measurement Sensors...............................23
5.Operating the EFM System ................................................................28
Main Overview Screen .................................................................28
6.Troubleshooting & Frequently Asked Questions ................................29
Frequently Asked Questions .................................................. 29-32
Troubleshooting...................................................................... 32-44
ECU Connectivity Troubleshooting................................. 32-36
Node & Sensor Connectivity Troubleshooting................ 37-39
EFM System App & Setup Troubleshooting ................... 40-43
7.Appendix ............................................................................................44
Appendix A: Using an ECU to Product Node Y-Adapter Cable ...45
Appendix B: Parts Lists................................................................46
8.Warranty .............................................................................................47
Table of Contents
MY ECU
SERIAL NUMBER:
__ __ __ __ __ __ __

3
Important Information
• Be sure to follow all safety instructions in your application equipment operator’s manual.
• Wilger Industries Ltd. (Canadian Head Office & Factory) and Wilger Inc. (US Office & Factory)
will furthermore be referred to as ‘Wilger’.
• Learn how to operate and service the application equipment correctly. Failure to do so could
result in personal injury or equipment damage. Wilger does not accept any liability or responsibili-
ty for personal, equipment or other damage or malfunctions arising from failure to comply with the
equipment’s operation manual.
• If you do not understand the information in this manual, or if you have any questions, contact
Wilger Customer Service. (USA: M-F 9-5; 1 877 968-7695 // CANADA: M-F 9-5; 1 833 242-4121)
• This manual should be considered a permanent part of your machine and should remain with
the machine when you sell it.
• Wilger reserves the right to alter illustrations and technical data contained in this manual with-
out notice of changes. Technical data and illustrations are provided for visual aids, and may differ
from your current system. Contact Wilger Support if any verification is needed.
• The contents of this manual are the intellectual property of Wilger. All use and/or reproduction
not specifically authorized by Wilger is prohibited. Send all requests for reproduction or modification
to: info@wilger.net
• All information, illustrations and specifications in this manual are based on the latest informa-
tion available at the time of publication. Wilger reserves the right to make changes at any time with-
out notice.

4
Introduction
The Wilger Electronic Flow Monitoring System (EFMS) is a compact flowmeter that can be used row-
by-row on liquid fertilizer or chemical application equipment. The flow meter is paired with a tablet,
or manufacturer’s monitor to provide accurate monitoring for both blockage and flow rate irregularity.
Similar to visual ball flow indicators, the Wilger Electronic Flow Monitoring System shows variations
in flow caused by blocked lines, incorrect orifices, or blown product hoses. However, the Wilger EFM
System provides the added benefit of indicating the actual flow (not just relative flow) for each row.
This information is conveniently displayed on a screen in your cab.
The EFM system utilizes a paddle-wheel flowmeter, with patented stabilizing flow jets, that maintains
accuracy across the flow range of 0.04 US GPM to 1.5 US GPM (0.15L/min to 5.6L/min), without
significant pressure drops. The EFM system accurately monitors flow on each outlet or product run,
which ensures the operator has complete and comprehensive flow information. The flowmeter can
provide a 40:1 flow range, pairing stabilizing flow jets appropriate for the users’ operational flow
range.
The Electronic Flow Monitoring app (Android OS) receives sensor information from the flowmeters
via an Electronic Control Unit (ECU). The ECU establishes a local WiFi connection with the tablet, so
there are no communication harnesses needed between the implement and the cab.

5
EFM System Components
Plumbing Components
The Electronic Flow Monitoring system uses O-ring Seal (ORS) plumbing, which is ultimately adapt-
able to any application equipment. However, the system typically requires:
• Plumbing manifolds, which split the flow to each flow run
• EFM flowmeters, each of which is equipped with:
• A flow jet, selected for the anticipated flow range
• An orifice, which determines the application flow rate
• Check valves (recommended) that allow flow to be manually shut off
• [OPTIONAL] Ball Flow Indicators, which can be installed to add visual indication of flow in
addition to the digital display.
O-ring Seal Check Valve
Flowmeter
O-ring Seal Outlet
O-ring Seal Manifold
with cap
Figure 1. Manifolds with flowmeter and check valve
O-ring Seal Check Valve
Flowmeter
O-ring Seal Outlet
Flow Indicator Column
Figure 2. Ball Flow Indicator with flowmeter
Figure 3. O-ring Seal Orifice for Various Flow rates
Figure 5. Orifice & Outlet in flowmeter
Figure 4. Flow Stabilizing Jets for measuring flow ranges
Green Jet:
0.04-0.12 us gpm
0.15-0.45 L/min
Red Jet:
0.1-0.31 us gpm
0.378-1.17 L/min
Lt Blue Jet:
0.18-0.98 us gpm
0.68-3.71 L/min
Black Jet:
0.57-1.53 us gpm
2.16-5.79 L/min

6
EFM System Components - cont’d
Electronics and Cabling Components
The EFM system operates from 12 VDC power (10.8-13.8v). Sensors, nodes and the ECU
are interconnected using multiconductor cables with weather-tight Deutsch connectors.
Figure 6. Electronic Control Unit
(ECU) with battery harness cable
Figure 7a. ECU to Product Node
Extension Cable (Also functions for
Node to Node Connections)
Electronic control unit (ECU) – Creates a
local WiFi network signal that allows the
EFM system to communicate with an
app running on an Android tablet in the
tractor cab. The Android app is provided
free as a download.
[Optional] Extension cables – Two extension cables are
available
ECU/Node to Node (8-pin)
Connects the ECU to the first product node in a chain
of multiple product nodes if a span greater than ~18” is
required.
Available in 12’ or 24’ length.
Node Harness to Quad-Sensor Cable (6-pin)
Connects a Node Harness Divider Cable (A/B/C/D) to a
quad-sensor cable, giving extra length if required.
Available in 6’ or 12’ length.
Figure 7b. Node Harness to Quad-
sensor Extension Cable
Figure 8. 4CH Node, 4CH Node Harness and single-sensor cable
4-Channel (4CH) Node, 4CH Node Harness, and Single Sensor cable – The 4CH node brings
together signals from up to four flow sensors and sends the signal to the ECU. A
4CH harness connects the node to four single-sensor cables. Each 4CH node has six
connectors: four 3-pin female Deutsch connectors (for sensor cables), one 8-pin female
Deutsch connector (for connecting to the next node in the chain, or to a terminator), and
one 8-pin male Deutsch connector (for connecting to the previous node in the chain, or
the ECU)
#20608-01 #20608-02
#20584-00 (6” length)
#20584-10 (10’ length)
#20615-06 (6’)
#20615-12 (12’)
#20616-12 (12’)
#20616-24 (24’)
#20603-00 KIT - includes Terminator (#20604-00), Antenna
(20603-03), Battery Harness (#20603-02), ECU (#20603-01)

7
EFM System Components - cont’d
Electronics and Cabling Components
Figure 9. 16CH Node, 16CH Node Harness, and Quad-sensor cable
16-channel (16CH) node, 16CH node harness and quad-sensor cable – Enables the 16CH node
harness to connect to four quad-sensor cables (allowing up to 16 sensors per 16CH
product node) to be connected and communicate with the system. Each 16CH node
has six connectors: four 6-pin female Deutsch connectors (for quad-sensor cables), one
8-pin female Deutsch connector (for connecting to the next node in the chain, or to a
terminator), and one 8-pin male Deutsch connector (for connecting to the previous node
in the chain, or the ECU).
Hall Effect Sensor
Sensor/Flowmeter
Binding Nut
Flowmeter Paddle
wheel and ceramic
encoder magnet
Figure 10. Hall Effect Sensor, Flowmeter paddle wheel & encoder magnet
Figure 11. ECU Harness Terminator
#20585-01
Sensor and Encoder – Hall effect sensor detects rotation of the encoder magnet on the wheel,
producing pulses at a rate representative of flow.
8-pin node harness terminator – Terminates the series (chain) of product
node harnesses that originate at the ECU. The terminator will always be
plugged into the last product node(s) of the chain.
(Advanced: If an ECU to Node Y-adapter is used at the ECU, two
terminators are required – one on each end of the chain.)
Figure 12. 4CH Node Sensor connector cap (3-pin) [left]
16CH Node harness (A/B/C/D) connector cap (6-pin) [middle]
Hall Effect Sensor Rubber Cap [right]
4CH, 16CH node harness & sensor caps –
Protect unused sensor connectors from corrosion.
Used for any unused sensors or harness
connections
#20612-00
#20609-00
#20604-00
#20611-02
#20611-01 #20585-00

8
EFM System Components - cont’d
Electronics and Cabling Components
ECU Splitter Cable - The ECU to Node Splitter cable
is used only when plumbing manifolds and EFM
components cannot be centrally located on the
application equipment.
In situations that dictate the EFM components and
plumbing manifolds must be located alongside the
application equipment’s length, the splitter can be
used to minimize the amount of extra wiring and/or
extension harnessing required.
For proper use and labeling of a ECU splitter,
reference Appendix 1.
Figure 13. ECU Splitter - Used to split ECU Node Connection into Right/Left
Nodes [Advanced]
#20605-00 KIT
includes:
ECU Splitter
(#20605-01)
and Terminator
(#20604-00)

9
Tablet and EFM App
NOTE: EFM App can
be available from
www.wilger.net/efm.apk
It may also be available
from the GooglePlay
App store.
Android App requires
Android 8.0 or greater
The Electronic Flow Monitoring (EFM) System includes an Android
app that runs on an Android tablet computer located in the the
tractor cab.
Figure 14. Electronic Flow Monitoring System App on Android Tablet
The EFM app (downloadable from www.wilger.net, GooglePlay Appstore) is relatively simple to
operate and interpret. It provides a highly customizable visual indication of flow rates for each
sensor. Up to three different products can be shown at a time. Up to 196 sensors (shared across
the three products) can be monitored.
Flow alarm thresholds are easily changed for any of the three products. Green balls indicate a
sensor is within the threshold; yellow indicates the flow is approaching, or past the threshold; red
indicates a serious flow alarm condition.

10
App Setup and Operating Screens & Pages
The app provides three main screens for setting up and operating the system:
• Main Overview - up to four pages of information for operating the system
• ECU Settings – for configuring units, values and system options
• EFM Sensor Setup - up to four pages for configuring individual sensors
[Advanced]
• Advanced Settings & Calibration - Advanced Menu and Manual Calibration
The Main Overview screen includes icons at the top, right that provide access to the other screens and
additional menu items.
Figure 15. EFM App Main Overview Screen
Figure 16. ECU main Settings [left]
Sensor Setup Page [middle]
Advanced Setup [right]
SYSTEM SETUP SCREEN
ACCESS CODE
To access the Sensor
Settings screen, the operator
must enter a four-digit
System Setup Access Code.
The factory default code is
1111.
The System Setup Access
Code can be changed from
within the Setup menu.
ECU Main
Settings
Sensor Setup
Page Help Advanced
Settings &
More Options

11
Help and Options Screens
The following screens provide additional information and options:
• Help - provides access to this manual in electronic format
• More Options & Advanced Settings
• Status and history messages about wireless status
• Status and history message about loop communications errors
• A log file (.csv) with flow information
• Advanced Settings screen, allowing for manual jet calibration using actual flow rates, Saving Sensor
setup profiles (and recalling them), or enabling SIMPLE view (showing ONLY balls going up and down)
Figure 17. The digital manual PDF which is accessed by clicking the ? HELP button.
Figure 18. The advanced setup & calibration screen
SIMPLE MODE or NORMAL MODE
Allows selection of Simple mode, which removes all flow rate
information, showing only ball height variation.
SAVE/RECALL PROFILE
Allows saving of EFM sensor setup page and ECU settings page
information into a profile to allow easy switching between crops.
There are 3 profiles that can be used for saving/recalling.
High Pass Filter [BETA FEATURE]
For ease of monitoring flow that is pulsing, a high pass filter can
be adjusted to skip frequencies that are too high (or pulses that
occur too fast - which are likely caused by the encoder magnet
spinning backwards during an ‘off’ pulse)
CUSTOM CALIBRATION
To allow for greater accuracy, using a flow test, a user can ‘start
accumulation’ as they start collecting a single outlets flow. After
30 seconds of collection (longer will provide more accuracy), the
user will press STOP ACCUMULATION, and stop collection of flow.
The user will them input the collected flow (in gallons), and press
CALCULATE, to generate a new Calibration Jet number.
By pressing UPDATE CAL NUMBER, it will send that new
calibration number to the product’s JET selection. This can be
ovewritten on the ECU Settings page, if an error is made.

12
Overview of the EFM System
Basic Structure
Figure 19. 8-pin female connector
Figure 20. 8-pin male connector
The Electronic Flow Monitoring System can be retro-fitted on an existing liquid
fertilizer or chemical application kit using O-ring seal (ORS) fittings, or added as a
new kit to an existing machine.
• One ECU is required per EFM system (and can accommodate up to 196
product outlets/sensors).
• The 8-pin female Deutsch connector from the ECU plugs into the 8-pin
male connector on the harness connected to the first product node (Node 1)
• Additional Product Nodes are daisy-chained (using node-to-node extension
cables – if extra harness length is required)
• There are two types of product nodes: 4-channel (4CH) and 16-channel
(16CH)
NOTE: Wherever possible, use 16CH nodes. Use 4CH nodes only where four
sensors or less are required
• 4CH nodes connect to a harness that allows connection to four single-
sensor cables
• 16CH nodes connect to a product node harness that allows connection to
four quad-sensor cables, which facilitates the use of up to 16 sensors in total
• Each unused product node connection should be capped to protect
connections from possible corrosion.
• Sensors are designated by node, cable, and sensor.
Example: Sensor 2B3 is Node 2, Cable B, Sensor 3 (See Figure 21)
• The last product harness in the chain requires a node harness terminator.

13
Overview of the EFM System - cont’d
Basic Structure
Figure 21. System Structure for EFM system using 3 nodes
ADVANCED:
Using an ECU to Node Y-adapter
If more convenient, an ECU to Product Node Y-adapter cable can be used to split
the system into two sections allowing the ECU to be located in the middle of the
implement with a series of Product Nodes on each side.
For more information on the use of the ECU to Product Node Y-adapter cable, see
Appendix 1.

14
Installing your EFM System
Planning your Installation
NOTE: For more assistance in planning your installation, download the EFM System System
Kit Builder, Quote Sheet, or for other information from www.wilger.net, OR contact your Wilger
dealer, OR contact Wilger directly.
Using a whole host of available Wilger O-ring sealed (ORS) fittings, manifolds, or flow indicator
columns, a flow monitoring system can be built to fit a vast majority of application equipment.
Based on the application equipment, and your preferences:
1. Determine the number products/rates that will be monitored simultaneously.
Each sensor must be correctly grouped with like sensors, monitoring the same product, to ensure all
flows will display correctly.
2. Determine the flow rate units that will be used (US GPM, L/min or Oz/min)
3. Determine the application rate units that will be used (US GAL/AC, IMP GAL/AC, L/HA, or US
GAL/1000sq ft)
4. Ensure 12 VDC power is available on the application equipment.
5. Determine the size of the feed lines feeding each manifold/section.
6. Determine the hose size required for lines feeding each liquid maifold.
Hose barb options include: 1”, ¾”, 5/8”, ½”, 3/8”, ¼”
7. Determine how the application equipment’s sections are split up (how many outlets per
section, and the spacing between each outlet).
8. Estimate the approximate distance between each section feed line.
This is important for optimizing EFM manifold locations and minizing excess harmess extension
cables.
9. Determine the number of outlets/runs to be monitored.
E.g. A 48 row air seeder applying liquid fertilizer requires 48 sensors. If the same air seeder applied
liquid fertilizer and starter, it would require 96 sensors.
10. Determine how many sections the EFM must be split into.
E.g. 6 sections x 8-rows/section
11. Optimally, feed each EFM pumbling manifold centrally, splitting the manifold with an ORS Tee.
(This provides more consistent flow.) In the event of smaller manifolds, a single side-fed manifold is
sufficient.
12. IMPORTANT! Locate and name each EFM sensor based on its product node number, divider
letter (A-D), and sensor cable number (for 16CH nodes: 1-4; for 4CH nodes, sensor cables are
numbered with the product node number plus A1, A2, A3, A4 ).
e.g. For a 16CH Node: Product Node 1 + Divider A + Sensor 1 = Sensor 1A1
For a 4CH Node: Product Node 1 + A + Sensor 1 = 1A1
Note: Divider letter is always A for 4CH nodes
WILGER Industries Ltd.
[Canada]
1 (833) 242-4121 or
info@wilger.net
WILGER Inc.
[USA]
1 (877) 968-7695 or

15
Installing your EFM System - cont’d
Plumbing Manifolds
Green Jet:
0.04-0.12 us gpm
0.15-0.45 L/min
Red Jet:
0.1-0.31 us gpm
0.378-1.17 L/min
Lt Blue Jet:
0.18-0.98 us gpm
0.68-3.71 L/min
Black Jet:
0.57-1.53 us gpm
2.16-5.79 L/min
Flow Stabilizing
Jet Ranges:
1. Use an ORS Tee (#20526-00) to connect the manifolds together and an
end cap (#20521-00) at each end.
2. Install the preferred inlet size into the ORS Tee.
3. Determine the EFM jet required for the flow range required by your
application.
4. Add the jets into each EFM body. (They only fit into the in-flow side of the
EFM body.)
5. Connect an electronic flow meter (EFM) sensor to each check valve outlet.
6. Connect a manual ON/OFF check valve to the top of each EFM sensor.
(This allows the run to be shut off for maintenance.)
7. Add the ORS metering orifices to the outlet fittings, sized as required by
your application equipment outlets.
Example:
• Six sections of eight runs each, for a total of 48 runs.
• Center-feed each section (with 20526-00 TEE and hose barb inlet) using two
4-outlet EFM manifolds (#20644-00), and an outlet (with an option for a metering orifice)
attached to the EFM body, with end caps to close the manifold (#20521-00).
Figure 22. Example Plumbing Manifold

16
Installing and Connecting Electronics
1Correct installation of the terminator is critically required for proper flow readings in the app.
Figure 23. A 16CH node, harness, and quad-sensor cable
and example numbering
16CH Node
#20611-01
16CH Node Harness
#20611-02 Quad-Sensor Cable
#20585-00
NODE #1 DIV
A/B/C/D
SENSOR
1/2/3/4 1234
NODE 1
DIV A
SENSOR 1
‘1A1’
NODE 1
DIV A
SENSOR 4
‘1A4’
Installation of the electronics is primarily a matter of plugging connectors together as per the
arrangement determined in Planning Your Installation:
NOTE: While connecting ECU, nodes, harnesses and sensors, mark each item to make it easy to
identify and configure in the app at a later step.
1. Connect each product node to a product node harness. (Select 16CH or 4CH harnesses
based on your original installation plan.)
2. Link the nodes together in a daisy-chain by plugging the female 8-pin Deutsch connector of
the first node into the male 8-pin Deutsch connector of the second, etc.
SUGGESTED BEST-PRACTICE: Label each product node with the number of its sequence in the
chain (Suggestion: use a mark-all marker).
NOTE: 4CH node harnesses are compatible with 16CH node harnesses (and vice versa).
3. Connect the ECU’s 8-pin female Deutsch connector to the 8-pin male Deutsch connector on
the harness plugged into the first product node. If necessary, use an ECU to node extension cable.
(If using a ECU Y-splitter cable, reference Appendix 1).
4. Connect an 8-pin ECU terminator to the harness on the last node of the chain.1
5. Connect sensor cables to node harnesses. (Single sensor cables to 4CH node harnesses;
quad sensor cables to 16CH node harnesses.)
6. Cap off any unused node connections to avoid possible corrosion of terminals.
Installing the Wilger Electronic Flow Monitoring System App
NOTE: EFM App can
be available from
www.wilger.net/efm.apk
It may also be available
from the GooglePlay
App store.
Android App requires
Android 8.0 or greater
Using the Android tablet:
1. Establish a WiFi connection to the Android tablet.
2. Open a browser and download the EFM app from:
• Wilger’s website (http://www.wilger.net/efm.apk)
• Google Play (https://play.google.com/store?hl=en)
NOTE: The tablet may require permissions to install apps from
“outside” sources, for downloading the app from the wilger.net website.
3. Install the Wilger Electronic Flow Monitroing System app on the
tablet.
4. Launch the app.
TIP: Refer to your android tablet manual for more detailed information
on downloading and installing software.

17
Launching the App
SYSTEM SETUP SCREEN
ACCESS CODE
To access the Sensor
Settings screen, the operator
must enter a four-digit
System Setup Access Code.
The factory default code is
1111.
The System Setup Access
Code can be changed from
within the Setup menu.
1. On the tablet home screen, tap the EFM app icon (named Wilger Flow
Monitoring System).
Figure 24. An Android Tablet
The following screen appears, indicating that the ECU is not communicating with the ECU.
ECU Settings Button
Figure 25. No ECU Connectivity.

18
Connecting the Tablet to the ECU
IMPORTANT: The app communicates with the ECU using the tablet’s WiFi, but you
do not connect the tablet to the ECU using the same WiFi menu on the tablet that
you would use to connect the tablet to your home WiFi. If you do, you will have to
re-configure the tablet to “forget” the ECU before performing the following (correct)
connection procedure.
Special steps are required if you are using an ANDROID 10.0+ device with an app
software version of 2.6.2 or earlier.
To connect the app to the ECU:
1. Make sure the ECU has power. The red light beside the power icon on
ECU will light up. The red light beside WIFI icon , will light up and blink steadily.
- Before first connection to ECU and tablet, the ECU will go through a 10
second power cycle reinitializing the WIFI broadcast until connection.
- Once ECU has had a successful connection, this power cycle will adjust to
a 30 second cycle.
2. Locate and record (for later use) the ECU serial number on the back of the
ECU
3. On the Main Overview screen, tap the ECU Main Settings icon. (See
Figure 25).
4. Type in the default system access code (1111) and press Accept.
1
1
2
2
3
3
BACK
MY ECU
SERIAL NUMBER:
__ __ __ __ __ __ __
RETAIN SERIAL NUMBER HERE IN
CASE ECU STICKER WEARS OFF
Figure 26. PIN required to enter settings screens
The ECU Main Settings page appears.
NOTE: You can also change the access code by pressing Change.

19
ENTER ECU
SERIAL HERE
5. Tap the ECU Serial Number field.
The on-screen keyboard appears
6. Type in the ECU serial number you previously recorded from the ECU.
7. Tap Next.
The tablet will automatically connect to the ECU. This process may take a few minutes for an
initial connection.
8. Verify that the light beside the WiFi icon on the ECU lights up solid. This indicates
you have successfully connected your ECU to the android tablet.
2
Tip for Android Tablets Version 9.0.0r65 and earlier and App version 2.6.3 or earlier:
If the tablet is attempting to connect to the ECU WiFi directly through the tablet’s setting, the EFM app may
not work. It must connect using the “Connecting the Tablet to the ECU” procedure shown above. Before this
procedure will work, you must reconfigure the tablet to “forget” the incorrect WiFi connection. To do so:
1. Navigate to the tablet’s Connections Settings, WiFi, Manage Networks page
2. Select the Wilger connection listed there
3. Select Forget.
Figure 27. Setting ECU Serial Number in ECU Settings Page
Figure 27b. Connecting to ECU WIFI on Android 10.0+
Tips for Android Tablets Version 10.0.0+:
You will have a prompt asking to use a
specific WIFI connection with using the app.
Accept the connection.

20
Configuring the ECU Settings
In addition to connecting the ECU to the tablet, (as described in the previous section), the ECU Main
Settings Page allows you to configure many other settings used for accurate flow monitoring and
operation of the system.
# of Nodes
ECU Serial Number
View Layout [Multi-Product or Single]
Diagnostic History
Page Scroll Cycle (sec)
Flow Rate Unit
Application Rate Unit
Application Speed & Unit
Outlet Spacing & Unit
Alarm Threshold %
Jet Selection &
Calibration Number
Factory Reset for ECU Settings & Sensor
Setup Pages
Installed Nodes (# of Nodes): This field auto-populates if the ECU has power and is properly
attached to all product nodes in series, with the terminator attached to the last product node
harness. Verify that the number of nodes indicated matches the actual number of nodes in your
system. If it does not auto-populate, simply input the correct number of nodes.
ECU Serial Number: As described in “Connecting the Table to the ECU” you must enter the correct
ECU serial number in this field to get the tablet to communicate with the ECU over WiFi. The serial
number is printed on the back of the ECU. Tap the field to open the numeric keypad popup and enter
the desired value.
Figure 28. ECU Setting Page with Breakdown of Parts
These fields
are entered via
Numeric Keypad
Figure 29. Sections requiring keypad entry
Other manuals for EFMS
1
Table of contents
Other WILGER Measuring Instrument manuals