Cleaning the interior components
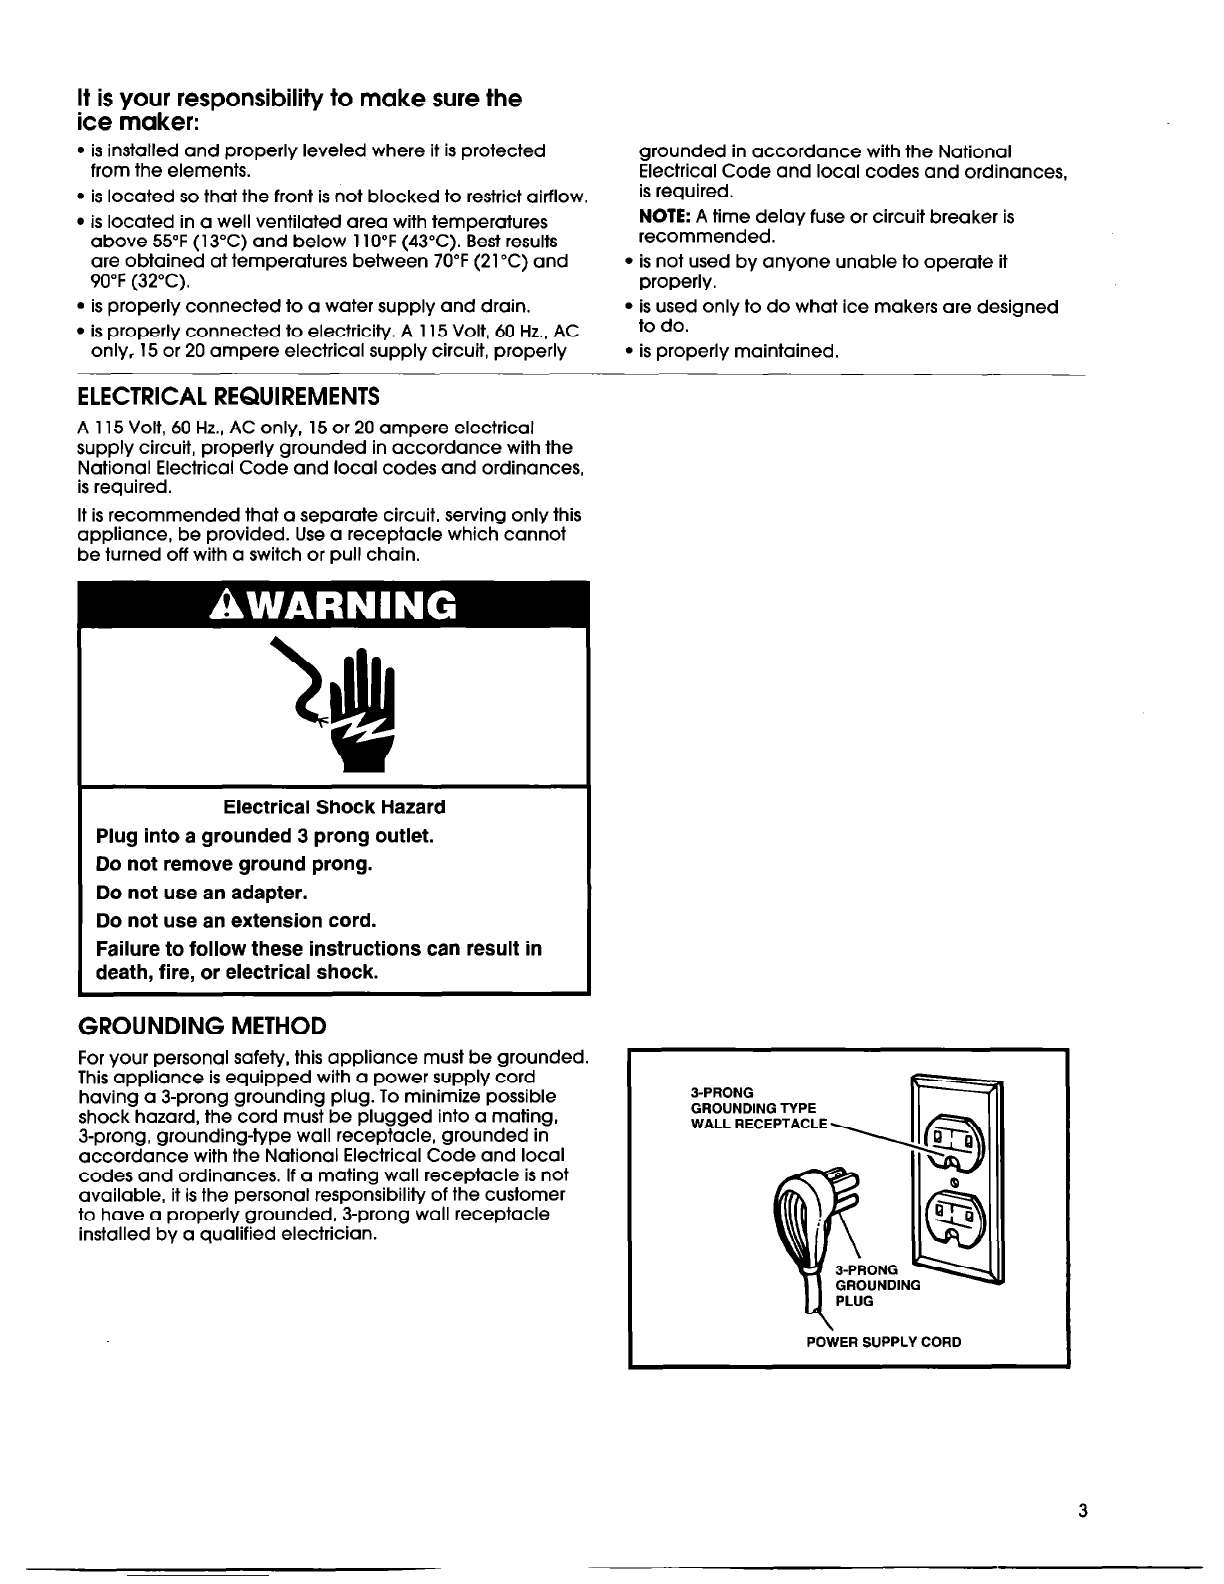
Electrical Shock Hazard
Disconnect power before cleaning.
Replace all panels before operating.
Failure to do so can result in death or electrical shock.
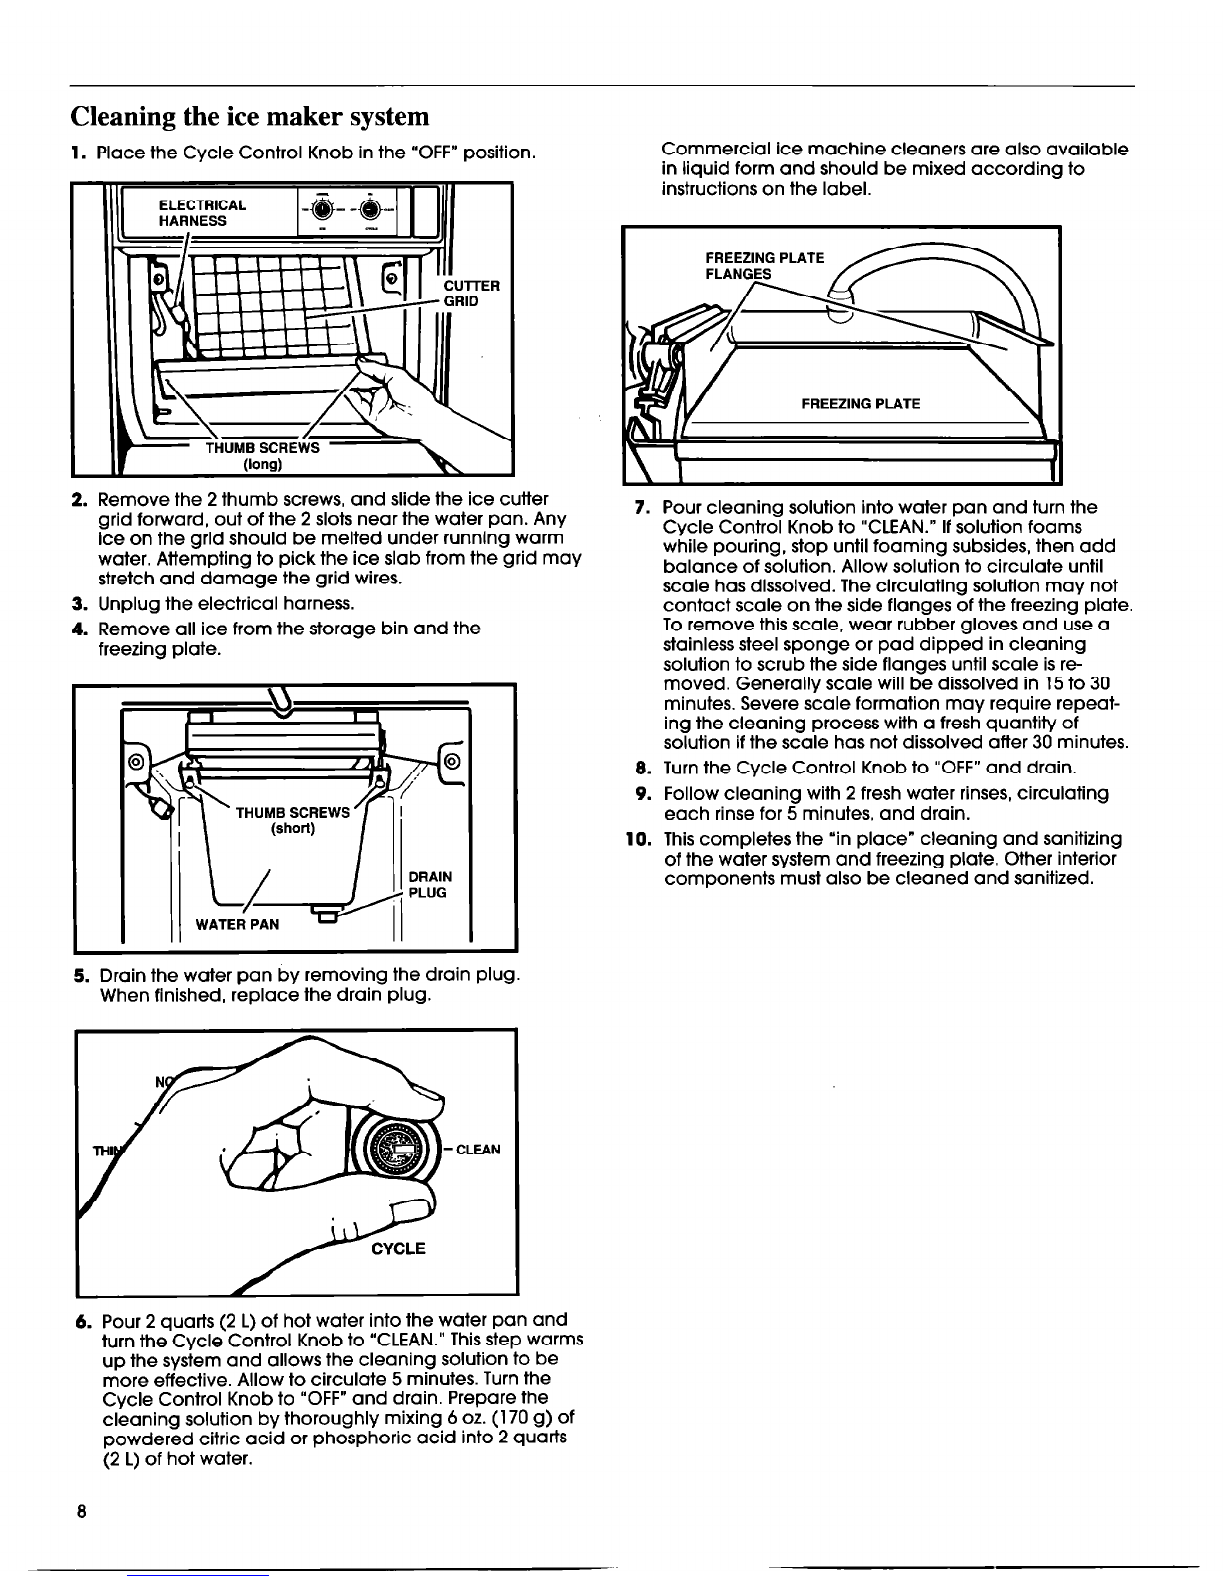
1.
Unplug ice maker or disconnect power.
2. Open the storage bin door and remove any ice that is
in the bin.
3. Remove the ice retainer baffle by flexing it and sliding if
off the studs.
4. Remove the ice cutter grid by unscrewing the 2 thumb
screws, sliding the grid forward, and unplugging the
electrical wire harness.
5. Remove the water pan by unscrewing the
2 thumb screws.
END CAPS
7. Remove the water distributor from the freezing
plate. It is held in place by rubber end caps,
Remove the inlet hose and clean all water
distributor holes and the small orifice in the inlet
side of the water distributor. When replacing the
water distributor, make sure the end caps are
located in the freezing plate holes and that the
water distributor holes face down.
8. Wash the
interior components
(ice retainer
baffle, cutter grid, water pan, inlet hose, and
water distributor) and the storage bin, door
gasket, and ice scoop with mild soap or
detergent and warm water. Rinse in clean
water. The components should also be cleaned
in a solution of 1 tablespoon (15 mL) of house
hold bleach mixed with 1 gallon (3.8 L) warm
water.
DO NOT WASH PLASTIC PARTS IN THE
DISHWASHER. They cannot withstand
temperatures above 145°F (63°C).
9. Replace the interior components (water distribu-
tor, inlet hose, water pan, cutter grid, and ice
retainer baffle).
10.
Check the following:
l
Hose from water valve is in the water pan.
l
Rubber drain plug is in the water pan.
l
Water distributor is seated and holes are
facing down.
l
Hose is connected to the pump and the
water distributor.
l
Hose from water pan is inserted into the
storage bin drain opening.
11.
Reconnect the electrical harness, and slide
cutter grid into place. Tighten the thumb screws.
12. Plug in ice maker or reconnect power.
13. Reset the controls, see “Setting the controls” on
page 4.
6. Remove the hose from the water pump.
9 1