manuals.online logo
Brands
  1. Home
  2. •
  3. Brands
  4. •
  5. Wimberley
  6. •
  7. Camera Accessories
  8. •
  9. Wimberley PP-211 User manual

Wimberley PP-211 User manual

Wimberley, Inc. ©2018, All Rights Reserved Rev. 180325
Arched Recess
reliably grip cylindrical
objects such as small
flashlights and branches.
Foam Jaw Inserts
Grip delicate objects without damage.
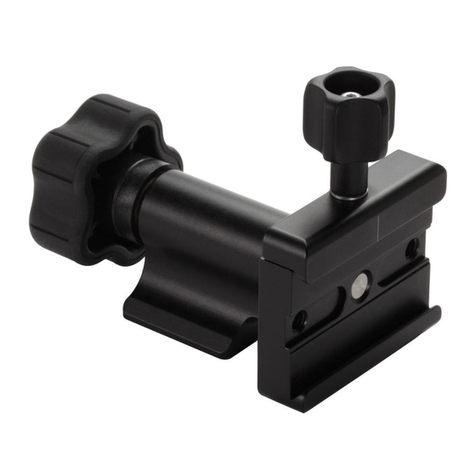
The Plamp Clip
Thumbscrew Turn the thumbscrew to open or close the jaws of the
clip. Compared to typical spring-activated clips, thumbscrew activated
clip jaws allow for more finesse when holding delicate objects, as well
as much higher maximum clamping force when desired.
Clip Body
The clip is custom designed to hold
anything from the most delicate plant stems
to heavy reflectors and diffusers. It is made of
nearly unbreakable ST Nylon
Jaw opening band
This elastomer band puts tension on the clamp’s moving
jaw so that it opens when you loosen the thumbscrew. It
is made of weather/UV resistant EPDM
Special notches in the clip’s jaws grab the steel rim on reflectors and
diffusers, providing a secure, slip-free attachment (applies to typical cloth
reflectors/diffusers with steel perimeter hoop). This new feature is a drastic
improvement over other clips currently on the market.
The firm grip allows you to make precise adjustments to the angle of a reflector.
You can even hold diffusers cantilevered straight out above your subject
Important Feature
Reflector/Diffuser Notches
Package Contents:
• The Plamp Clip (Qty 1)
Connecting the Plamp Clip to your Plamp
1. Remove the old clip end from the
Plamp by firmly grabbing the Loc-Line®
segment next to the end segment that is
attached to the clip. Bend it sharply until
the segments pop apart (do not worry,
you will not hurt the Plamp).
2. To attach the new clip, forcefully press it onto the segment
that was previously attached to the old clip. It should snap into
place with an audible “pop”. It takes a substantial amount of
pressure to make this happen. It helps to place your fists be-
tween your knees, holding the mating pieces as close to the
connecting joint as possible. Squeeze your knees together
forcefully as you force the joints together with your hands. If
you are still having difficulty you can heat up the female socket
to facilitate the process (details be-
low).
Heating the female socket:
Heat some water to boiling or near-
boiling temperature. Warm the female
end of the segment for 30-60 seconds in
the hot water. Connect the segments by
pushing them together. Use the knee-
squeezing technique mentioned above if
needed. The segments should pop into
place fairly easily.
Wimberley, Inc. Phone: 1-434-529-8385
1750 Broadway St Toll Free: 1-888-665-2746 (USA & Canada)
Charlottesville, VA
22902 USA www.tripodhead.com info@tripodhead.com
5 Year Warranty – See www.tripodhead.com/warranty.cfm for complete details
Made in USA
PP-211 The Plamp II
Thumbscrew Clip
Plamp Stake
Adjusting the rotational resistance of the clip
The Plamp clip is designed to rotate relative to the articulating arm with slightly less
resistance than is found between similar arm segments. If you desire this resistance
to be higher or lower, you may accomplish this by adjusting the Torx 20 mounting screw
clockwise (for more resistance) or counter-clockwise (to loosen)
You may access this screw by popping off the
final arm segment and plamp clip from the arm.
PP-210
Plamp Rod Extension ($19.00)
The screw may be adjusted
with a Torx 20 wrench
(See part# KY-PP-201)
Extending the reach of your Plamp
You may extend the reach by using a Plamp Stake (part # PP-300)
which enables positioning independent of your tripod.
You may also be interested in the Ground Plamp (part # PP-400)
Which Combines the independence of the plamp stake with the
articulation of the Plamp II in one convenient package.
Ground
Plamp
Camera Generated Vibrations
If your Plamp is secured to your cameras tripod, it is
possible for vibrations from mirror slap to travel through
the Plamp to your subject, negatively affecting image
sharpness. This issue is magnified when you add the
12” extension to the plamp.
We strongly advise using mirror lock-up
(if your camera has this feature)
Alternately, you can attach the Plamp II to an object not
connected to your camera such as our plamp stake
(part# PP-300) or a second tripod.
These vibrations are not a concern when
Holding objects that are not in the picture
(e.g. reflectors & diffusers).
Fine control using the Plamp Rod Extension
For extra dexterity try using the Plamp Rod Extension in con-
junction with the Ground Plamp or a Plamp II connected to a
tripod leg or Plamp Stake.
Rod Extension
Plamp II
Ground Plamp
Move desirable background or
foreground elements
into the picture.
Move distracting back-
ground or foreground
elements out of the way
Tips, Tricks and other Plamp products

This manual suits for next models

1

Other Wimberley Camera Accessories manuals

Wimberley MH-100 User manual

Wimberley

Wimberley MH-100 User manual

Wimberley F-9 User manual

Wimberley

Wimberley F-9 User manual

Wimberley WH-200-S User manual

Wimberley

Wimberley WH-200-S User manual

Wimberley P-30 User manual

Wimberley

Wimberley P-30 User manual

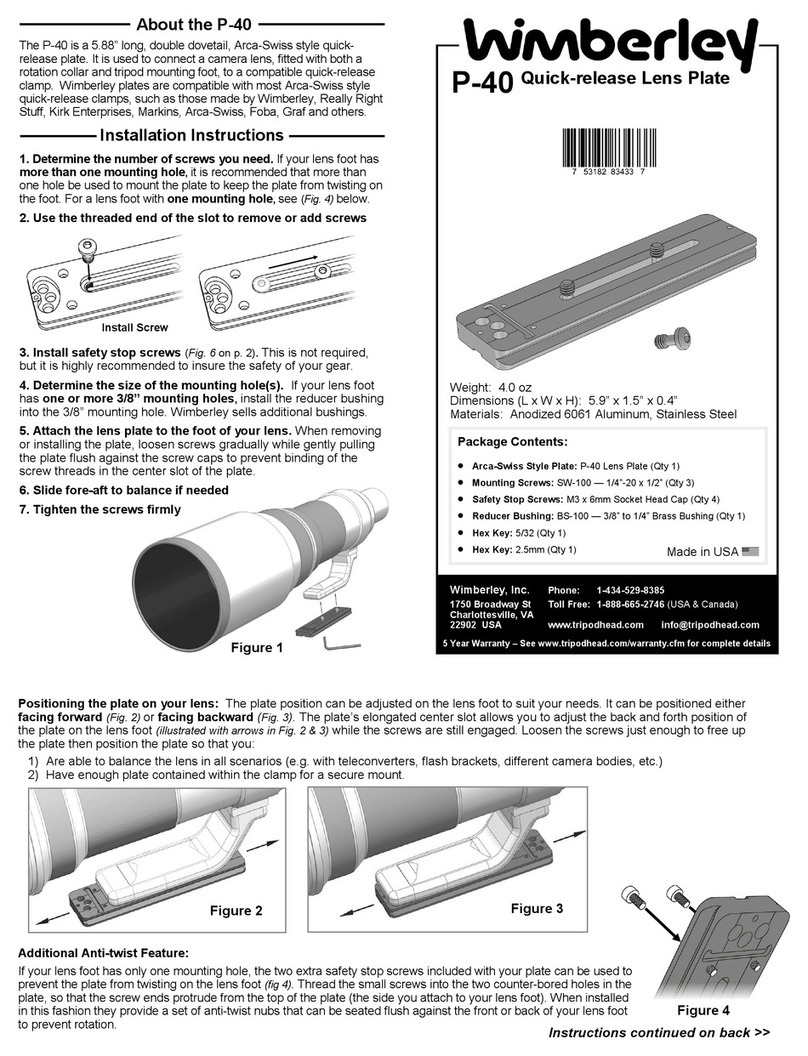
Wimberley P-40 User manual

Wimberley

Wimberley P-40 User manual

Wimberley M-8 User manual

Wimberley

Wimberley M-8 User manual

Wimberley F-3 User manual

Wimberley

Wimberley F-3 User manual

Popular Camera Accessories manuals by other brands

Moog Videolarm VLC485 Product instructions

Moog Videolarm

Moog Videolarm VLC485 Product instructions

Ryobi EST0002 STUDTECH user manual

Ryobi

Ryobi EST0002 STUDTECH user manual

Ferno 082-2012 Guide

Ferno

Ferno 082-2012 Guide

Flowcine xSPINE Easyrig Vario 5 Mounting instructions

Flowcine

Flowcine xSPINE Easyrig Vario 5 Mounting instructions

Pard NV007S Operation manual

Pard

Pard NV007S Operation manual

Energizer 341 Product data sheet

Energizer

Energizer 341 Product data sheet

Hanwha Techwin Wisenet SPM-4210 quick guide

Hanwha Techwin

Hanwha Techwin Wisenet SPM-4210 quick guide

Duracell Power PIX NX1500 Dimensions

Duracell

Duracell Power PIX NX1500 Dimensions

Craftsman CMXELAYMPL1031 instruction manual

Craftsman

Craftsman CMXELAYMPL1031 instruction manual

FiT 500010 instruction manual

FiT

FiT 500010 instruction manual

Fantasea FP-1 manual

Fantasea

Fantasea FP-1 manual

Manfrotto MVM250A Instructions for use

Manfrotto

Manfrotto MVM250A Instructions for use

Manfrotto MHXPRO-3W instructions

Manfrotto

Manfrotto MHXPRO-3W instructions

MAC PocketWizard Plus owner's manual

MAC

MAC PocketWizard Plus owner's manual

ricsonix Camlynx Operational user guide

ricsonix

ricsonix Camlynx Operational user guide

Panasonic WV-7135 operating instructions

Panasonic

Panasonic WV-7135 operating instructions

Transcend PowerAway P8 quick guide

Transcend

Transcend PowerAway P8 quick guide

Ego Power+ BA2240T Original instructions

Ego Power+

Ego Power+ BA2240T Original instructions

manuals.online logo
manuals.online logoBrands
  • About & Mission
  • Contact us
  • Privacy Policy
  • Terms and Conditions

Copyright 2025 Manuals.Online. All Rights Reserved.