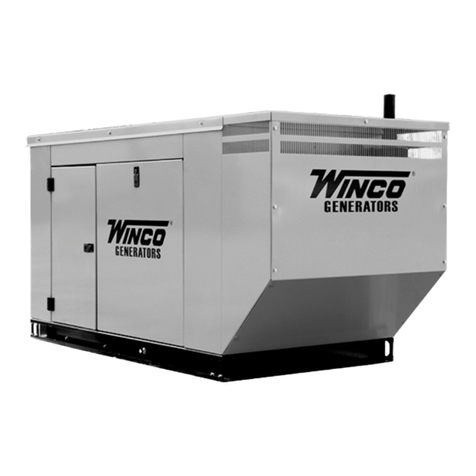
Winco RP25/D Setup guide

WINCO INC. 225 S. CORDOVA AVE. LE CENTER, MN 56057
SERVICE DEPT. 507-357-6831 • SALES DEPT. 507-357-6821
www.wincogen.com
INSTALLATION AND
OPERATORS
RP25/D
GENERATORS
MANUAL
DSE 7310 MKII ELECTRIC START

2OPM-114
REV B
TABLE OF CONTENTS
SAVE THESE INSTRUCTIONS 3
TESTING POLICY 3
SAFETY INFORMATION 4
CALIFORNIA PROPOSITION 65
ANSI SAFETY DEFINITIONS
SPECIFICATIONS 5
RP25
GENERATOR END
INTRODUCTION 6
PRODUCT DESCRIPTION
PREPARING THE UNIT 7
UNPACKING
LIFTING THE GENERATOR SET
TOWING THE EQUIPMENT
SETTING THE JACKS
INSTALLATION 7
GENERAL INFORMATION
COOLANT
INSTALLING THE BATTERY
BATTERY CHARGER & BLOCKHEATER
MOUNTING THE AUTOMATIC TRANSFER SWITCH
ELECTRICAL CONNECTIONS 10
RECEPTACLE PANEL
A.C. ELECTRICAL CONNECTIONS
GROUNDING
CAM-LOCK CONNECTIONS
D.C. ELECTRICAL CONNECTIONS
STARTING PROCEDURE 12
SELECTING THE CORRECT VOLTAGE
DC INTERCONNECTIONS TO THE ATS
INITIAL START UP
CONNECTING THE LOADS
50 CYCLE OPERATION
VOLTAGE REGULATOR WIRING 15
MAINTENANCE 16
MAINTENANCE SCHEDULE
TROUBLESHOOTING TABLE 16
WIRING SIZE TABLE 17
SELECTOR SWITCH WIRING DIAGRAM 18
SELECTOR SWITCH WIRING DIAGRAM 19
DSE 7310 MKII WIRING DIAGRAM 20
THREE PHASE AC WIRE HIGH AND LOW WYE 21
THREE PHASE WIRING - DELTA 22
SINGLE PHASE AC WIRING - 4 LEAD 22
ENGINE WIRING HARNESS 23
12 MONTH LIMITED WARRANTY 24

3OPM-114 REV B
SAVE THESE INSTRUCTIONS
This manual contains important instructions that should be followed
during installation and maintenance of the generator. Read and
understand all instructions in the manual before starting and operating
the generator.
USING THIS MANUAL
Congratulations on your choice of a WINCO generator. You have
selected a high-quality, precision-engineered generator designed and
tested to give you years of satisfactory service.
To get the best performance from your new generator, it is important
that you carefully read and follow the operating instructions in this
manual.
Should you experience a problem please follow the “Troubleshooting
Tables” near the end of this manual. The warranty listed in the manual
describes what you can expect from WINCO should you need service
assistance in the future.
COPY YOUR MODEL AND SERIAL NUMBER HERE
No other WINCO generator has the same serial number as yours.
If you should ever need to contact us on this unit, it will help us to
respond to your needs faster.
MODEL __________________________________________________
SERIAL NUMBER _________________________________________
PURCHASE DATE _________________________________________
DEALER NAME ___________________________________________
DEALER PHONE # ________________________________________
TESTING POLICY
Before any generator is shipped from the factory, it is fully checked
for performance. The generator is loaded to its full capacity, and the
voltage, current, and frequency are carefully checked.
Rated output of generator is based on engineering tests of typical units,
and is subject to, and limited by, the temperature, altitude, fuel, and
other conditions specied by the manufacturer of applicable engines.
This unit comes factory set for either key start or manual start. With the
DSE 7310 MKII controller used in the manual start option it is possible
to wire the control for remote start. Wiring instructions can be found
further in this manual. The key start version does not have this option.

4OPM-114
REV B
Fire extinguishers rated ABC by NFPA are appropriate.
E. Store fuel only in an approved container, and only in a well
ventilated area.
F. Follow local codes for closeness to combustible material.
3. DEADLY EXHAUST GAS -
Exhaust fumes from any gasoline engine contain carbon monoxide, an
invisible, odorless and deadly gas that must be mixed with fresh air.
A. Operate only in well ventilated areas.
B. Never operate indoors including attached garages
C. Never operate the unit in such a way as to allow exhaust gases
to seep back into closed rooms (i.e. through windows, walls,
oors).
4. NOISE HAZARD -
Excessive noise is not only tiring, but continual exposure can lead to
loss of hearing.
A. Use hearing protection when working around this equipment for
long periods of time.
B. Keep your neighbors in mind when using this equipment.
5. CLEANLINESS -
Keep the generator and surrounding area clean.
A. Remove all grease, ice, snow or materials that create
slippery conditions around the unit.
B. Remove any rags or other materials that could create a
potential re hazard.
C. Carefully clean up any gas or oil spills before starting the unit.
6. SERVICING EQUIPMENT -
All service, including the installation or replacement of service parts,
should be performed only by a qualied technician.
A. Use only factory approved repair parts.
B. Do not work on this equipment when fatigued.
C. Never remove the protective guards, covers, or receptacle
panels while the engine is running.
D. Use extreme caution when working on electrical components.
High output voltage from this equipment can cause serious
injury or death.
E. Always avoid hot mufers, exhaust manifolds, and engine parts.
They can cause severe burns instantly.
F. The use of the engine-generator set must comply with all
national, state, and local codes.
SAFETY INFORMATION
This engine generator set has been designed and manufactured to
allow safe, reliable performance. Poor maintenance, improper or
careless use can result in potentially deadly hazards; from electrical
shock, exhaust gas asphyxiation, or re. Please read all safety
instructions carefully before installation or use. Keep these instructions
handy for future reference. Take special note and follow all warnings on
the unit labels and in the manuals.
CALIFORNIA PROPOSITION 65
WARNING: This product contains crude oil, gasoline,
diesel fuel and other petroleum products, Antifreeze to
which can expose you to chemicals including toluene
and benzene, Ethylene glycol (ingested) which are
known to the State of California to cause cancer, birth defects or other
reproductive harm and developmental issues.
For more information go to www.P65Warning.ca.gov.
ANSI SAFETY DEFINITIONS
DANGER:
DANGER indicates an imminently hazardous situation which, if not
avoided, will result in death or serious injury. This signal word is to be
limited to the most extreme situations.
WARNING:
WARNING indicates a potentially hazardous situation which, if not
avoided, could result in death or serious injury.
CAUTION:
CAUTION indicates a potentially hazardous situation which, if not
avoided, may result in minor or moderate injury. It may also be used to
alert against unsafe practices.
1. ELECTRICAL SHOCK -
The output voltage present in this equipment can cause fatal electric
shock. This equipment must be operated by a responsible person.
A. Do not allow anyone to operate the generator without proper
instruction.
B. Guard against electric shock.
C. Avoid contact with live terminals or receptacles.
D. Use extreme care if operating this unit in rain or snow.
E. Use only three-pronged grounded receptacles
and extension cords.
F. Be sure the unit is properly grounded to an
external ground rod driven into the earth.
2. FIRE HAZARD -
Gasoline and other fuels present a hazard of possible explosion and/
or re.
A. Do not refuel when the engine is running or hot.
B. Keep fuel containers out of reach of children.
C. Do not smoke or use open ame near the generator set or fuel
tank.
D. Keep a re extinguisher nearby and know its proper use.

5OPM-114 REV B
SPECIFICATIONS
RP25
Generator
Wattage 19,700 20,000 20,000 20,000
kVa 19.7 25 25 25
Volts 120/240 120/208 120/240 277/480
Phase Single Three Three Three
PF 1.0 .80 .80 .80
Amps 70(1) 69 60 30
CB Size 70 70 70 30
Hertz 60 60 60 60
(1) Maximum current available at terminal block and cam-lock. A maximum current of 82
amps is available when the receptacle package is used.
Engine
Model Isuzu 4LE1
Starting System 12 Volt
Mufer Standard
Fuel Consumption (full load) 1.8 Gal/Hr
Engine Fluid Specications
Fuel ASTM D-975 -1D or 2D
EN590 or equivalent
Oil Type SEE LUBRICATION SECTION
Oil Capacity 8.6 Quarts
Cooling System 50/50 mix
GENERATOR END
NOTE: Review the Stamford Newage nameplate on your generator.
Some custom applications use other models. Check the generator
nameplate for actual model number. Additional generator information
available on line at www.wincogen.com under Service Support.
Model Stamford PI144F1L
Winding Group 311
Resistances:
Rotor 0.708 Ohms @22°C
Stator (L-L) 0.265 Ohms Per Ph @ 22°C
Exciter Rotor (L-L) 0.201 Ohms Per Ph @ 22°C
Exciter Stator (L-L) 20.3 Ohms @ 22°C
EBS Winding 12.9 Ohms @ 22°C
Voltage Regulator (L-L) AS480

6OPM-114
REV B
ENGINE
Refer to the engine operators manual for more detailed operation and
maintenance information.
CAUTION: EQUIPMENT DAMAGE:
Be sure to check the engine oil level frequently as specied in the
engine manual.
The engine manufacturer has established an excellent worldwide
engine service organization; engine service is available from a nearby
authorized dealer or distributor. Go to the WINCO website for a list of
engine dealers (http://wincogen.com/Engine_Support) or contact the
WINCO Service Department.
The rated power of each engine-generator is limited by the
temperature, altitude, and all other ambient conditions specied by
the engine manufacturer. Engine power may decrease 3% for each
1000 feet above sea level, and will decrease an additional 3% for each
10 degrees Fahrenheit above 60° Fahrenheit. Units should not be
operated in ambient temperature greater than 122° Fahrenheit.
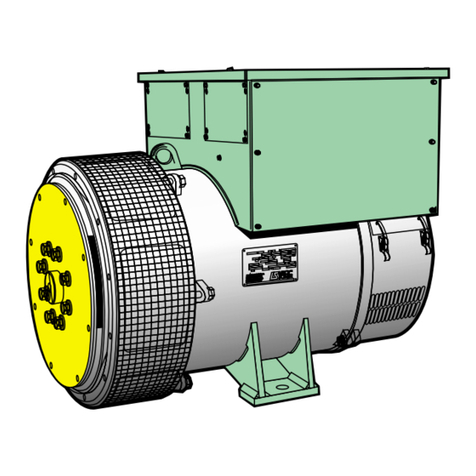
GENERATOR
WINCO generator sets use brushless, AVR (Auto-Voltage Regulator)
controlled broad-range generator ends. The generator converts
rotational mechanical energy into electrical energy. These WINCO units
are equipped with generators manufactured by Cummins Generator
Technology. Each generator ‘end’ has its own data tag. A unique serial
number is on the data plate.
TRAILER/HOUSING
These switchable voltage generators are normally shipped fully
enclosed & mounted on a trailer. The trailer is DOT approved and you
should receive a certicate of origin. This will allow you to register the
equipment and obtain tags from your state. If you should encounter any
problems registering the trailer, contact the WINCO Service Dept at
507-357-6831.
INTRODUCTION
PRODUCT DESCRIPTION
This engine-generator set is designed for unattended remote start
operation. It can be operated as part of a fully automatic standby power
system or independently as a local start unit in a prime power system.
The engine-generator set is fully tested at the factory prior to shipment
to insure proper operation of each individual component as well as the
total system’s performance and reliability.
The engine generator set consists of a multi-cylinder, liquid cooled
engine nominally operating at 1800 rpm. The generator frequency
regulation is maintained by the engine governor to within +/- 1.5 Hz
(cps), from no load to rated load for standard mechanical governors
and to within +/- .5 Hz or better for units equipped with an electronic
governor. The generator is a single bearing, direct drive, rotating eld
design. The generator is connected to the engine ywheel via exible
drive disks. Generator set is skid mounted with isolation mounts
between the engine and base on all units.
A customer supplied 12 Volt battery is required to complete the
installation. Battery requirements are listed later under the battery
installation section.
Unit Orientation Note: All references used in this manual for unit
familiarization, access and component locations on the Generator Set
are oriented from a TOP (plan) VIEW with engine at the FRONT and
generator to the REAR.
WINCO uses a common junction box for all customer control and
power connections (both AC output and DC control). The common
electrical junction box is always on the left side at the generator end of
the machine.
The engine is controlled and Generator Set operation is monitored for
safe operation by a programmable microprocessor based electronic
Engine Control Module (ECM) with an LCD digital display. The
generator set ECM control is mounted on a vertical pedestal on the
right side of the generator. The ECM is programmed with a cycle
cranking sequence - 3 cycles of 15 seconds on/15 seconds off, and
5 minute cool-down delay. The cool-down delay can be changed in
the eld from 0 to 30 minutes by your installer. Other features, timing
cycles, set points, and signal output capabilities are possible. Consult
factory for procedure and passwords.
NOTICE:
These units will automatically transfer if a power outage occurs while
running in exercise mode.
GENERATOR SET
Every WINCO generator set has its own unique identity data plate.
This data plate identies the complete unit model number, the system
serial number, and has links to the individual components that form the
generator set in our factory records. Several of the major components
also have their own individual data plates providing additional
information to document build data for warranty and replacement parts.

7OPM-114 REV B
INSTALLATION
WARNING: PERSONAL INJURY:
PERSONAL INJURY - Before proceeding with the installation, be sure
the DSE7310 MKII is in the “stop” position. Before proceeding with the
installation, be sure the Generator MLCB (Main Line Circuit Breaker) is
in the ‘OFF’ position and the unit starting battery is disconnected.
GENERAL INFORMATION
This engine-generator set is supplied as weather enclosed, trailered
packages. The DOT certied trailer is required for mobile applications.
Consult a qualied, licensed electrician or contractor to install and wire
the gen-set. The installation must comply with all national, state, and
local codes. The factory weather enclosures are acoustical housing
intended for outdoor use only. Units are not intended to be used
indoors and no support is available to assist in re-engineering nished
packaged units.
Before beginning the installation process, recheck the voltage, phase,
and amperage rating of the generator set. Be certain it can handle the
intended load and are compatible with the intended loads. Plans for
installation should be prepared with proper attention to mechanical and
electrical engineering detail to assure a satisfactory system installation.
The information in this manual is offered only as a guide to nalizing
your installation plans.
FUEL REQUIREMENTS
During periods of normal operations, the engine uses #2 diesel fuel.
Seasonally blended fuel should be used during time of extreme cold to
ensure proper engine operation. See the engine operator’s manual for
more specic information on requirements.
NOTE: When starting the unit for the time it may be necessary to prime
the engine before engine before engaging the starter. The internal tank
on the unit was not used during testing so there may be some air in the
fuel lines that will have to be bled out.
LUBRICATION
Before starting the engine, check the oil level in the crankcase. If
it is low, rell to the full mark with the proper weight/grade of oil as
recommended by the engine manufacturer’s maintenance instructions.
The necessity of using the correct oil, and keeping the crankcase full,
cannot be over emphasized. Failure to use the proper oil and keep the
crankcase properly lled will cause excessive engine wear and shorten
its useful life.
PREPARING THE UNIT
UNPACKING
1. As you receive your unit, it is critical to check it for any damage. If
any damage is noted, it is always easiest to refuse the shipment and
let WINCO take care of the freight claim. If you sign for the unit, the
transfer of the ownership requires that you le the freight claim
2. Before proceeding with the preparations of your new generator
for operation, take a couple of minutes to ensure the unit you have
received is the correct model and review the specication pages in this
manual to ensure that this unit meets your job requirements.
CAUTION: EQUIPMENT DAMAGE:
This unit is shipped with oil and a 50/50 mix of coolant. Be sure to
check all uid levels before operating. See engine manufacturer’s
instruction manual for recommended oil requirements before initial
starting.
Once generator set is on-site:
After inspecting the engine-generator for external, physical damage,
locate and check the following items packed with the unit:
a. Installation and Operator’s Manual.
b. Engine manufacturer’s instruction manual.
c. Battery hold-down brackets & hardware.
d. Unit components or accessory items shipped loose for on-site
installation.
e. Optional accessories.
LIFTING THE GENERATOR SET
1. Make sure that the area under the equipment is kept clear.
2. Be certain rigging is designed to lift unit safely.
3. Never attempt to lift the unit unless you are certain the lifting
device has sufcient capacity.
4. Never allow the unit to swing while suspended.
5. Be certain the supporting structure is adequate to handle the
weight of the unit.
CAUTION:
Only lift the unit using the factory installed lifting eye, located on top of
the unit’s housing.
TOWING THE EQUIPMENT
1. Always use a vehicle capable for safe operation.
2. Never tow without the safety chains secured.
3. Always use the proper ball hitch size on the vehicle.
4. Never attempt to tow with a vehicle without side mirrors installed.
SETTING THE JACKS
1. Move the two rear jacks from transport position to run position.
2. Rotate the front jack from transport position to run position.
3. Level the unit using the three jacks before starting the unit.
4. Return jacks to transport position before moving the unit.

8OPM-114
REV B
COOLANT
Before starting the engine, check the coolant level in the radiator. If
it is low, rell as specied in the engine manufacturer’s maintenance
instructions. The radiator should be lled to about 1 inch below the ller
neck. For additional information on engine coolant requirements, see
engine manufacturer’s maintenance instructions.
INSTALLING THE BATTERY
CAUTION:
In the following battery installation procedure, check to be sure the
DSE 7310 MKII is in the “stop” position. This should be your last step
before initial start-up.
The RP25 is a 12 volt system and requires a single battery. The
batteries should be rated at a minimum of 650 CCA. Installation of the
highest CCA rated battery, within the correct BCI group, will increase
cold weather starting performance. Gel batteries should not be used
with the battery tender installed in the generator enclosure.
Installation and servicing of batteries must only be preformed or
supervised by personnel knowledgeable of batteries and the required
precautions. Keep unauthorized personnel away from batteries.
When installing or replacing batteries, use the proper group/size
starting battery. The battery should be a maintenance-free lead acid
design. Deep cycle batteries will not work for this application.
CAUTION: PERSONAL DANGER:
NEVER dispose a battery in a re. The battery is capable of exploding.
DO NOT open or mutilate the battery. Released electrolyte is known to
be harmful to the skin and eyes and to be very toxic.
These engine-generator sets are all NEGATIVE ground. Be very careful
not to connect the battery in reverse polarity, as this may short circuit
the battery charging system on the engine.
CAUTION:
A battery presents a risk of electrical shock and high short circuit
current. The following precautions must be observed when working
with batteries:
1. Remove watches, rings, and other metal objects.
2. Use tools with insulated handles.
3. Check both the battery cable ends and the battery posts to be
sure they are free of corrosion.
4. Always connect the battery positive cable rst and then connect
the battery negative cable. When removing the battery cables
from the battery, reverse the procedure, disconnect the negative
rst and then the positive cable.
5. Be sure all connections are tight and coat the terminals and cable
ends with dialectic grease.
WARNING:
The electrolyte is diluted sulfuric acid that is harmful to the skin
and eyes. It is electrically conductive and corrosive. The following
precautions must always be taken.
1. Always wear full eye protection and protective clothing.
2. Where electrolyte contacts skin, wash off immediately with water.
3. If electrolyte contacts the eyes, ush thoroughly and immediately
with water and seek immediate medical attention
4. Spilled electrolyte is to be washed down with an acid neutralizing
agent. A common practice is to use a solution of one pound
of bicarbonate of soda (baking soda) to one gallon of water.
The bicarbonate of soda solution is to be added until the evidence
of reaction (foaming) has ceased. The resulting liquid is to be
ushed with water and the area dried.
DANGER: EXPLOSIVE FIRE RISK:
1. Never smoke when near batteries.
2. Do not cause a ame or spark in the battery area.
3. Always discharge static electricity from your body before touching
batteries by rst touching a ground metal surface.
SERVICING BATTERIES
Batteries used on these units may, over time, lose water. This
is especially true if you are using a trickle charger to maintain
your battery. Different types of batteries require various types
of maintenance. Refer to the battery manufacturer for specic
recommendations.
NOTE: Always make sure that a new battery is fully charged before
installing it on a generator set. Failure to do so can cause damage to
the engine control module in the generator set.
All connections must be clean and tight. Depending on your battery
type, check the electrolyte in the battery periodically to be sure it is
above the plates. Never allow the battery to remain in a discharged
condition.
CAUTION: EQUIPMENT DAMAGE:
Never attempt to jump start this engine. If the battery should
accidentally become discharged, disconnect the battery cables and
recharge the battery before attempting to start the unit. Boost/jump
starting this unit improperly will result in PERMANENT DAMAGE TO
THE ENGINE CONTROL MODULE (ECM).

9OPM-114 REV B
BATTERY CHARGER & BLOCKHEATER
A three-stage electronic battery charger is provided standard on this
unit. This charger has three rates of charging. During the rst mode,
known as Bulk charging, the charging current is limited to 2 Amps at a
voltage of up to 14.5 VDC. The green LED will blink during this stage.
During the Absorption mode, the charger holds the battery voltage at
approximately 14.5 VDC, and then gradually reduces the amount of
Amps it delivers to the battery. This way the battery is able to “absorb”
the last 10% of charge as quickly as possible without becoming
overheated. The green LED will blink during this stage. When the
battery approaches full charge, the charger switches into its third
charging stage, gradually reducing the current fed to the batteries to
as low as 0.1 Amps. At the same time, it reduces its output to a “Float”
or “Maintenance” charging rate of approximately 13.3 VDC nominal,
indicated by the green LED. This low “Float” or Maintenance” voltage
gently “tops off” the battery, keeping it fully charged and ready until
needed. The green LED will indicate the battery is fully charged.
The blockheater on this unit is 1000 watts and should also be plugged
in the Shore Power receptacle. The block heater is thermostatically
controlled and when plugged in will maintain the engine coolant
temperature between 100 and 120 degrees F.
MOUNTING THE AUTOMATIC TRANSFER SWITCH
For standby applications, an automatic transfer switch (ATS) will
be necessary for automatic starting. A wall mounted ASCO 300
ATS designed for inside or outside installation. The transfer switch
is UL1008 approved. A fourteen day electronic exerciser circuit is
installed in the ATS as standard equipment. The ATS also contains the
power failure sensing circuitry necessary to start and stop the engine
generator set. The transfer switch is also equipped standard with a 3
second start delay, and a 15 second transfer delay to allow the engine
to warm up before transferring the load to the generator. When the line
power is restored the ATS has a 5 minute transfer delay to allow the
incoming utility to stabilize before transferring back to line power and
then an additional 1 minute engine cool down delay before the engine
shuts down. Read and understand the ATS owners manual before
installing, servicing or operating the transfer switch.
WARNING: FIRE HAZARD:
All wiring must be done by a licensed electrician, and must conform to
the National Electrical Code and comply with all the local codes and
regulations. Check with the local authorities before proceeding.
INSTALLATION NOTES:
Because of many different types of service, feeder and distribution
equipment, no specic wiring instructions can be provided. It is
recommended that only copper wire be used. In all cases it is
essential that while the load is connected to the generator, there can
be absolutely no feedback from the generator to the power line or the
power line to the generator. When properly installed, the normal ATS
Control and safety system will eliminate all paths and feedback.
To wire the automatic transfer switch into existing wiring, rst determine
which circuits will be on the emergency load circuit. If the entire load is
transferred, the transfer switch can be wired directly after the watt-hour
meter and the service entrance, providing the service entrance ampere
rating is within the transfer switch’s rated capability.
If only specic circuits are to be powered under emergency power
failure conditions, an additional distribution panel designated
“emergency distribution panel” must be installed.
All selected emergency circuits are removed from main distribution
panels and installed in the emergency distribution panel. The ATS is
then installed between the main panel and the emergency distribution
panel. Suggested circuits: freezer, refrigerator, furnace, emergency
lights, sump pump, emergency outlet circuits, etc. Total running load
must not exceed generator rating.

10 OPM-114
REV B
E: FULL POWER OUTPUT & NEUTRAL TERMINAL BLOCK :
See A.C. Electrical Connections in this manual.
F: DOOR SAFETY SWITCH:
This safety switch is connected to the DSE 7310 MKII engine control
and will shut the unit down any time door is opened with the unit
running. This prevents someone from accidentally contacting the main
power connection with the unit running. This unit will not start if the
door is not closed and latched.
G: WIRE ENTRANCE HOLES:
These hole have been specically provided for you to route your
full power leads through to the output lugs. The routing holes were
provided to insure that no small child or curious adult can reach inside
and come into contact with the main output lugs with the unit running.
H: 120V 20 AMP 3-WIRE RECESSED SHORE POWER PLUG:
NEMA Spec 5-20. This panel mounted plug is designed to plug directly
in a standard 20 amp receptacle on a extension cord. The plug when
connected will provide power to the block heater and the battery trickle
charger mounted inside the generator enclosure. This can be used
when the set is used in a standby application to keep the engine warm
and the battery charged or in your rental yard to keep the battery
charged up. This receptacle is to be powered by a GFCI circuit and
installed in accordance with the United States National Electric Code.
I: 2 - 120V 20 AMP GROUND FAULT INTERRUPTER DUPLEX:
These duplex receptacles are protected by 20 amp circuit breakers
mounted just above the duplexes. The “T” slot design both 15 and 20
amp 120V cords can be plugged in.
J: 2- 120/240V 50 AMP 4-WIRE TWISTLOCK:
These receptacles are rated for dual voltage, 120 or 240V use. It is
a 4-wire receptacle, with a center grounding pin. 4-wire drop cords
plugged into this receptacle may be split into 120V receptacles at a
distrobution box. Each receptacle is protected by a two pole 50 amp
circuit breaker mounted just above it. THIS RECEPTACLE UTILIZES A
HUBBLL PLUG PART # CS6365.
K: 250V 50 AMP CIRCUIT BREAKERS:
These circuit breakers protect the 2 - 50 amp twistlock receptacles (H).
L: 120V 20 AMP CIRCUIT BREAKERS:
These two push button 20 amp circuit breakers protect the two GFCI
receptacles (G).
WARNING:
A mainline circuit breaker has been provided inside the generator
housing. During all wiring installations, make sure the breaker is in the
OFF position and the generator operating switch is in the OFF position.
ELECTRICAL CONNECTIONS
NOTICE: CLASS 1 WIRING METHODS ARE TO BE USED FOR ALL
FIELD WIRING CONNECTIONS TO TERMINALS OF A CLASS 2
CIRCUIT
All wiring must be completed in accordance with the National Electric
Code as well as any state and local codes.
You must pay particular attention to wire size requirement for
the amperage of service you are dealing with. The table below
provides you guidance on wire sizing based on both wire type and
amperage. Wire amperages have been derated for 40° C ambient
temperatures operation.
WARNING:
Make sure the generator is disconnected from the battery to prevent
accidental starting.
RECEPTACLE PANEL
A: 208/240 VOLT MAINLINE CIRCUIT BREAKER:
This is the low voltage mainline circuit breaker feeding the full output
terminal block. This circuit breaker is used when the selector switch
is in the 120/208V 3-PH, 120/240V 3-PH, or 120/240V 1-PH switch
position.
B: 480 VOLT MAINLINE CIRCUIT BREAKER:
This is the high voltage mainline circuit breaker feeding the full output
terminal block. This circuit breaker is used when the selector switch is
in the 277/480V 3-PH position.
C: CIRCUIT BREAKER LOCKING BAR:
Select and turn on either the high voltage breaker (480V) or the low
voltage breaker (208/240V), depending on which position you have the
selector switch in. This bar prevents both breakers from being turned
on at the same time.
D: REMOTE START/E-STOP TERMINAL BLOCK
This terminal block provides the customer two different connections.
Torque screws to 9.6 in. lb. using 14 to 16 AWG copper wire with lugs.
See D.C. Electrical Connections in this manual.
A C B D
E
HG
F
I
J
K
L

11OPM-114 REV B
A.C. ELECTRICAL CONNECTIONS
This AC terminal block is covered by a lockable access cover. Access
for routing the wires into the terminal block is provided via a small
access door just to the left of the main control panel door. You will also
nd your convenience receptacles located behind this small door. All
receptacles located here have their own circuit breaker for protection.
NEUTRAL LUGS:
These lugs are isolated from ground and provided for you to connect
your neutral wire from the transfer switch to the generator. Lugs will
handle up to 2/0 wire. Torque lugs to 150 in. lbs. using #1 and #2 wire
and 180 in. lbs. for 1/0 & 2/0 wire.
GROUND LUG:
These ground lugs are bonded to ground and are provided for you
to connect your ground wire from the transfer switch to. The lugs will
accommodate up to 2/0 wire. Torque lugs to 150 in. lbs. using #1 & #2
wire and 180 in. lbs. for 1/0 & 2/0 wire.
L1, L2, & L3 POWER OUTPUT LUGS:
The full power terminal block is capable of handling full generator
output at any of the selected voltages. For single phase 120/240
connect to L1 and L3, the third leg L2 is not powered or used. Lugs will
handle up to 2/0 wire. Torque lugs to 150 in. lbs. using #1 & #2 wire
and 180 in. lbs. for 1/0 & 2/0 wire. In the 120/240V 3-Ph conguration
with the wild leg (208 line to neutral) is wired to the L2 position.
WARNING: PERSONAL DANGER:
This unit is shipped with the neutral and ground unbonded. If the unit
is to be used as a stand-alone generator, you must bond neutral and
ground together either at this terminal block or somewhere in your
system.
GROUNDING
A grounding lug has been provided on the engine generator set and
the generator set must be properly grounded to good earth ground.
Generally an 8 foot copper rod driven into the earth will provide a
proper earth ground.
GROUND
NEUTRAL
L1
L2 “WILD LEG”
L3
CAM-LOCK CONNECTIONS
This unit is equipped with Com-Lock connector, located behind the
rear, right door panel. These Cam-Locks are connected to the full load
terminal blocks and are capable of providing full generator output in
all voltage congurations. The mating connectors are model CL2FB,
which are available with different ire size capabilities.
D.C. ELECTRICAL CONNECTIONS
All DC connections are completed on the terminal strip just below
the engine control. All DC connection must be separate conduit. You
cannot mix AC and DC leads at the same conduit.
CUSTOMER REMOTE START CONNECTIONS TERMINALS. This
can be either an automatic transfer switch or just a remote switch in
a job trailer. This feature requires a relay closure between the two
connections on the terminal block to put the unit into an auto-start
mode. The auto-start mode has both a start delay and a cool down
delay built into the DSE 7310 MKII
Torque Screws to 9.6 in. lb. using 14 to 16 awg copper wire with lugs.
Note: Any relay closure can be used to start and stop this generator. As
long as the contact stays closed the engine generator set will continue
to run. Once the relay is opened the unit will shut down and remain in
the standby mode until the remote start relay is closed again.
ESTOP- & ESTOP+. Remote Emergency Stop terminals. These
two terminals are shipped with a jumper installed. If your application
requires the installation of a Remote Emergency Stop switch, remove
the jumper and wire your switch to these terminals. This unit will not
start and run without either the jumper installed or a remote N/C switch
installed.

12 OPM-114
REV B
STARTING PROCEDURE
CONTROL LAYOUT
STOP/RESET - This button places the module into its Stop/Reset
mode. This will clear any alarm conditions for which the triggering
criteria have been removed. The fuel supply de-energizes and the
engine comes to a standstill. Should a remote start signal be present
while operating in this mode, a remote start WILL NOT occur.
MANUAL MODE - This button places the module into its Manual
Mode. Once in Manual Mode, the model responds to the Start button
to start the generator and run it off load.
START - Pressing this button from STOP/RESET will start the engine
and run the load.
AUTO MODE - This button places the module into its Auto Mode.
This mode allows the module to control the function of the generator
automatically.
ALARM/LAMP TEST - This button silences the audible alarm in
the controller, de-activates the Audible Alarm output (if congured)
and illuminates all of the LEDs on the module’s face as a lamp test
function.
MENU NAVIGATION - Used for navigating the instrumentation, event
log, and conguration screens.
PROTECTIONS
When an alarm is present, the common alarm LED if congures will
illuminate. The LCD display will show an icon to indicate the failure.
WARNINGS
Warnings are non-critical alarm conditions and do not affect the
operation of the generator system, they serve to draw the operator’s
attention to an undesirable condition. Warning alarms are self-resetting
when the fault condition is removed. The icon will appear steady in the
display.
SHUTDOWNS
Shutdowns are critical alarm conditions that stop the engine and draw
the operator’s attention to an undesirable condition. Shutdown alarms
are latching. The fault must be removed and the STOP/RESET button
pressed to reset the module. The icon will be ashing in the display.
SELECTING THE CORRECT VOLTAGE
A variety of phase voltages are available from the four position selector
switch. The four basic connection patterns are Delta (120/240). Low
or Parallel Wye (120/208), High Wye (277/480), and Single Phase
120/240.
DC INTERCONNECTIONS TO THE ATS
WARNING:
Be sure Engine/Generator is in the OFF position before you make any
DC interconnections.
CAUTION:
Never run the AC and DC wiring in the same conduit.
ASCO 300 UL SWITCH
Your DC connection points in the ASCO 300 ATS terminals “14” and
“15”. Depending on the size of the switch, they are located in different
locations.
135060-00 60708-165
A - Customer Remote Start CONNECTIONS TERMINALS. The
two remote start leads from the Automatic Transfer Switch are
connected to the two terminals marked GROUND & START. The
wire in terminal GROUND is Battery Negative and the wire in the
terminal labeled START is your Remote Start lead. Closing these
two leads together will signal the DSE 7310 to go into an auto-
start mode and start up the engine generator.
Depending on the distance, 14 to 16 gauge stranded wire
should be used. It is suggested that these wires be labeled S1
JURXQGDQG6VWDUW The terminal blocks are designed to
use terminal lugs on all wires and the screws should be torqued
to 9.6 in. lbs.
1RWH$Q\UHOD\FORVXUHFDQEHXVHGWRVWDUWDQGVWRSWKLV
JHQHUDWRU$VORQJDVWKHFRQWDFWVWD\VFORVHGWKHHQJLQH
JHQHUDWRUVHWZLOOFRQWLQXHWRUXQ2QFHWKHUHOD\LVRSHQHG
WKHXQLWZLOOVKXWGRZQDQGUHPDLQLQWKHVWDQGE\PRGHXQWLO
WKHUHPRWHVWDUWUHOD\LVFORVHGDJDLQ
B - ESTOP- & ESTOP+. Remote Emergency Stop terminals.
These two terminals are shipped with a jumper installed. If your
application requires the installation of a Remote Emergency
Stop switch, remove the jumper and wire your switch to these
terminals. This unit will not start and run without either the
jumper installed or a remote N/C switch installed..
C. - Battery Charger Failure. Battery charger failure relay input
from remote battery charger to DSE7310 controller.
D - Remote Display Panel Interface Terminals. These
interface terminals are prewired to allow for the connection of a
remote display. This display allows for the remote annunciation
of alarms at a location such as a nurses station or a control
room. This display can used to meet the remote annunciation
requirements of NFPA 110 standards. (This feature meets the
annunciation requirements in applications requiring NFPA110
level one protection.)
DC Interconnections to the
Automatic Transfer Switch
*************
***** WARNING *****
*************
%HVXUH(QJLQH*HQHUDWRULVLQWKH³2))´SRVLWLRQEHIRUH
you make any DC interconnections.
*******CAUTION******
1HYHUUXQWKH$&DQG'&ZLULQJLQWKHVDPHFRQGXLW
ASCO 185 UL SWITCH
<RXU'&FRQQHFWLRQSRLQWVLQWKH$6&2$76DUH
WHUPLQDOV³´DQG³RQWKHLQWHUIDFHWHUPLQDOEORFN
ASCO 300 UL SWITCH
Your DC connection points in the ASCO 300 ATS are terminals
³´DQG³´'HSHQGLQJRQWKHVL]HRIWKHVZLWFKWKH\DUH
located in different locations.
TB7
removable
terminal block
TB7–4, TB7–5, TB7–6
123456789
Figure 4. TB7 generator starting contact terminals.
Table A. Generator Start Connections
When the Utility fails Terminals on Controller
contact closes TB7–4 and TB7–5
contact opens TB7–5 and TB7–6

13OPM-114 REV B
The table below show the voltages at the terminal lug as well as the
receptacles for all four voltage patterns available through the selector
switch.
VOLTAGE SELECTOR
SWITCH POSITION
TERMINALS MINIMUM
VOLTAGE
NORMAL
VOLTAGE
MAXIMUM
VOLTAGE
120/240V SINGLE PHASE
LINE TO LINE L1 TO L3 220 240 260
120/240V RECEPTACLES 110/220 120/240 130/260
LINE TO NEUTRAL L1 TO N 110 120 130
L2 TO N -0- -0- -0-
L3 TO N 110 120 130
120V RECEPTACLES 110 120 130
120/208V THREE PHASE
LINE TO LINE ALL 200 208 220
120/240V RECEPTACLES 110/200 120/208 127/220
LINE TO NEUTRAL ALL 115 120 127
120V RECEPTACLES ALL 115 120 127
G3 TO N 115 120 127
120/240V THREE PHASE
LINE TO LINE ALL 220 240 260
120/240V RECEPTACLES 110/220 120/240 130/260
LINE TO NEUTRAL
USE CAUTION THIS CONFIGURATION
HAS A HIGH VOLTAGE LEG
G1 TO N 110 120 130
(HIGH VOLTAGE LEG) G2 TO N 191 208 225
G3 TO N 110 120 130
120V RECEPTACLES 110 120 130
277/480V THREE PHASE
LINE TO LINE ALL 416 460 480
120/240V RECEPTACLES NONE NONE NONE
LINE TO NEUTRAL ALL 240 265 277
120V RECEPTACLES NONE NONE NONE
WARNING: POTENTIAL EQUIPMENT DAMAGE
The 120/240V three phase position has a wild leg that produces 208V
line to neutral on G2. Be sure when connecting to your panel or load,
that you match the wild phase on the generator to the wild phase in
your panel or load. failure to do so will result in 120V devices receiving
208V. You must also match your rotation.
Before wiring and starting this unit, be sure you have the selector
switch set for the right voltage. You must depress the safety switch
below the selector switch to change the position of the voltage selector
switch. If the unit is running, depressing this switch will shutdown the
engine-generator set.
At the same time you are making the voltage selection, you must also
adjust the setting on the mainline circuit breaker to give the proper
breaker protection. If you have any doubts as to the voltage in your
area compare your incoming power or load name plates.
INITIAL START UP
WARNING: EQUIPMENT DAMAGE:
Before attempting to start this unit, complete your pre-start checklist
and ensure the generator mainline circuit breaker is in the proper
position prior to starting. Starting this unit without it properly connected
can cause serious personal injury or equipment damage.
DO NOT jump start these engine-generator sets. Starting these units
on a low battery or jump starting them will cause damage to the engine
control module.
Use the following check list to verify correct installation before starting
the engine.
□ Engine oil. Fill as required with proper grade/qty.
□Engine coolant. Fill as required with proper mixture.
□Unit mounting base properly bolted down.
□Clearance for service and maintenance on all sides.
□ Proper fuel line material and size.
□All fuel line connections tight.
□Battery connections clean and tight
□Battery fully charged.
□All AC and DC wiring installed and properly protected.
After completing the previous checklist, the engine-generator set is
ready for initial start-up.
MANUAL MODE
1. Select the desired voltage with the selector switch.
2. Turn off both main line circuit breakers.
3. Press and release the MANUAL MODE button. The small LED light
next to it should come on.
4.. Press and release the green START ENGINE button. The DSE
7310 MKII will send a start signal to the glow plug solenoid on the
engine. Preheating the engine for about 10 seconds at the end of that
time will engage the fuel rack solenoid and the starter. This will start the
cranking cycle (10 seconds on and 10 seconds off).
Note: There is no start delay in this mode of operation.
If the engine fails to start during this cranking period, the starter motor
is disengaged and goes into a rest mode after which a second attempt
is made to start the engine. Should this sequence continue through 3
cranking cycles the start sequence will be stopped and the display will
show ‘FAILED TO START”.
All engine functions are controlled by the DSE 7310 MKII controller.
Once the unit is running, the control will display the engine information,
To get the generator information, scroll down on the controller.
The AC ouptut readings displayed on the DSE 7310 MKII are collected
through the AC interface harness wired in the generator control box.
Any shutdowns related to the AC output are a function of the controller
are based on information collected in the DSE 7310 MKII via this AC
harness.
5. After the engine is running at the proper speed, adjust the voltage to
the desired level using the external voltage trim rheostat.
6. Turn on the proper main line breaker (either high or low voltage) and
padlock the lock bar to prevent the incorrect breaker from being turned
on.

14 OPM-114
REV B
8. Connect the load block to the transfer switch using the proper wire
sizes. Refer to the National Electric Code Handbook (NFPA 70) for
proper wire type and sizing. Use Table 310-16 for wiring run through
conduit and table 310-17 for free air wiring.
Use extreme caution when installing the delta voltage pattern. One
power leg of this 3-phase pattern produces 208V measured from line
to neutral. Be sure to match the location of the generator wild leg to the
location of the wild leg on the incoming power service. Failure to do so
will cause equipment damage to any 120V load incorrectly connected
to this line.
9. Connect the neutral to the transfer switch using the same size wire.
10. For isolated neutral operation, remove the jumper wire between the
ground lug and the neutral connection block. Then route a ground lead
back to system ground.
11. Ground the generator with an eight foot copper ground rod or other
approved grounding system. Connect #4 AWG copper cable from the
ground lug on the generator to the ground rod.
12. Depress the RUN button on the RP25 control panel to start it.
13. Check the voltage at the ATS. Verify that it matches the incoming
power line voltage line-to-line and line-to-neutral on each leg.
14. Check the three phase rotation pattern. Ensure that you have the
same rotation, with both the generator and the normal power source.
15. Depress the STOP button on the front of the engine control.
Let the unit stop and depress the AUTO button. The unot is now in
AUTOMATIC mode. Also be sure the AUTO light is lit on the control,
letting you know it is in auto mode. See control panel layout for
additional information.
16. To test the Automatic Transfer Switch, follow the instruction on the
operator’s manual that came with the transfer switch. If you get a fault
during the initial start up or prior to start up, it is most likely a false
warning light. Simply reset the ATS start over.
17. Once you have completed testing of the ATS, be sure you ALWAYS
leave the system in the standby mode,unless servicing the unit. For
standby operation, press the AUTO button on the front of the control.
The green light should light up next to the AUTO button.
NOTE: For setting the exerciser circuit, for all ATS, see the operator’s
manual shipped with the ATS.
WARNING: EQUIPMENT DAMAGE:
Never apply a load to the generator until you have rst checked the
voltage at the terminal blocks or Cam-Locks.
7. With the engine running smoothly check the no load voltage and
frequency on the digital display. The voltage should be 208/240/480 AC
depending on which model you have and a frequency of 59.5 to 60.5
hertz (Hz).
If you have the proper voltage at the generator the next step is to check
the voltage at the generator terminals. The voltage between the L1, L2,
and L3 terminals should be the same as it was on the generator front
panel. The voltage should also be checked between the hot terminals
(L1, L2, and L3) and the N to be certain of a balanced voltage output
and a solid neutral connection.
ON 240 VOLT (DELTA) SYSTEMS BE SURE YOU KNOW WHERE
THE HIGH VOLTAGE “WILD” LEG IS. IT MUST BE IN THE SAME
LOCATION ON THE LINE SIDE AS IT IS ON THE GENERATOR SIDE.
NOTICE:
If for any reason during the check out procedure the voltage and
frequency are not correct, depress the STOP/RESET button and
correct the trouble before proceeding.
8. Stopping - There are two ways to stop the unit when it is in the
manual mode. Pressing the STOP/RESET button will stop the unit
immediately. Pressing the AUTO mode button will stop the unit but only
after the cool down timers have timed out and there is no remote start
signal being sent to the unit.
AUTO MODE
1. Complete the previous Manual Mode starting procedure to ensure
the system is set up properly.
2. Ensure the engine is in the OFF position during installation of the
remote start connections.
3. Locate the remote start terminal block. This terminal block is located
next to the full power connections, behind the access door on the
control panel.
4. Locate the remote start terminals in your remote automatic transfer
switch (ATS). The RP25 requires a contact closure for start.
WARNING: EQUIPMENT DAMAGE:
The remote “signal” must be a “dry” (non-powered) contact closure.
Using a power contact will cause permanent damage to the engine
control module.
5. For most installations, 16 gauge wire is sufcient to handle the
control signal. On extremely long runs, increase the wire size to
minimum voltage drop.
6. Locate and identify the “neutral” and “generator” connections in the
ATS.

15OPM-114 REV B
CONNECTING THE LOADS
WARNING:
All wiring must be done in accordance with National Electric Code
NFPA 70.
There are three ways the loads may be connected to the RP25:
1. Front Panel -
A variety of receptacles have been provided for your convenience
on the front panel. The 120V receptacles are powered when the
voltage selector switch is in the 120/240 single phase, 120/40V three
phase, and 120/208V three phase position. The 240V receptacles
are only usable in the 120/240V single phase and 120/240V three
phase position. In the 120/208V position, the 240V receptacles have
only 208V at them. Refer to the voltage output table, located
previously in this manual.
2. Full Power Load Connection Terminal Block -
For remote connections and connecting load distribution boxes,
heavy duty terminal blocks have been provided. These terminal
blocks are located on the rear of the unit justs below the DSE7310
MKII controller. The neutral and ground are connected together
at this panel. For use with an isolates neutral, remove the jumper
strap between the neutral connection block and the ground lug. This
will isolate the neutral from the ground and allow your a single point
grounding at a distribution panel. When using these terminal blocks,
be sure to use wire rated large enough to carry your full load or the
full rated load of the generator.
3. Full Power Cam-Lock Connections -
For ease of connecting and disconnecting loads, these units have
been equipped with Cam-Locks located behind the right hand, rear
door. See the Cam-Lock Connections in this manual. Instructions
for the Full Power load Connection Terminal Block apply for the
Cam-Locks. If you need to run an isolated neutral system, the
jumper between the neutral and ground musts be removed at the
terminal block.
4. Grounding The Unit -
To comply with current safety standards, this generator set must be
properly grounded. Ground the RP25 by driving an eight foot copper
ground rod into the earth. Then connect a #4AWG ground cable
from the grounding lug on the generator to the ground rod.
50 CYCLE OPERATION
With a couple of minor changes, these mobile diesel generators are
capable of producing 50Hz power. Two changes must be made:
1. The engine must be reduced to 1500 RPM governed speed.
Consult your local Isuzu service center for the proper procedure
for reducing engine speed and setting up the governor to operate
at 1500 RPM.
2. The automatic Volt/Hz regulator must be also reset to operate at
50 Hz. Refer to the Stamford generator manual for instructions.
VOLTAGE REGULATOR WIRING
AS440 Automatic Voltage Regulator
The following is a list of connections on the AVR. These have been
factory set and other than voltage adjustment, should never be
changed.
VOLTS
To adjust generator output voltage.
Clockwise to increase voltage.
STABILITY
To prevent voltage hunting.
Clockwise to increase the dampening effect.
STANDARD CONNECTIONS
Terminals 1 & 2 will be tted with a shorting link if no hand trimmer is
required.
Terminals La & Lb are linked only for special low voltage applications.
UFRO - Under Frequency Roll Off
Terminal S1 is connected to the C.T., S2 on the AVR.
DROOP - Normally preset in the works to give 5% voltage droop at full
load zero power factor.
Terminal A1 is connected to the AVR 0 Volts. Positive on A2 increases
excitation, negative on A2 decreases excitation.
TRIM - allows the user to adjust the sensitivity of the input.
LED Indicator Light - indicates over excitation condition or under speed
running.

16 OPM-114
REV B
MAINTENANCE
The ultimate aim of a preventive maintenance program is to maintain
the equipment in optimum condition, for the maximum amount of time
during it’s useful life. The detection of faults before they develop into
major problems will decrease downtime. A regular schedule of cleaning
and inspection will help assure trouble-free operation. Personnel
responsible for maintenance should set up a schedule for inspection,
and cleaning at intervals calculated to keep the equipment in good
condition. In making up a schedule, keep the following in mind:
A. New equipment must be carefully monitored until extended operation
has demonstrated that it is performing satisfactorily.
B. Old equipment requires more frequent inspection (and possibly
servicing) than similar equipment that has lower hours.
C. Time spent in cleaning, inspecting and correcting minor defects
before they become major troubles saves time in overhaul and repair.
MAINTENANCE SCHEDULE
SERVICE INTERVALS
Check Engine Oil Level Daily
Check Coolant Level and for Leakage Daily
Check Air Filter Daily
Check Electrolyte Level in Battery and Clean Terminals 6 Months
Drain Water from Fuel Pre-Filter 150 Hours
Check Belts and Belt Tension 300 Hours
Check Oil Vapor Filter 300 Hours
Change Oil 600 Hours
Change Oil Filters 600 Hours
Change Fuel Filters 600 Hours
Change Fuel Prelter 600 Hours
Check Exhaust System for Damage 6 Months
Clean Fuel Tank 6 Months
Change Auxiliary Member Belt 1200 Hours
Change Air Filter (depending on conditions) 1200 Hours
Change Coolant 1200 Hours
Change Oil Vapor Filter 2 Years
Clean Turbocharger 1200 Hours
Adjust Play in Valve-Rocker Arms and Pump-Rocker Arms 1200 Hours
* There are additional maintenance items and explanations in the
engine operator’s manual. Read thoroughly before operating this unit.
TROUBLESHOOTING TABLE
NOTE: Before doing any trouble shooting, check the digital display on
the DSE 7310 MKII. Normally, it will tell why the unit has failed. This
will shorten your trouble shooting time and in many cases, prevent the
replacement of parts that may not be defective.
Problem Possible Causes
Unit will not crank when power fails Digital genset not in AUTO
Transfer control switch not in
AUTOMATIC position
Incorrect wiring between ATS and genset
Defective control relay in ATS
Fuse(s) blown in the DSE 7310 MKII
Defective DSE 7310 MKII
Loose or dirty battery terminals
Defective starter
Defective start solenoid
Low/dead battery
Engine won’t crank Low/dead battery
Blown DC fuses
Defective DSE 7310 MKII
Defective key switch
Loose or dirty battery terminals
Defective starter
Defective start solenoid
Locked up engine genset
Defective engine harness
Improper battery voltage to start solenoid,
fuel pump, or fuel solenoid
Engine cranks but will not start Improper fuel delivery to the unit
Fuel supply shut off
Fuel tank empty
Air in the fuel system
Engine fuel solenoid has not opened
Defective fuel pump
Defective fuel solenoid
Defective engine harness
Improper battery voltage to fuel pump or
fuel solenoid
Engine starts, then stops and alarm
light comes on
Engine oil pressure is low
Engine has high water temperature
Engine has overspeed
Engine has gone into overcrank
No output from AC generator
Loss of speed signal
Loss of run signal
Engine will not come up to speed
after it starts
Insufcient fuel volume getting to the unit
1. Too small of fuel line
2. Fuel racks not open properly
Governor is defective
AC short in generator components
ATS will not transfer to Emergency
Supply (generator)
No AC generator output
Defective ATS control board. See ATS
manual
Circuit breaker open or defective
ATS will not re-transfer to normal
power
Proper power line not available at line
terminals in ATS panel
Defective ATS control board. See ATS
manual
No AC output from generator Defective diode
Defective voltage regulator
Defective rotor
Defective stator
Defective exciter rotor
Defective exciter stator
AC short in the output leads
Defective/open generator output breaker
Wiring error

17OPM-114 REV B
WIRING SIZE TABLE
The table below is based on Table 310.15 (B) (16) un the National Electric Code 2014 edition. Allowable ampacitier of insulated conductors rated 0 through 2000V, 75°C through
90°C. Not more than three current-carrying conductors in Raceway, Cable, or Earth (direct buried). Adjust for 40°C (104°F) ambient temperature.
Copper
75°C
Copper
90°C
Aluminum
Copper Clad Aluminum
75°C
Aluminum
Copper Clad Aluminum
90°
Wire Type:
RHW, THHW, THW, THWN,
XHHW, USE, ZW
Wire Type:
TBS, SA, SIS, FEP, FEPB, MI, RHH,
RHW-2, THHN, THHW, THW-2, XHH,
XHHW, XHHW-2, ZW-2
SIZE AWG
OR KCMIL
Wire Type:
RHW, THHW, THW, THWN,
XHHW, USE
Wire Type:
TBS, SA, SIS, THHN,
THW-2, THWN-2, RHH, RHW-2, USE-2,
XHH, XHHW, XHHW-2, ZW-2
44
57
75
88
101
114
132
154
176
202
224
251
273
295
334
370
405
418
431
458
480
519
550
572
585
50
68
86
100
118
137
155
177
205
237
264
291
319
346
391
432
473
487
505
532
560
605
642
669
683
8
6
4
3
2
1
1/0
2/0
3/0
4/0
250
300
350
400
500
600
700
750
800
900
1000
1250
1500
1750
2000
35
44
57
66
79
88
106
119
136
158
180
202
220
238
273
299
330
339
348
374
392
427
458
480
493
41
55
68
77
91
105
123
137
159
187
209
232
255
278
319
350
382
396
410
437
455
496
532
560
573
For additional information, see table 310.15 of the National Electric Code.

18 OPM-114
REV B
SELECTOR SWITCH WIRING DIAGRAM
SEE FOLLOWING PAGE FOR REFENCES

19OPM-114 REV B
SELECTOR SWITCH WIRING DIAGRAM
127(6
%2/''(127(6),1$/$66(0%/<&211(&7,21
966 92/7$*(6(/(&7256:,7&+
5(9,6,216
5(9
,51
'(6&5,37,21
'$7(
%<
$33'
-
&+$1*(/8*21%%:,5(
56
'5&
.
6+((7&87/,67:$66+((7
6&1
=-)
/
6((6+((7
6&1
=-)
0
5(029('-:,5($(1'/8*
$6&
=-)
1
83'$7('$;$<$=%$$'1$8:,5(6
00/
'5&
2
6((6+((7
00/
'5'
9$5,286
&+.'%<
(1*$335
7,7/(
92/7$*(6(/(&725
6:,7&+$66(0%/<
'$7('$7( '$7(
'5$:1%<
02'(/
3$57
&/5
7+,6'5$:,1*&217$,16
35235,(7$5<
,1)250$7,21%(/21*,1*
72:,1&2
81$87+25,=('86(,6
352+,%,7('
0$7(5,$/
53
5
:(,*+7
72/(5$1&(
81/(6663(&,),('
2)
1$
/%6
=-)

20 OPM-114
REV B
DSE 7310 MKII WIRING DIAGRAM
Table of contents
Other Winco Portable Generator manuals

Winco
Winco W70PTOS Administrator Guide

Winco
Winco WC10000VE-G Setup guide

Winco
Winco HPS6000HE-03/A Administrator Guide

Winco
Winco DP5000-03/A Setup guide

Winco
Winco 35-75 PTO Specifications

Winco
Winco PSS20B2W/C Setup guide

Winco
Winco WC3000H User manual

Winco
Winco WL22000VE/B Administrator Guide

Winco
Winco DE2314 Series Setup guide

Winco
Winco PSS60/D Setup guide

Winco
Winco PSS60/E Setup guide

Winco
Winco W10PTOS/A Setup guide

Winco
Winco PSS150/A Setup guide

Winco
Winco DL5000H/C Setup guide

Winco
Winco PSS90/F Setup guide

Winco
Winco DP3000HR-01/A Administrator Guide

Winco
Winco HPS6000HE/I Setup guide

Winco
Winco MDS50R3/B User manual

Winco
Winco PSS60B User manual

Winco
Winco W6010KE-03/A Administrator Guide