1-800-777-8466
TABLE OF CONTENTS
Important Safety Information..........................................................................................................................
Feature Descriptions.............................................................................................................................................
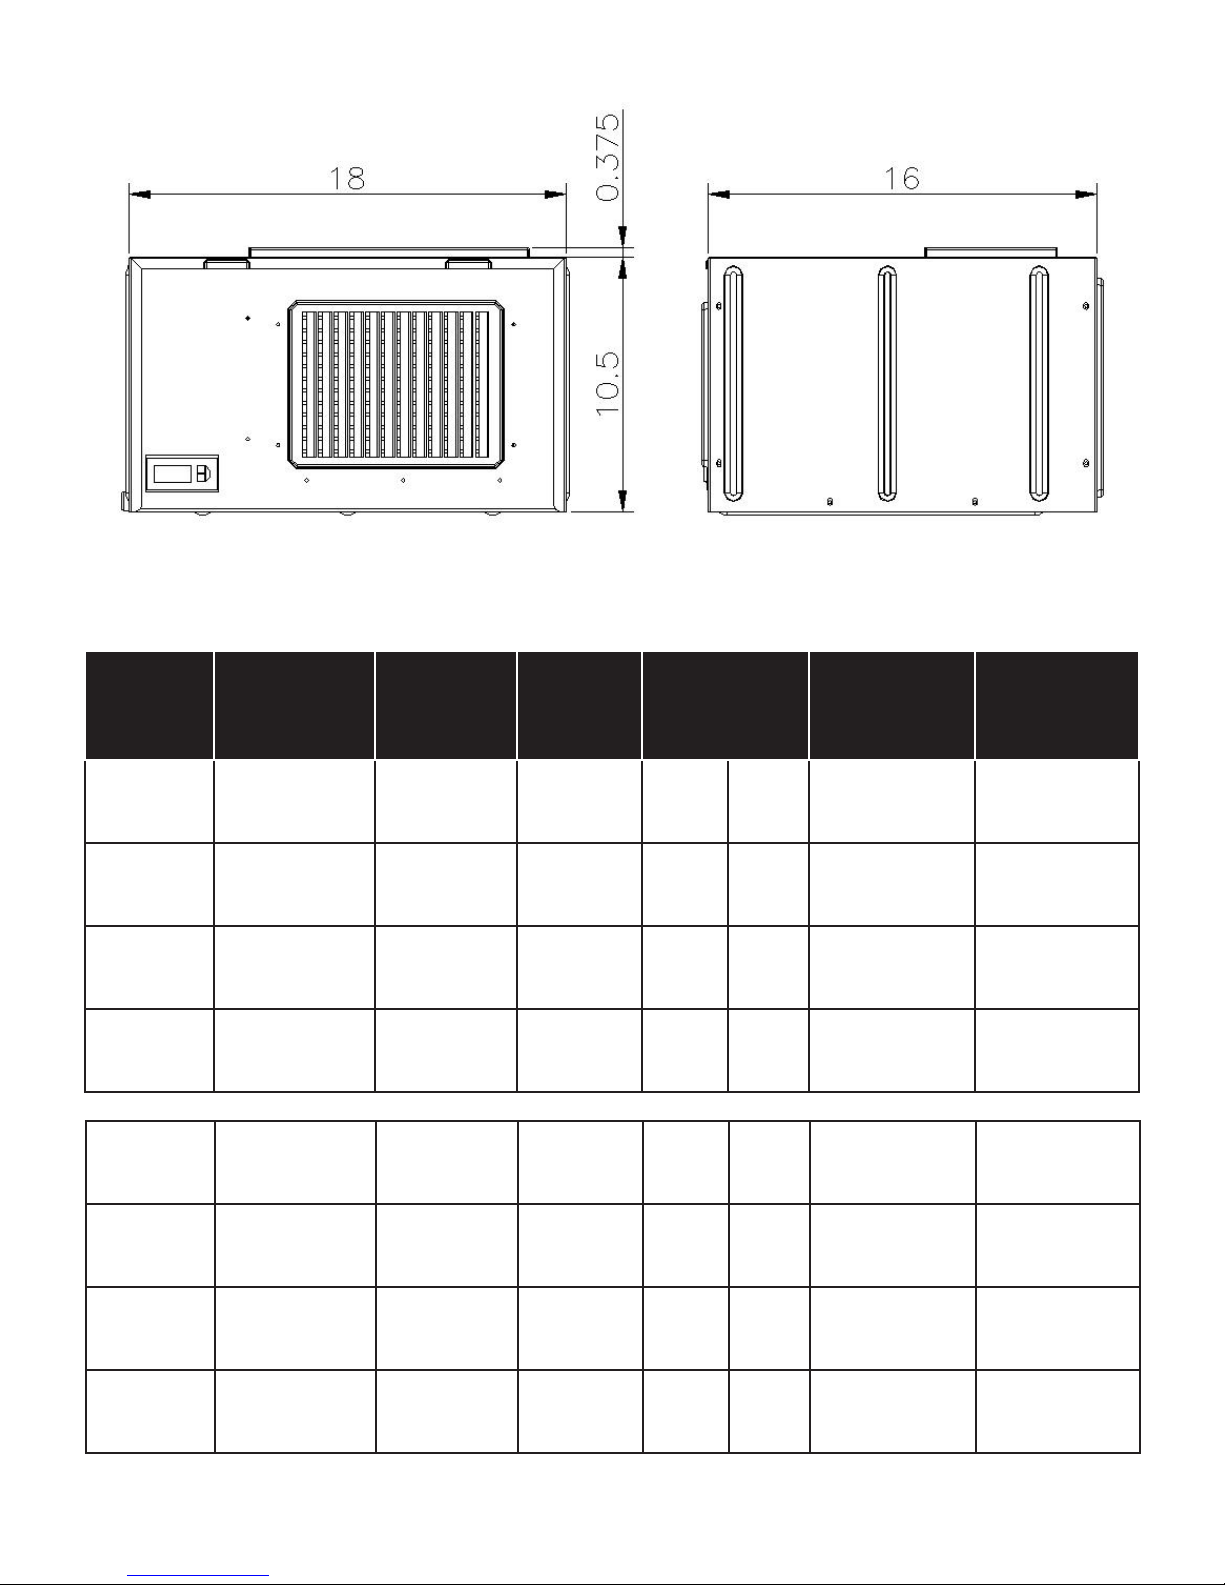
HTD and HTD-TE Units................................................................................................................
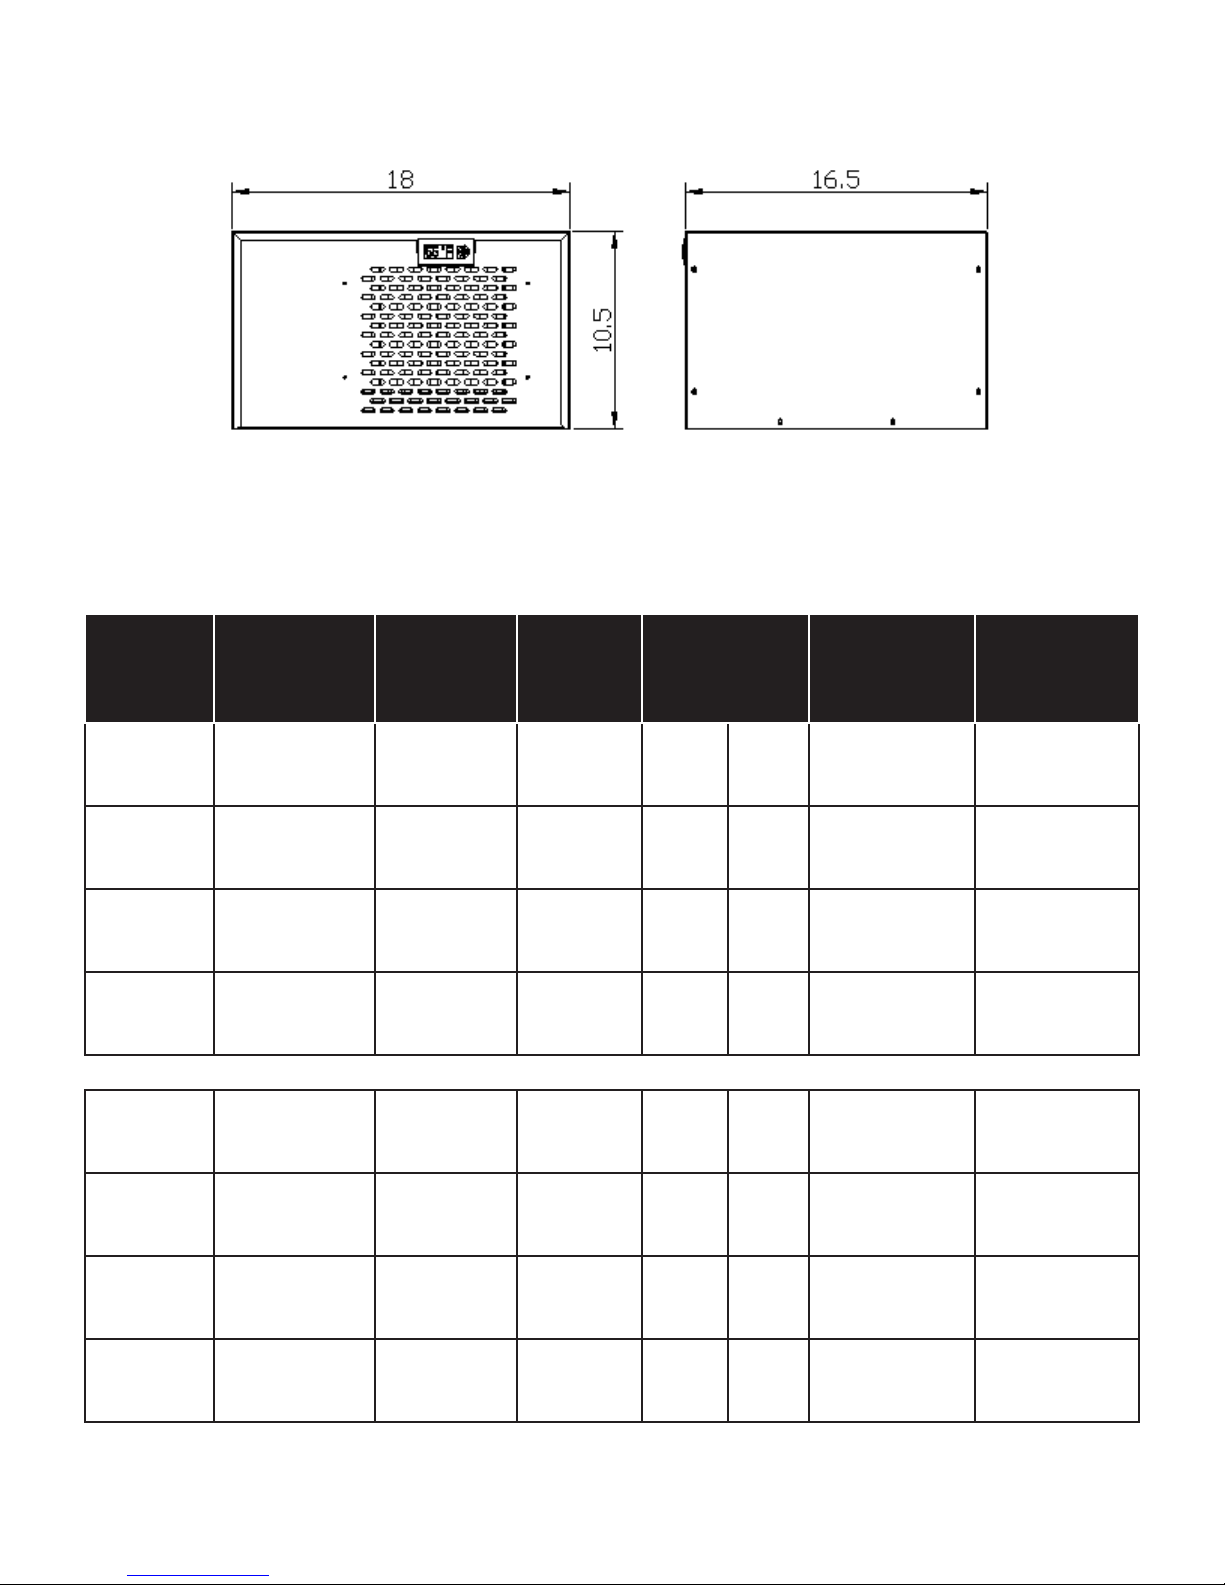
CD and CD-TE Units......................................................................................................................
HZD Units........................................................................................................................................
Installation Instructions.......................................................................................................................................
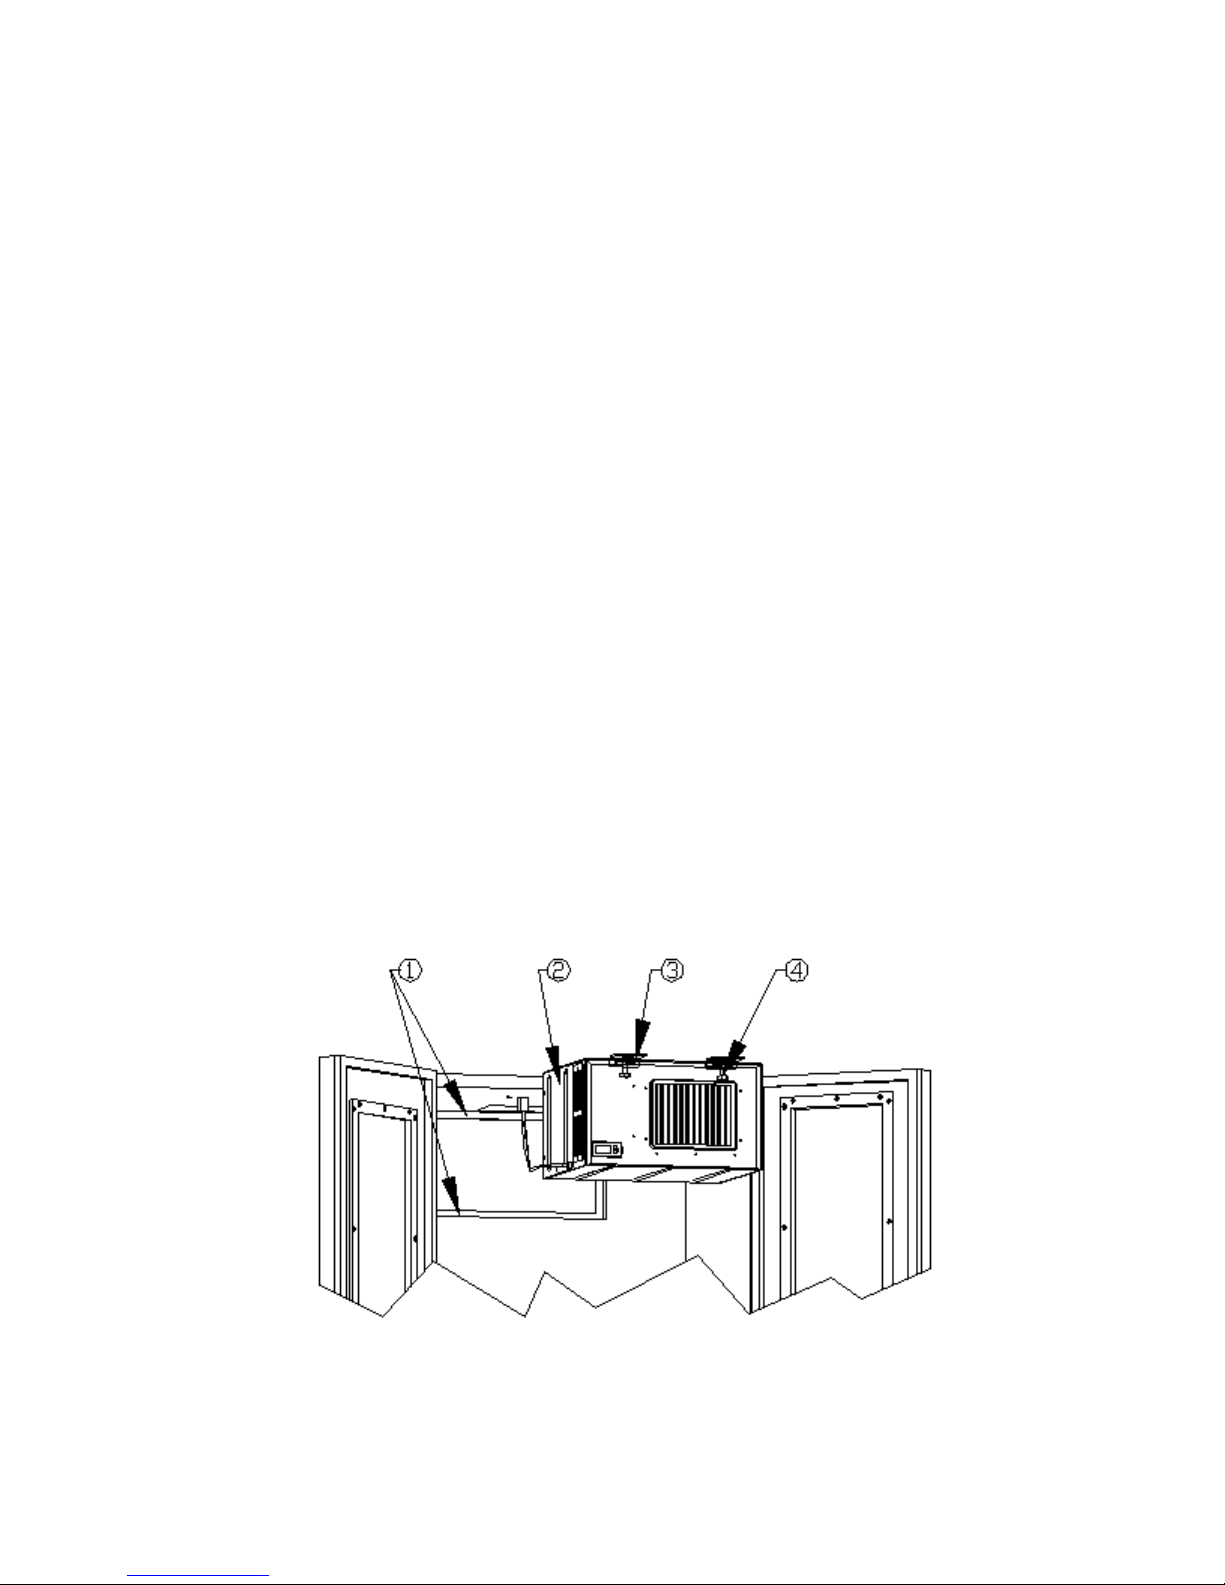
HTD and HTD-TE Units................................................................................................................
CD and CD-TE Units......................................................................................................................
HZD Units........................................................................................................................................
Temperature and Humidity Control...............................................................................................................
Use of the Digital Controller................................................................................................................
Cleaning and Care Guide.....................................................................................................................................
Troubleshooting Guide........................................................................................................................................
Electrical Wiring.......................................................................................................................................................
HTD and HTD-TE Units................................................................................................................
CD and CD-TE Units......................................................................................................................
HZD Units........................................................................................................................................
Appendix.....................................................................................................................................................................
Warranty......................................................................................................................................................................
Wine-Mate Cooling Systems..............................................................................................................................
3
4
5
6
8
10
11
13
14
19
20
22
23
27
27
27
28
29
30
31
2