Note: The camera will shut down automatically if it is in standby mode without any operation more
than 1 minute.
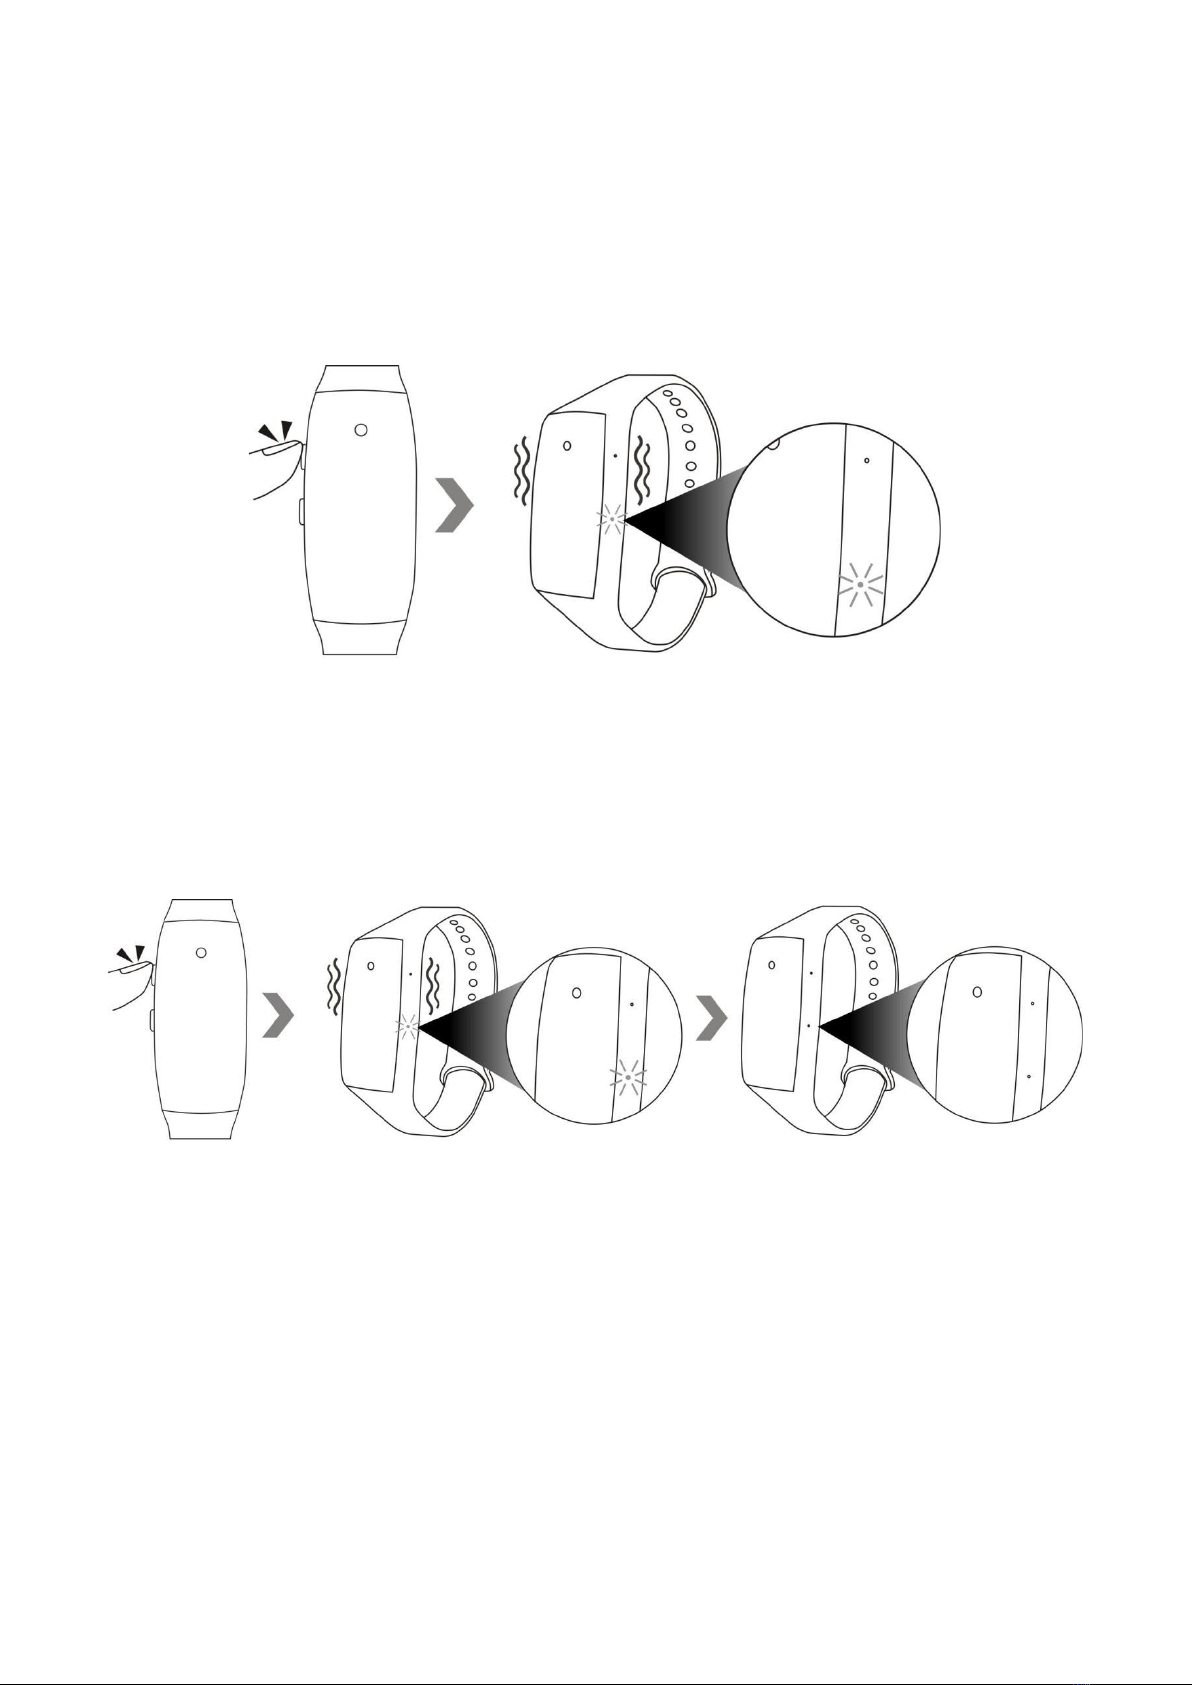
VI. Record Audio
6.1 Hold down the power button for 2 seconds to turn on the camera, the camera will vibrate once,
the red indicator light will be solid on, indicating that the camera has entered into standby mode.
6.2 Hold down the photo button for 4 seconds and then hands off, the camera will start audio
recording. The camera will vibrate 3 times, the red indicator light will go off, the blue indicator
light will flash 3 times and then go off.
6.3 Press the photo button once again to stop audio recording. The camera will vibrate once, the
red indicator light will be solid on.