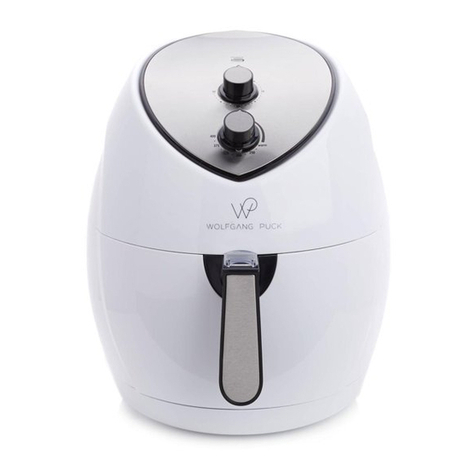
Wolfgang Puck SWPAF85 Installation instructions

USE AND CARE
9 QT. RAPID-AIR
1700-WATT
AIR FRYER
Model SWPAF85
IMPORTANT NOTICE
Please read operating instructions before using this
product. Please keep original box and packing materials
in the event that service is required.
Wolfgang Puck is a trademark of Wolfgang Puck Worldwide
Model SWPAF85
Synergy Housewares, LLC.
Toll-free: 866-444-4033
Hours: M-F 8:30am-5:00pm EST
Printed in China
For questions or concerns please contact customer service at:

Read all instructions.
Do not touch hot surfaces. Use handles or knobs.
To protect against electrical shock do not immerse cord, plug or
housing in water or other liquid.
Close supervision is necessary when any appliance is used by or near
children.
Unplug from outlet when not in use and before cleaning. Allow to
cool before putting on or taking off parts.
Do not operate any appliance with a damaged cord or plug or after
the appliance malfunctions or has been damaged in any manner. For
customer service please contact 866-444-4033.
The use of accessory attachments not recommended by the
appliance manufacturer may cause injuries.
Do not block any ventilation openings. Install in accordance with the
manufacturer’s instructions.
Do not use outdoors.
Do not let cord hang over edge of table or counter, or touch hot
surfaces.
Do not place on or near a hot gas or electric burner, or in a heated
oven.
Extreme caution must be used when moving an appliance containing
hot oil or other hot liquids.
Plug the cord into the wall outlet. To disconnect, turn timer knob to
the 0 (off) position, then remove plug from wall outlet.
Do not use appliance for other than intended use.
Oversize foods or metal utensils must not be inserted in the appliance
as they may create a fire or risk of electric shock.
A fire may occur if the appliance is covered or touching flammable
material, including curtains, draperies, walls, and the like, when in
operation. Do not store any item on top of the appliance when in
operation. Leave at least 5” free space on the back and sides and
above the appliance while cooking.
Do not clean with metal scouring pads. Pieces can break off the pad
and touch electrical parts, creating a risk of electric shock.
Extreme caution should be exercised when using containers
constructed of other than metal or glass.
1
2
3
4
5
6
7
8
9
10
11
12
13
14
15
16
17
18
19
20
21
22
23
24
25
26
27
When using electrical appliances, basic safety precautions should always
be followed, including the following:
IMPORTANT SAFEGUARDS
Do not store any materials, other than manufacturers recommended
accessories in this appliance when not in use.
Do not place any of the following materials in the appliance: paper,
cardboard, plastic, and the like.
Use extreme caution when removing the pan, or Rack and disposing
hot grease.
Should dark smoke appear to be coming from the appliance
Immediately unplug. Wait for smoke to stop before pulling the pan
out of appliance.
Do not leave appliance unattended while it is operating.
Hot air and steam will be released from the air outlet opening at the
rear of the housing. Keep your hands and face away from the steam
and air outlet openings. Never cover air outlet.
This appliance is not a deep fryer and should never be filled with fat
or oil.
Never use this appliance without the pan and Rack in place.
Always remove crumbs and food particles from pan before cooking
a second batch of food.
SAVE THESE INSTRUCTIONS
HOUSEHOLD USE ONLY
Additional Safety Information
Use only 3-prong extension cord with 3-blade grounding plug.
The marked rating of the extension cord must be equal to or greater
than the rating of this appliance. The electrical rating of this appliance
is 1,700 watts.
GROUNDING INSTRUCTIONS: This appliance must be grounded. It is
equipped with a 3-prong cord having a grounded plug. The plug must be
plugged into an outlet which is properly installed and grounded.
WARNING: Improper use of the grounded cord can result in the risk of
electric shock. Consult a qualified electrician if necessary. Do not attempt
to defeat this safety feature by modifying plug.
A short power-supply cord is provided to reduce the hazards resulting
from entanglement or tripping over a long cord. If it is necessary to use
an extension cord, it should be positioned such that it does not drape
over the counter or tabletop where it can be pulled on by children or
tripped over and:
A.
B.
1 2

In the beginning, there was
Wolfgang Puck. There were
cooks and there were kitchens
and there were people eating
food, but the world had never
seen anything like Spago—
with its California cuisine, its
casual elegance, and its chef
whose genuine warmth and
love of craft redefined the
dining experience. And they
came—from LA and from
everywhere—to experience
the future. Wolfgang Puck
shaped the modern culinary
landscape: he was the first
celebrity chef, the inventor
of fusion cuisine, the first in
farm-to-table. His work is
inspired by California living,
and an insistence on only the
freshest ingredients. From
his legendary fine dining icons, his entrepreneurial spirit has built
an empire—from dining, to catering, to products for the home—
touching the lives of millions around the globe. Today, as always,
Chef Puck is earnestly, restlessly, tirelessly at work behind the scenes
inventing what’s next. He is driven by a genuine love of his craft, a
passion for what’s possible, and its potential to change the world.
Table of Contents
Important Safeguards ................................................................. 1
Additional Safety Information ............................................... 2
About Wolfgang Puck ............................................................... 3
Know Your Air Fryer ................................................................... 5
Before Your First Use ................................................................. 6
Using Your Air Fryer ................................................................... 7
Care & Cleaning ............................................................................ 8
Air Fryer Cooking Chart ........................................................... 9
Troubleshooting ............................................................................11
Recipes .............................................................................................12
Limited Warranty .......................................................................22
Contact Information ........................................................... Back
3 4

Power
Indicator Light
Timer/Power
Knob
Heat Indicator
Light
Temperature
Knob
Housing
Air Inlet
Air Outlet
Pan
Air Frying
Rack
Handle
Before Your First Use
Unpack the Air Fryer and remove all packaging materials. Clean the
Air Fryer according to the Care & Cleaning section of this manual.
We recommend performing a trial run of your Air Fryer to eliminate
any protective substance from the heating elements. Conduct the trial
run in a well-ventilated area as a small amount of smoke and odor
may be detected. This is normal and should be expected. Follow the
procedure below for the trial run.
Place Air Fryer on a stable, level surface.
Place Rack in the Pan and insert into Housing.
Note: This appliance is rated 1,700 watts and should be the only
appliance operating on the circuit to avoid tripping your circuit
breaker. Always ensure that your Timer/Power Knob is set to 0 (off)
and your Temperature Knob is set to Off before plugging into the wall
outlet
Plug the Air Fryer into the wall outlet.
Set the Temperature Dial to 400°F and the Timer Knob to 20 minutes.
Your trial run is complete once the set time has elapsed.
1
2
3
4
5
6
7
Actual product may differ slightly from illustrations on this page
Know Your Air Fryer Know Your Air Fryer (Cont.)
5 6

Your Air Fryer should be cleaned after each use. Residual food particles
and grease can cause the Air Fryer to smoke excessively if not properly
cleaned.
Turn the Timer Knob to the 0 (off) position and unplug from wall outlet.
Allow all parts to completely cool before cleaning.
Pan and Rack
No parts of the Air Fryer are dishwasher safe. Please follow the below
cleaning instructions:
To avoid damaging the nonstick surfaces do not use metal utensils. Only
use nylon or wooden utensils.
Remove the Rack from the Pan. The Pan and Rack are nonstick coated to
allow for easier release of food residue. Do not clean with metal
scouring pads as pieces can break off the pad and touch electrical
parts, creating a risk of electric shock. Do not use abrasive cleaners.
Wash the Pan and Rack with warm soapy water using a sponge or
cleaning cloth. If food residue is hard to remove from Pan or Rack, soak
them for 10 minutes in warm, soapy water. Rinse and dry parts
thoroughly before reassembling and storing.
Housing, Cord, and Plug
These parts should never be immersed in water or any other liquid. Only
wipe these parts using a damp cloth then dry thoroughly.
Using Your Air Fryer
Caution:
This Air Fryer works by circulating hot air via a convection fan. Do not
fill the Pan with oil or frying fat.
Caution:
Both the Pan and Rack are very hot after cooking, use caution when
handling to avoid a burn injury, always use potholders or oven mitts.
When cooking foods greater than 3lbs always support the Pan Handle
using 2 hands, one on the Handle, and one on the rear of the Pan.
Care & Cleaning
Place the appliance on a flat, stable, level, heat-resistant surface.
Remove the Pan from the Housing by pulling the Handle towards
you.
Place your ingredients on the Rack. Do not allow food to exceed the
top of the Vent Slots on the Rack (see Know Your Air Fryer)
Note: Never use the Pan without the Rack in place.
Place the Pan back into the Housing until it is completely flush with
the Housing. If the Pan is not fully engaged into the Housing the Air
Fryer will not turn on.
Note: This appliance is rated 1,700 watts and should be the only
appliance operating on the circuit to avoid tripping your circuit
breaker. Always ensure that your Timer/Power Knob is set to 0 (off)
and your Temperature Knob is set to Off before plugging into the wall
outlet.
Plug the Air Fryer into the wall outlet. The Power Indicator Light will
illuminate whenever the appliance is plugged in.
Turn the Temperature Knob to the desired temperature.
Turn the Timer Knob to the desired cooking time. The Heat Indicator
Light will illuminate and will cycle on and off during cooking to ensure
the set temperature is maintained. For recipe times greater than 30
minutes, reset the Timer Knob once the set time has elapsed.
The Timer Knob will automatically turn the appliance off when the set
time has elapsed. You can manually turn the appliance off by turning
the Timer Knob counter-clockwise to the 0 (off) position.
Some food types require rotating halfway through the cooking cycle.
When the Timer has elapsed the signal bell will ring and the Air Fryer
will turn off. Unplug the Air Fryer from the wall outlet. Remove the
Pan from the Housing and place it on a heat-resistant surface such as
a trivet. We recommended using tongs or other kitchen utensils to
remove the food from the Rack. You can also remove the Rack from
the Pan and empty your food onto a plate (see Caution statement on
next page).
1
2
3
4
5
6
7
8
9
10
Using Your Air Fryer (cont.)
7 8

Air Fryer Cooking Chart Air Fryer Cooking Chart (Cont.)
Cooking times in the chart below represent total cooking time. If a
cooking method is recommended for the ingredient it should be done
half-way through the times below.
The cooking chart provides general guidelines and can be adjusted to
suit your own personal taste.
When cooking foods such as fresh potatoes we recommend spraying
the food with an oil mister to give extra crispiness. Do not spray the food
until you are ready to place the Pan in the Housing.
Never add oil or fat to the Pan for shallow or deep frying. This Air Fryer
is designed to cook via convection air. Placing oil into the Pan can cause
splattering of oil into the heating elements and poses a fire risk.
9 10
Burger, 4oz.
Beef Tenderloin, 8 oz.
London Broil, 2 lbs.
Meatballs, 1-3 in
Rib-eye, bone-in, 1-in, 8 oz.
Sirloin Steak, 1-in, 12 oz.
Beef Eye Round Roast, 4-5 lbs.
Breasts, boneless, 4 oz.
Drumsticks, 2.5 lbs.
Thighs, bone-in, 2 lbs.
Wings, 2 lbs.
Whole Chicken, 5 lbs.
Tenders
Calamari, 8 oz.
Salmon Fillet, 6 oz.
Tuna Steak
Shrimp
Onion Rings, 12 oz.
French Fries, cut thin, 20 oz.
French Fries, cut thick, 17 oz.
Mozzarella Sticks, 11 oz.
Chicken Nuggets, 12 oz.
Ingredient Time
(Minutes)
Temp.
(°F)
18-22
16-18
24-28
7-10
12-16
10-14
48-55
12-14
20-24
22-24
12-14
60
8-10
4-6
12-14
8-10
4-6
8-10
12-14
18-20
8-10
10-12
375°F
400°F
400°F
375°F
400°F
400°F
400°F
375°F
375°F
375°F
400°F
375°F
375°F
400°F
375°F
400°F
400°F
400°F
400°F
400°F
400°F
400°F
Suggested
Method
Flip
Shake
Flip
Shake
Shake
Shake
Shake
BEEF
CHICKEN
FISH & SEAFOOD
FROZEN FOODS
Lamb Chops, 1-in thick
Rack of Lamb, 2 lbs.
Pork Loin, 2.5 lbs.
Pork Chops, bone-in, 1-in
Asparagus
Broccoli Florets
Carrots
Corn on the Cob
Eggplant, 1.5-in pieces
Green Beans
Mushrooms, 1/4-in slices
Peppers, 1-in pieces
Potatoes, 1-in pieces
Potatoes, Whole
Sweet Potatoes, baked
Zucchini, 1/2-in pieces
Ingredient Time
(Minutes)
Temp.
(°F)
10-12
22-26
55-60
12-14
5-6
6-8
14-16
6-8
14-16
4-6
4-6
14-16
12-14
38-42
32-36
12-14
400°F
375°F
350°F
400°F
400°F
400°F
375°F
400°F
400°F
400°F
400°F
400°F
400°F
400°F
375°F
400°F
Suggested
Method
LAMB
PORK
VEGETABLES

Troubleshooting
Recipes
11 12
Food
is not
cooked
properly
Assembled
Pan won’t
slide into
Housing
properly
French fries
are not fried
evenly
Food is
not fried
evenly
The Rack is
overloaded.
The temperature is set
too low.
Rack is overloaded.
Rack is not placed in
Pan correctly.
Potatoes are not fresh,
too soft.
Potatoes are not
rinsed properly during
prepartion.
Some foods need to
be shaken or flipped
during the cooking
process.
Use smaller amounts of food,
spread evenly throughout
the Rack.
Ensure you are using the correct
temperature for the recipe, or
reference the Air Fryer Cooking
Chart on pages 9 & 10 of this
manual.
See Air Fryer Cooking Chart
on pages 9 & 10 of this
manual.
Excess oil from fatty foods
had dripped into the Pan and
is causing the smoking. This is
normal.
Clean the Pan and Rack
after each use.
Problem Cause Solution
White
smoke
coming
from unit
Oil is dripping into Pan.
Pan or Rack has
grease rediue
from previous
cooking.
Use fresh, firm potatoes.
Rinse and pat dry to remove
excess starch.
The Air
Fryer has
no power
The appliance is not
plugged in.
You have not turned on
the Timer.
Plug power cord into wall socket.
Set the Timer to desired cooking
time, the Timer controls the
power to the Air Fryer.
Do not fill the Rack above the
top of the Vent Slots (see
Page 5).
Adjust the Rack to place into the
bottom of the Pan evenly
Fries are not
crispy Raw fries have too much
water, starch, or are cut
too thick.
Rinse and pat dry cut potatoes
to remove excess starch
Use smaller cut fries.
Mist or spray a small amount of
oil on fries

Miso Salmon
2 servings
INGREDIENTS
2 salmon fillets
2 tablespoons light miso paste
METHOD
1. Spread both sides of salmon fillets with miso paste.
2. Place salmon into the air fryer.
3. Set temperature to 400°F and timer to 10 minutes.
4. Air fry for 5 minutes then turn over and cook for an additional 5 minutes
or until salmon flakes easily.
5. When cooking is complete, transfer to a serving plate.
6. Garnish as desired and serve.
Easy Pimento Chicken Tenders
2 servings
INGREDIENTS
8 raw chicken tenders
2 tablespoons panko bread crumbs
Spray olive oil, kosher salt and fresh pepper to taste
8 strips pimento peppers, from a jar
1/4 cup plain Greek yogurt, for dipping
METHOD
1. Place chicken, panko, spritzes of oil, salt and pepper into a plastic zip top
bag; shake to coat.
2. Transfer chicken to the air fryer then top each tender with a strip of
pimento.
3. Set temperature to 400°F and timer to 12 minutes.
4. Air fry for 6 minutes then toss and continue to cook for an additional 6
minutes or until chicken is just cooked through.
5. When cooking is complete, transfer to a serving plate.
6. Garnish as desired and serve with yogurt for dipping.
13 14

Easy French Fries
Italian Chicken Wings
1 serving
INGREDIENTS
1 large Russet potato
Spray oil and kosher salt to taste
METHOD
1. Cut potato into long, thin fries.
2. Spritz with oil then sprinkle with salt.
3. Place potatoes into the air fryer.
4. Set temperature to 375°F and timer to 20 minutes.
5. Air fry for 10 minutes then toss and cook for an additional 10 minutes or
until brown.
6. When cooking is complete, transfer to a serving plate.
7. Garnish as desired and serve.
2-4 servings
INGREDIENTS
12 chicken wing drumettes and flats
Spray olive oil
1 package dry Italian dressing mix, to taste
METHOD
1. Place wings, a few spritzes of oil and Italian dressing mix into a plastic
zip top bag; shake bag to coat.
2. Transfer wings to the air fryer.
3. Set temperature to 450°F and timer to 24 minutes.
4. Air fry for 12 minutes then toss wings and cook for an additional 12
minutes or until well browned and cooked through.
5. When cooking is complete, transfer to a serving plate.
6. Garnish as desired and serve.
Crustless Quiche
4 servings
INGREDIENTS
2 large egg whites
4 large eggs, beaten
1 cup Brussels sprouts or spinach, shaved
3 tablespoons unsalted butter, melted
2 tablespoons chiffonade of prosciutto
1/4 cup cottage cheese
Kosher salt and fresh pepper to taste
METHOD
1. Using a hand mixer, whip all ingredients together until foamy.
2. Divide mixture between 4 large ramekins.
3. Place ramekins into the air fryer.
4. Set temperature to 250°F and timer to 20 minutes.
5. Air fry for 10 minutes then turn and cook for an additional 10 minutes or
until eggs are just set.
6. When cooking is complete, transfer to a serving plate.
7. Garnish as desired and serve.
15 16

Appetizer Orange Camembert Baked Pears
6 servings
INGREDIENTS
1 small camembert cheese
1 package (17.1 ounces) puff pastry, thawed
1/4 cup orange marmalade
1 tablespoon turbinado sugar
Crackers and apple wedges, for serving
METHOD
1. Place the whole cheese in the center of the puff pastry.
2. Spread marmalade over the cheese.
3. Place pastry into the air fryer.
4. Fold puff pastry over the cheese to form a square package.
5. Crimp to seal then sprinkle with sugar.
6. Set temperature to 325°F and timer to 30 minutes.
7. Air fry for 15 minutes then turn and cook for an additional 15 minutes or
until puffed and well browned.
8. When cooking is complete, transfer to a serving plate.
9. Garnish as desired and serve with crackers and apple wedges.
2 servings
INGREDIENTS
2 firm pears
4 prunes, chopped
1/4 teaspoon ground nutmeg
METHOD
1. Using a melon baller, remove each pear's core without cutting all the way
through.
2. Stuff cavities with prunes then sprinkle with nutmeg.
3. Transfer pears to the air fryer.
4. Set temperature to 350°F and timer to 20 minutes.
5. Air fry for 20 minutes or until well browned and soft.
6. When cooking is complete, transfer to a serving plate.
7. Garnish as desired and serve.
17 18

Mexican Fiesta Salad Extra Lean Bison Patty
2-4 servings
INGREDIENTS
1 jalapeño pepper, minced
Zest and juice of 1 lime
1 tablespoon cilantro, chopped
Spray oil, kosher salt and fresh pepper to taste
4 fillets mild white fish
8 cups spring mix lettuces
Ranch dressing, for serving
METHOD
1. Place the jalapeño, lime and cilantro into a plastic zip top bag.
2. Add the fish, a few spritzes of oil, salt and pepper; shake to coat.
3. Transfer fish to the air fryer.
4. Set temperature to 400°F and timer to 10 minutes.
5. Air fry for 5 minutes then turn and cook for an additional 5 minutes or
until fish flakes easily.
6. When cooking is complete, transfer to a top of salad greens.
7. Garnish as desired and serve with dressing.
2 servings
INGREDIENTS
10 ounces lean ground bison
1/4 cup red bell pepper, diced
1 cup spinach, chopped
1/4 teaspoon dried sage
Kosher salt and fresh pepper to taste
METHOD
1. In a bowl, combine all ingredients then shape mixture into 2 patties.
2. Place patties into the air fryer.
3. Set temperature to 400°F and timer to 14 minutes.
4. Air fry for 7 minutes then turn and cook for an additional 7 minutes or
until internal temperature reaches 165°F on a meat thermometer.
5. When cooking is complete, transfer to a serving plate.
6. Garnish as desired and serve.
19 20

Cheesy Bread
2 servings
INGREDIENTS
2 tablespoons unsalted butter, melted
1 hoagie roll, cut in half lengthwise
1/2 cup Parmesan cheese, grated
2 sprigs rosemary
METHOD
1. Spread butter over bread then top with cheese and rosemary sprig.
2. Place bread into the air fryer.
3. Set temperature to 325°F and timer to 10 minutes.
4. Air fry for 5 minutes then turn and continue to cook for an additional
5 minutes or until brown.
5. When cooking is complete, transfer to a serving plate.
6. Garnish as desired and serve.
Limited Warranty
21 22
This warranty covers all defects in workmanship or materials in the mechanical
and electrical parts, arising under normal usage and care, in this product for
a period of 12 months from the date of purchase provided you are able to
present a valid proof-of-purchase. A valid proof-of-purchase is a receipt
specifying item, date purchased, and cost of item. A gift receipt with date
of purchase and item is also an acceptable proof-of-purchase. Product is
intended for household use only. Any commercial use voids the warranty.
This warranty covers the original retail purchaser or gift recipient. During
the applicable warranty period within normal household use, we will repair
or replace, at our discretion, any mechanical or electrical part which proves
defective, or replace unit with a comparable model.
To obtain service under the terms of this warranty, call Toll Free (866) 444-
4033.
THIS LIMITED WARRANTY COVERS UNITS PURCHASED AND USED WITHIN
THE UNITED STATES AND CANADA AND DOES NOT COVER:
•Damages from improper installation.
•Defects other than manufacturing defects.
•Damages from misuse, abuse, accident, alteration, lack of proper care and
maintenance, or incorrect current or voltage.
•Damage from service by other than an authorized dealer or service center.
This warranty gives you special legal rights and you may also have other
rights to which you are entitled which may vary from state (province) to state
(province).
Proof of purchase required to validate the warranty.
Shipping and handling charges may apply.
Table of contents
Other Wolfgang Puck Fryer manuals

Wolfgang Puck
Wolfgang Puck SWPAFOR23 User manual

Wolfgang Puck
Wolfgang Puck Bistro BDFR0040 Installation instructions

Wolfgang Puck
Wolfgang Puck BDFR0030 Bistro collection User manual

Wolfgang Puck
Wolfgang Puck BDFR0020 Bistro collection User manual

Wolfgang Puck
Wolfgang Puck BDFR0070 Installation instructions

Wolfgang Puck
Wolfgang Puck BDFR0010 Bistro collection User manual

Wolfgang Puck
Wolfgang Puck BDFR1000 Installation instructions

Wolfgang Puck
Wolfgang Puck BAFR0007 User manual

Wolfgang Puck
Wolfgang Puck Bistro BDFR0060 Owner's manual

Wolfgang Puck
Wolfgang Puck SWPAF97 Installation instructions