Whisper-Ride 4050.845.060
11/16/2007 LR (3)
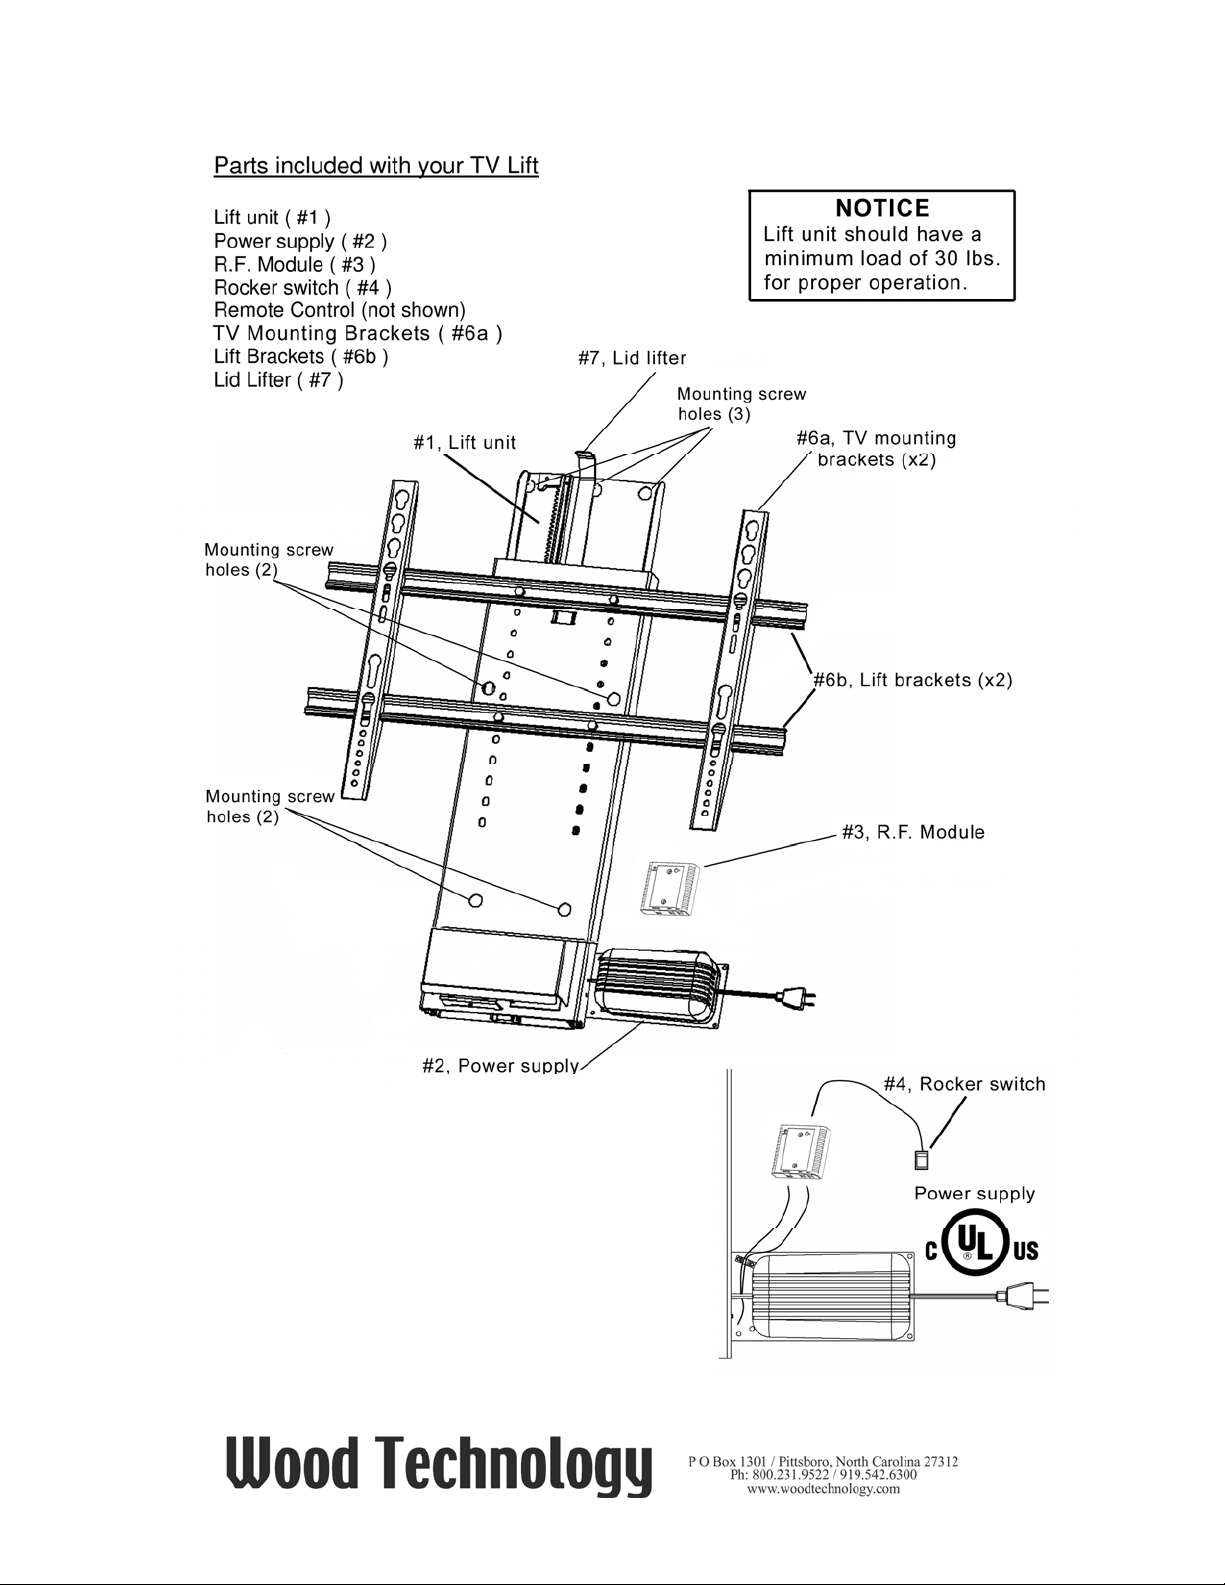
Mounting Instructions for the TV Lift
1) Remove all contents from packaging and compare with parts list. Test the lift at this
time. Refer to the drawing and proceed as follows: Connect the lift (#1) and power
supply (#2) to the RF Module (#3). Once all connections have been made, plug
power supply (#2) into a grounded wall socket. Position lift vertically. Test lift using
rocker switch (#4) – have lift travel a few inches and then back down. Use same
method to test remote. The rocker switch must be pressed continuously to make lift
work. Releasing switch will stop unit immediately. To operate remote push
appropriate button once or twice. Push button again to stop unit.
Please see “Helpful Hints” on page 4 before continuing.
Unplug all electronics before installation.
2) Place the lift unit (#1) on the back panel of cabinet in a location that will allow full up
and down movement of TV. Unit must be a minimum of 1/8” down from the top edge
of the cabinet.
3) Fasten the unit securely to the cabinet using the 7 screw holes shown in the drawing
on page one. Screws must be appropriate for the material being used. Lift must be
mounted vertically (using a level) inside cabinet.
4) Fasten the power supply (#2) to the back of the cabinet on the right side of the unit
as shown in the drawing. Secure with screws.
5) Fasten R.F. Module (#3) next to the power supply leaving enough room to connect
wires.
6) Mount rocker switch (#4) to the upper part of the cabinet by cutting a hole and
pressing the switch into place. Secure excess wire to keep away from moving parts.
7) Make connections as done previously for testing. Plug the power cord into grounded
socket and test the lift. If the unit doesn’t work, check all connections and retry. If
still not working, refer to trouble shooting guide.
8) Slide both TV brackets (#6a) onto the two lift brackets (#6b) as shown in the
drawing. Adjust the brackets to fit the mounting holes on the TV. Secure brackets to
the TV – MAKE SURE TV IS CENTERED ON BRACKETS.
9) Raise lift to uppermost position. Place TV in best position on lift based on the size of
the TV. Put bolts on lift bracket through lift’s front holes and secure into position.
Lower lift with TV, making sure the TV does not extend past top edge of cabinet in
the lowered position.
10)Insert lid lifter (#7) into slot on lift with curve facing toward the front. The top of the
lifter curve must be above the top of the TV. With lift in the up position, use allen
wrench to secure lid lifter in place.
The instructions above are based on a typical cabinet installation.