3/5
woodlineshade.com Toll Free 1 – 800 – 260 – 0617
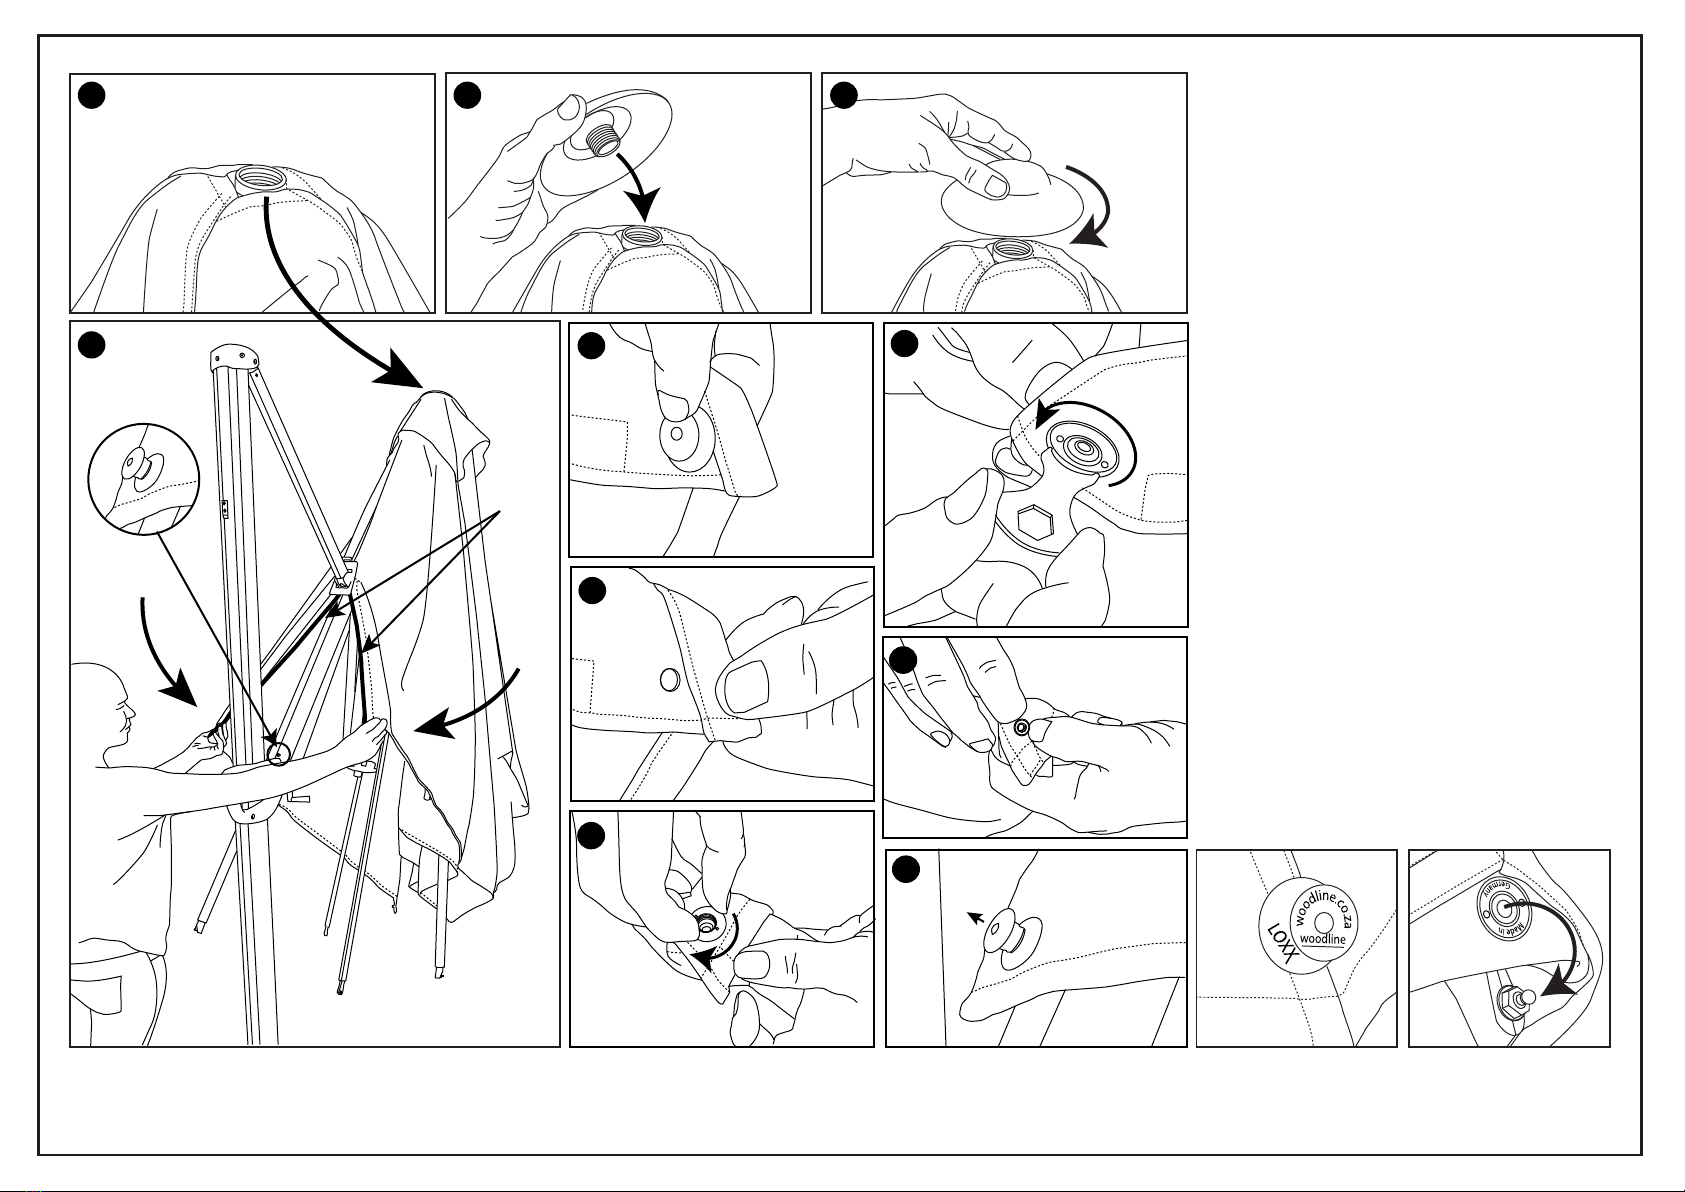
ATTACHING THE UMBRELLA CANOPY:
1) Using a step ladder, rst remove the nial cap and
then lift the fabric of the canopy up and over the
canopy structure.
2) Align the top hole with the nial cap thread and
then place the nial cap down in position.
3) Screw the nial cap rmly in place to secure the top
of the canopy to the structure. Do not overtighten.
4) Slide the canopy down over the structure as shown.
Secure the two velcro surfaces all the way down to
close the fabric over the sliding arm.
5) Go to the top piece of fabric with the LOXX fastener.
6) Using the LOXX key remove the washer from under-
neath the top layer of fabric’s LOXX fastener.
7) Align the two holes in the fabric at the base of where
the two velcro surfaces meet.
8) Push the LOXX fastener through both layers of fabric
ensuring fabric won’t interfere with the fastener.
9) Apply washer to the underside joining both fabric
layers together and then tighten with the LOXX key.
10) To attach the canopy to the umbrella structure pull
the top half of the newly tted LOXX fastener up then
place it onto the ball stud that is tted to the base of
the sliding arm, release to attach. You can then attach
the canopy ends to the rib ends using the same
process until all 8 corners are attached.
Turn the crank clockwise to open the canopy. Adjust to
preferred angle by squeezing the pistol grip and
pushing the sliding arm mechanism up or down. Press
down on foot pedal to freely rotate the umbrella 360˚.
1
4
2 3
7
5
8
PAVONE USA 01/03/21
2 fabric layers join
at LOXX fastener
Align & join
fabric along
Velcro closure
6
9
10
Start by removing the finial cap from the structure.
Place canvas over top of structure until the top hole
in the fabric is aligned with the thread of the finial cap.
Finial cap
of canopy
Finial cap
of canopy