Load Assist Kit Operation
Unloading
2
2-2 WM doc 4/21/21 Load Assist Kit Operation
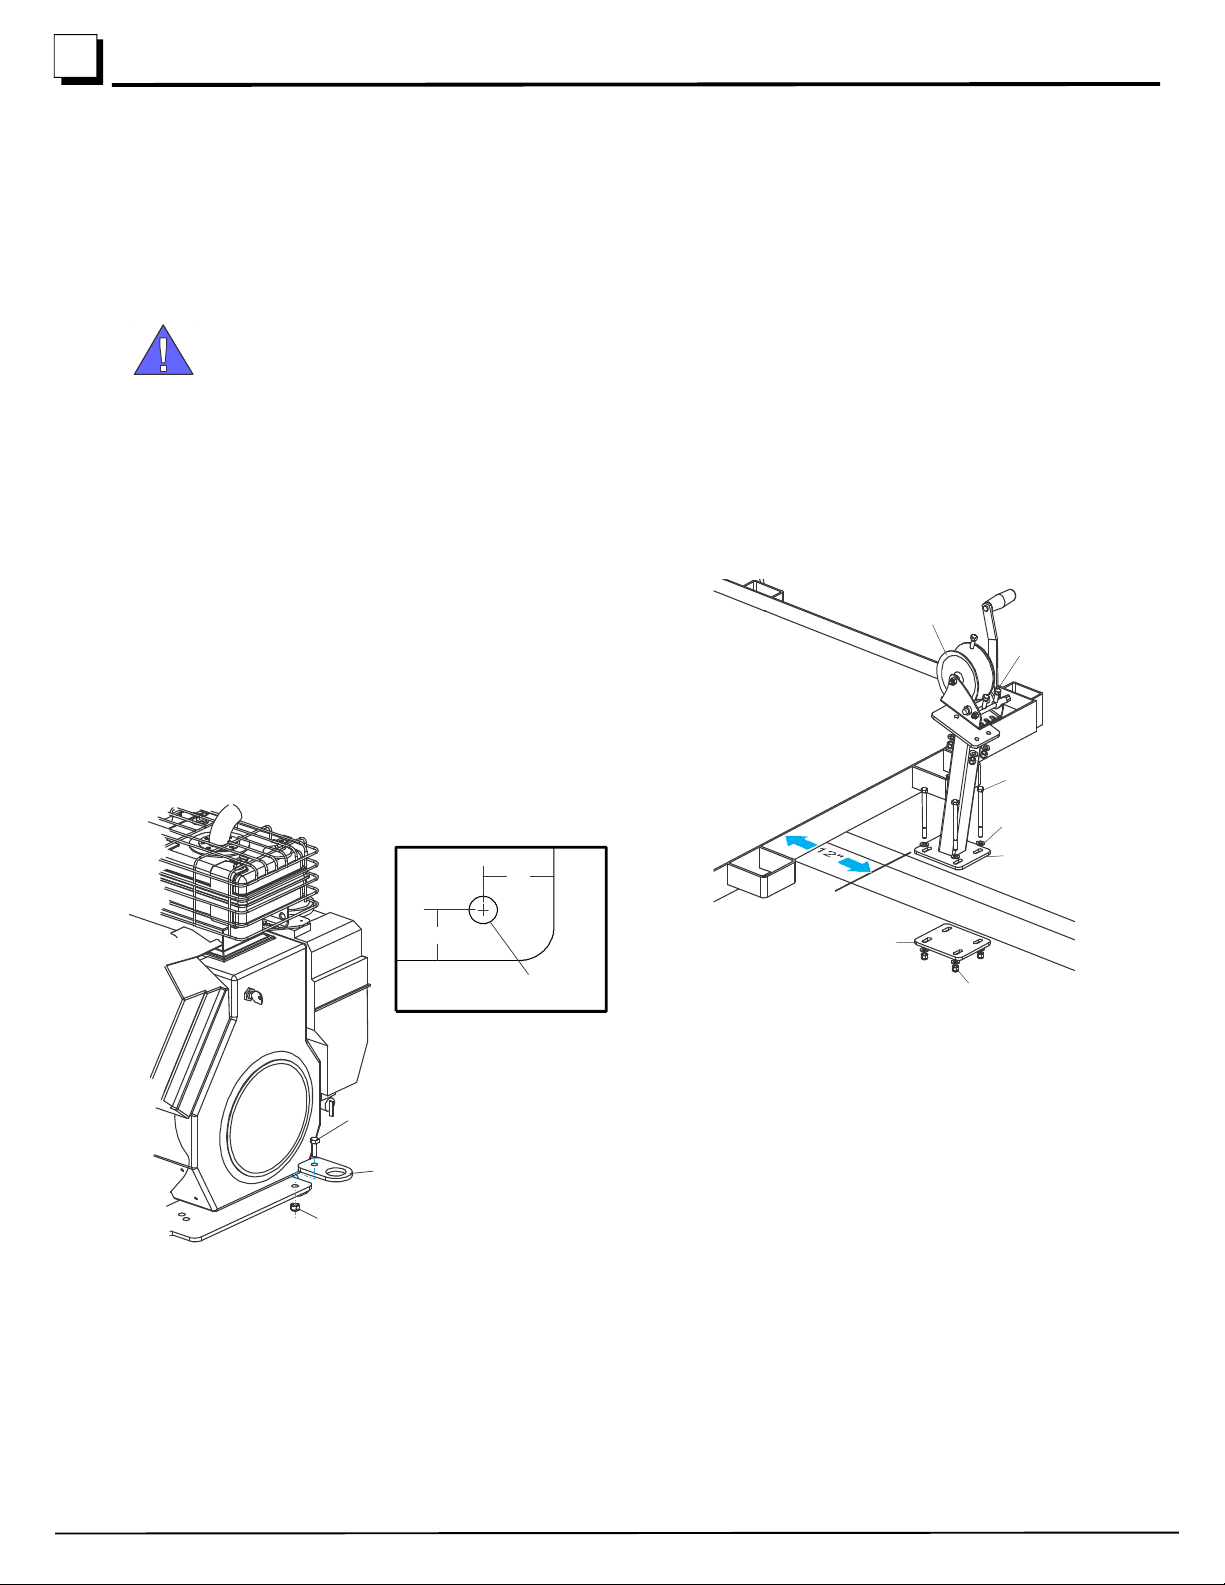
11. Place the winch ratchet pawl in the neutral position and pull the winch strap toward the saw head and hook onto the bracket
on the motor mount plate.
WARNING! Keep clear of spinning winch handle. Failure to do so could cause personal injury.
12. Lower the clamp posts.
13. Raise the saw head just enough to clear
any objects, such as trailer fenders, that
may interfere with the saw head as it
moves toward the front of the sawmill.
14. Engage the ratchet pawl and turn the
winch handle to pull the saw head toward
the front of the sawmill.
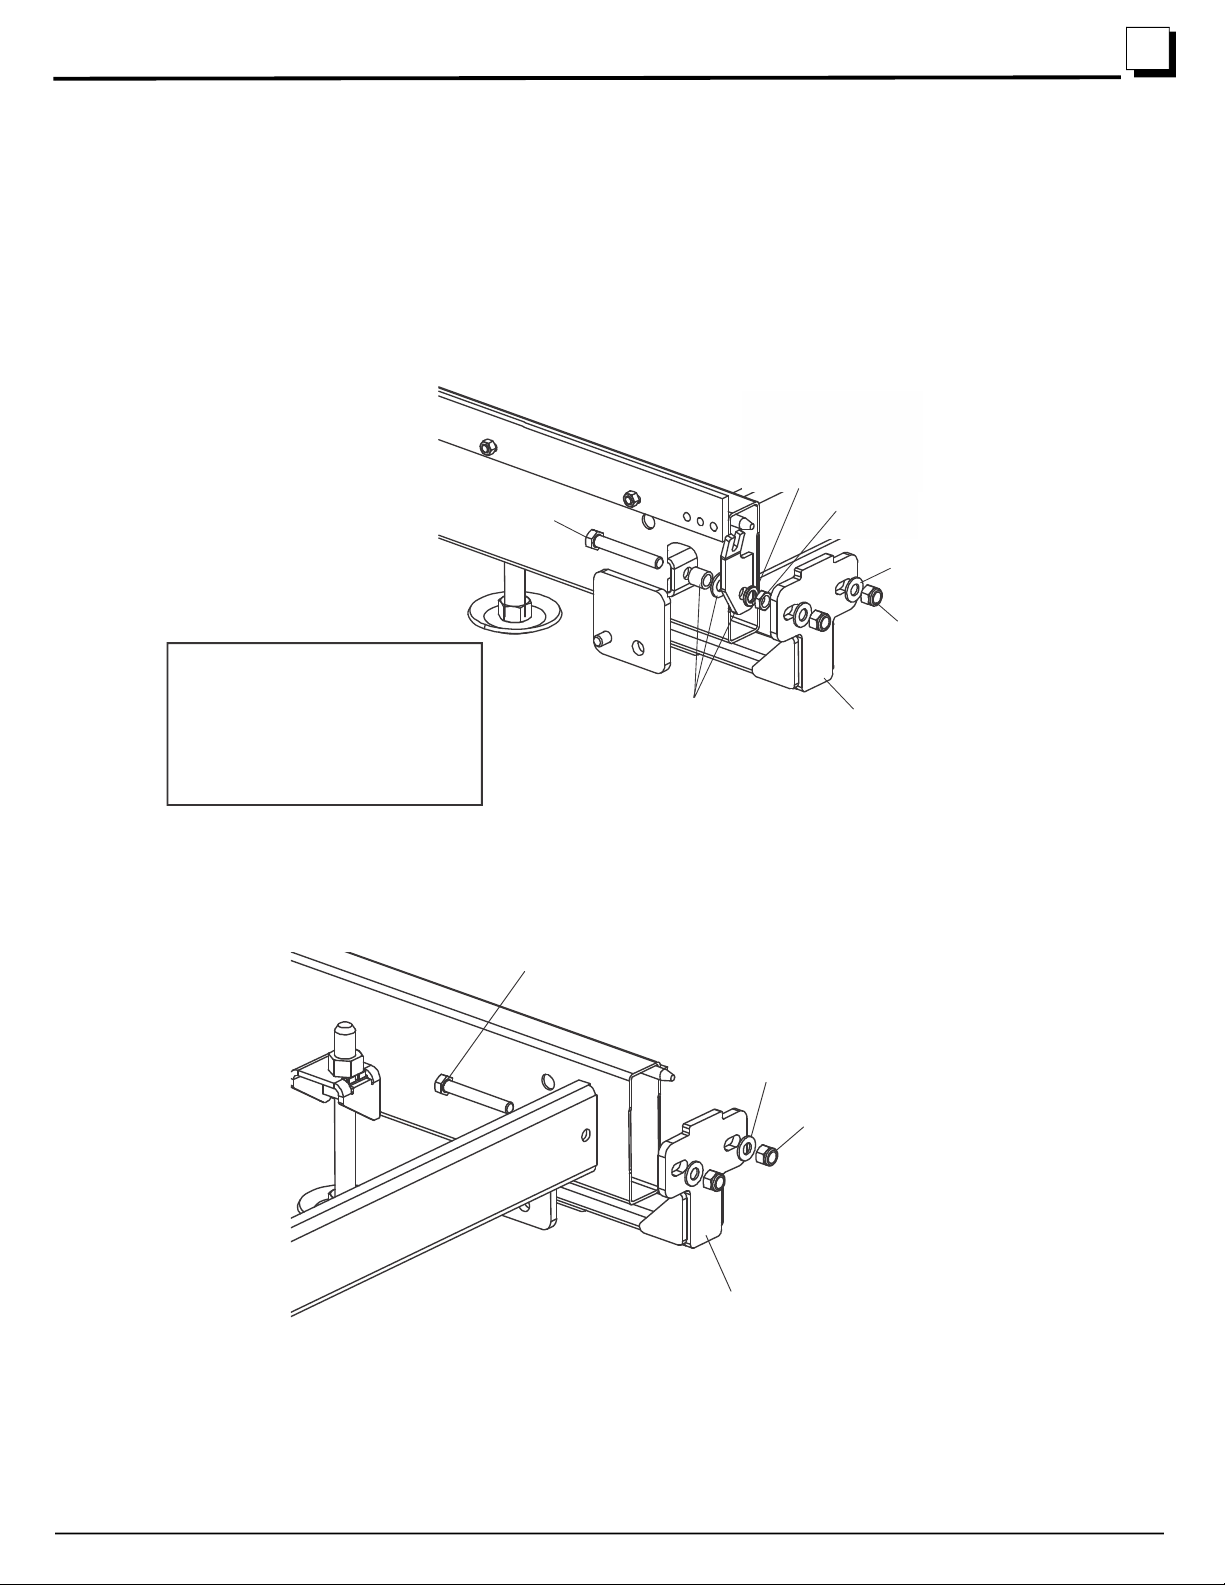
15. Stop when the front locking pin is aligned
with the hole in the bed frame.
16. Leave the winch strap hooked to the saw
head to help secure it during transport.
17. Rotate the front locking pin to the travel
position so the pin engages the hole in
the bed frame.
18. Leave the rear locking pin in the opera-
tion position to prevent the saw head
from tipping.
NOTE: See your LT15 operator’s
manual for detailed locking pin oper-
ating instructions.
19. Lower the saw head all the way down to
the bed. If applicable, remove the water
lube tank and mounting bracket from the
saw head.
20. Strap the sawmill securely to the trailer (straps not included). Use at least two straps, one to secure the bed and one to
secure the saw head.
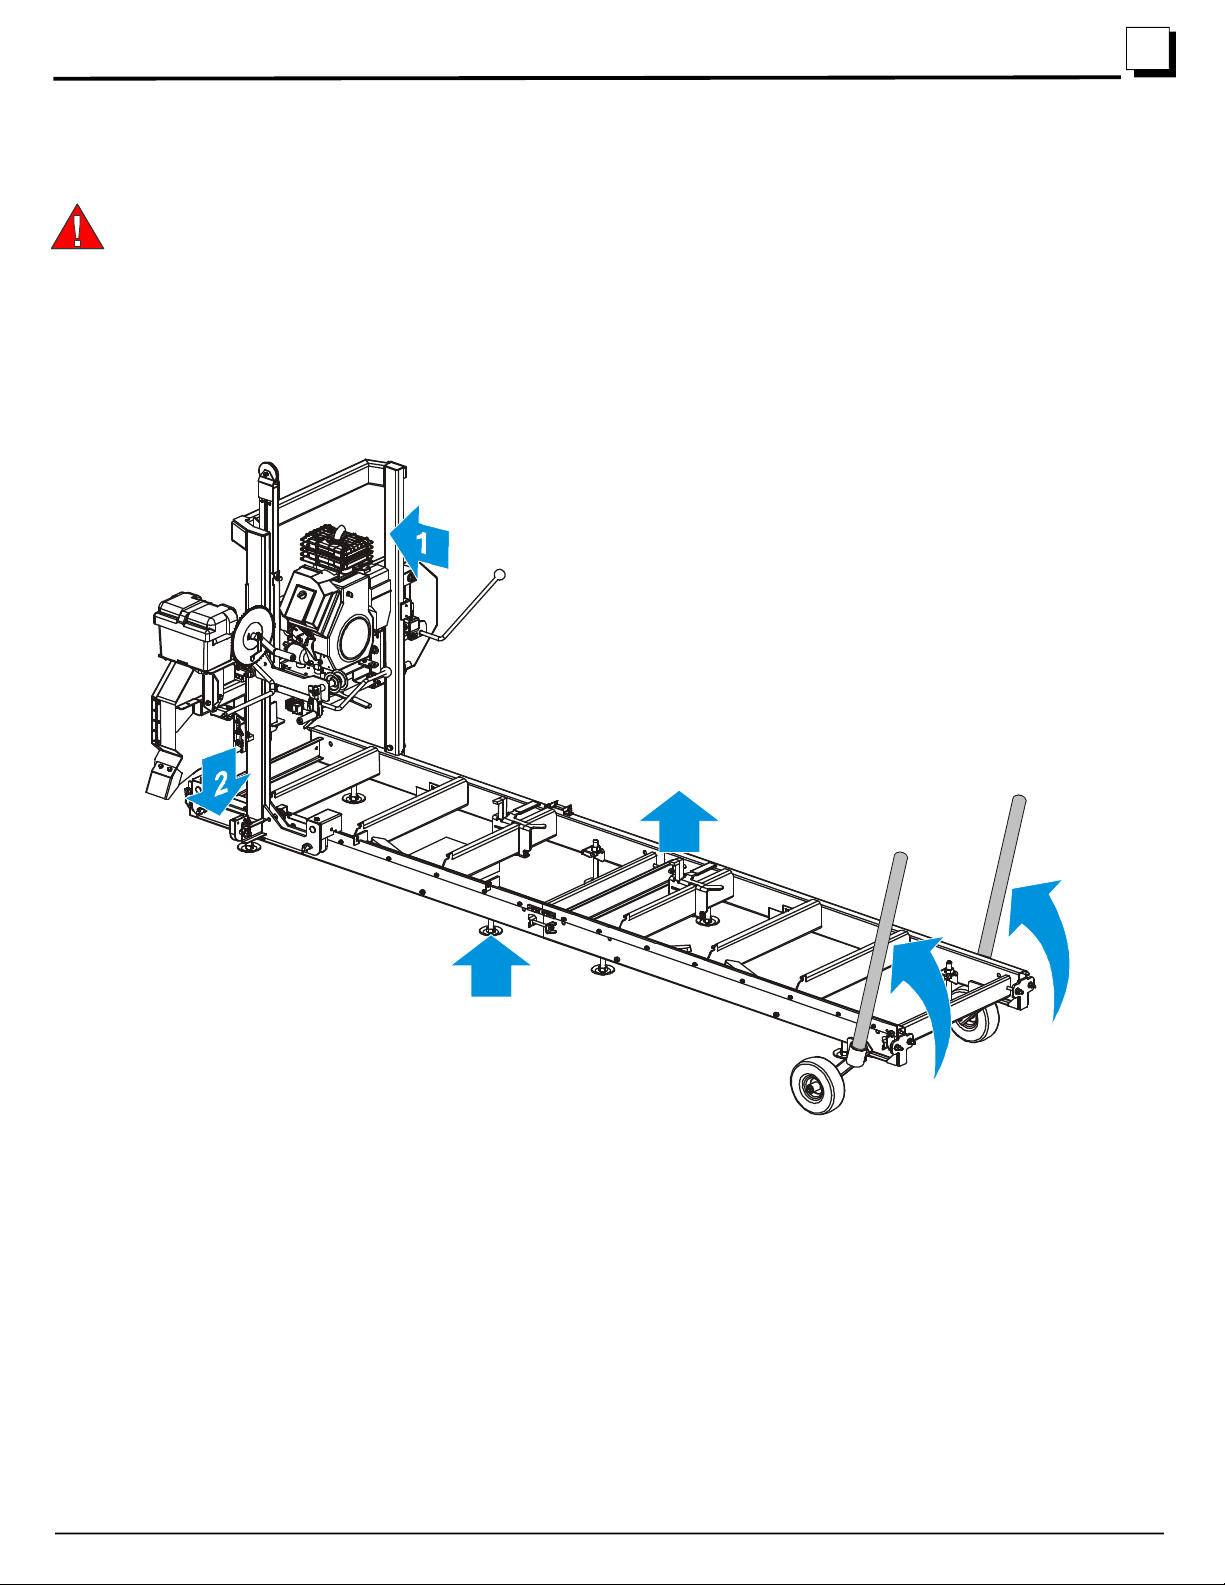
2.2 Unloading
DANGER! Keep all persons out of the path of moving equipment when loading or unloading sawmill. Follow all safety
precautions provided in the winch manufacturer’s instructions. Failure to do so will result in serious injury.
1. Remove straps holding sawmill to the trailer.
2. Raise the saw head just enough to clear any
objects, such as trailer fenders, that may interfere
with the saw head as it moves toward the rear of the
sawmill.
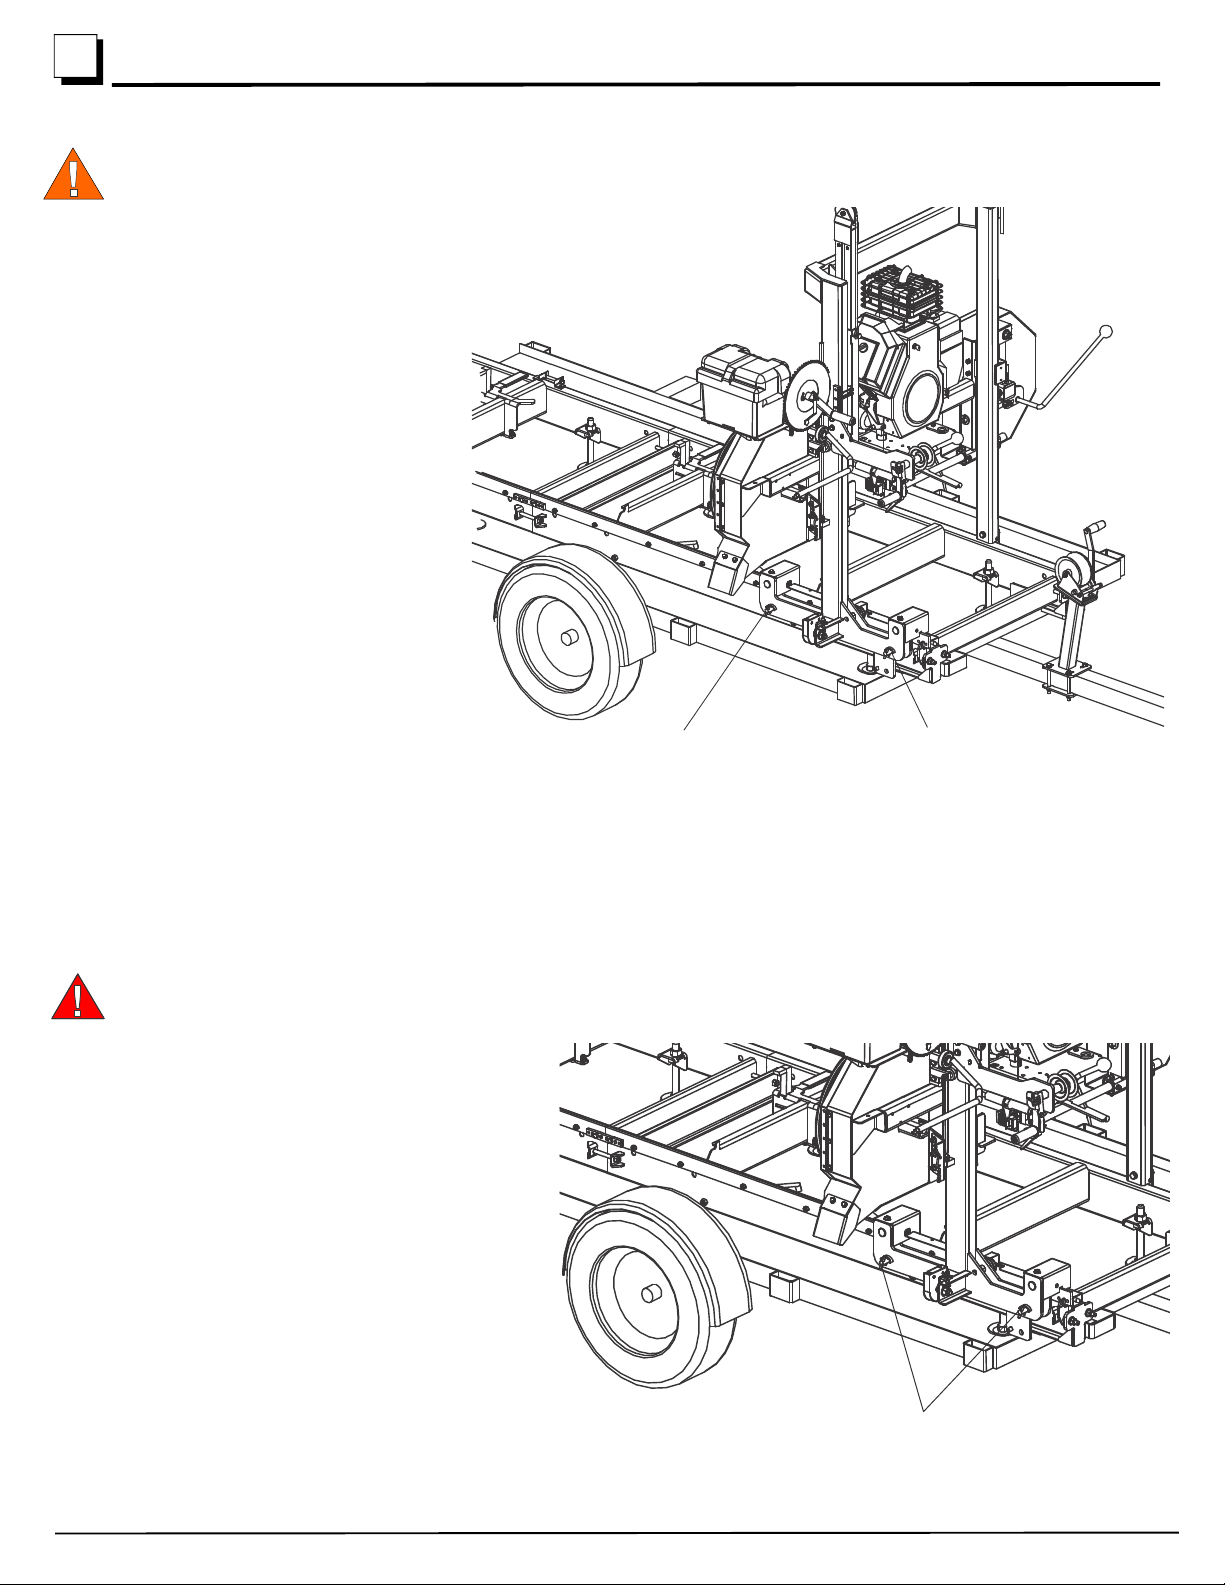
3. Place the front locking pin in the operation position.
The rear locking pin should already be in the operation
position. See your LT15 operator’s manual for detailed
locking pin operating instructions.
4. Make sure the winch strap is still hooked to the
bracket on the motor mount plate.
5. Place the winch ratchet pawl in reverse.
6. Let out enough of the winch strap so you can move
the saw head just to the tilting point of the trailer.
7. Place the winch ratchet pawl in forward.
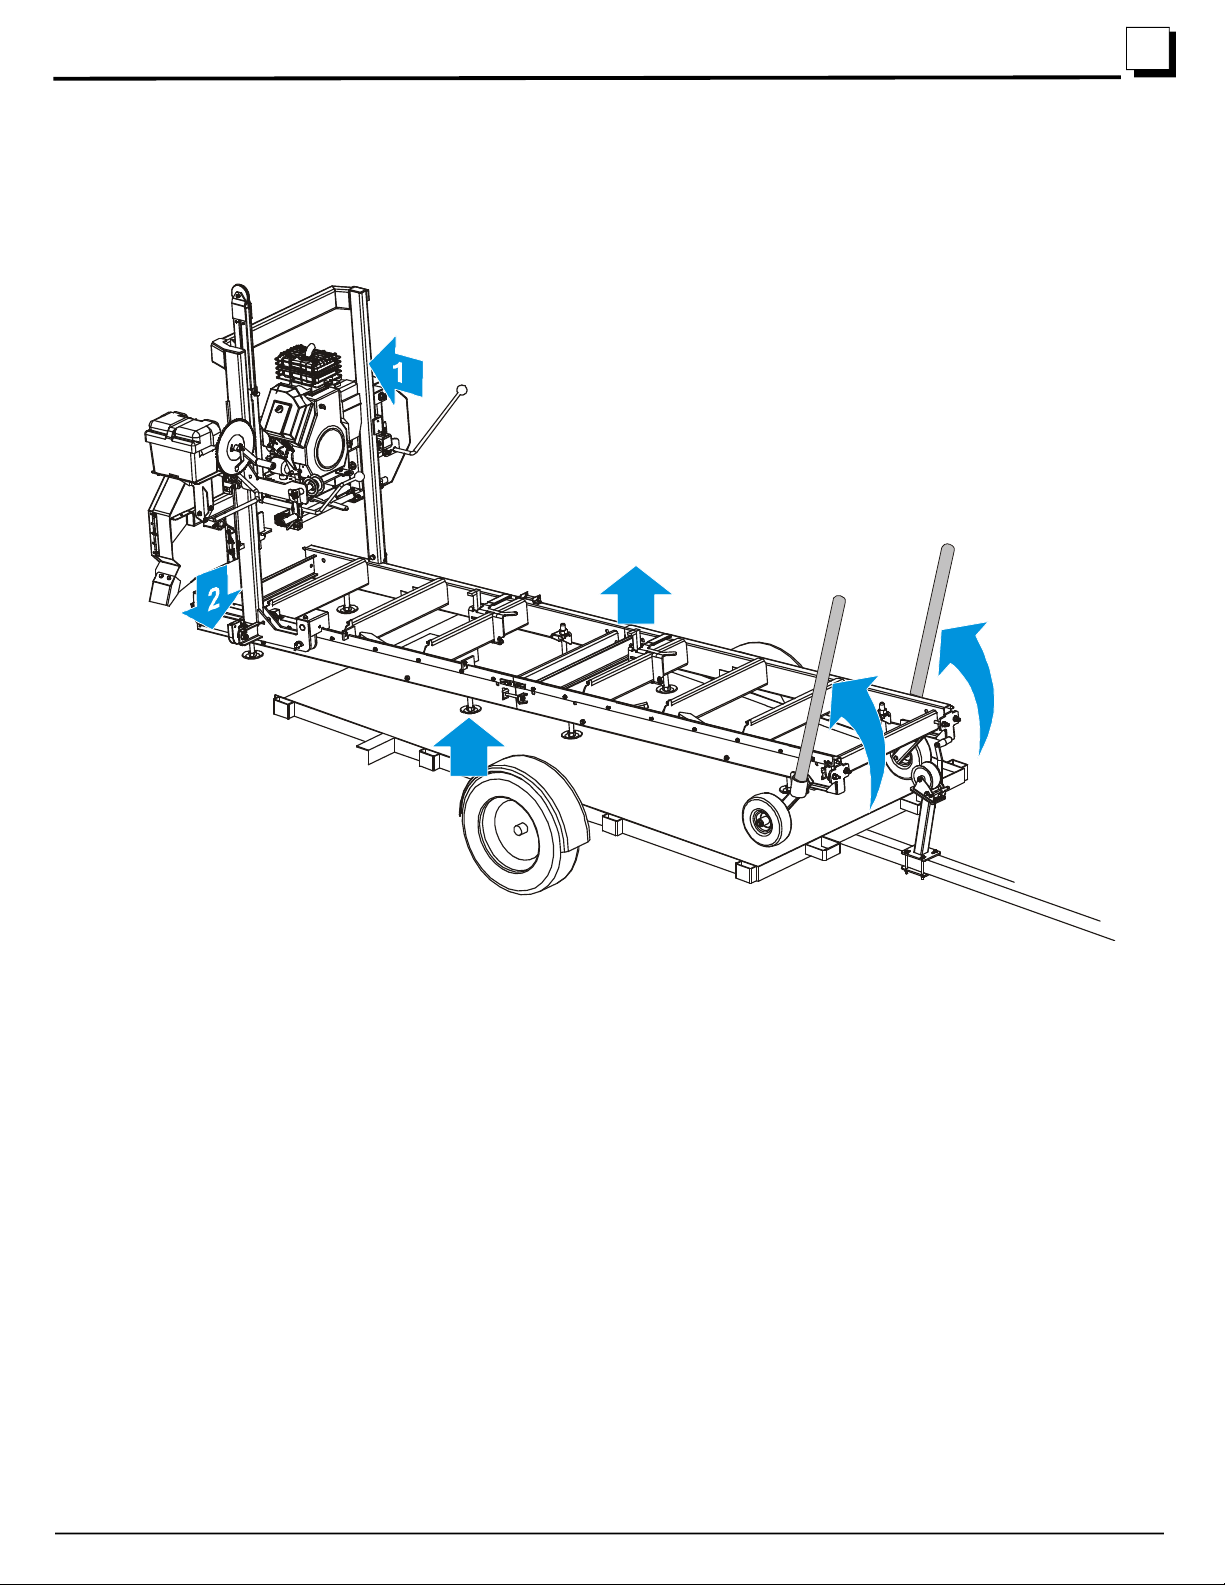
engaged in bed frame hole)
Rear locking pin in
operation position
FIG. 2-2
Front & rear locking pins
FIG. 2-3