poseur / one-piece top 800mm deep
Rack Systems (Engineering) Ltd, 1 Wits End, Kirkby Mills Industrial Estate, Kirkbymoorside, York YO62 6PG t: 01751 432647 www.racksystems.co.uk
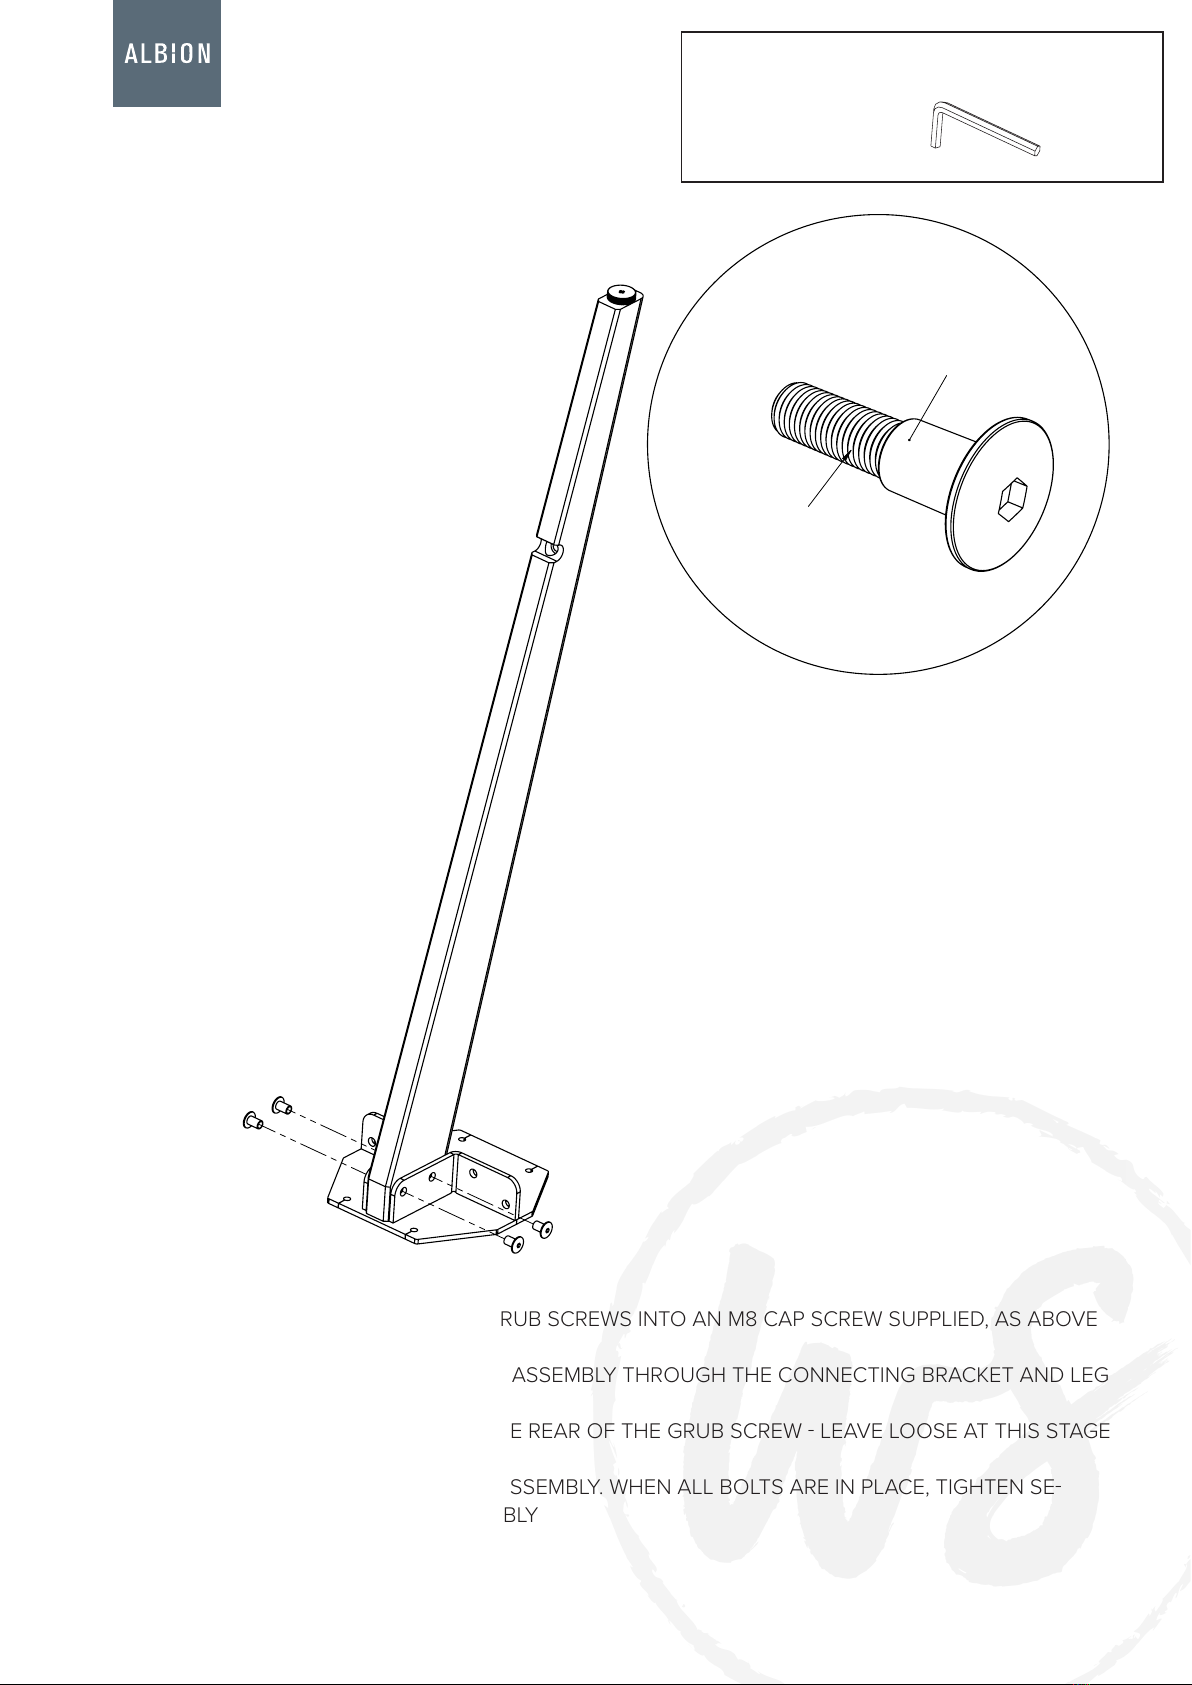
PLASTIC SPACER CLIPS PASS
THROUGH THE SLOT IN THE
FRONT OF THE TOP RAILS AND
ARE LOCATED IN THE TOP VIA
70MM WOODSCREWS.
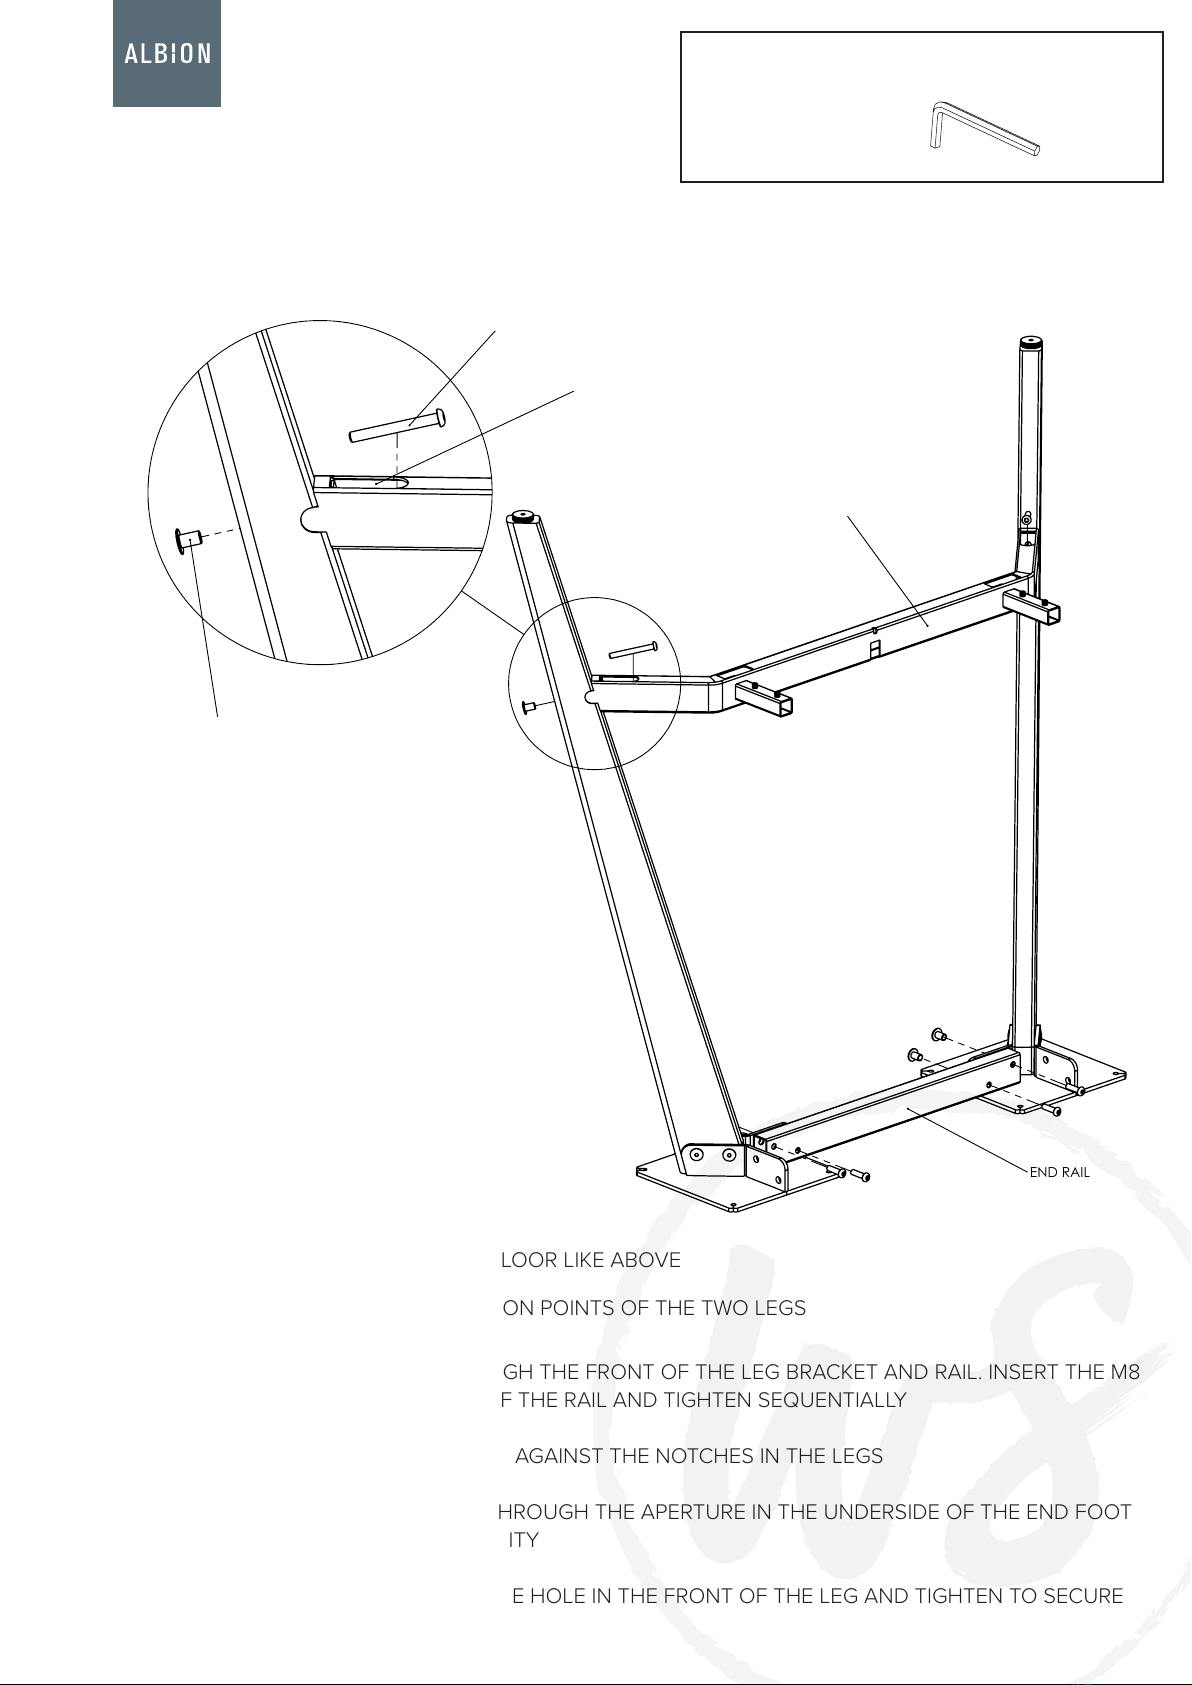
FOOT RAIL
SPIGOT
5mm
Assemble the pre-assembled end leg sets & rails on the floor like above.
•
Align the rails at the connection points of one leg set.
•
Pass the M8 connector cap through the front of the leg bracket and rail. Insert the M8
•
x 30 socket screw into the rear of the rail and tighten sequentially.
Ensure the grub screws in the spigots are wound in, then slide the foot rails over the
•
spigot bars.
Unwind the spigot grub screws into the foot rails until tight.
•
Repeat the steps for the other leg set.
•
Turn the frame work over, locate the table top into position and secure in place with
•
M6 x 15 connector bolts through the leg brackets and 70mm woodscrews through the
spacer clips and rails.
SPLINTA POSEUR CONNEKT - 800 WIDE TABLE
ASSEMBLY INSTRUCTIONS
MINS
SPLINTA POSEUR CONNEKT - Assembly Instrucons
800(W) 4 LEG TABLE
Page 22
• ASSEMBLE THE PRE-ASSEMBLED END LEG SETS & RAILS ON THE FLOOR LIKE ABOVE. ALIGN THE
RAILS AT THE CONNECTION POINTS OF ONE LEG SET
• PASS THE M8 CONNECTOR CAP THROUGH THE FRONT OF THE LEG BRACKET AND RAIL. INSERT THE
M8 X 30 SOCKET SCREW INTO THE REAR OF THE RAIL AND TIGHTEN SEQUENTIALLY
• ENSURE THE GRUB SCREWS IN THE SPIGOTS ARE WOUND IN, THEN SLIDE THE FOOT RAILS OVER THE
SPIGOT BARS
• UNWIND THE SPIGOT GRUB SCREWS INTO THE FOOT RAILS UNTIL TIGHT
• REPEAT THE STEPS FOR THE OTHER LEGS
• TURN THE FRAME WORK OVER, LOCATE THE TABLE TOP INTO POSITION AND SECURE IN PLACE WITH
M6 X 15 CONNECTOR BOLTS THROUGH THE LEG BRACKETS AND 70MM WOODSCREWS THROUGH
THE SPACER CLIPS AND RAILS
ALBION
GENERAL CARE
Designed by us, reimagined by you, Albion systems furniture is
handmade entirely in the UK to an almost infinite range of combinations.
This is British craftsmanship made to last, for spaces that need to deliver.
hardware tool required
4/5mm
allen key
thank you for your purchase!
This page lists the contents included in
the box. Please take time to identify the
hardware as well as the individual
components of the product. As you
unpack and prepare for assembly, place
the contents on a carpeted or padded
area to protect them from damage. Please
follow the assembly instructions closely.
Improper assembly can result in personal
or property damage. 2 adults are required
to safely assemble this product.
!
airfoil
G28T TABLE / 160cm, 180cm, 200cm
cleaningandcare
• Clean surfaces with a dry or damp soft cloth.
• Use water-based cleaning agents only. Do not
use oil or solvent based cleaners.
• It is recommended to use coasters to protect
surface from heat and water. Do not leave spills
unattended.
• Periodically check and tighten hardware as
necessary.
Made in China - r01 1/2www.madfurnituredesign.com
x 01
x 04
x 01
x 22
hardware components
Fixing kit provided